
Imagine turning your ordinary stovetop into a stylish and functional workspace with just a bit of DIY magic.
A noodle board also known as a stovetop cover does exactly that! Originally designed to provide extra counter space, these boards have evolved into charming kitchen accessories that add both beauty and practicality to your home.
Whether you’re looking to enhance your farmhouse-style kitchen or simply need more prep space, making your noodle board is an easy and rewarding project. With just a few materials and a touch of creativity, you’ll have a custom stovetop cover that’s both eye-catching and useful.
Ready to get started? Let’s dive into this fun DIY!
Materials required for making a noodle board
To make a noodle board, you’ll need the following materials:
Wood & Hardware:
- Wood planks (pine, oak, or any preferred type) – typically 1×6 or 1×8 boards
- Plywood backing (optional for added stability)
- Wood screws or nails
- Wood glue
- Handles (for easy lifting)
- Hinges (optional if you want a foldable design)
Tools:
- Measuring tape
- Saw (circular saw or hand saw)
- Drill & bits
- Screwdriver
- Clamps (to hold pieces in place)
- Sandpaper or sander
Finishing Supplies:
- Wood stain or paint (to match your kitchen décor)
- Polyurethane or food-safe sealant (for protection)
- Paintbrush or rag (for applying stain/sealant)
7-step guide to making a DIY noodle board
Here’s a simple 7-step guide to making a DIY noodle board for a 4-burner stovetop:
Step 1: Measure Your Stovetop
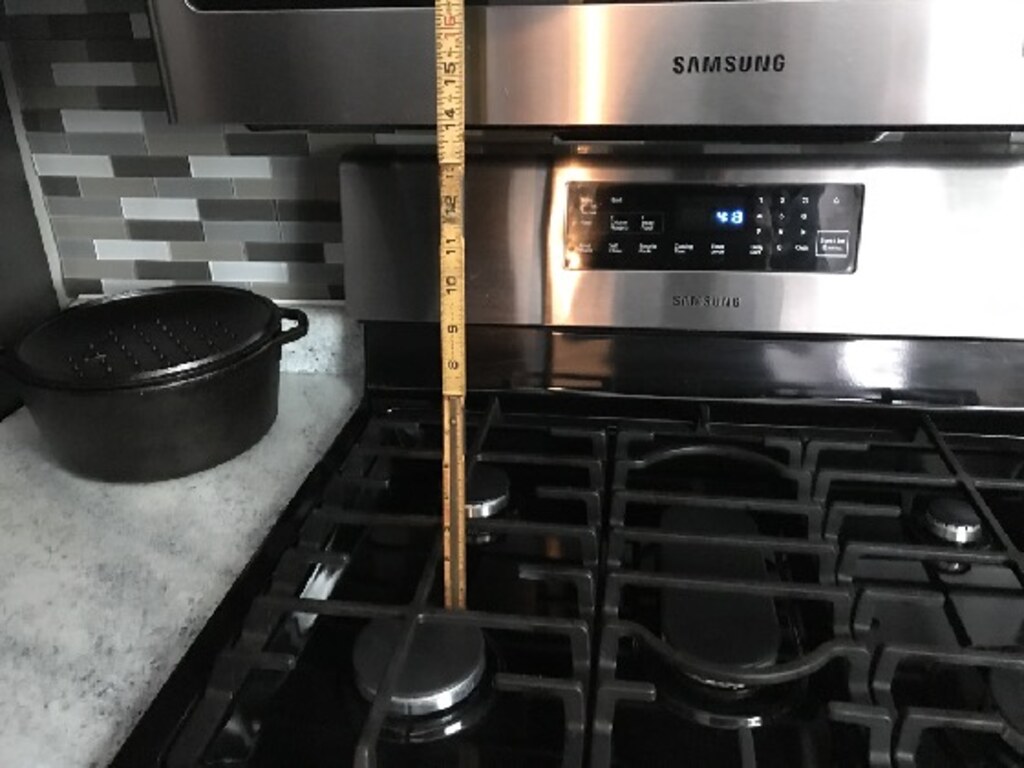
Before you start cutting wood, the first step is to measure your stovetop accurately. Using a measuring tape, determine the width and depth of your stovetop.
To ensure a proper fit, add about ½ to 1 inch on each side so the board comfortably rests on top without shifting. If your stove has control knobs at the back, measure the available flat surface to ensure the noodle board won’t interfere with them.
For gas stoves, consider adding small rubber feet or heat-resistant pads underneath the board to allow airflow and prevent heat buildup. Getting these measurements right is crucial for a snug and secure fit.
Step 2: Cut Your Wood
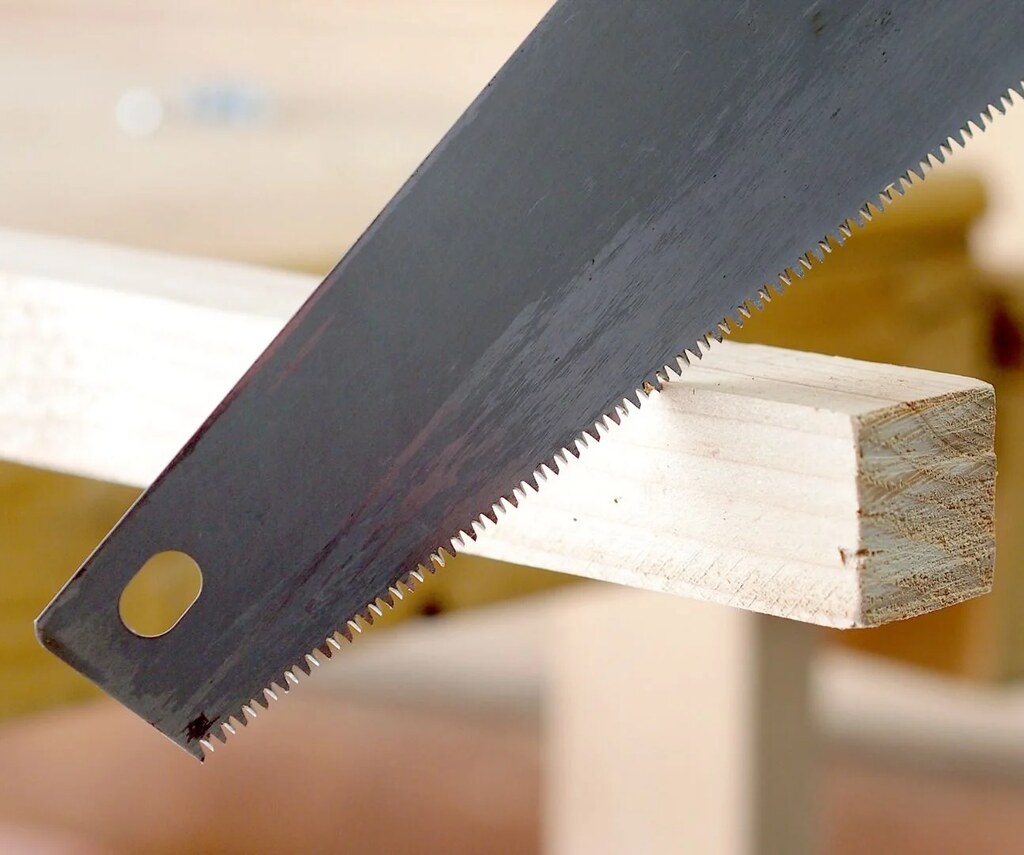
Once you have your measurements, it’s time to cut the wood. The main surface of your noodle board will be made of 1×6 or 1×8 wooden planks, depending on your preferred look and thickness.
Cut enough planks to cover the width of your stovetop when placed side by side. Then, cut two shorter pieces from 1×4 or 1×6 boards to serve as side rails, which will frame the board and provide stability.
If you want to reinforce the structure, you can also cut a thin plywood backing to attach underneath. Choosing the right wood is important—pine is budget-friendly, while oak, maple, or walnut offer more durability and a high-end look.
Step 3: Assemble the Board
Now it’s time to assemble your noodle board. Lay out the top planks side by side on a flat surface, ensuring they fit together without noticeable gaps. Attach the side rails to each end using wood glue first to hold them in place.
Once dry, reinforce the structure by securing the rails with wood screws or nails. If you’re using a plywood backing, attach it using small nails or screws for extra durability. To keep the pieces from shifting while working, use clamps to hold everything in place.
Proper assembly ensures the noodle board is strong enough to handle regular use.
Step 4: Sand for a Smooth Finish
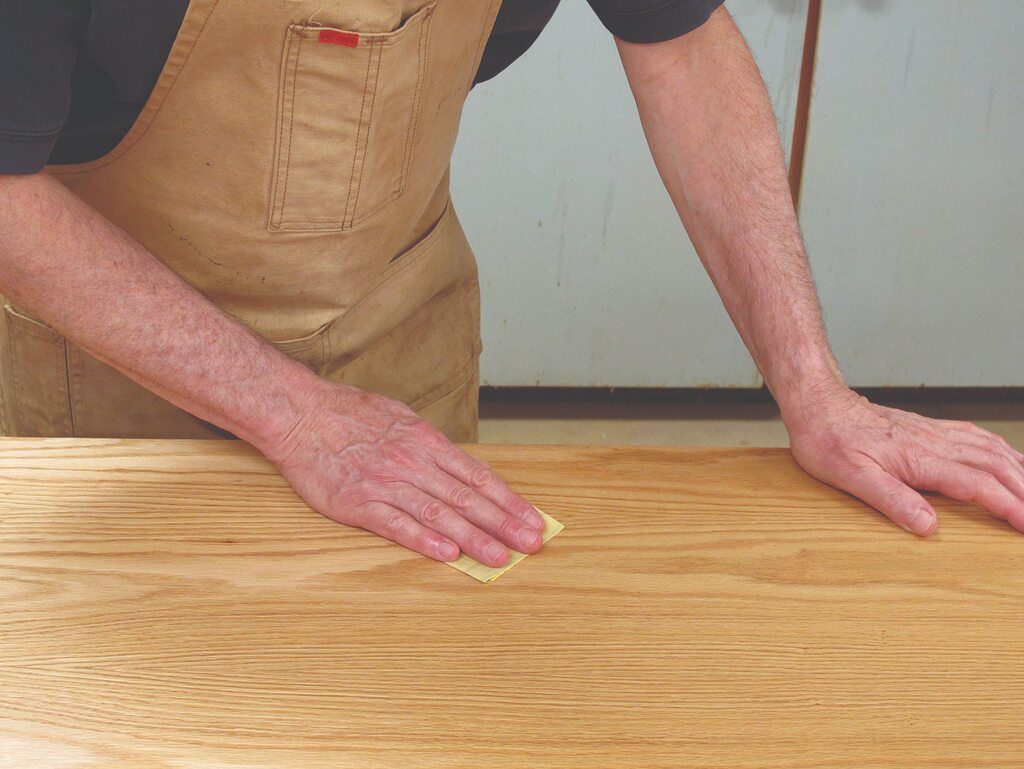
For a professional and polished look, sanding is an essential step. Use medium-grit sandpaper (80-120 grit) to smooth out rough spots, edges, and surfaces. This will remove any splinters and make the board safe to use.
Next, switch to fine-grit sandpaper (220 grit) for an even smoother finish, especially on the top surface. Pay extra attention to the edges and corners to prevent any sharp areas that could scratch your stovetop.
If you have an electric sander, it can make this process quicker and more even. A well-sanded board will also absorb stains or paint more effectively in the next steps.
Step 5: Attach Handles
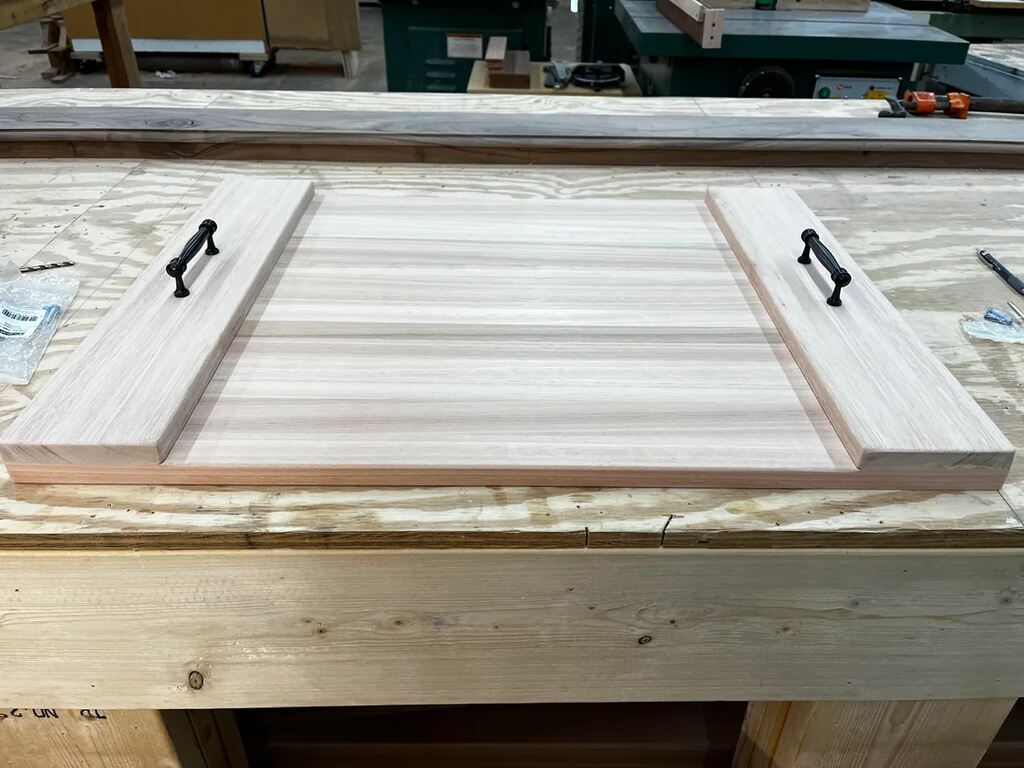
Handles make your noodle board more functional, allowing for easy lifting and movement. Choose sturdy metal or wooden handles that match your kitchen style—whether it’s farmhouse, rustic, or modern.
Position the handles evenly on both sides and mark where you’ll drill the holes. Use a drill with pilot holes to prevent the wood from splitting, then attach the handles using screws.
If you want a foldable noodle board, you can also add hinges to one side, allowing you to lift one end for easier storage when not in use.
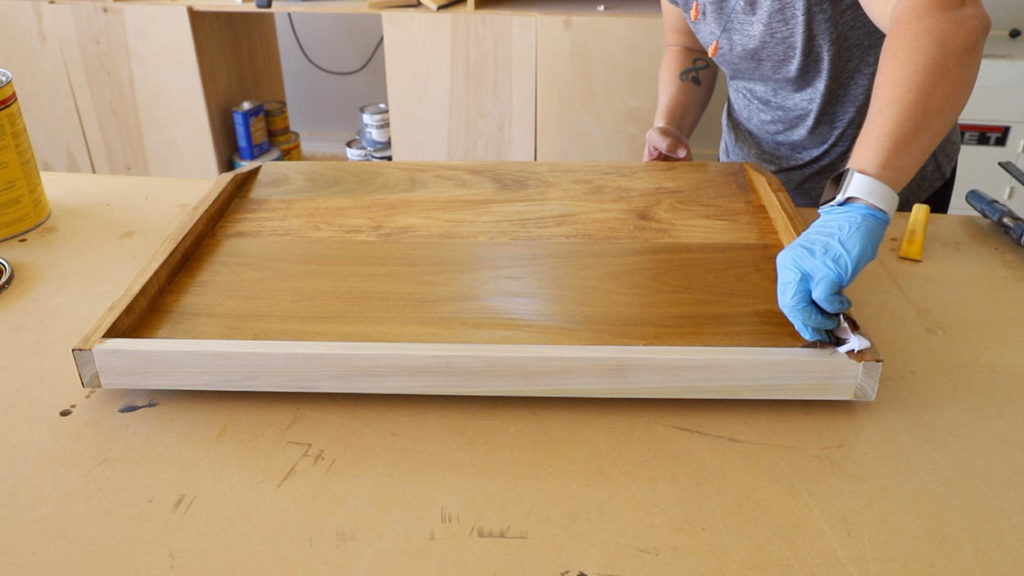
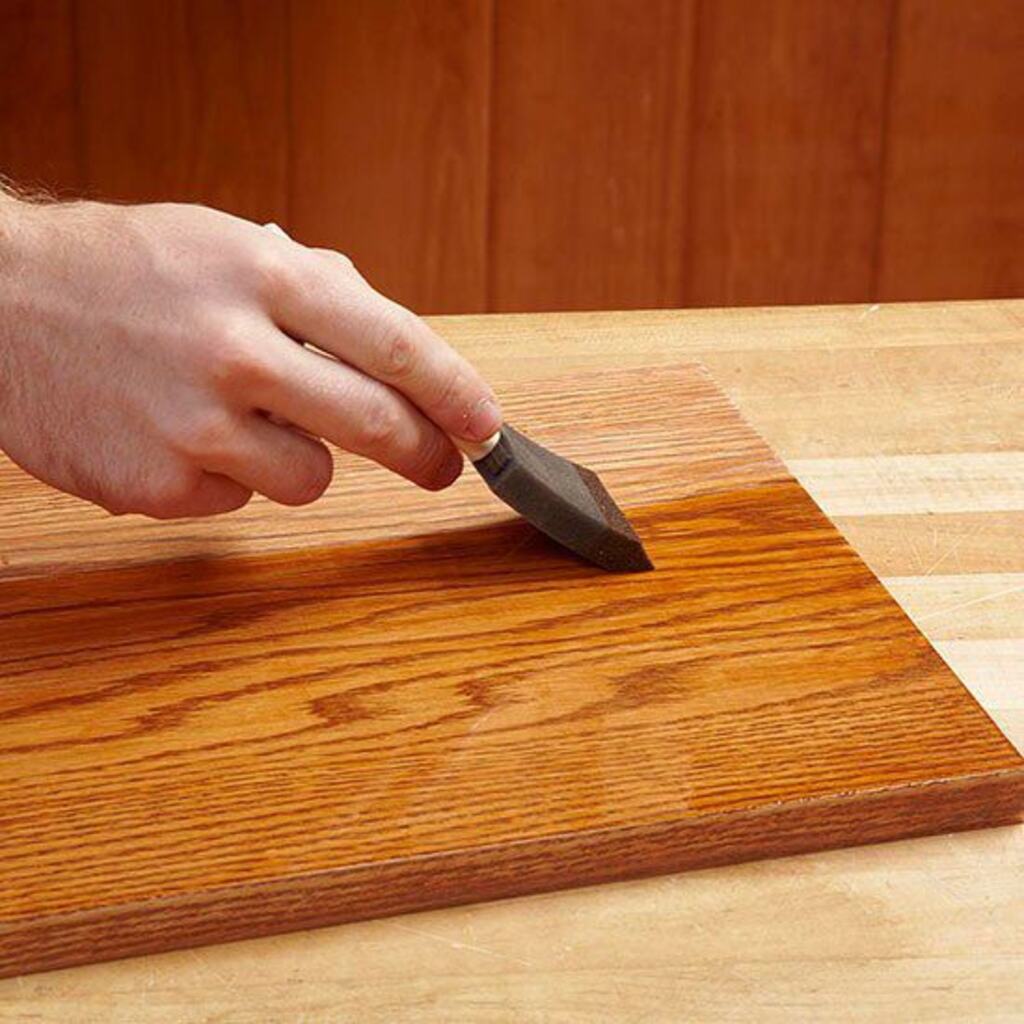
Step 6: Stain or Paint Your Board

Now that your noodle board is assembled and sanded, it’s time to customize it with stain or paint. If you want a natural wood look, use a wood stain that enhances the grain.
Apply it evenly with a brush or cloth, wiping off excess stains for a smooth finish. If you prefer a painted noodle board, choose high-quality furniture paint and apply two light coats for a clean and modern appearance.
Let the stain or paint dry completely before moving to the final step. This is also your chance to get creative—consider adding stenciled designs, a distressed look, or decorative trim to match your kitchen décor.
Step 7: Seal for Protection
Sealing your noodle board is essential to protect it from moisture, stains, and heat. Apply polyurethane, polyacrylic, or a food-safe sealant to ensure durability.
If you plan to use your noodle board for food prep, opt for a food-safe finish like mineral oil or butcher block oil instead of polyurethane. Use a brush or cloth to apply an even coat, letting it dry completely before using the board.
If using polyurethane, apply at least two coats for extra protection, allowing drying time between each coat. Sealing will keep your noodle board looking great and make it easier to clean over time.
Final Touches & Usage
Once your noodle board is fully dry, place it over your stovetop and enjoy the extra counter space and stylish look it adds to your kitchen. You can use it as a decorative piece, a serving tray for snacks or drinks, or even as a cutting board if sealed with food-safe materials.
It’s a simple DIY project that not only enhances your kitchen’s functionality but also adds a personalized touch to your home. Enjoy your handmade noodle board.
FAQ
What is the purpose of a noodle board?
A noodle board is a stovetop cover that adds extra counter space, enhances kitchen decor, and protects the stove from dust and spills. Originally used for rolling dough, it now serves multiple functions, including a serving tray, food prep station, and decorative piece. It can also hide scratches on old stovetops and, when sealed with food-safe materials, double as a cutting board. With customizable designs, it’s a stylish and practical addition to any kitchen.
What kind of wood to use for a noodle board?
For a DIY noodle board, use pine for affordability, maple for durability and food safety, oak for strength, or walnut for a premium look. Birch and poplar offer a balance of cost and durability. For decorative use, pine or poplar work well; for heavy use, choose maple, oak, or walnut. Always seal with a protective finish, and use food-safe oils if prepping food.
How to protect a noodle board?
To protect a noodle board, seal it with polyurethane, polyacrylic, or food-safe oil, avoid direct heat, use felt pads or rubber feet, clean with a damp cloth (no soaking), and reapply sealant regularly for durability.
Conclusion
A DIY noodle board is a stylish and functional addition to any kitchen, providing extra counter space, stove protection, and decorative charm. By choosing the right wood, sealing it properly, and maintaining it with care, you can ensure its durability and long-lasting appeal.
Whether used for food prep, serving, or simply enhancing your kitchen’s look, a well-crafted noodle board is both practical and customizable. With the right materials and a little creativity, you can easily make one that suits your style and needs. Start your DIY project today and enjoy the added convenience in your kitchen.