
In this blog, I will explore creative and stylish beadboard trim ideas that can elevate the look of any space. Whether you want to add a touch of classic charm, farmhouse warmth, or modern elegance, beadboard trim is a versatile design element that brings character and depth to walls, ceilings, and even furniture.
From simple wainscoting to bold full-wall applications, beadboard trim offers endless possibilities for transforming your home. It can create cozy cottage vibes in a bedroom, add texture to a plain hallway, or give a bathroom a fresh and airy feel.
The best part? It’s an affordable and relatively easy way to achieve a high-end look. Get ready to fall in love with this timeless and charming detail.
Popular Beadboard Trim Ideas
Here are 6 popular Beadboard Trim Ideas:
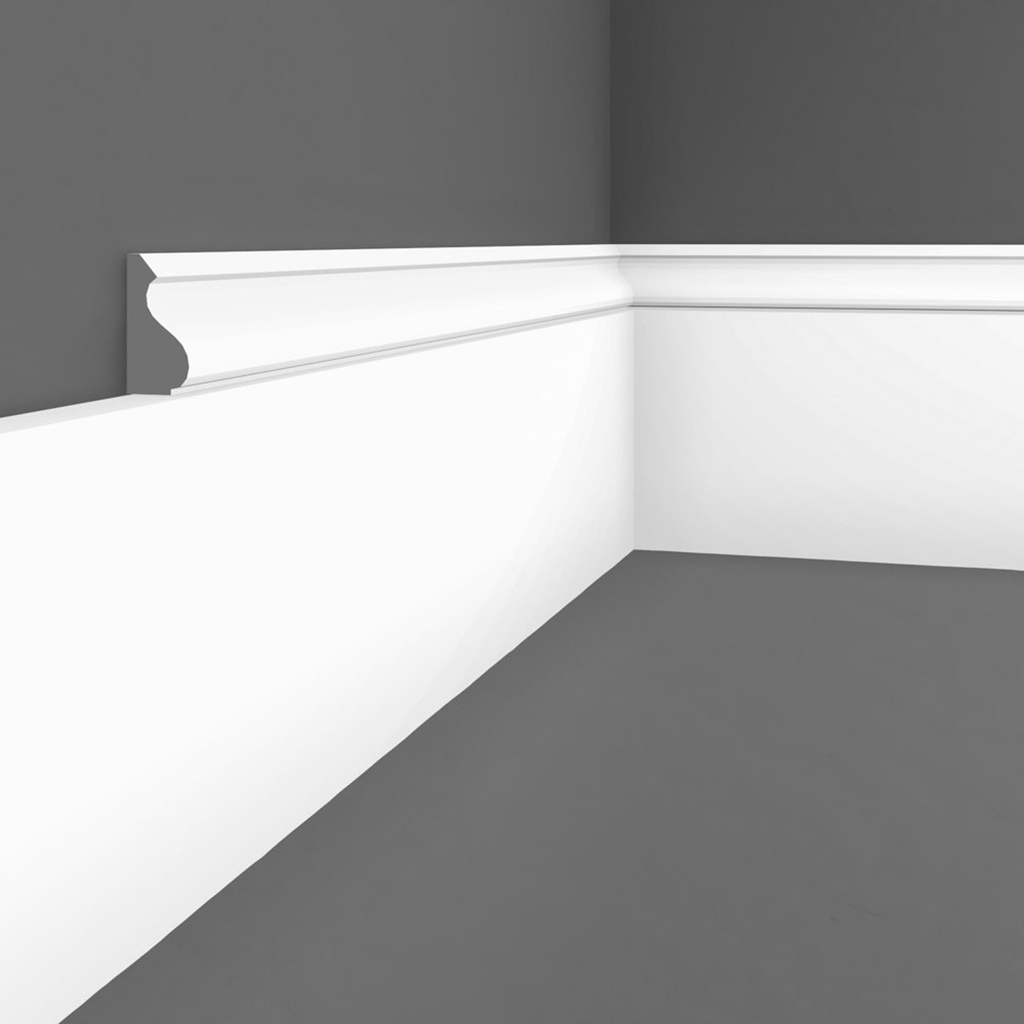
1. Horizontal Molding Trim
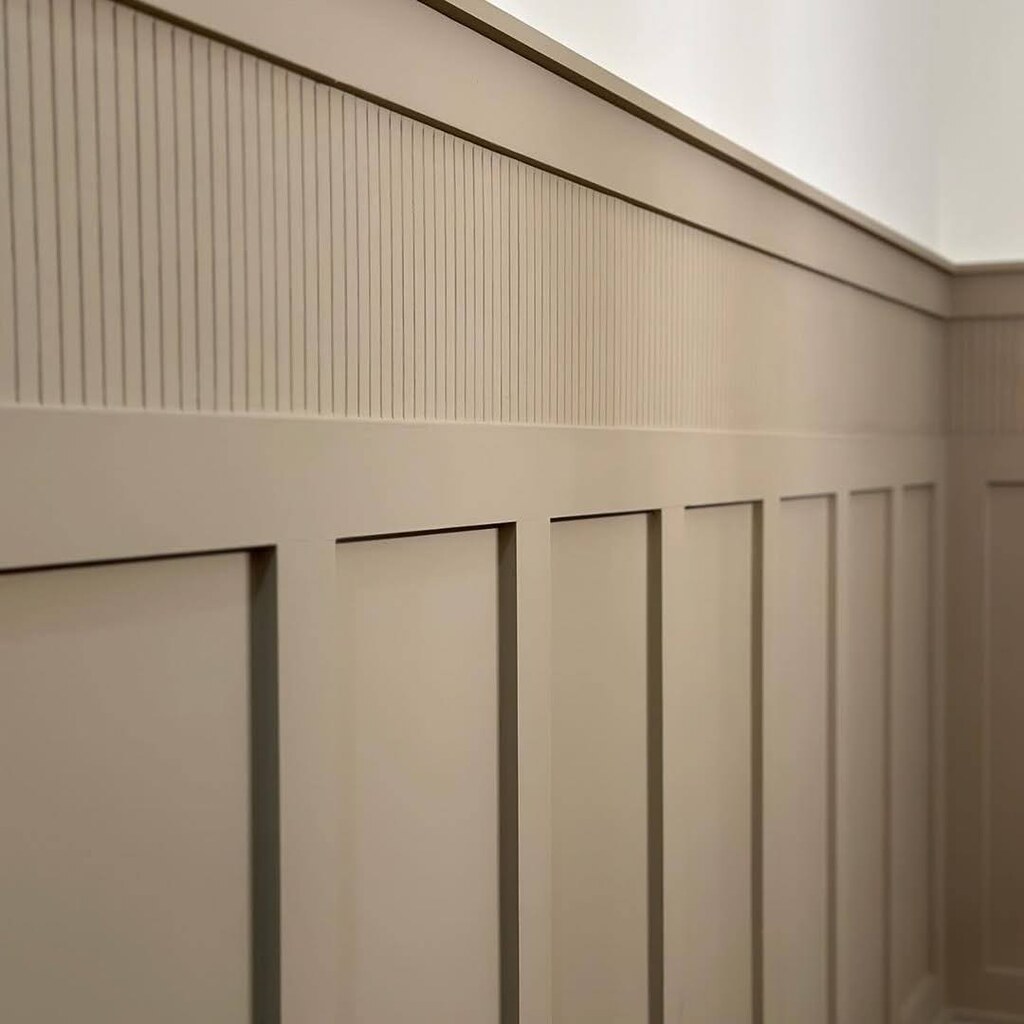
Horizontal molding is a stylish way to break up large walls, adding dimension and visual interest. This trim can run along the middle or upper portion of a wall, creating a sleek, structured look. It’s particularly effective in hallways, living rooms, or stairwells where tall, empty walls can feel overwhelming.
To install, choose a molding width that complements your room’s proportions—narrow for a subtle effect or wider for a bold statement. Pair it with contrasting paint colors above and below the trim to enhance depth and character.
2. Chair Rails Trim
Chair rails serve both a practical and decorative purpose, originally designed to prevent furniture from scuffing walls. Today, they’re a classic way to introduce a refined touch to dining rooms, hallways, and home offices.
It is installed at 32–36 inches from the floor, they can be paired with beadboard or painted panels below for added texture. For a modern twist, try a double chair rail, layering two horizontal moldings to create a more intricate, dimensional effect.
3. Wainscoting Styled Trim
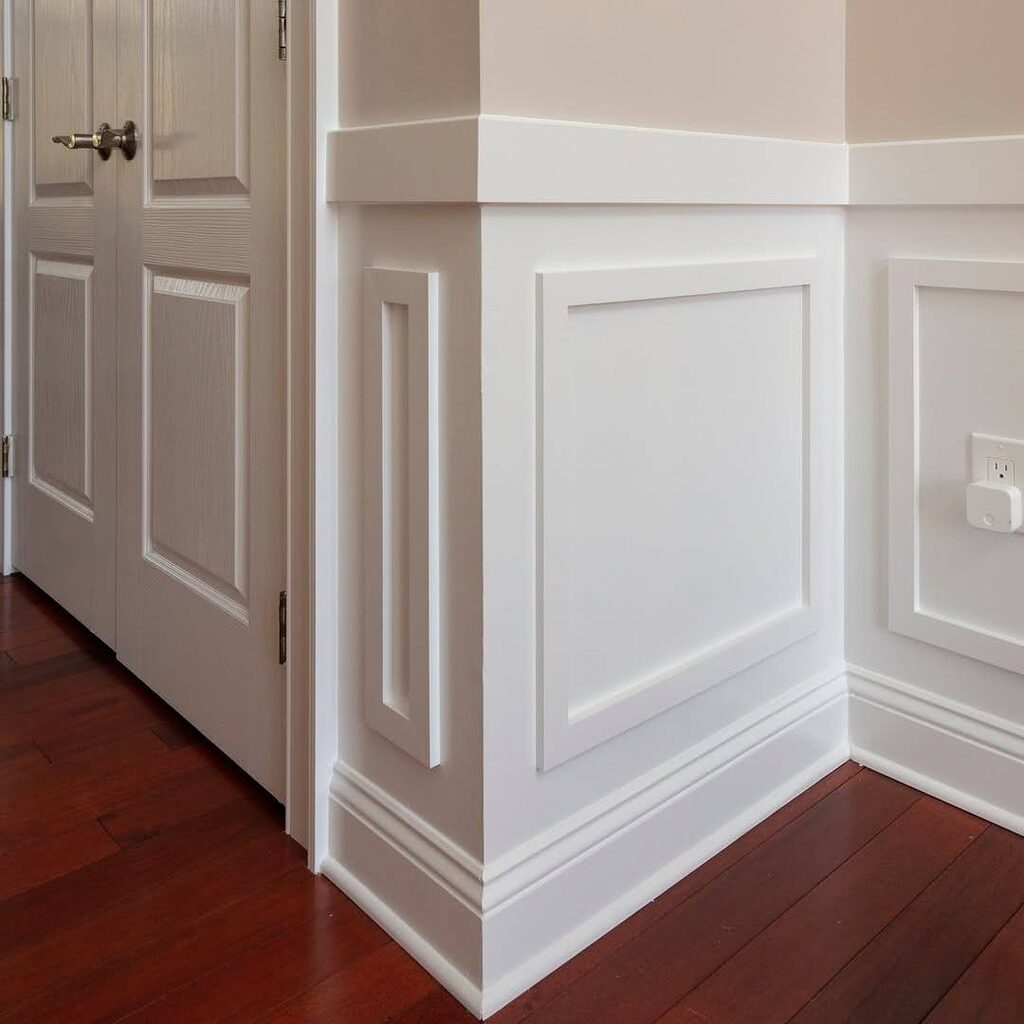
Wainscoting comes in a variety of styles, from traditional beadboard panels to more detailed box molding designs. Full-wall wainscoting is perfect for adding elegance to entryways and bathrooms, while half-wall beadboard works well in bedrooms and kitchens to create a cozy, cottage-like atmosphere. Framed panel wainscoting, with its clean, geometric shapes, suits contemporary interiors.
Board and batten wainscoting gives a farmhouse-inspired look. To install, measure, and mark your desired height, attach panels or molding, and finish with a crisp coat of paint for a polished result.
4. Crown Molding Trim
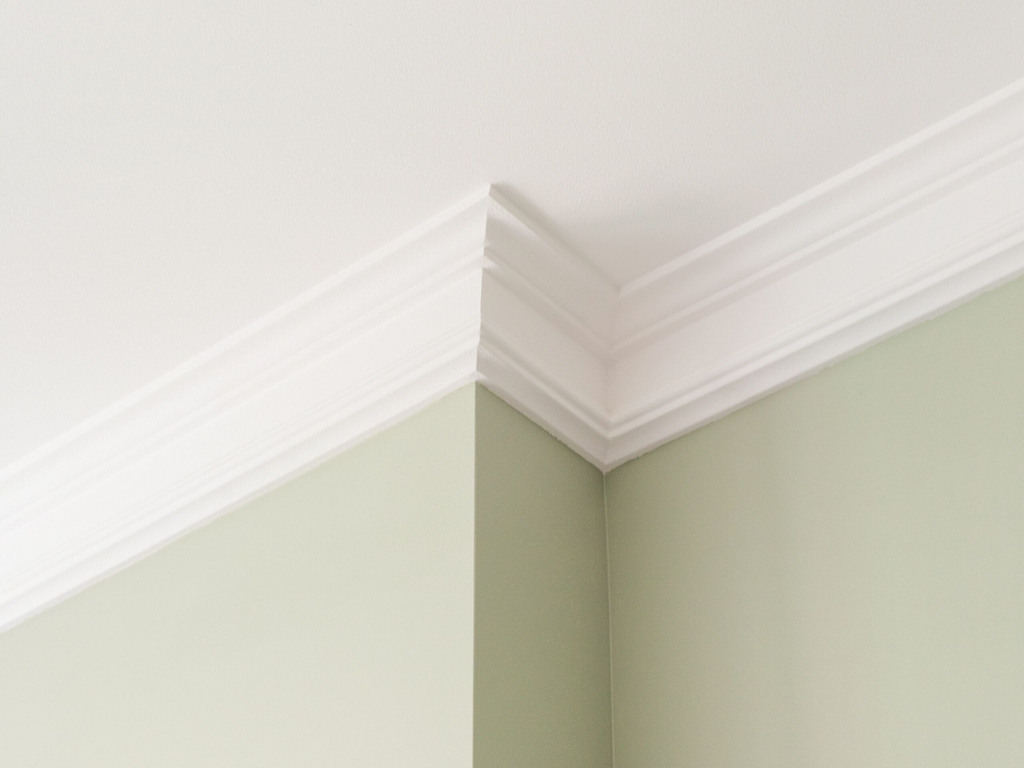
Crown molding is a decorative trim installed where the wall meets the ceiling, adding a refined and elegant touch to any room. When used with beadboard, it elevates the overall design by creating a smooth, polished transition.
You can use it in traditional or modern interiors, crown molding enhances the visual appeal, making ceilings feel higher and rooms more sophisticated. To use crown molding with beadboard, first, install the beadboard panels up to the ceiling or desired height.
Then, measure and cut the molding at precise angles using a miter saw. Secure it with nails or adhesive, ensuring a snug fit along the ceiling line. Finish by caulking any gaps and painting the molding to match or contrast with the beadboard for a seamless, stylish effect.
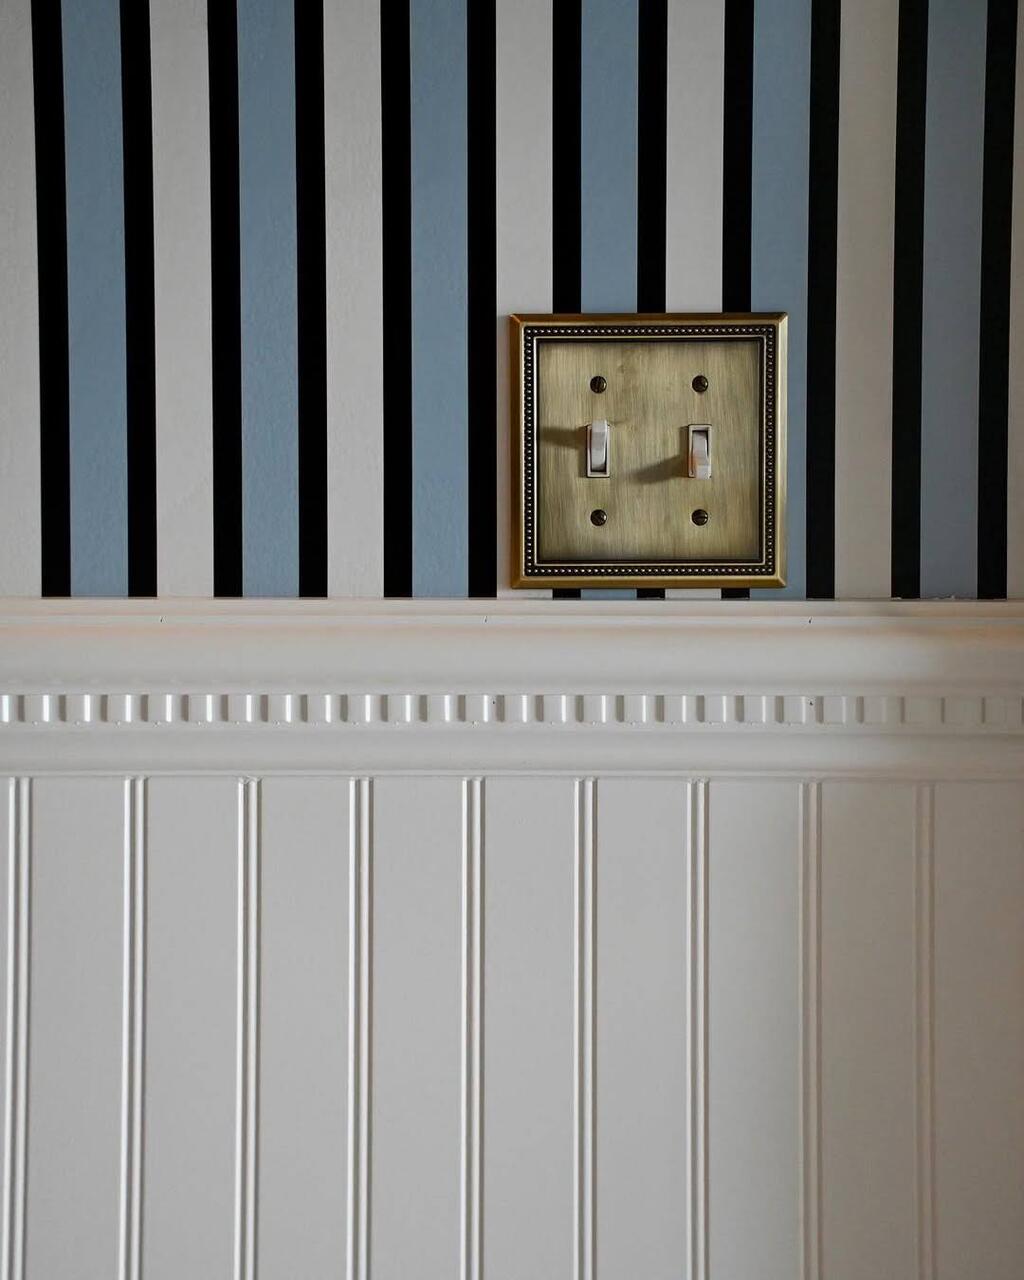
5. Cap Molding Trim
Cap molding is a finishing trim that sits on top of beadboard wainscoting, creating a clean and professional transition to the wall. This small yet impactful detail prevents raw edges from being visible while giving the beadboard a more structured and complete appearance.
It’s a subtle design element that can make a big difference in the overall aesthetic. To install cap molding, first, secure the beadboard panels to the wall, ensuring they are level. Then, cut and attach the cap molding along the top edge using finishing nails or construction adhesive.
Fill any gaps with caulk for a flawless finish. Depending on your style, you can paint it the same color as the beadboard for a cohesive look or use a contrasting shade to create visual interest.
6. Quarter-Round Trim
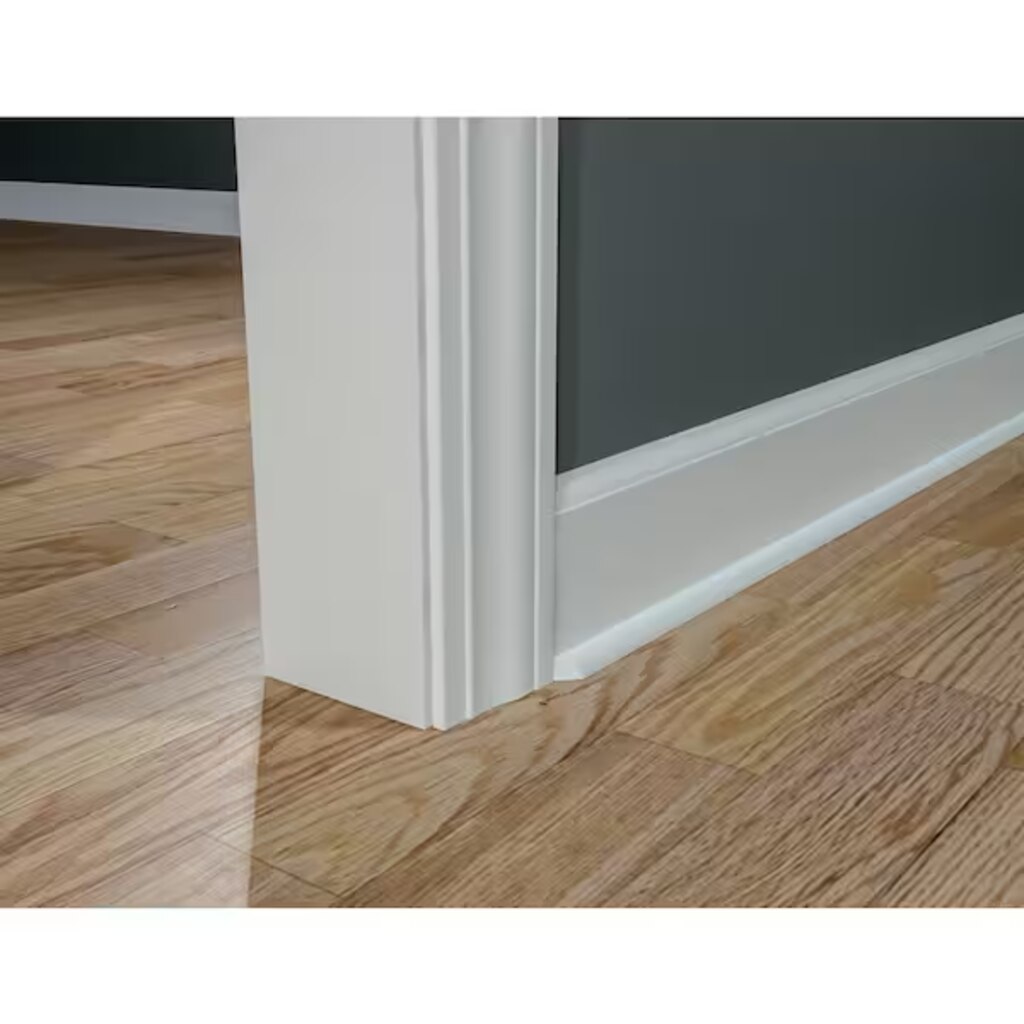
Quarter-round trim is a small, curved molding used to cover gaps where beadboard meets the floor, ceiling, or adjoining walls. This trim is especially useful for hiding imperfections, creating a seamless transition.
It gives your beadboard installation a professional, finished appearance. To apply quarter-round trim, measure and cut the pieces to fit along the edges where needed. Use finishing nails or adhesive to secure them in place, ensuring they align properly.
Once installed, fill nail holes with wood filler and caulk any gaps before painting or staining to match the beadboard. This simple addition brings cohesion and polish to your beadboard project.
How to Choose the Right Beadboard Trim?
We need to consider the following points:
1. Pick the Right Material
Beadboard comes in MDF (budget-friendly but not moisture-resistant), PVC (waterproof and durable for kitchens and bathrooms), and wood (classic, stainable, and great for a natural look). Choose based on where you’ll install it.
2. Choose the Correct Panel Size
Beadboard is available in large sheets (4×8 feet) for quick coverage or narrow planks for a more detailed look. For wainscoting, a height of 36-42 inches is ideal, while floor-to-ceiling beadboard makes a bold statement.
3. Select the Bead Style
For a modern look, go with wide-spaced beads (2-3 inches apart). If you prefer a traditional design, narrow beads (1 inch apart) work best. V-groove beadboard offers a sharper, more defined pattern.
4. Decide on Paint or Stain
Painted beadboard in white, pastels, or neutrals creates a fresh, clean look, while stained wood adds warmth and rustic charm. Use semi-gloss or glossy paint in high-moisture areas for durability.
5. Pick an Installation Method
Use nail-down installation for wood panels, adhesive for MDF or PVC, and tongue-and-groove panels for a seamless finish. Choose the method that works best with your walls and skill level.
6. Match It to Your Home Style
For farmhouse or cottage styles, go with classic white beadboard. A modern look works best with wide panels in muted tones. Stained wood suits rustic or traditional homes, while light-colored beadboard enhances coastal spaces.
By keeping these key factors in mind, you’ll find the perfect beadboard trim to enhance your home’s aesthetic and functionality.
Beadboard Installation Tips for a Flawless Finish
- Let the beadboard sit in the room for 48 hours before installation to prevent warping.
- Secure the panels by nailing them into studs or using construction adhesive for extra support.
- Start at the center and work outward to create a balanced and symmetrical look.
- Use trim, chair rails, or caulk to hide seams and achieve a seamless finish.
- Keep the beadboard level by using a level and spacers throughout the installation.
- Cut openings for outlets and fixtures in advance to ensure a precise fit.
- Choose semi-gloss or mildew-resistant paint for added durability and moisture protection.
- Hide nail holes with wood filler or nail through the tongue for a cleaner appearance.
- Add a decorative top rail to enhance wainscoting and create a smooth transition to the wall.
- Apply a waterproof sealant in moisture-prone areas to extend the beadboard’s longevity.
Conclusion
Beadboard trim is more than just a decorative detail—it’s a timeless design element that adds texture, warmth, and character to any space. Whether you’re aiming for a cozy cottage vibe, a modern farmhouse feel, or a sleek contemporary touch, beadboard adapts effortlessly to your style.
With endless design possibilities, from wainscoting to ceilings and accent walls, beadboard trim allows you to create a polished, cohesive look that enhances your home’s charm. Plus, with easy maintenance and DIY-friendly installation, it’s a simple yet impactful way to transform your interiors.
FAQs
1. Can I install beadboard trim myself?
Yes, beadboard is DIY-friendly. Depending on the surface, it can be installed using nails, construction adhesive, or a combination of both.
2. How do I maintain beadboard trim?
Dust regularly, clean with mild soap and water, and touch up paint or caulk small gaps as needed to keep it looking fresh.
3. Can beadboard trim be used in moisture-prone areas?
Yes, but it should be properly sealed with a waterproof primer and paint to prevent swelling or warping.
4. What’s the best paint finish for beadboard trim?
Semi-gloss or satin finishes are ideal for durability and easy cleaning, especially in kitchens and bathrooms.


