
Looking for ways to add character to your home without breaking the bank? Beadboard trim is your answer.
In this article, I’ll share practical ideas for using beadboard trim throughout your home. From classic wainscoting to creative ceiling treatments, you’ll find,
- Budget-friendly ways to transform boring walls
- DIY-friendly projects for every skill level
- Step-by-step guidance to get professional results
I’ve used beadboard in countless projects. The results are always impressive, and my clients are amazed by the value it adds.
If you’re searching for inspiration or ready to start your first beadboard project, you’ll find exactly what you need here.
Why Beadboard Trim Works in Any Room
Beadboard isn’t just pretty, it’s practical.
Here’s why I love it (and why you will too):
- Adds timeless detail without emptying your wallet
- Blends perfectly in both modern and traditional homes
- Stands up to daily life while being easy to clean
- Can be painted any color to match your style
- Simple enough for a weekend DIY project
The best part? You don’t need to be a master carpenter to install it.
Wall & Wainscoting Upgrades
Let’s start with the classics, walls are beadboard’s natural home.
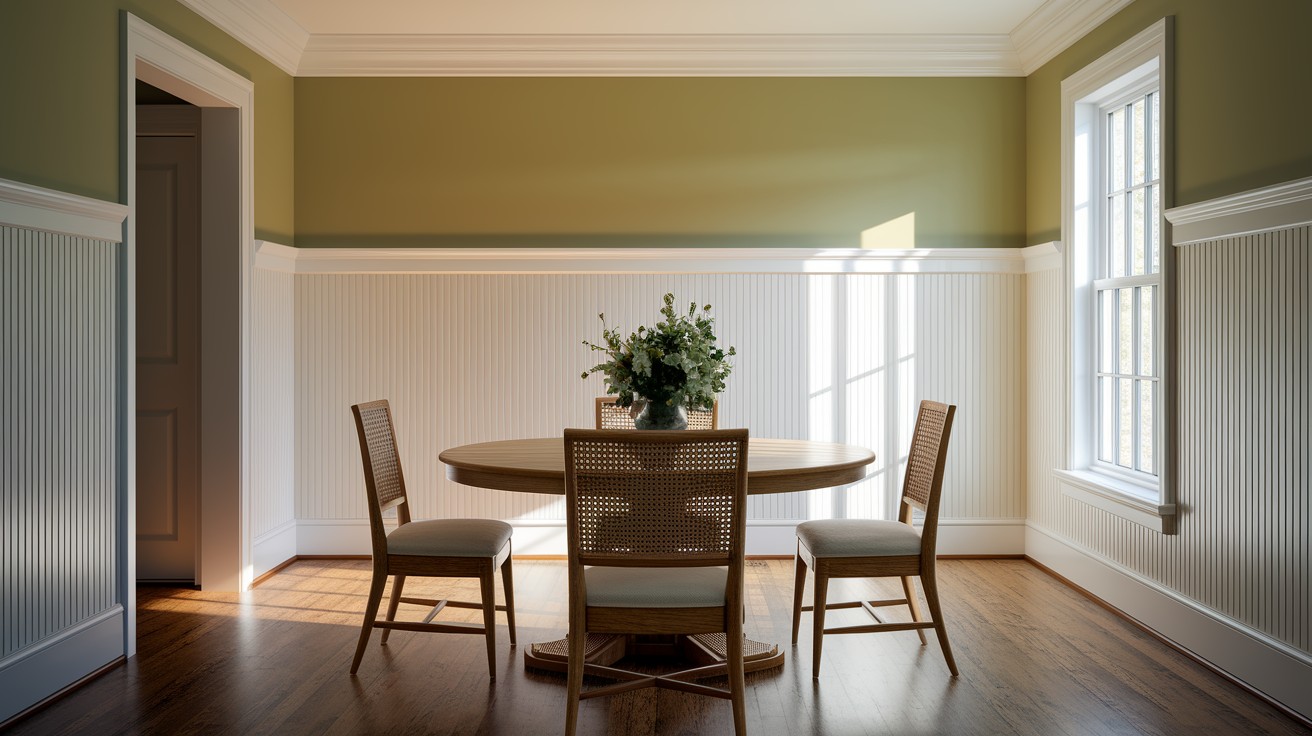
1. Classic Chair Rail with Beadboard Paneling
This combo never goes out of style. Install beadboard panels up to 36″ high, cap with a chair rail, and paint the upper wall a complementary color.
I did this in my dining room last year. Guests always ask if it’s original to the house, that’s how timeless it looks.
For best results, choose a chair rail that’s at least 2.5″ wide to create proper visual weight. The contrast between the smooth wall above and textured beadboard below creates an amazing dimension. Consider adding a thin piece of base cap molding where the beadboard meets the floor for a truly finished look.
2. Full Wall Beadboard Wainscoting
Why stop halfway? Cover an entire wall with beadboard for major impact.
This works amazingly in bathrooms, mudrooms, or even bedrooms. Paint it white for a coastal vibe or go bold with navy or forest green.
Full wall treatments create a cozy, enveloping feeling that’s perfect for smaller spaces. The vertical lines naturally draw the eye upward, making ceilings appear higher. I recommend using wider beadboard planks (3-4″) for full walls to keep the look from becoming too busy or overwhelming.
3. Hallway Picture Rail with Beadboard Wainscot
Hallways deserve love too. Install beadboard wainscoting capped with a picture rail about 5 feet up the wall.
Hang family photos above it. You’ll smile every time you walk through.
The higher placement of the picture rail creates a gallery-like feeling in an otherwise transitional space. Paint the beadboard a different color than the wall above for added drama. This treatment also helps protect hallway walls from scuffs and bumps – perfect if you have kids or pets running through regularly.
4. Bedroom Accent Wall with Framed Beadboard Panels
Create an eye-catchingfocal point by framing sections of beadboard with simple trim.
It’s like wainscoting’s cooler cousin, and perfect behind a bed.
This treatment adds architectural interest without overwhelming the space. For a modern twist, paint the beadboard and frame the same color as the wall for a tone-on-tone look. The texture still shows through, but the effect is more subtle and refined.
I love using this technique in guest bedrooms to create interest without a huge investment.
5. Laundry Room Wall Treatment with Utility Hooks and Trim
Make your laundry room functional AND beautiful. Install beadboard on the walls, add trim, then mount hooks for hanging items.
Suddenly, doing laundry doesn’t seem so bad!
The beadboard provides a sturdy backing for hooks that won’t pull out of drywall. Paint everything in a semi-gloss finish for easy cleaning when inevitable detergent splashes happen.
Add a small shelf above the hooks for laundry supplies, and you’ve created a custom storage solution that looks like it was designed by a professional.
6. Under-Stair Nook Wrapped in Beadboard
Got an awkward space under the stairs? Transform it with beadboard trim.
Add a cushion and pillows for a cozy reading nook, or build shelves for extra storage.
The texture of beadboard makes these often-forgotten spaces feel intentional and charming. Installation is surprisingly easy since most under-stair spaces have simple angles to work with.
For maximum impact, paint the beadboard a contrasting color from surrounding walls, this visual separation makes the nook feel like a special destination rather than leftover space.
Furniture & Built-In Enhancements
Beadboard isn’t just for walls! It elevates furniture pieces too.
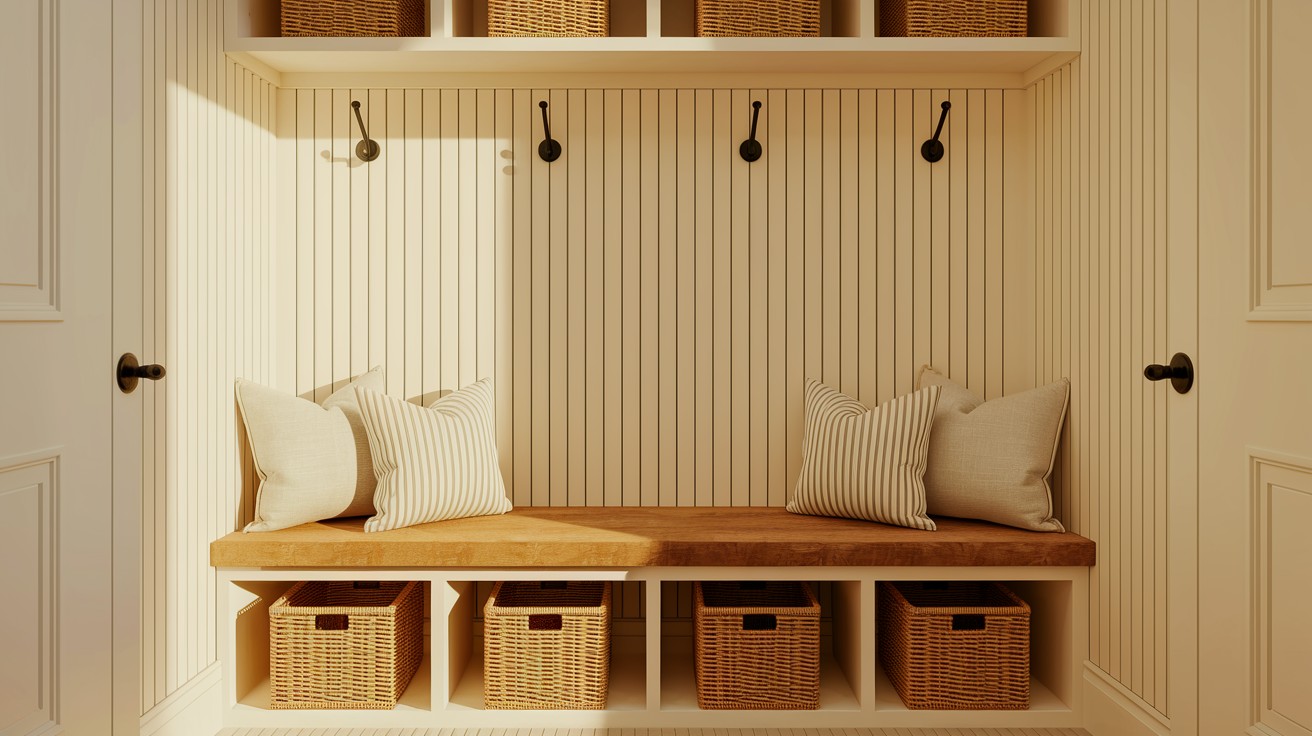
1. Mudroom Bench with Beadboard Backing and Trim
My mudroom bench gets compliments all the time. The secret? Beadboard backing.
Build a simple bench, add beadboard behind it with hooks above, and you’ve got a practical and attractive entry solution.
Make it even more useful by building storage cubbies under the bench for shoes and sports equipment. The beadboard backing stands up to scratches better than plain drywall, making it perfect for busy entryways.
For an extra touch of style, add a small shelf above the hooks for seasonal decor or a small basket to catch keys and sunglasses.
2. Built-in Bookshelves with Beadboard Backs and Trim
Plain bookshelves? Boring! Line the backs with beadboard panels for instant character.
Paint the beadboard a different color than the shelves for extra pop.
This trick works on both built-ins and freestanding bookcases. For store-bought shelves, simply cut beadboard panels to size and secure them with finishing nails or strong adhesive. The texture of the beadboard makes your displayed items stand out more dramatically against the backdrop, great for showcasing collections or special books.
3. Cabinet End Panels Finished with Beadboard Trim
Those plain sides of kitchen cabinets? Cover them with beadboard panels.
It’s an easy weekend project that makes your kitchen look custom-built.
This upgrade is especially impactful on island cabinets or any cabinet end that’s visible when entering the room. Measure carefully and use a jigsaw to cut out any needed holes for electrical outlets before installation.
The beadboard can be painted to match your cabinets or in a complementary accent color for a two-tone kitchen look that’s extremely on-trend.
4. Beadboard Trim Around Built-in Banquettes
If you have a built-in dining nook, add beadboard to the back and sides.
It’s perfect for kitchen nooks, breakfast areas, or window seats.
Beadboard on banquettes adds both texture and durability to an area that sees daily use. Finish the edges with simple trim pieces to create a polished, custom look.
For maximum practicality, apply several coats of polyurethane over painted beadboard in eating areas, this creates a wipe-clean surface that stands up to spills and sticky fingers.
5. DIY Headboard with Framed Beadboard Inset
Need a headboard? Build a frame, add beadboard in the center, and mount it to the wall.
You’ll save hundreds compared to store-bought options.
This project requires only basic tools and can be completed in a single weekend. Size your headboard generously, it should extend about 6 inches beyond each side of the mattress for proper proportion. For an upscale look, add crown molding to the top edge and paint everything in a rich, saturated color like navy, forest green, or charcoal gray.
Architectural Trim & Accents
Small beadboard details make a big difference.
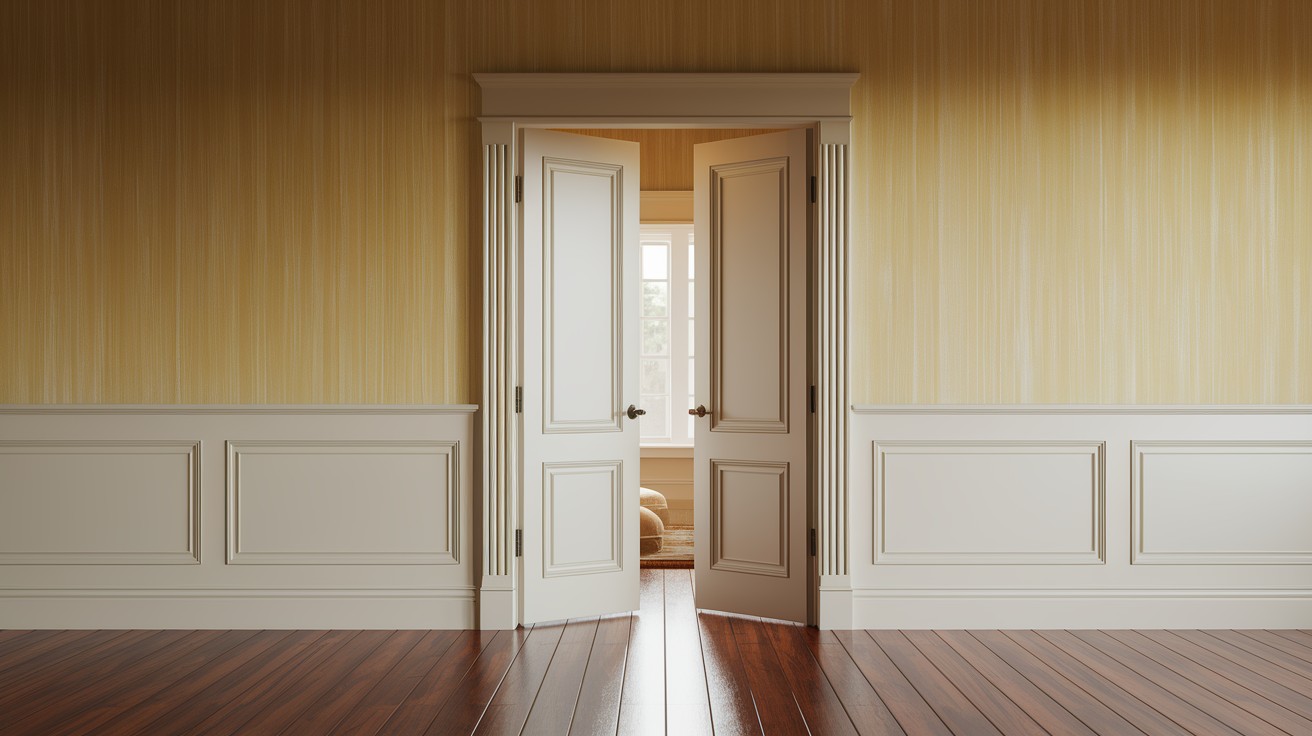
1. Beadboard Trim Around Door Frames
Beef up boring door casings with beadboard trim. It adds depth and interest to every doorway.
This works especially well in craftsman-style homes.
Installation is straightforward, start with standard door casing, then add a layer of beadboard cut to size, and finish with a thin strip of decorative trim. The layered look creates architectural significance even in newer construction. Paint all components the same color for a cohesive look, or highlight the beadboard in a subtle accent shade for more dimension.
2. Window Trim with Beadboard Detailing
Windows deserve special treatment too. Add beadboard under the sill or around the frame.
It catches the light wonderfully throughout the day.
For a custom look without the custom price, extend the beadboard 4-6 inches beyond the window frame on all sides before adding your final trim. This creates the impression of a much more substantial window. Use this technique in rooms that feel a bit bland – the texture and dimension instantly elevates basic windows into architectural features.
3. Beadboard Baseboards Instead of Standard Trim
Swap basic baseboards for taller versions with beadboard detail.
This one change can transform a room’s entire feel.
Aim for baseboards at least 6-8 inches tall for maximum impact – the height creates a grounding effect that makes ceilings appear higher. Installation is simple but requires precise cutting at corners for a professional finish. Consider adding a small strip of quarter-round at the floor junction to hide any small gaps and create a finished, custom look.
4. Beadboard Picture Frame Molding
Create wall panels by framing sections of wall with trim, then add beadboard centers.
It’s like traditional panel molding but with extra texture.
This technique works beautifully in dining rooms, entryways, and formal living spaces. For proper proportion, divide your wall into evenly spaced sections using painter’s tape before installation – this helps you visualize the final result. Leave at least 4 inches between frames and between frames and corners/ceilings for a balanced look that doesn’t feel crowded.
5. Closet Interior with Beadboard Trimmed Walls
Why should closets be boring? Line them with a beadboard for a happy surprise every time you open the door.
Bonus: it’s more durable than regular drywall.
This unexpected detail turns a utilitarian space into something special with minimal effort. Since closets are small, you can often complete this project with leftover beadboard from larger room renovations. Add simple hooks directly to the beadboard for hanging accessories, or install a thin shelf above clothing rods for out-of-season storage – the beadboard backing provides sturdy support without wall anchors.
Kitchen & Bath Features
These rooms are beadboard’s natural habitat.
1. Kitchen Island Beadboard Wrap
My kitchen island was plain until I added beadboard panels to all sides.
Now it’s the focal point of the room. This project took one afternoon and less than $100.
Measure carefully and cut each panel with a 45-degree angle at the corners for a seamless wrap. Use construction adhesive along with finishing nails for a secure attachment that won’t warp or pull away over time.
Consider adding decorative corbels or brackets where the beadboard meets the countertop overhang for an extra touch of custom craftsmanship that elevates the entire kitchen.
2. Beadboard Behind Open Shelving in Kitchens
Open shelving pops against a beadboard backdrop. The vertical lines add height and interest.
White dishes look especially crisp against painted beadboard.
This treatment works best when the beadboard extends from counter to ceiling, creating a cohesive backdrop for your shelving.
For a modern twist, paint the beadboard in a moody hue like slate blue or forest green, the texture keeps it from feeling too dark or heavy. Since kitchen walls face cooking splashes, choose a high-quality semi-gloss or satin paint that can be wiped clean easily.
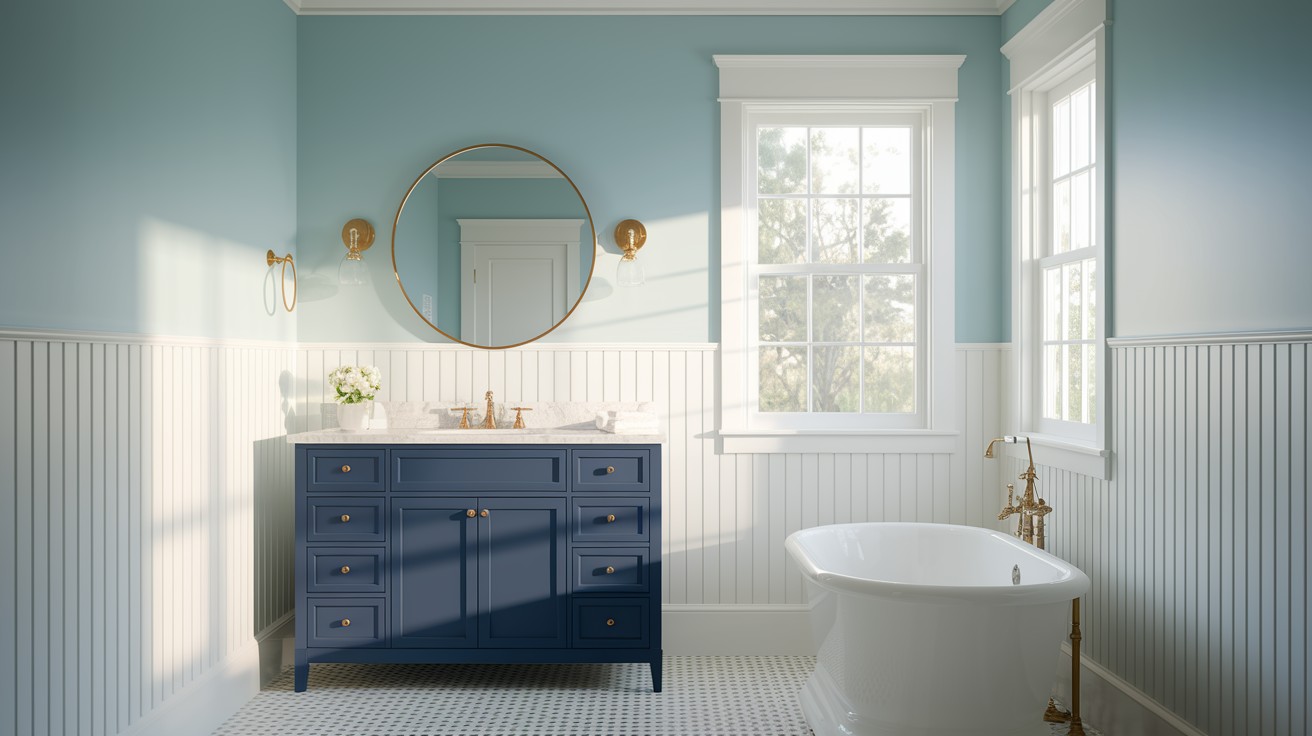
3. Bathroom Vanity Backsplash with Beadboard Trim
Skip the tile! A beadboard backsplash behind your bathroom sink looks classic and costs less.
Seal it well with semi-gloss paint for moisture protection.
To ensure long-term durability in wet areas, caulk all seams thoroughly with a high-quality silicone caulk before painting.
The slight texture of beadboard also helps hide water spots and toothpaste splashes better than flat surfaces. For an extra custom touch, cap the beadboard with a simple piece of trim at the top or frame the mirror with coordinating beadboard trim for a cohesive look.
4. Entryway Wall Organizer with Beadboard Back and Hooks
Create a custom organizer with a beadboard backing, trim, and hooks for coats and bags.
Add a shelf above for extra storage. Perfect for small entries!
The vertical grooves of beadboard subtly guide the eye upward, making narrow entryways feel taller and more spacious.
Choose heavy-duty hooks that screw directly into the beadboard backing for maximum holding strength. For families, consider mounting the hooks at staggered heights so everyone from kids to adults can reach their own designated spot.
Ceilings & Statement Surfaces
Look up! Ceilings need love too.
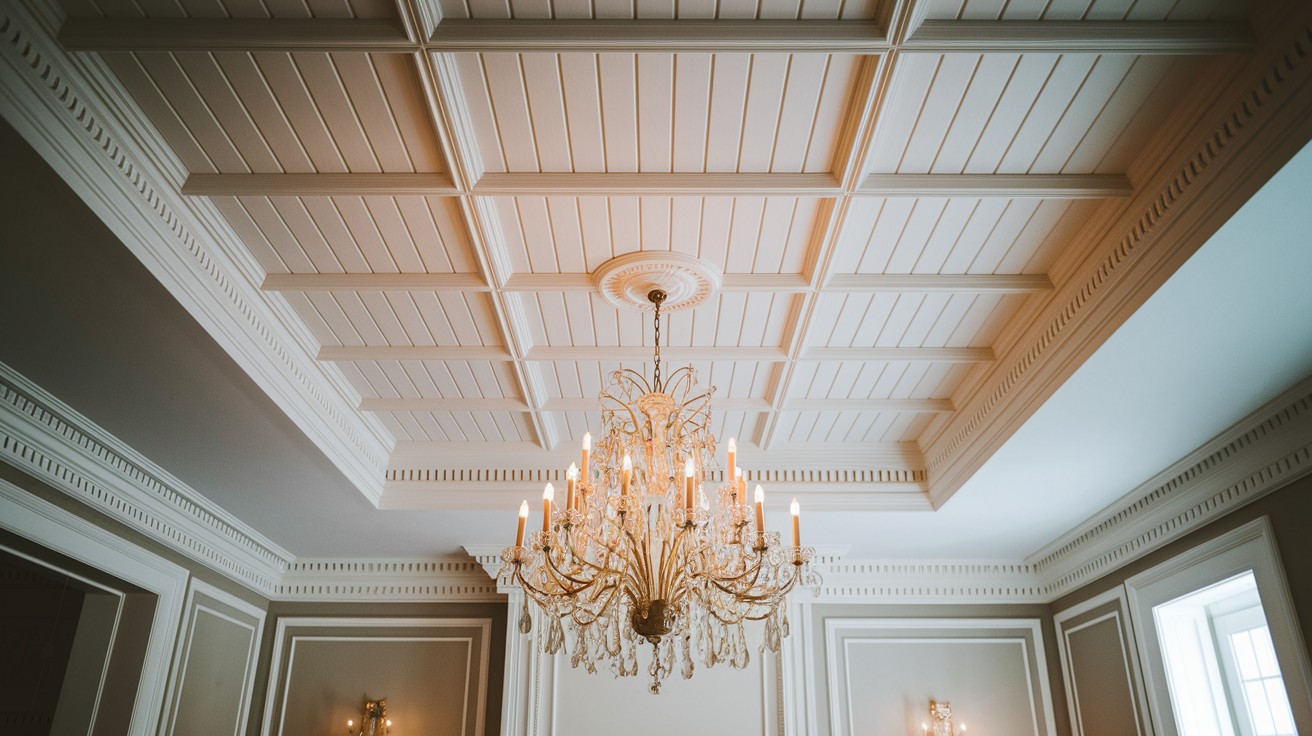
1. Ceiling Trim with Beadboard Inlay
Frame sections of your ceiling with trim, then fill with beadboard panels.
It’s unexpected and absolutely gorgeous, especially in dining rooms.
For installation, create a paper template of each section first to ensure perfect fits before cutting your beadboard.
This technique works best on ceilings at least 9 feet high, as it visually lowers the ceiling slightly. Consider painting the beadboard panels a shade lighter than the trim for subtle depth, or go bold with a contrasting color for dramatic effect in formal spaces.
2. Crown Molding and Beadboard Ceiling Combo
Pair crown molding with a full beadboard ceiling for major impact.
This works beautifully in porches, bathrooms, or any room needing character.
Installing beadboard on ceilings is easier with a pneumatic nail gun and a helper – the awkward angle makes it challenging to hold panels in place while securing them. Always run beadboard perpendicular to ceiling joists for proper support and minimal sagging over time. For an elegant, cohesive look, match the beadboard ceiling color to your trim color throughout the room.
3. Outdoor Porch Ceiling with Beadboard Trim
There’s a reason beadboard porch ceilings are classic – they look amazing and last forever.
Paint them light blue (called “haint blue” in the South) for tradition and bug protection.
For outdoor applications, choose exterior-grade beadboard or PVC panels that won’t warp, rot or be damaged by moisture. Install proper ventilation if covering an existing porch ceiling to prevent moisture buildup and extend the life of both the beadboard and the structure. The clean lines of beadboard create a beautiful contrast against more rustic elements like exposed rafters or rough stone columns.
4. Beadboard Fireplace Surround and Mantel Trim
Update a tired fireplace with beadboard panels and trim.
It’s much cheaper than stone or tile but looks just as impressive.
Always check local fire codes before installation – typically, beadboard must be at least 6 inches away from the fireplace opening, with proper heat shields installed. Frame out the surround first, then add beadboard panels and finish with trim pieces for a custom built-in look. The vertical lines of beadboard naturally draw the eye upward, making fireplaces appear taller and more substantial.
5. Tiny Powder Room, Tall Beadboard Trim
Small powder rooms shine with floor-to-ceiling beadboard. It’s like a jewelry box!
Paint it a bold color for maximum impact in a tiny space.
The consistent texture of beadboard creates a cocoon-like effect that makes these small spaces feel intentional rather than cramped. For a modern look, install the beadboard horizontally instead of vertically – this unexpected orientation makes narrow rooms feel wider. Add simple picture ledges or floating shelves mounted directly to the beadboard for decorative storage without sacrificing precious floor space.
How to Start Your Beadboard Trim Project
Ready to try beadboard in your home? Here’s my simple process:
- Pick one small area to start – a bathroom or half wall is perfect
- Measure carefully and buy 10% extra materials
- Gather supplies: beadboard panels, trim pieces, construction adhesive, nail gun if possible
- Paint before installation for easier coverage
- Cut carefully using a table saw or circular saw
- Install panels first, then add trim pieces
- Caulk all seams for a seamless look
- Touch up paint where needed
The key is starting small. Don’t tackle your whole house at once!
Conclusion
Beadboard trim transforms ordinary spaces into something special, without requiring professional skills or a massive budget.
After exploring these 25+ ideas, you can see why beadboard has remained popular for generations. It’s versatile, affordable, and adds instant character to any room. Start small with a bathroom accent wall or go bold with a kitchen island makeover. The great thing about beadboard is that you can’t really go wrong.
I’ve installed beadboard in cottages, modern homes, and century-old farmhouses. In each case, it elevated the space while honoring the home’s character. Your perfect beadboard project is waiting. Pick one idea, gather your supplies, and experience the satisfaction of this classic upgrade.
Which room will you transform first?
Frequently Asked Questions
Can beadboard be installed in small bathrooms, or will it make the space feel smaller?
Beadboard actually makes small bathrooms feel more finished and intentional. Install it 3/4 of the way up the wall and paint it white or a light color for best results.
How do I clean and maintain beadboard trim over time?
Wipe with a damp cloth and mild soap for regular cleaning. Refresh with a new coat of semi-gloss paint every few years to keep it looking crisp.
What’s the difference between beadboard panels and beadboard wallpaper?
Real beadboard panels are made of wood or MDF and add actual texture to walls. Beadboard wallpaper mimics the look but doesn’t offer the same depth or durability.
Can I install beadboard myself if I’ve never done woodworking before?
Absolutely! Start with pre-made panels and basic tools. The most important skills are measuring carefully and cutting straight lines.
How do I handle electrical outlets when installing beadboard on walls?
Purchase electrical box extenders before starting your project. These inexpensive plastic pieces extend your outlets to sit flush with the new beadboard surface.