
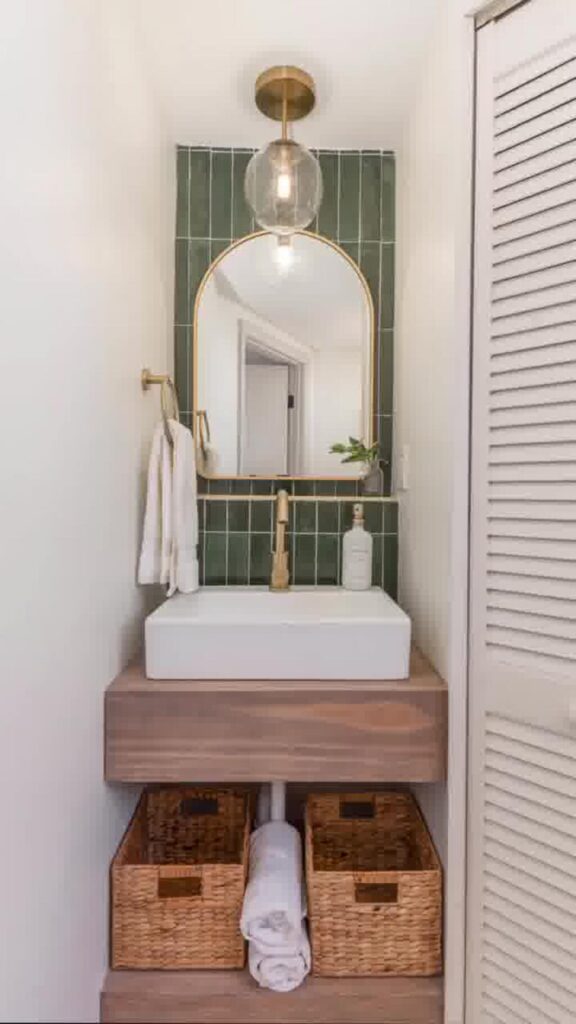
In this blog, I’ll show you how I built my own DIY floating vanity—turning a simple idea into a stylish, space-saving upgrade.
If you’re tired of bulky vanities or overpriced options that don’t quite fit your space, why not create your own? It’s easier than you think! I’ll guide you through the process step by step so you can achieve a sleek, modern look without breaking the bank.
Let’s get started.
Why I Chose to DIY My Floating Vanity
After browsing high-end vanities online, I quickly realized that the one I loved cost well over $3,000.
That just wasn’t in my budget! So, I decided to roll up my sleeves and build it myself for under $400.
By using high-quality materials like red oak plywood and adding custom details, I achieved a stunning floating vanity that looks like it came straight out of a designer catalog.
Materials List
Here’s everything I used to bring my vision to life:
Lumber List:
- (1) 3/4″ x 4′ x 8′ Red Oak Plywood
- (1) 1/2″ x 4′ x 4′ Red Oak Plywood
- (2) 1″ x 8″ x 6′ Red Oak Board
- (1) 1″ x 2″ x 8′ Red Oak Board
Additional Supplies:
- Wood glue
- Brad nails (1 1/4” and 1” sizes)
- 1 1/4” wood screws
- 12” soft-close drawer slides
- Waterproof polyurethane finish
- Whitewash stain
- Sandpaper (220 grit)
- Pocket hole screws (1 1/4”)
- Vessel sink and faucet
My Custom Measurements
My floating vanity is designed to be 38” wide, 22” tall, and 24” deep. I made sure to adjust the drawer depth to accommodate plumbing while maximizing storage space.
Cut List:
- Outside Box:
- (1) 3/4″ Plywood – 38″ x 24″ (top)
- (2) 3/4″ Plywood – 35″ x 24″ (inside box – top & bottom)
- (2) 3/4″ Plywood – 22″ x 24″ (outside box – sides)
- (1) 1/2″ Plywood – 36 1/2″ x 24″ (bottom panel)
- Drawer:
- (1) 1″ x 8″ – 34″ x 6″ (drawer back)
- (2) 1″ x 8″ – 10″ x 6″ (drawer sides)
- (1) 1″ x 8″ – 35″ x 7″ (drawer front)
- (1) 1/2″ Plywood – 33″ x 9 3/4″ (drawer bottom)
- Face Trim:
- (2) 1″ x 2″ – 38″ x 1 1/2″ (top & bottom trim)
- (2) 1″ x 2″ – 22″ x 1 1/2″ (side trim)
Step 1: Cutting and Prepping the Lumber

Using a table saw, I cut all my plywood and boards to size. Once cut, I lightly sanded every piece with 220-grit sandpaper to ensure a smooth surface for assembly and staining later on.
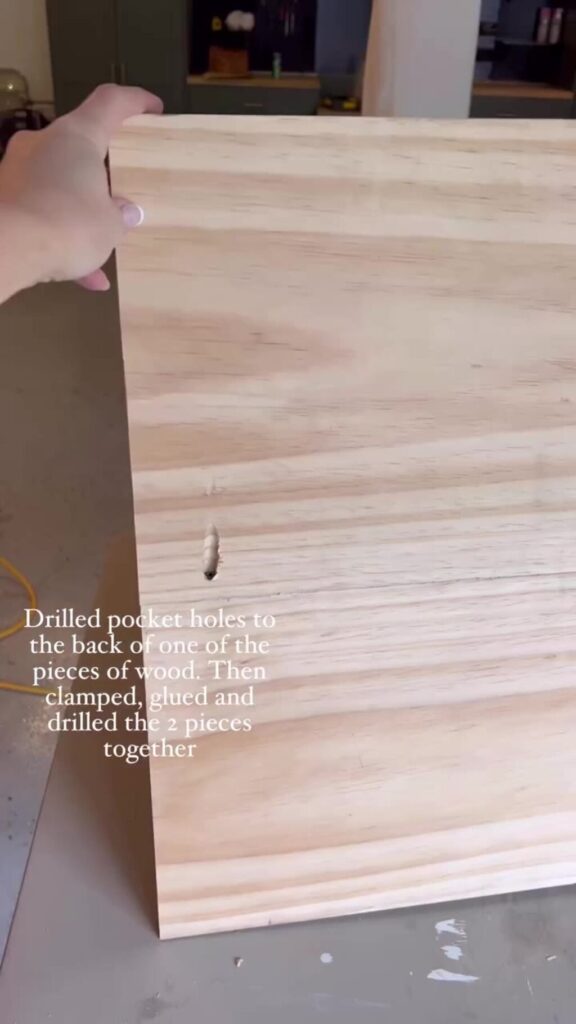
Step 2: Building the Interior Box

I assembled the interior box first, using wood glue and brad nails to hold the panels in place. Then, I reinforced the joints with 1 1/4” screws, making sure to countersink them so they wouldn’t show.
A quick tip: Always position the best-looking side of the plywood inward since this will be visible when opening the drawer.
Step 3: Installing the Drawer Stop & Backer Board
I cut a 1×2 red oak board to fit inside as a drawer stop and secured it with wood glue and brad nails. Then, I added a sturdy backer board (1×6) to mount the vanity securely to the wall.
Step 4: Assembling the Exterior Box
For extra durability and a polished look, I doubled up my plywood layers. The bottom piece was cut from 1/2” plywood, while the sides and top were 3/4” plywood. I mitered the top edges at 45 degrees for seamless joints.
Once dry-fitted, I glued and clamped everything, securing the top first with screws from underneath, then attaching the sides and bottom.
Step 5: Adding Face Trim
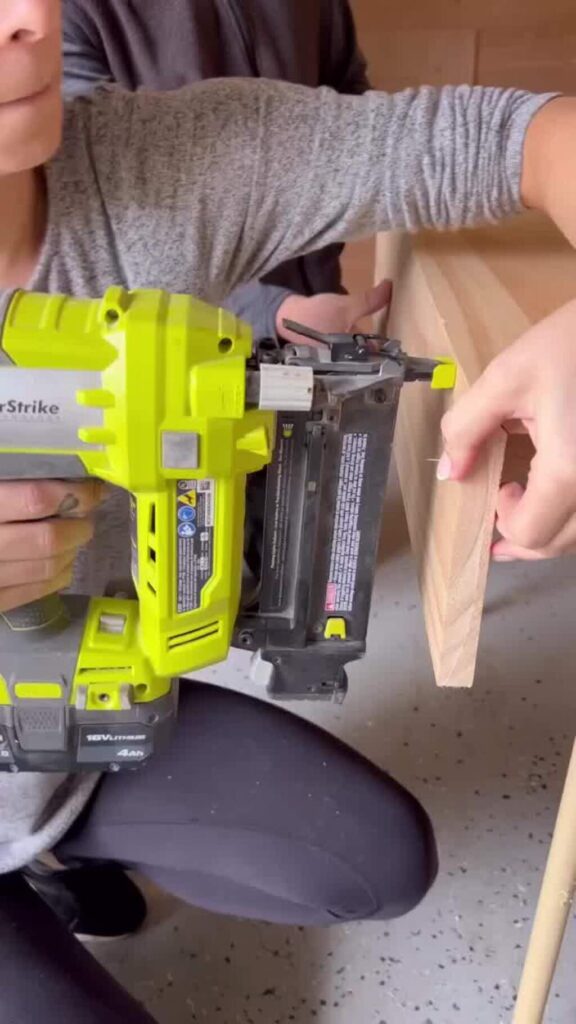
To give the vanity a finished look, I installed 1×2 red oak trim around the front edges. I mitered the corners at 45 degrees, applied wood glue, and nailed them in place.
Step 6: Building and Installing the Drawer
Since the plumbing takes up some space, I designed the drawer to be shallow but wide.
- I cut a 1/2” dado groove in the side panels to fit the bottom plywood.
- I used pocket hole screws to attach the sides to the back panel.
- For the front, I slightly angled the top edge, allowing it to double as a handle.
- The drawer slides were installed inside the vanity, making sure they were level before attaching them to the drawer.
Step 7: Sanding & Staining
Once fully assembled, I sanded everything again with 220-grit sandpaper, rounding out the edges slightly for a smooth finish.
Originally, I tried a weathered oak stain, but it wasn’t quite the look I wanted. So, I sanded it lightly and applied a whitewash stain instead.
This transformed the red oak into a gorgeous light, natural wood tone, giving it the appearance of white oak. Finally, I sealed everything with a waterproof polyurethane finish to protect it from moisture.
Step 8: Installing the Floating Vanity
To mount the vanity, I located the wall studs and secured the backer board into them with heavy-duty screws. I made sure it was completely level before tightening everything down.
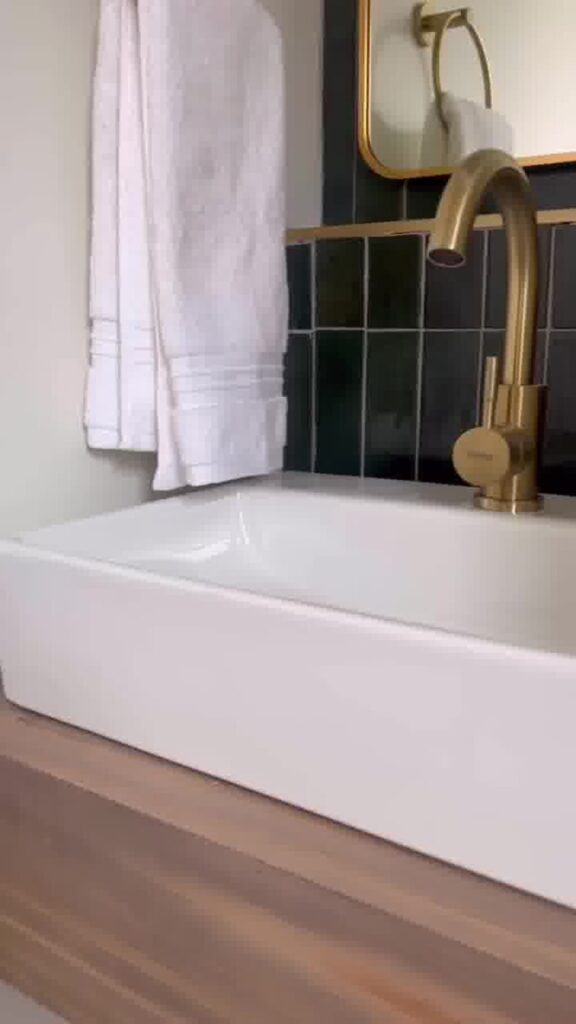
Step 9: Installing the Sink & Faucet
The last step was installing the vessel sink and faucet. I cut a hole in the top panel to accommodate the plumbing and made sure the water lines could connect seamlessly behind the drawer.
Conclusion
This entire DIY floating vanity cost me under $400, including materials, stain, and the sink! Compared to the high-end versions I found online, I saved over $2,500. Plus, I have a custom piece that perfectly fits my space and style.
If you’re thinking about making your floating vanity, go for it! It’s a rewarding project that adds a high-end touch to any bathroom without breaking the bank. Let me know in the comments if you try it—I’d love to see your creations!
FAQs
Is a floating vanity strong enough to hold a sink?
Absolutely! When properly mounted to wall studs, a floating vanity can easily support a sink and countertop. Just make sure to use heavy-duty brackets or a sturdy frame.Do I need special tools to install a floating vanity?
Not necessarily! A drill, level, stud finder, and screws are the basics. If you’re adding plumbing adjustments, a jigsaw or hole saw may come in handy.
Can I install a floating vanity without professional help?
Yes! If you’re comfortable with basic DIY projects and have the right tools, you can install one yourself. Just double-check your wall support and measurements.
How much weight can a floating vanity hold?
It depends on your wall structure and mounting method. A properly secured floating vanity can support 150–300 lbs or more.
What type of wood is best for a DIY floating vanity?
Hardwoods like oak, maple, or walnut are durable and stylish. Plywood with a high-quality veneer is also a great budget-friendly option.
How do I make my floating vanity waterproof?
Use a water-resistant finish like polyurethane, marine-grade varnish, or waterproof wood sealer to protect against moisture.