
A stripped screw hole happens when the threads inside the hole get damaged or worn out. The screw can’t grip properly anymore. It just spins without tightening.
This problem shows up a lot in metal surfaces. Think about furniture hinges, machinery parts, or mounting brackets. Metal gets used hard and often. Repeated stress, overtightening, and regular wear can destroy the delicate thread pattern.
When screw holes fail, things get wobbly. Parts come loose. That’s not just annoying – it can be dangerous. A loose bracket might drop something heavy. A wobbly chair leg could cause a fall. Structural connections need reliable fastening.
Fixing stripped holes the right way brings back strength and stability. Your repairs will last for years when done properly. I’ll show you four proven methods that work for different situations and skill levels. These techniques will save you money and prevent safety issues.
How to Fix Stripped Screw Holes in Metal
This step-by-step guide shows you how to fix stripped screw holes in metal using four proven methods. Learn when to use larger screws, Helicoil inserts, metal epoxy, or retapping techniques.
Includes tool lists, safety tips, and prevention advice. Perfect for DIY repairs on furniture, machinery, and metal components.
Step 1: Gather Your Tools and Materials
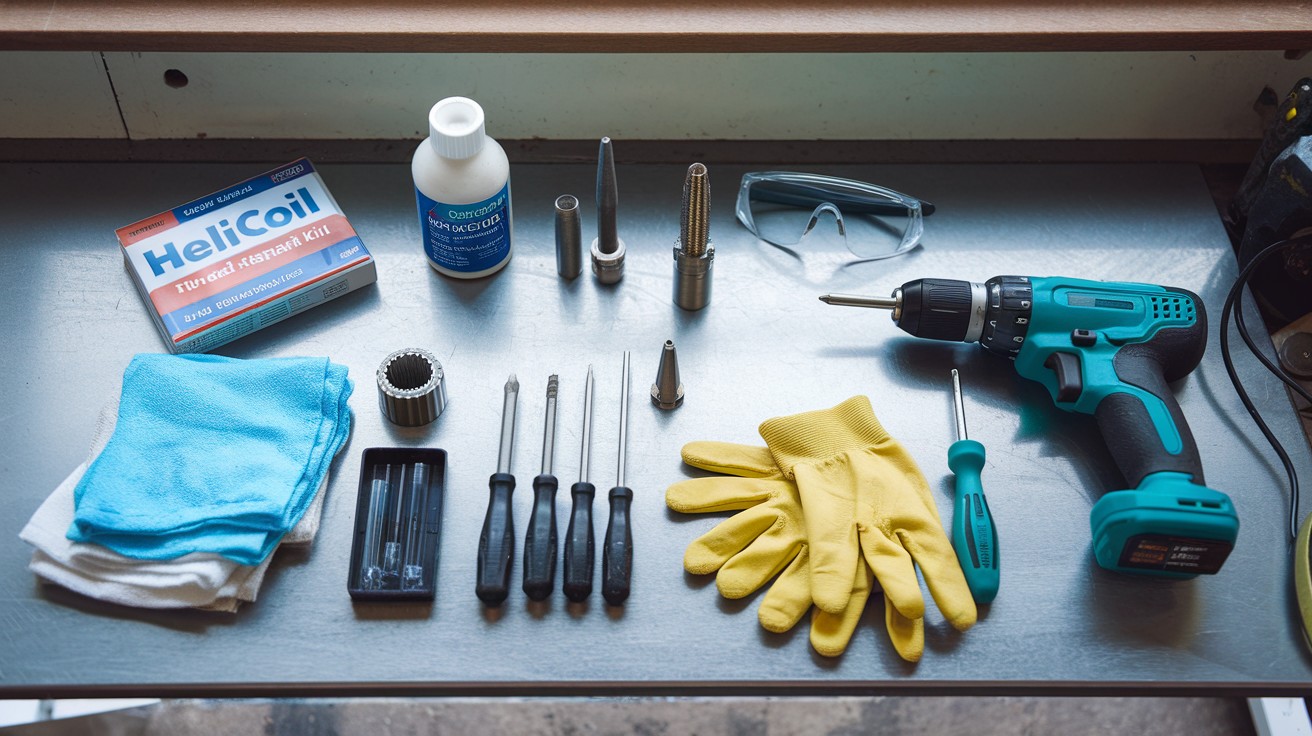
Before you start, collect everything you need. Having the right tools makes this job much easier.
Essential tools for most repairs:
- Thread repair kit (Helicoil or similar brand)
- Metal epoxy or filler compound
- Electric drill with various bit sizes
- Tapping tool set
- Helicoil insert or threaded insert
- Screwdriver set
- Clean rags
- Safety glasses
- Work gloves
You might not need every item. The repair method you choose determines which tools matter most.
Keep your workspace organized. Lay tools out where you can reach them easily. Good lighting helps, too.
Step 2: Clean and Inspect the Damaged Area

Start by cleaning around the stripped hole. Use a clean cloth to remove dust, grease, and metal shavings. A dirty work area leads to poor repairs.
Look closely at the damage. Is the hole partially stripped or completely ruined? Can you see any remaining threads?
Measure the original screw size. Write this down. You’ll need these numbers later.
Check what the screw holds in place. Is it structural? Does it carry weight? Heavy-duty applications need stronger repair methods.
Test the screw in the hole. Does it catch at all? Or does it spin freely? This tells you how much thread is left.
Step 3: Choose a Fixing Method
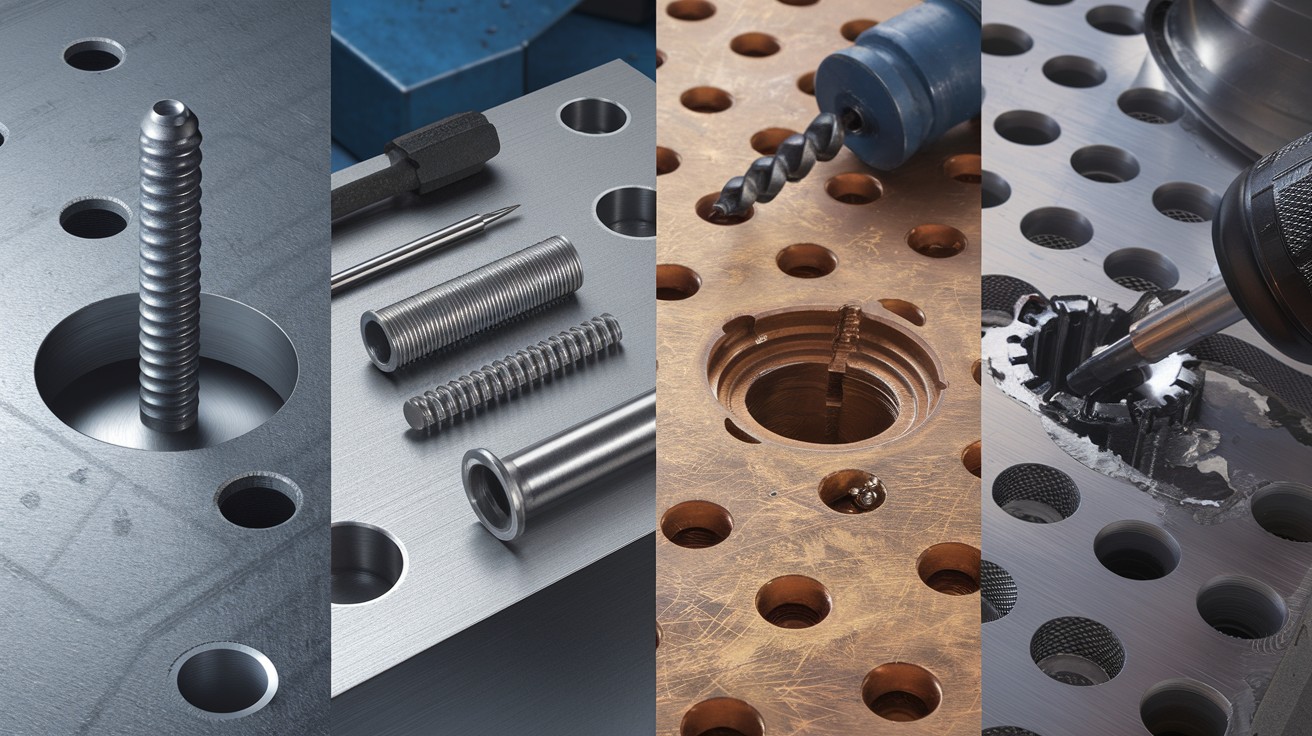
You have four main options. Pick based on your situation and skill level.
Option 1: Use a Larger Screw
This works for light-duty applications. It’s the simplest fix.
Drill out the hole slightly larger. Go up one screw size. For example, if you had a #8 screw, try a #10.
Test fit the new screw. It should thread in smoothly but snugly. Don’t force it.
This method works best when the original hole wasn’t too damaged. Quick and easy, but not always the strongest option.
Option 2: Use a Thread Repair Kit
This gives you the strongest repair. Professional mechanics use this technique.
First, drill out the damaged threads completely. Use the size specified in your kit instructions.
Next, tap new threads using the special tap from your kit. Turn it slowly and steadily. Back it out every few turns to clear metal chips.
Insert the Helicoil using the installation tool. Thread it in until it sits just below the surface.
Break off the tang at the bottom using needle-nose pliers. Now you can install your original screw size.
Option 3: Fill and Re-Drill
This works well for medium-duty applications. It’s more forgiving than other methods.
Clean the hole thoroughly. Any oil or debris will prevent bonding.
Mix your metal epoxy according to directions. Work quickly – most types set fast.
Fill the hole. Let it overflow slightly. You’ll sand this smooth later.
Wait for the full cure time. Don’t rush this step. Weak epoxy ruins the whole repair.
Drill a new pilot hole in the center. Start small and work up to the right size.
Tap new threads carefully. The epoxy cuts easily, so go slow.
Option 4: ReTap the Hole
This only works if some original threads remain. It’s worth trying first.
Choose a tap one size larger than the original threads. Or use the same size if the damage is minimal.
Apply cutting oil to reduce friction. This prevents the tap from breaking.
Turn the tap slowly. Feel for it, catching the remaining threads. Back out frequently to clear debris.
Test with a screw. If it holds firmly, you’re done. If not, try a different method.
Step 4: Test the Repair
Install your screw and test the connection. Turn it until snug, then stop. Overtightening will strip the threads again.
Check if the repaired joint feels solid. Try to wiggle whatever the screw holds. It shouldn’t move.
Load test if possible. Apply the same forces that the connection normally sees. Better to find problems now than later.
If the screw still feels loose, remove it and inspect your work. You might need to try a different repair method.
Step 5: Prevent It from Happening Again
Prevention saves time and frustration down the road.
Use washers under screw heads. They spread the load over a bigger area. This reduces stress on the threads.
Don’t overtighten screws. Snug is enough for most applications. More torque doesn’t always mean stronger connections.
Check your connections periodically. Vibration and use can loosen screws over time. Catch problems early.
Consider thread-locking compound for screws that vibrate loose repeatedly. A drop of blue Loctite helps screws stay put.
Match screw material to your base metal when possible. Dissimilar metals can corrode and weaken over time.
Conclusion
You now know four solid methods for fixing stripped screw holes in metal. The Helicoil method gives the strongest repair for heavy-duty applications. The larger screw option works for quick fixes on light-duty connections. Metal epoxy handles medium-duty situations well and forgives mistakes. Retapping saves time when damage is minimal.
Pick the method that matches your situation. Consider the load requirements, your available tools, and your skill level. Take your time and work carefully – rushing leads to poor results. A good repair done once beats multiple quick fixes that fail later.
Most importantly, learn from what caused the original failure. Was the screw overtightened? Did vibration loosen it repeatedly? Address these root causes to prevent future problems. Your repaired connections will serve you well for years to come.
Frequently Asked Questions
Can I use wood screws in metal holes?
No, wood screws won’t hold properly in metal. They lack the thread pitch and strength needed. Use machine screws or self-tapping screws specifically designed for use with metal.
How do I know which size Helicoil to buy?
Measure your original screw diameter and thread pitch. Buy a Helicoil kit that matches these specs. The kit includes the right drill bit, tap, and inserts.
Will metal epoxy hold as well as original threads?
Good quality metal epoxy can be very strong. However, it won’t handle repeated removal and installation like threaded inserts do. Use it for permanent connections.
What if the hole is in a thin piece of metal?
Thin metal makes repairs harder. Consider using a backing plate or nut on the opposite side. This gives you more material to work with and spreads the load.
Can I prevent stripped holes when installing new screws?
Yes. Drill proper pilot holes, use cutting oil, and turn screws slowly. Most stripping happens during installation, not from use. Take your time, and the threads will last longer.