
You’re looking at that wasted space under your cabinets. You’re wondering if you can do something useful with it. I get it. Storage is hard to find in any home.
I’ve spent years helping people make their kitchen space work better. Toe kick cabinets are one of my best solutions because they really work.
This guide covers everything you need to know. You’ll learn how these cabinets work, their benefits, and creative uses. I’ll walk you through how to install them and share design tips that actually matter.
You’ll also learn about common mistakes that waste money and time. Plus care tips that keep everything working well. I’ve seen these cabinets change messy kitchens into neat spaces. The best part? Nobody even knows they’re there until you show them off.
The Anatomy of a Toe Kick Cabinet
Let me break this down for you.
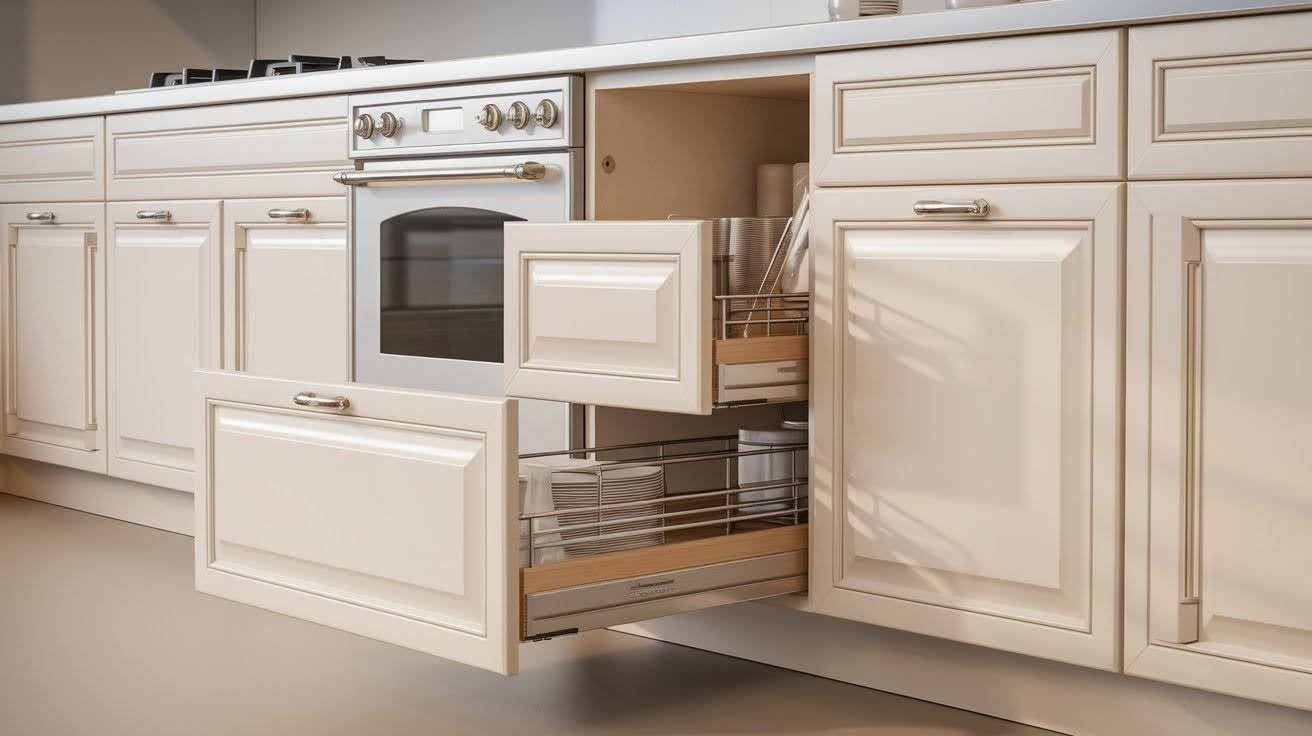
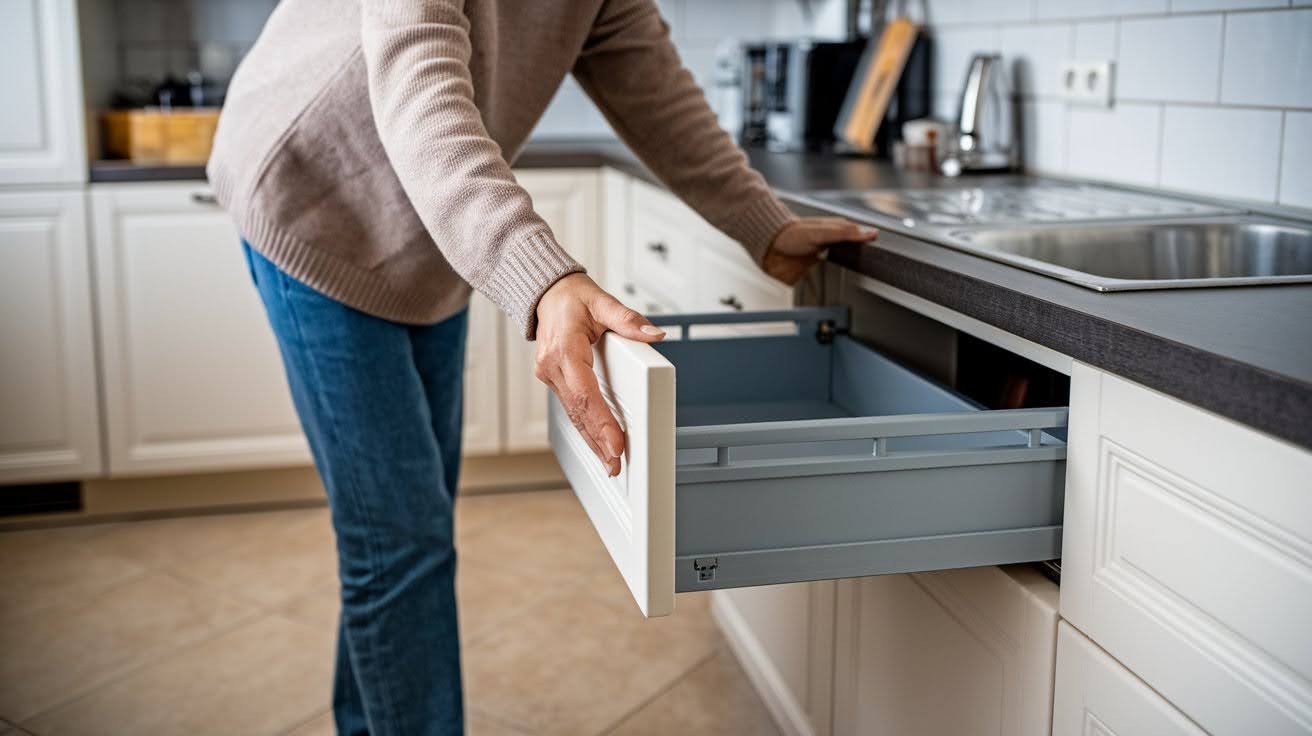
A toe kick cabinet sits in that narrow gap between your base cabinets and the floor. Most people call it the “toe kick space” because that’s where your toes naturally rest when you stand at the counter.
The space is usually 3-4 inches high and about 3 inches deep. Not huge, right? But here’s the thing. In most kitchens, this space just sits there doing nothing. The cabinet itself is basically a shallow drawer that slides out from this hidden area. Some open with a gentle push. Others have tiny handles that blend into the design.
You can put them under any base cabinet. Kitchen islands work great too.
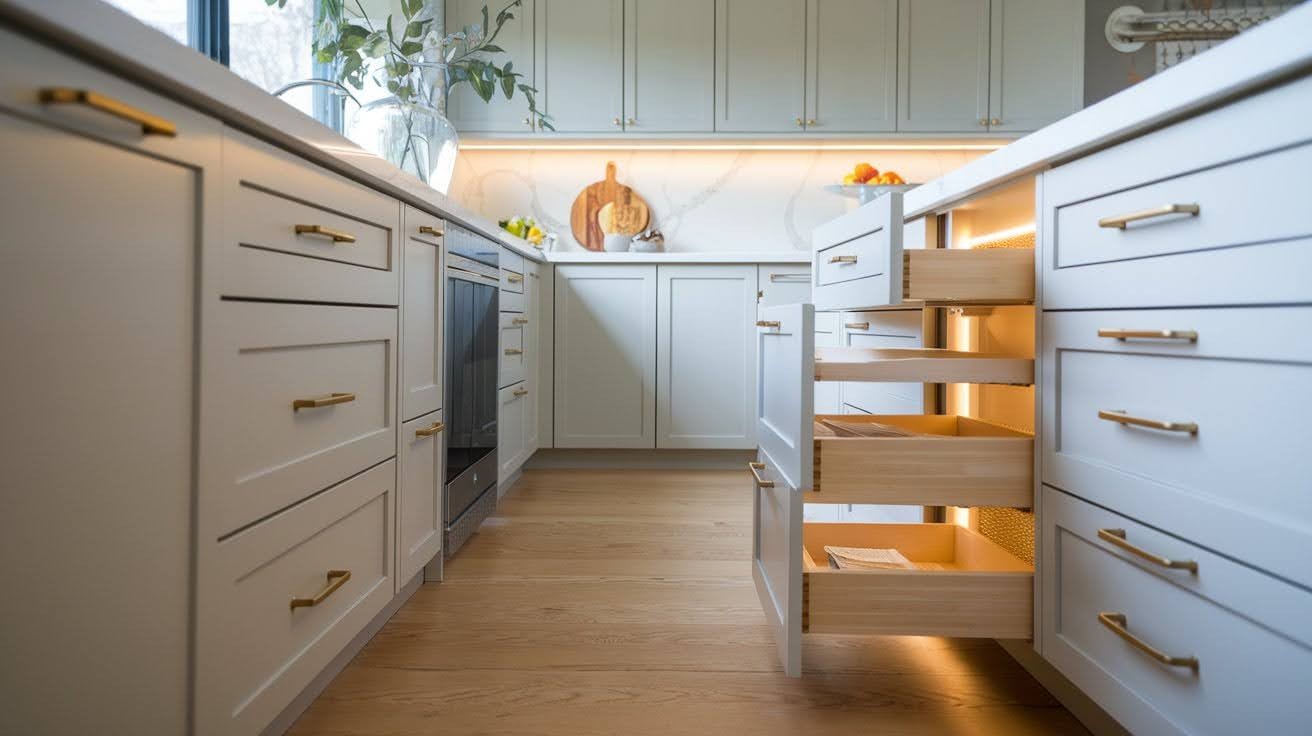
The magic happens in the details. The front panel matches your existing cabinets perfectly. No one even knows it’s there until you show them.
Creative Uses for Toe Kick Cabinets
This is where things get fun.
Most people think toe kick cabinets are just for storing random kitchen stuff. But you can get way more creative than that.
Pet Supplies Storage

Pet supplies work perfectly. Dog treats, leashes, and toys fit great in these shallow spaces. Your furry friends can’t get into them either.
Keep food bowls, grooming brushes, and waste bags organized in one spot. The low height makes it easy to grab what you need during walks or feeding time.
Baking Sheets and Cutting Boards
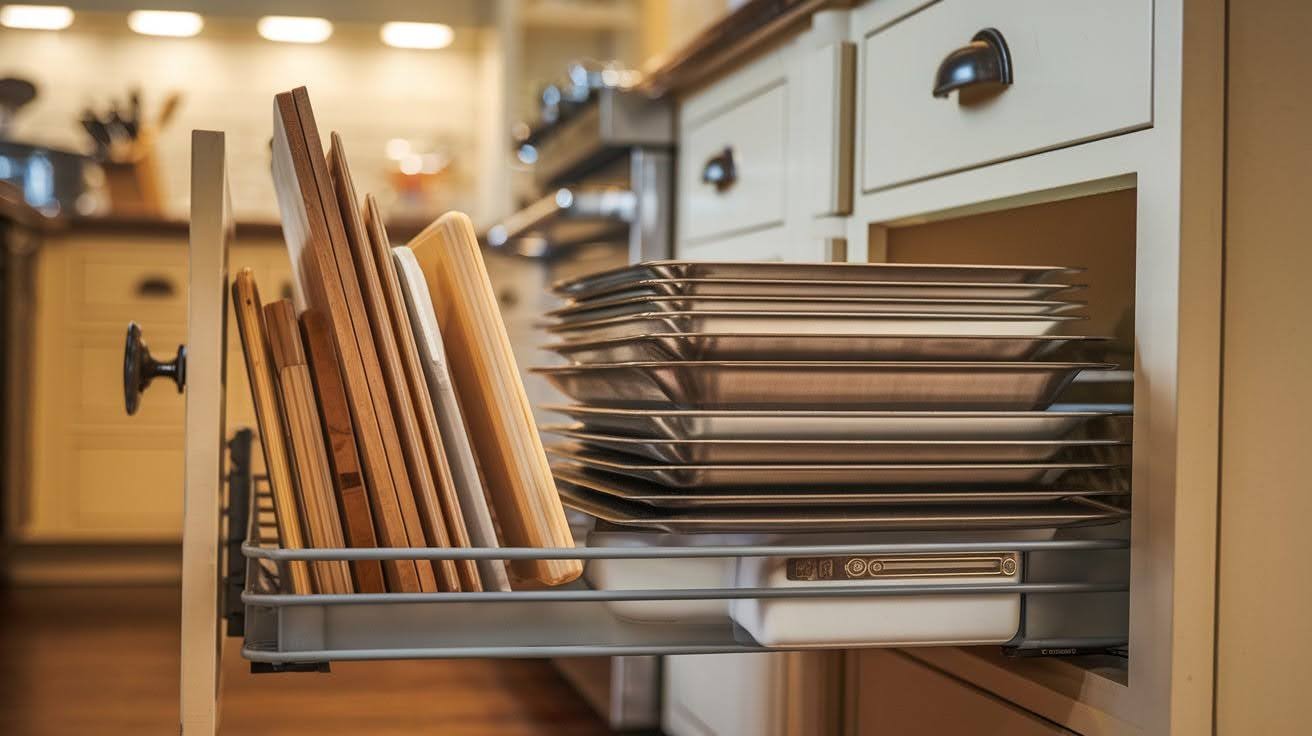
I know someone who stores all their baking sheets and cutting boards in toe kick cabinets. Brilliant, right? Those awkward flat items finally have a home.
No more balancing cutting boards against cabinet walls or stacking heavy baking sheets. Everything slides out smoothly when you need it and stays perfectly organized.
Hidden Step Stools
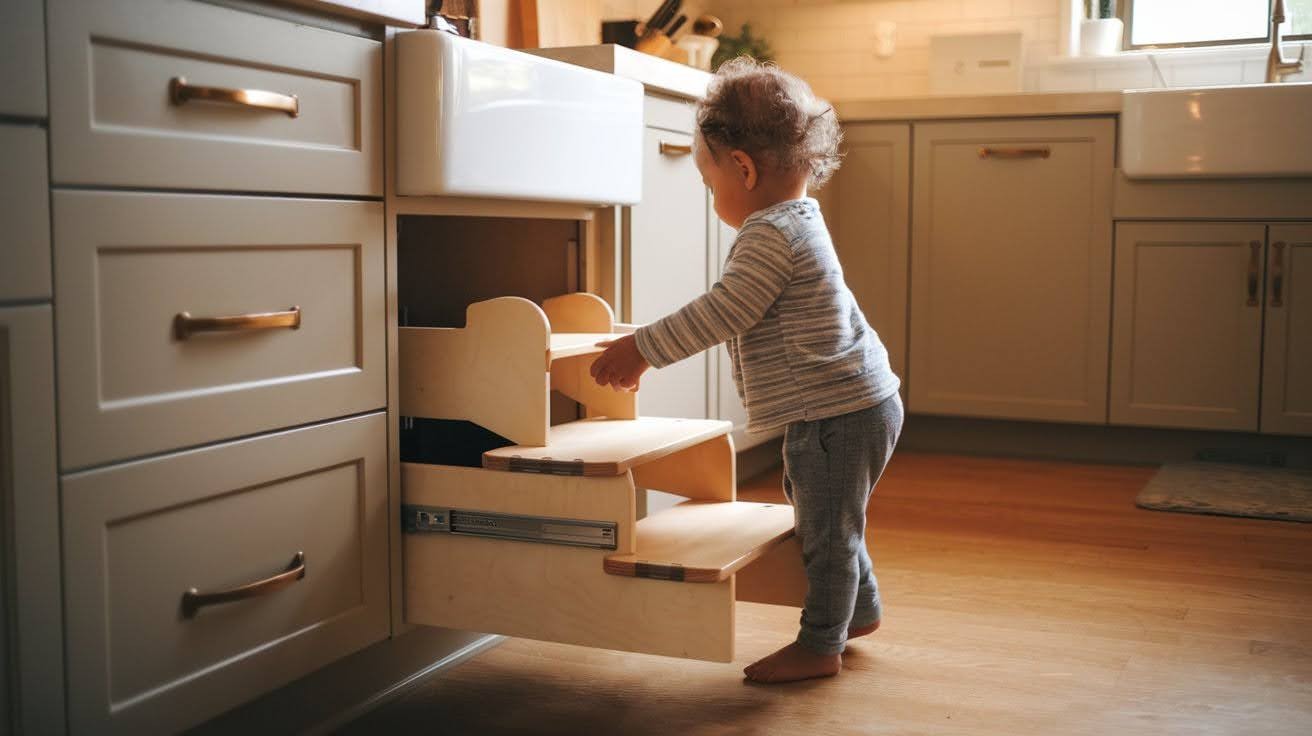
Step stools are game-changers here. Pull out a hidden step stool when you need to reach high shelves. Push it back when you’re done.
Kids love having their own special step stool that appears like magic. It keeps your kitchen looking clean while giving everyone safe access to higher storage areas.
Bathroom Cleaning Supplies
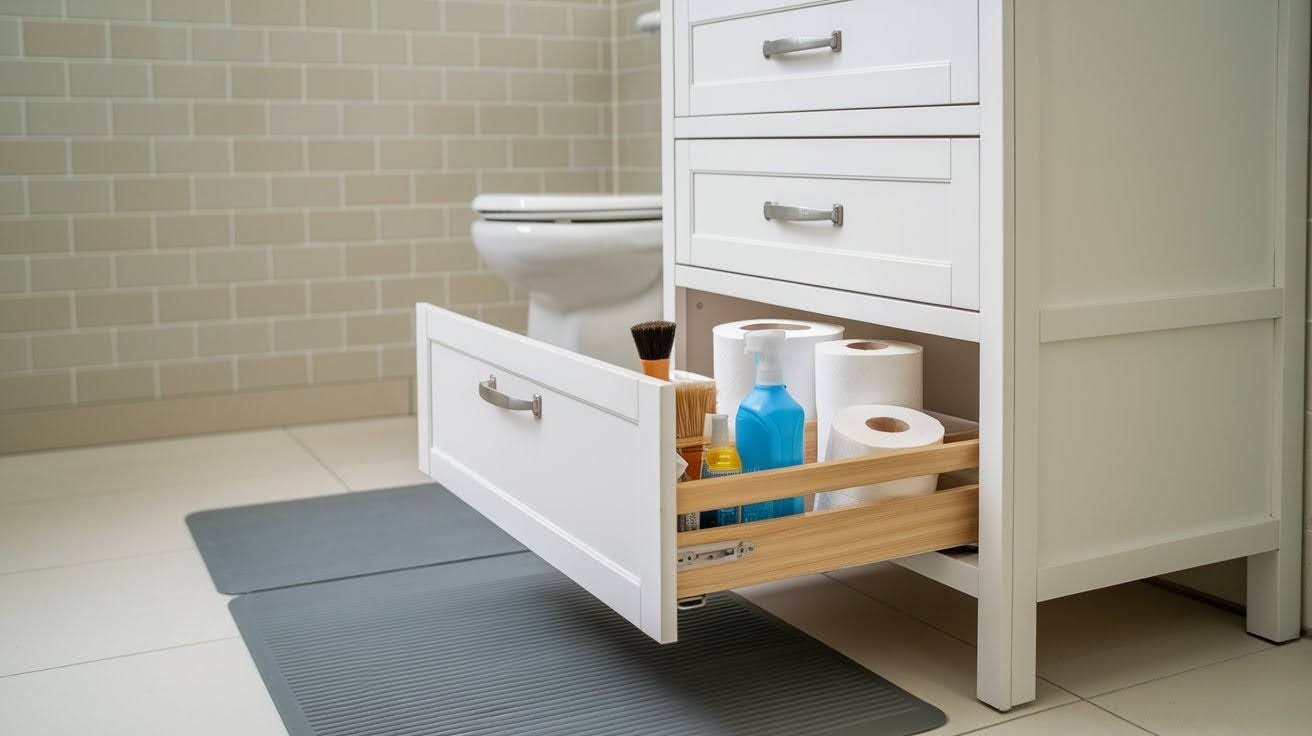
Here’s a clever one. Use them for cleaning supplies in the bathroom. All those bottles and brushes stay hidden but accessible.
Keep toilet paper rolls, extra towels, or personal care items within easy reach. The hidden storage keeps your bathroom looking neat without sacrificing convenience.
Bedroom Storage
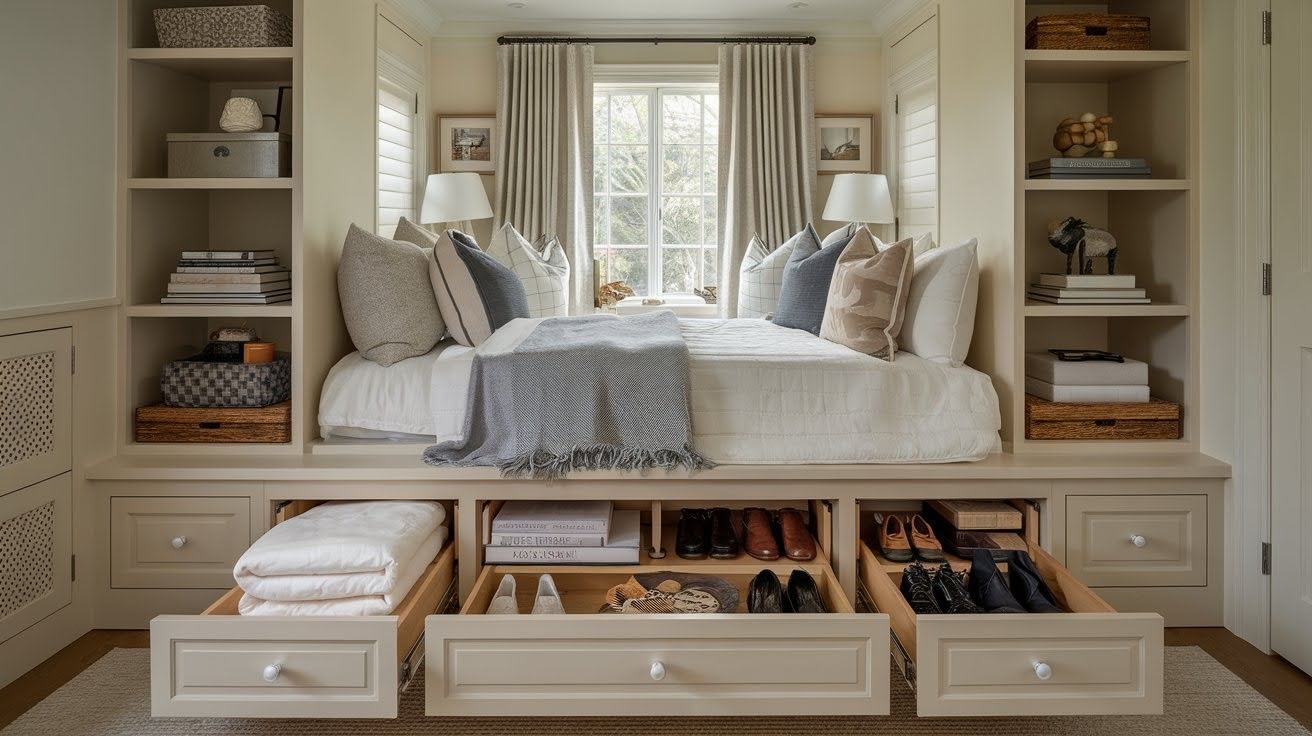
Some people even install them in bedrooms under built-in furniture. Extra blankets, seasonal clothes, or books fit perfectly.
Store out-of-season shoes, photo albums, or craft supplies that you don’t need every day. It’s like having a secret storage compartment that nobody knows about.
The key is thinking flat and long rather than tall and bulky.
How to Install a Toe Kick Cabinet
Let’s get real about installation. Can you do it yourself? Maybe. Depends on your skill level and patience.
DIY route first. You’ll need basic tools and about a weekend. Measuring is crucial here. Get it wrong, and your beautiful cabinet becomes an expensive mistake.
Step 1: Remove the Existing Toe Kick Panel
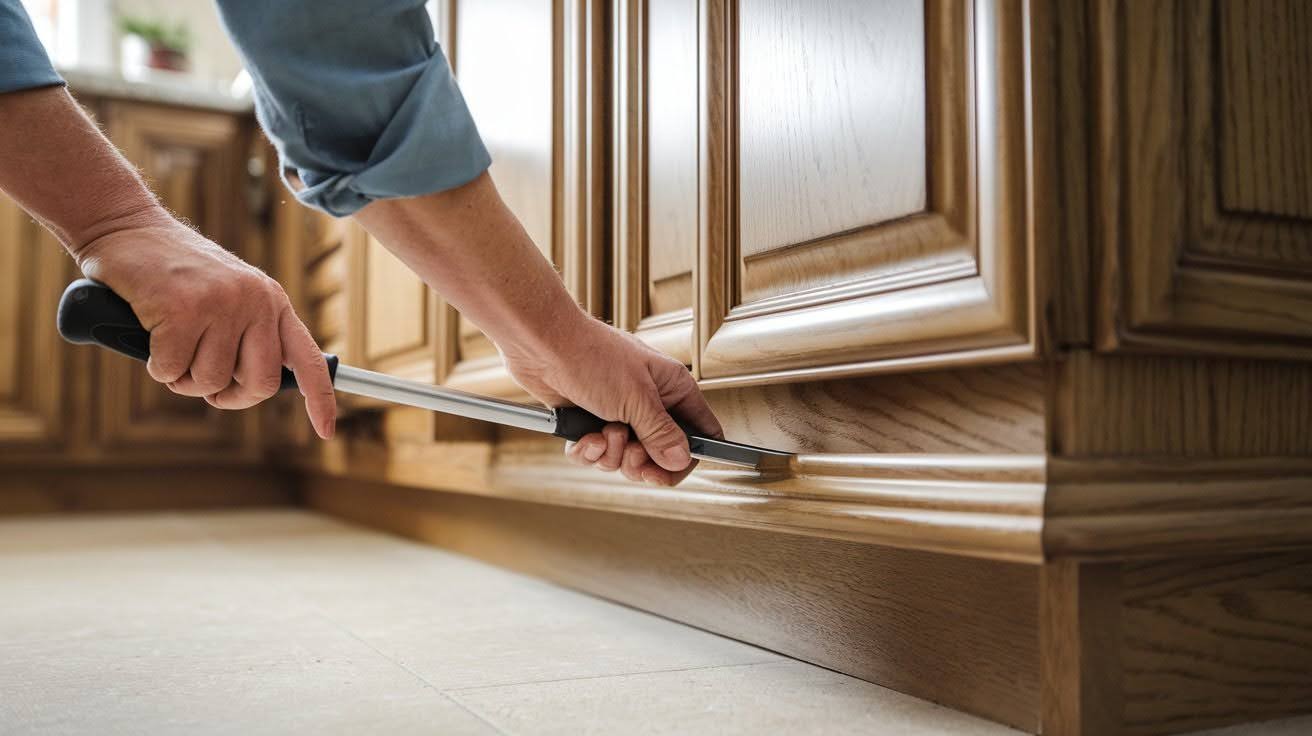
Start by removing the existing toe kick panel. Most pop off pretty easily.
Use a putty knife or flat pry bar to gently work along the edges. Some panels are held with small nails or clips that release with gentle pressure. Take photos before removing anything so you remember how it goes back together if needed.
Step 2: Measure the Space Carefully
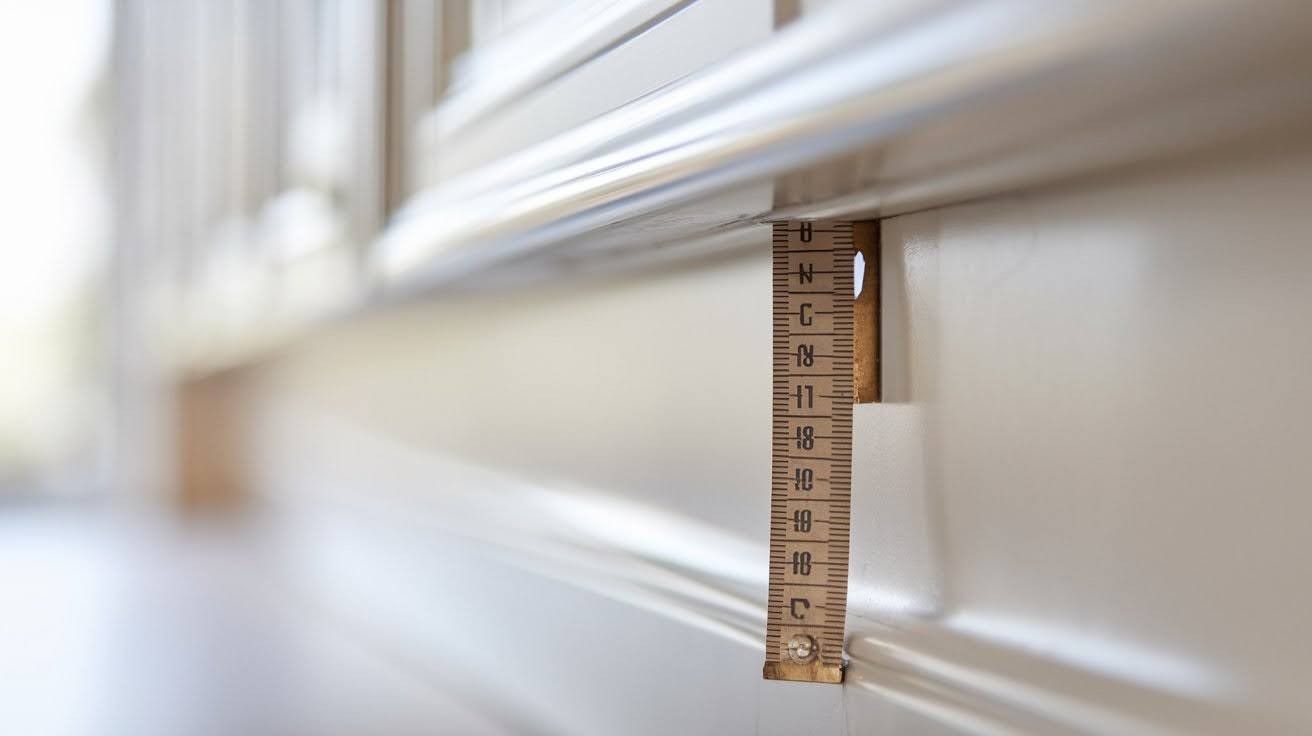
Measure the space three times. Write it down. Measure again.
Check the width at both the front and back since walls aren’t always straight. Measure the height at multiple points too. Note any pipes, electrical outlets, or other obstacles that might affect your cabinet size.
Step 3: Order Your Custom Cabinet

Order your cabinet to fit those exact measurements. Don’t try to make a standard size work. Trust me on this one.
Most manufacturers need 2-4 weeks for custom sizing. Order your cabinet hardware at the same time to ensure everything matches. Double-check your measurements one more time before placing the order.
Step 4: Mount the Tracks
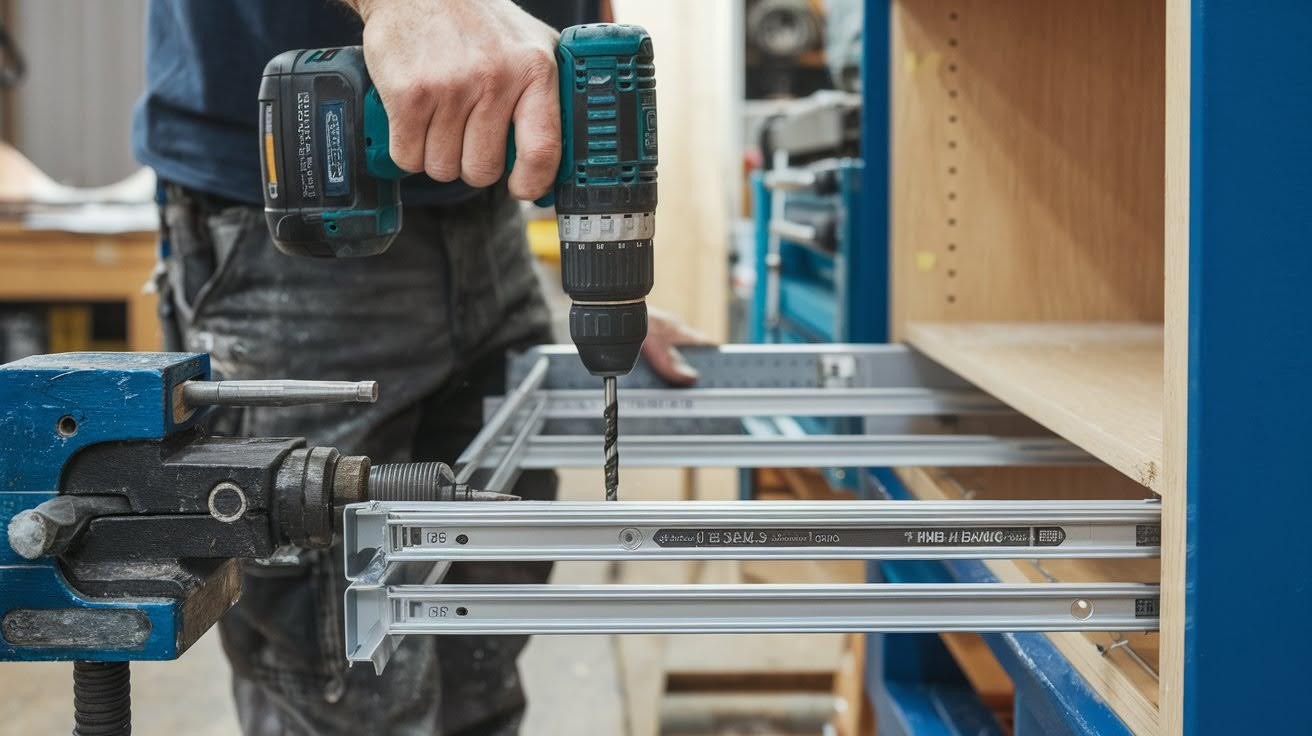
Installation involves mounting tracks inside the cabinet base. The drawer slides in and out on these tracks.
Mark your drill holes carefully using the template that comes with your cabinet. Use a level to ensure the tracks are perfectly straight. Pre-drill holes to prevent splitting the cabinet wood.
Step 5: Check Alignment
Here’s where most DIY projects go wrong. The alignment has to be perfect. If it’s off even slightly, the drawer won’t slide smoothly.
Test the drawer movement before securing everything permanently. Make small adjustments as needed. The drawer should slide in and out without binding or wobbling.
Professional installation makes sense if you’re not comfortable with power tools. Or if your cabinets are custom or unusually shaped. Most cabinet installers charge $200-400 per toe kick cabinet. Not cheap, but you get a warranty and peace of mind.
Either way, double-check that your flooring can handle the weight. Some toe kick cabinets hold 50+ pounds when fully loaded.
Toe Kick Cabinets vs. Traditional Base Cabinets
Let’s compare your options honestly.
| Feature | Toe Kick Cabinets | Traditional Open Toe Space |
| Storage | Extra hidden storage space | No additional storage |
| Cost | $200-400 per cabinet | No extra cost |
| Maintenance | Occasional cleaning and lubrication | None required |
| Installation | Professional or DIY project | Already installed |
| Accessibility | Items at floor level | Standard cabinet access |
| Kitchen workflow | Same foot space, plus storage | Standard foot space |
| Appearance | Seamless, hidden design | Clean, simple look |
| Durability | Depends on hardware quality | Nothing to break |
Which should you choose?
If you’re tight on storage and love organized solutions, toe kick cabinets are worth it. If you prefer simple, low-maintenance kitchens, stick with traditional open space.
There’s no wrong answer here. Both work fine. It comes down to your priorities and budget.
Design Tips to Make the Most of Your Toe Kick Cabinet
Design matters more than you think with these cabinets.
Match your existing cabinet fronts exactly. The whole point is invisible storage. If it looks different, it ruins the effect.
Hardware choices are tricky. Traditional handles stick out and become trip hazards. Push-to-open mechanisms work much better.
Think about what you’ll actually store before you buy. Long, flat items need different interior layouts than small bottles.
Some toe kick cabinets come with adjustable dividers. These are worth the extra cost if you store different types of items.
Lighting can be helpful here. LED strips that activate when you open the drawer help you see what’s inside.
Consider your kitchen workflow too. Put the cabinet where you’ll actually use it. Having it on the opposite side of the kitchen defeats the purpose.
The finish should match your cabinets, but the interior can be practical. Easy-to-clean materials make maintenance simpler.
Benefits of Toe Kick Cabinets
I’ll be honest with you. When I first heard about toe kick cabinets, I thought they were just a fancy gimmick. Boy, was I wrong.
- Create storage from unused space – You’re literally adding space from thin air under your existing cabinets.
- Keep your kitchen looking clean – No more mystery items hiding under cabinets. Everything has a proper home now.
- Budget-friendly storage solution – Instead of a major kitchen remodel, you add storage for a fraction of the cost.
- Better accessibility for all – Frequently used items stay at floor level. No more reaching up high or bending down low.
- Maintain your kitchen’s workflow – Walking around feels exactly the same. The toe kick space is still there for your feet.
Here’s what surprised me most. They don’t mess with your kitchen’s look at all. The design stays clean and seamless.
Common Mistakes to Avoid
I’ve seen people mess this up in some pretty predictable ways.
- Not measuring properly – Your cabinet needs to fit the space exactly. “Close enough” doesn’t work here.
- Overpacking them – Yes, you have new storage space. No, you shouldn’t cram everything possible inside.
- Ignoring your flooring type – Hardwood floors can handle the weight. Some vinyl flooring can’t. Check before you install.
- Buying cheap hardware – Poor quality slides break quickly. You’ll be opening this drawer hundreds of times. Invest in good tracks.
- Installing them everywhere – The biggest mistake? Adding them just because you can. Pick the spots where they’ll actually be useful.
These cabinets work best with items you use regularly but don’t need every day.
Maintenance and Longevity
Good news. Toe kick cabinets are pretty low maintenance.
Cleaning is straightforward. Wipe down the front panel like any other cabinet. The inside just needs occasional vacuuming.
The tracks need attention once in a while. A quick spray with furniture polish keeps everything sliding smoothly.
Check the alignment every few months. Heavy use can sometimes shift things slightly. Easy to adjust if you catch it early.
Quality matters for longevity. Cheap toe kick cabinets start having problems within a year. Good ones last as long as your regular cabinets.
Watch for wear patterns on the floor. The drawer slides in and out over the same spot repeatedly. Some flooring shows wear faster than others.
Most problems happen in the first six months. After that, you’re probably good for years.
Conclusion
Here’s my honest take on toe kick cabinets.
They won’t change your life overnight. But they will solve your storage problems in ways you never expected. I’ve watched many people find these hidden drawers for the first time. The reaction is always the same. Pure amazement followed by “why didn’t I know about this sooner?”
You now have everything you need to decide if toe kick cabinets make sense for your home. The how-to knowledge, design tips, and common mistakes to avoid.
My advice? Start with one cabinet in your busiest area. See how it works for your family. If you love the extra storage and ease of use, add more later. Trust me, once you try that hidden storage magic, you’ll want it everywhere.
Frequently Asked Questions
How much weight can toe kick cabinets hold?
Most quality toe kick cabinets handle 25-50 pounds when properly installed. Check your specific model’s weight rating before loading heavy items like cast iron pans.
Can I install toe kick cabinets in rental properties?
Yes, but get your landlord’s permission first since it involves modifying existing cabinets. Most installations are reversible if you keep the original toe kick panels.
Do toe kick cabinets work with all cabinet styles?
They work with most standard base cabinets that have traditional toe kick spaces. Custom or frameless cabinets might need special sizing or professional installation.
How often do toe kick cabinets need maintenance?
Basic cleaning every few months and track lubrication once or twice a year keeps them running smoothly. Quality hardware rarely needs repairs with normal use.
Are toe kick cabinets worth it for small kitchens?
Absolutely, especially in small kitchens where every inch of storage counts. They add storage without taking up any floor space or changing your kitchen’s footprint.