
Terracotta pots are simple, affordable, and perfect for a creative makeover. These clay containers have been around for centuries, and there’s something satisfying about transforming a plain pot into something special.
Painting terracotta pots is one of the easiest DIY projects you can try. You don’t need fancy skills or expensive supplies. With just a few basic materials, you can create beautiful pieces for your home or garden.
This article will show you creative painting ideas that work. We’ll cover different techniques, color combinations, and styles that look great without being complicated. You’ll find step-by-step guidance and practical tips from someone who’s painted dozens of these pots.
These painted pots make wonderful gifts, add personality to your garden, and brighten up any room. Let’s explore some fun ways to make your terracotta pots stand out.
Terracotta Pot Painting Ideas
Convert ordinary clay pots into beautiful decorative pieces with simple painting techniques. This guide covers easy DIY methods to personalize terracotta pots for your home, garden, or as thoughtful handmade gifts using basic supplies and beginner-friendly designs.
What You’ll Need
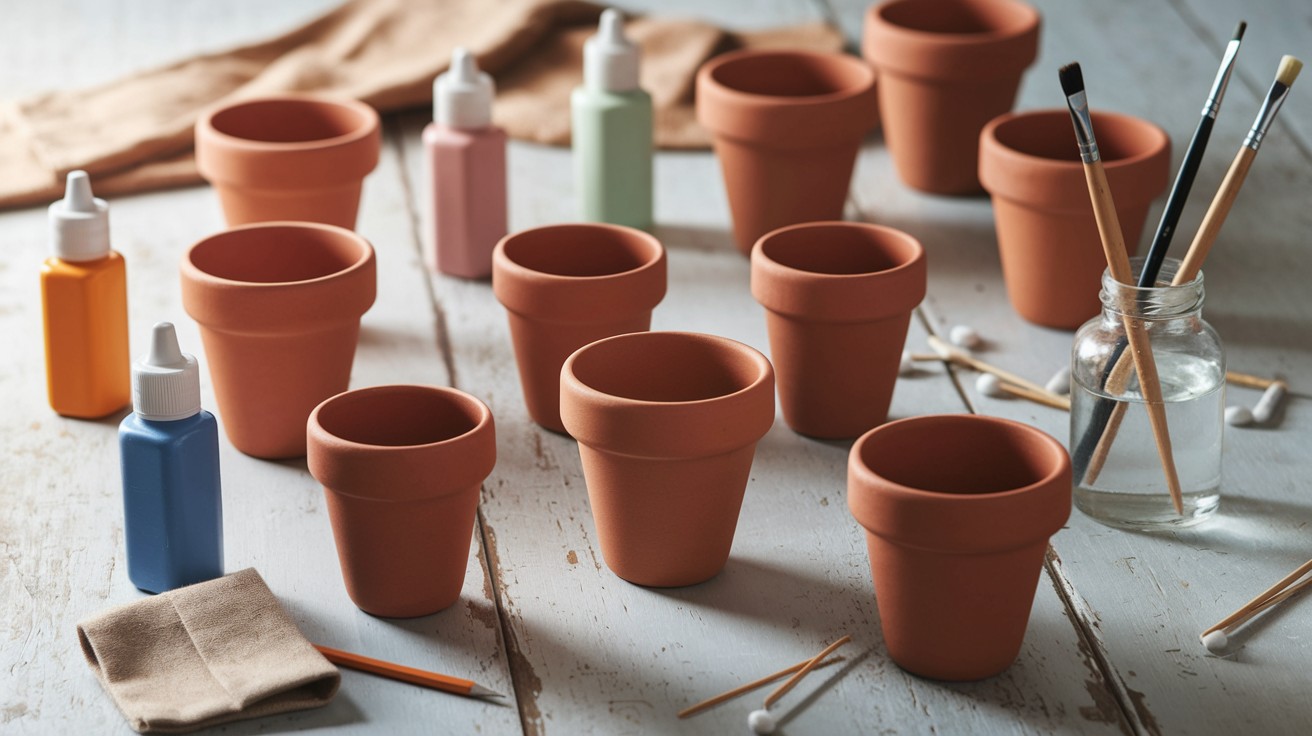
Must-Have Items:
- Terracotta pots (any size)
- Acrylic paint (regular or outdoor)
- Paintbrushes (variety pack with different sizes)
- Water container for cleaning brushes
- Paper towels or rags
Helpful Tools:
- Painter’s tape (for clean lines)
- Cotton swabs (for blending and details)
- Toothpicks (for dots and fine work)
- Pencil (for sketching first)
Finishing Touches:
- Sealant spray or brush-on (matte or glossy)
- Stencils (optional)
Optional Extras:
- Paint pens (for lettering)
- Sponges (for texture effects)
- Craft glue
- Small decorative items
Start with the must-have items. Add other supplies as you try new techniques.
Tips Before You Start
- Clean and dry pots completely to help paint stick better.
- Use white primer to make colors brighter.
- Sketch your design with a pencil first to plan your layout.
- Cover the work area with a newspaper to protect it from spills.
- Wear old clothes because paint stains permanently.
- Paint in thin layers to avoid drips.
- Let each layer dry to prevent smudging.
- Keep paper towels handy for quick cleanup.
- Work in good lighting to see details.
Creative Terracotta Pot Painting Ideas
Boho Chic Patterns
I love boho designs because they’re forgiving. If your lines aren’t perfect, it adds character.
Start with cream, beige, or soft white as your base. These neutral colors make everything else pop. Once dry, add tribal patterns using thin brushes.
Try these simple shapes:
- Zigzag lines around the rim
- Diamond patterns in the middle
- Straight lines that cross each other
- Small triangles clustered together
Use black or dark brown paint for contrast. Don’t worry about making it perfect. The handmade look is what makes boho style special.
Ombre & Color Block Pots

Color blocking is easier than ombre, so let’s start there.
Wrap painter’s tape around your pot to create sections. Press the edges down firmly. Paint each section a different color. Remove the tape while the paint is still slightly wet for clean lines.
For ombre, you need to work fast. Pick two colors that blend well together. Paint the top section with your lighter color. While it’s wet, add the darker color to the bottom and blend upward with a dry brush.
The key is moving quickly before the paint starts to dry.
Floral & Botanical Designs
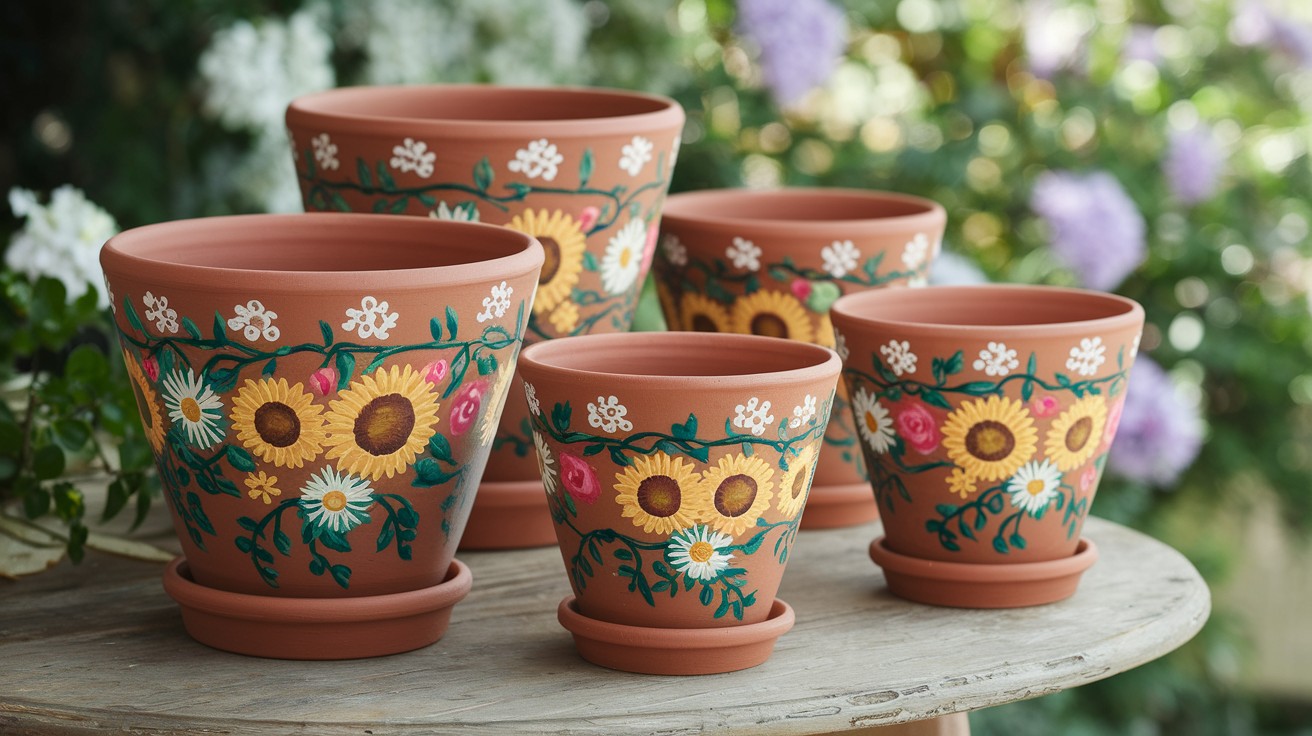
Flowers don’t have to be complicated to look good.
For simple roses, paint small circles and add curved lines around them. Daisies are just white ovals around a yellow center. I make leaves by painting oval shapes and adding a line down the middle.
Vines are my favorite because they’re hard to mess up. Paint curvy lines first, then add small leaves along the way. You can fill empty spaces with tiny dots for berries.
Start with one type of flower. Once you get comfortable, add more variety.
Cute Animal Faces
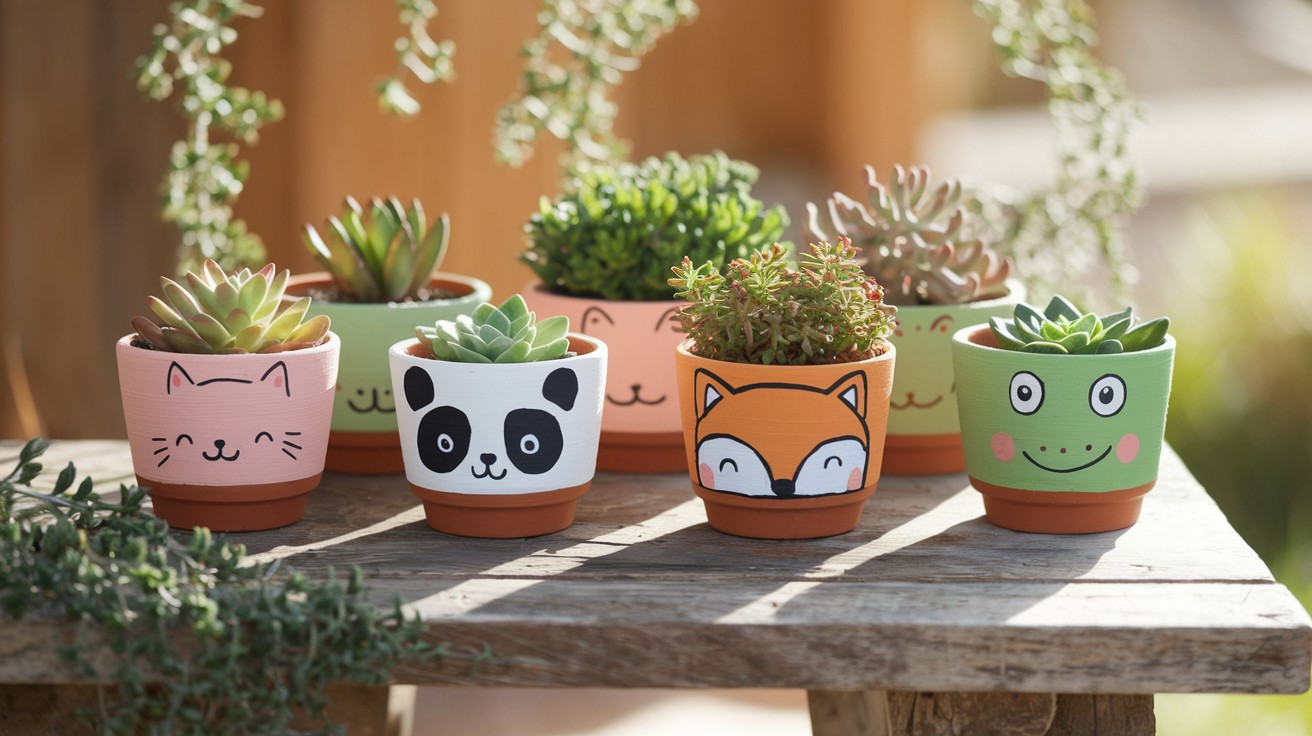
Kids go crazy for these. Adults secretly love them too.
Cats are the easiest to start with. Paint the whole pot in your chosen color. Once dry, add two triangular ears at the top. Draw whiskers, eyes, and a small nose with a fine brush or marker.
For owls, make big circular eyes and add a small triangular beak. Pandas need black patches around white eyes. Frogs just need two bulging eyes on top.
The simpler you keep the features, the cuter they look.
Galaxy & Space-Inspired Pots
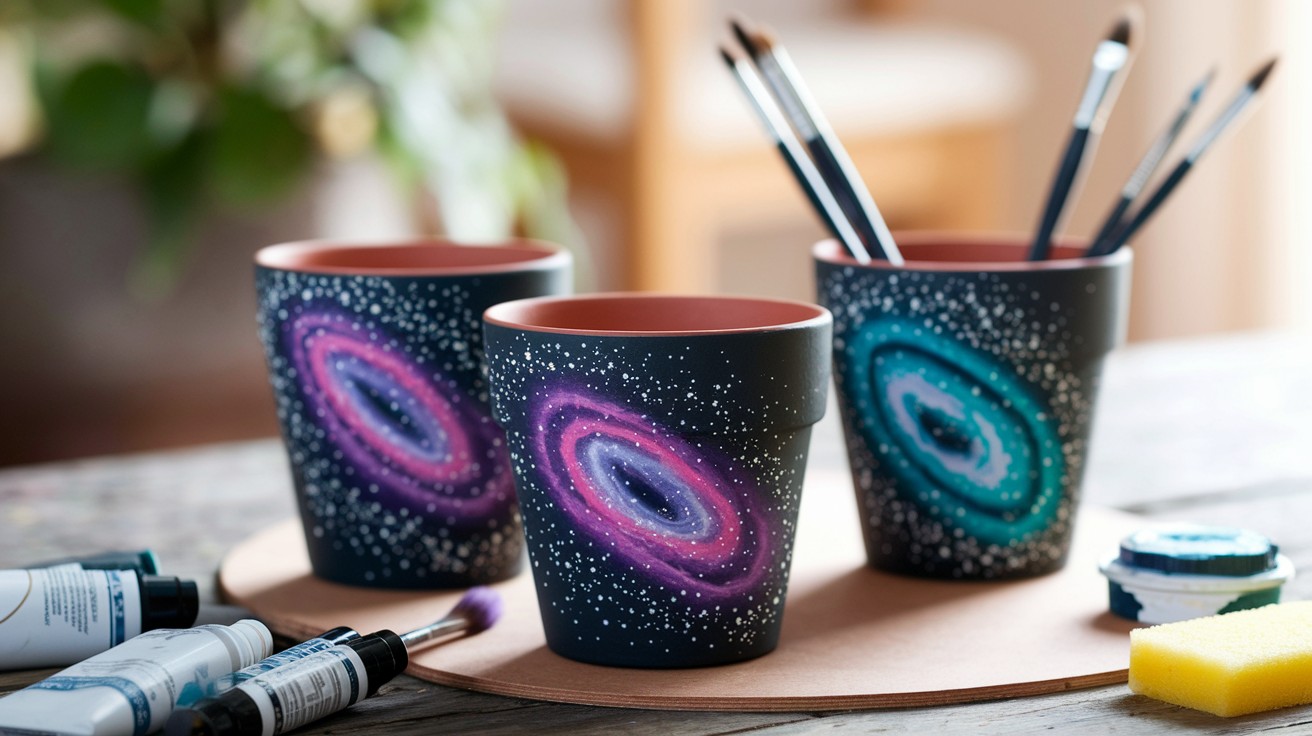
This technique uses sponges instead of brushes. It creates that perfect cosmic texture.
Paint your pot black first. Let it dry completely. Dab a damp sponge into purple paint and gently press it onto the pot. Don’t rub – just press and lift.
Add blue the same way, then a little pink. Blend colors where they meet by dabbing lightly.
For stars, dip an old toothbrush in white paint. Run your finger across the bristles to splatter tiny dots. Add a few larger stars with a small brush.
The sponge technique makes all the difference here.
Mandala or Dot Art
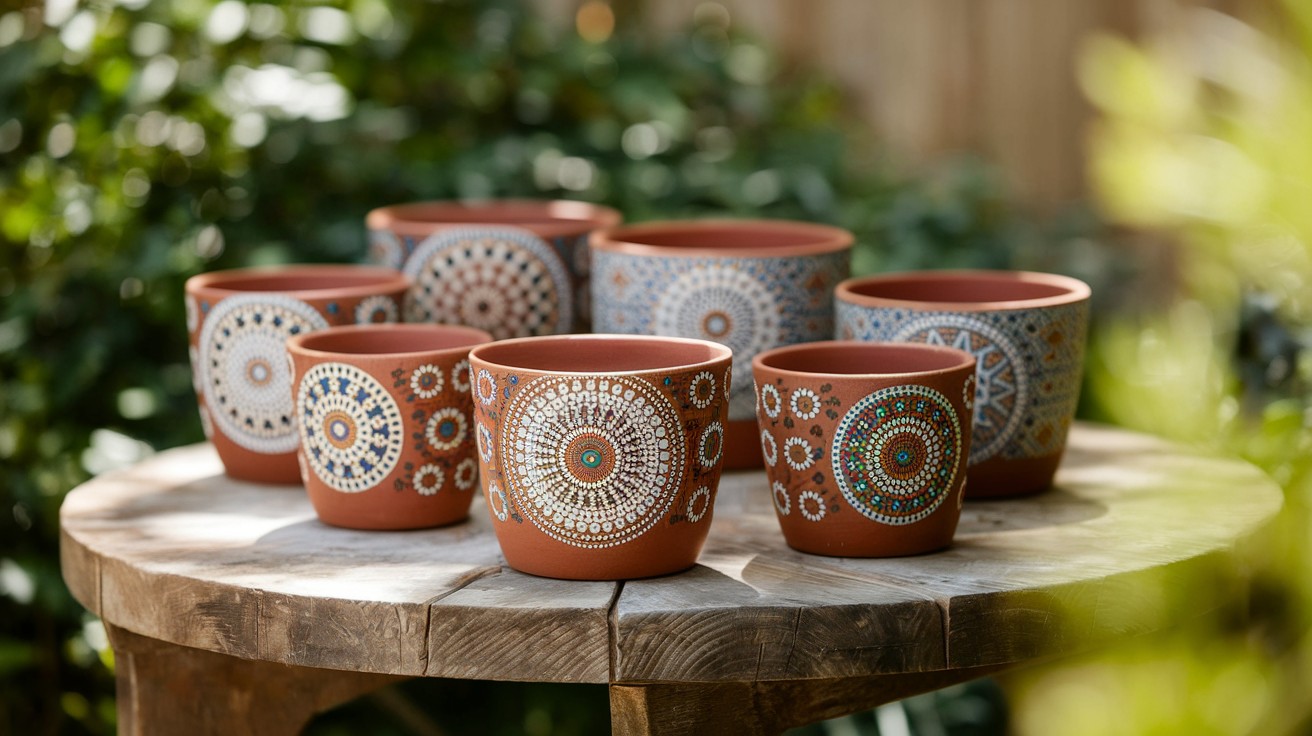
This style is surprisingly relaxing. I often lose track of time while making these.
You’ll need dotting tools. Cotton swabs work fine, or buy proper tools from craft stores. Different sizes create more interesting patterns.
Start with a dot in the center. Make a circle of dots around it. Keep adding circles, changing colors as you go. Try different patterns – sometimes I make petals, sometimes geometric shapes.
The repetitive motion is almost meditative. There’s no wrong way to do this.
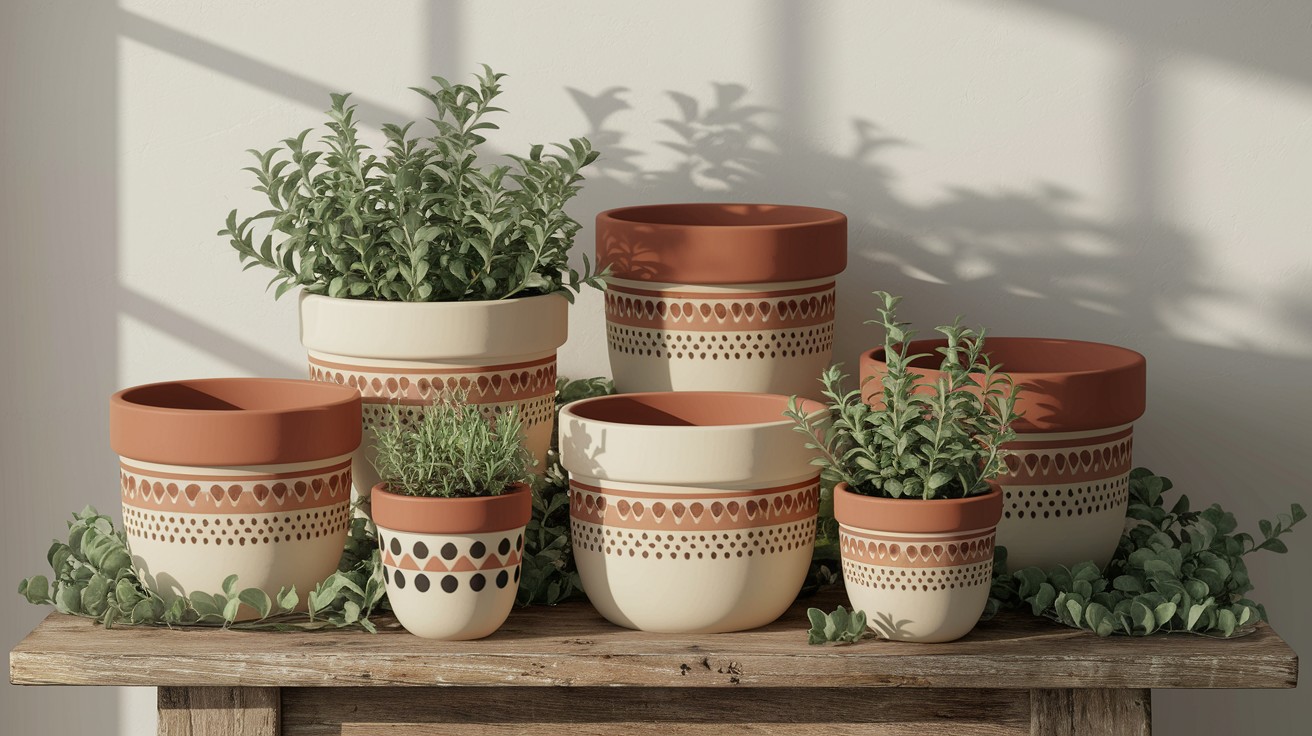
Farmhouse & Rustic Style
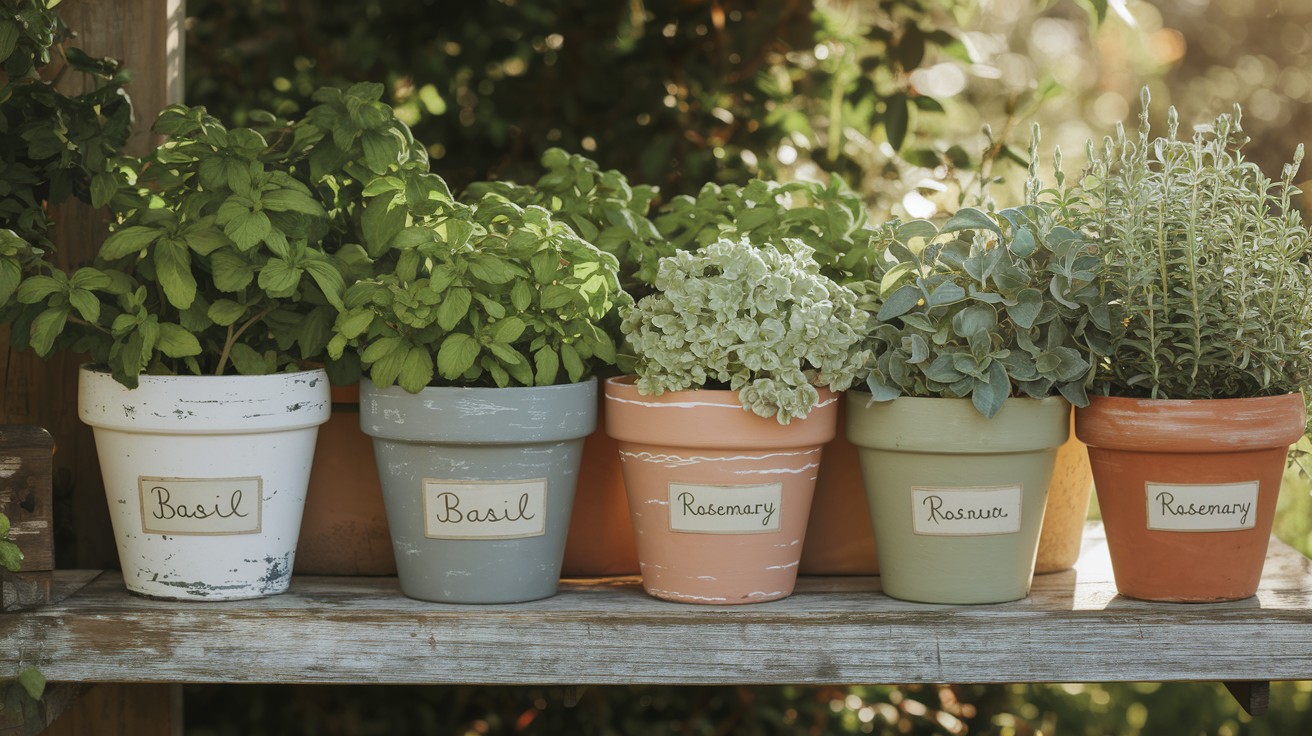
Chalk paint gives you that perfect matte finish for farmhouse looks.
Paint your pot with chalk paint in white, sage green, or soft gray. Let it dry, then lightly sand the edges and raised areas. This creates natural-looking wear.
Add herb labels using stencils or freehand lettering. “Basil,” “Rosemary,” and “Thyme” work well. You can also paint on mason jar-style rings or vintage-looking text.
For extra rustic appeal, tie twine or burlap ribbon around the rim.
Quote & Lettering Pots
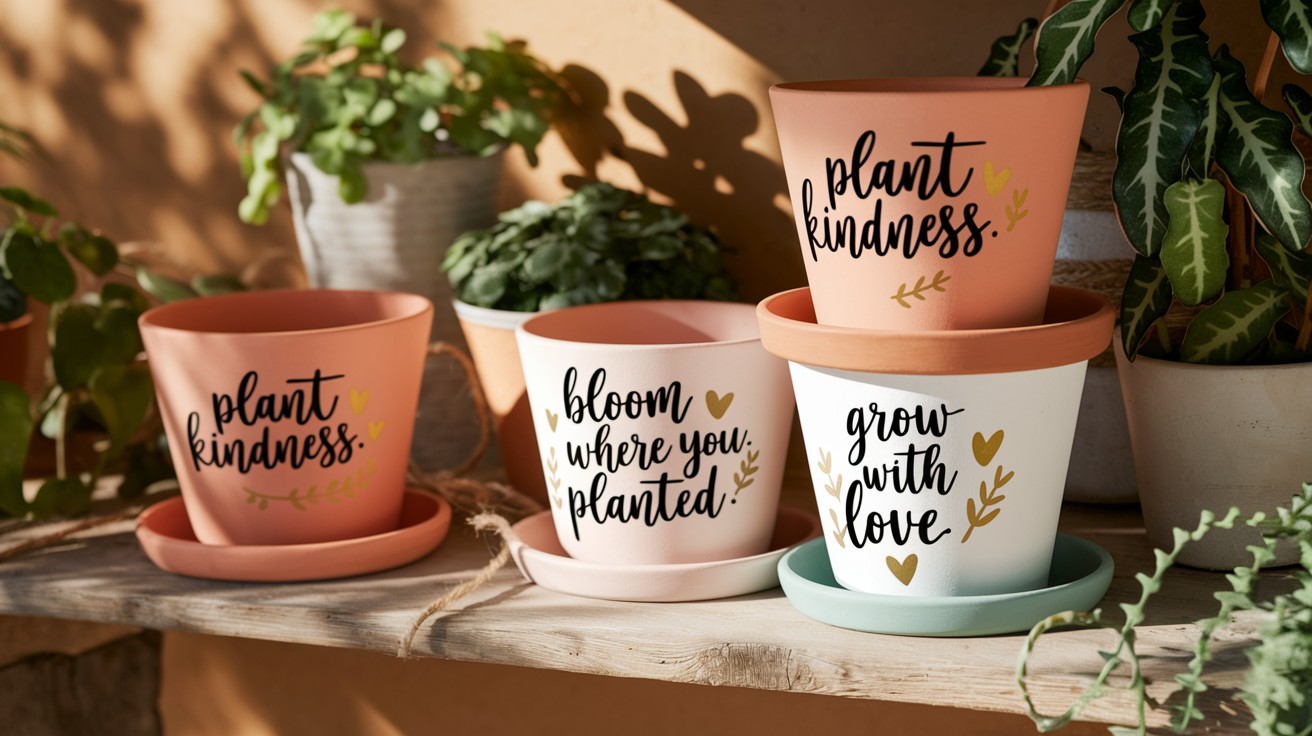
Short phrases work better than long quotes on curved surfaces.
Practice your lettering on paper first. Simple, clean fonts are easier to read than fancy scripts. “Grow Happy,” “Bloom Where You’re Planted,” or “Plant Lady” are popular choices.
Use a pencil to sketch the words lightly first. Paint over with a small brush, keeping your hand steady. If you make mistakes, let it dry and paint over it.
Plant puns always make people smile.
Holiday-Themed Designs
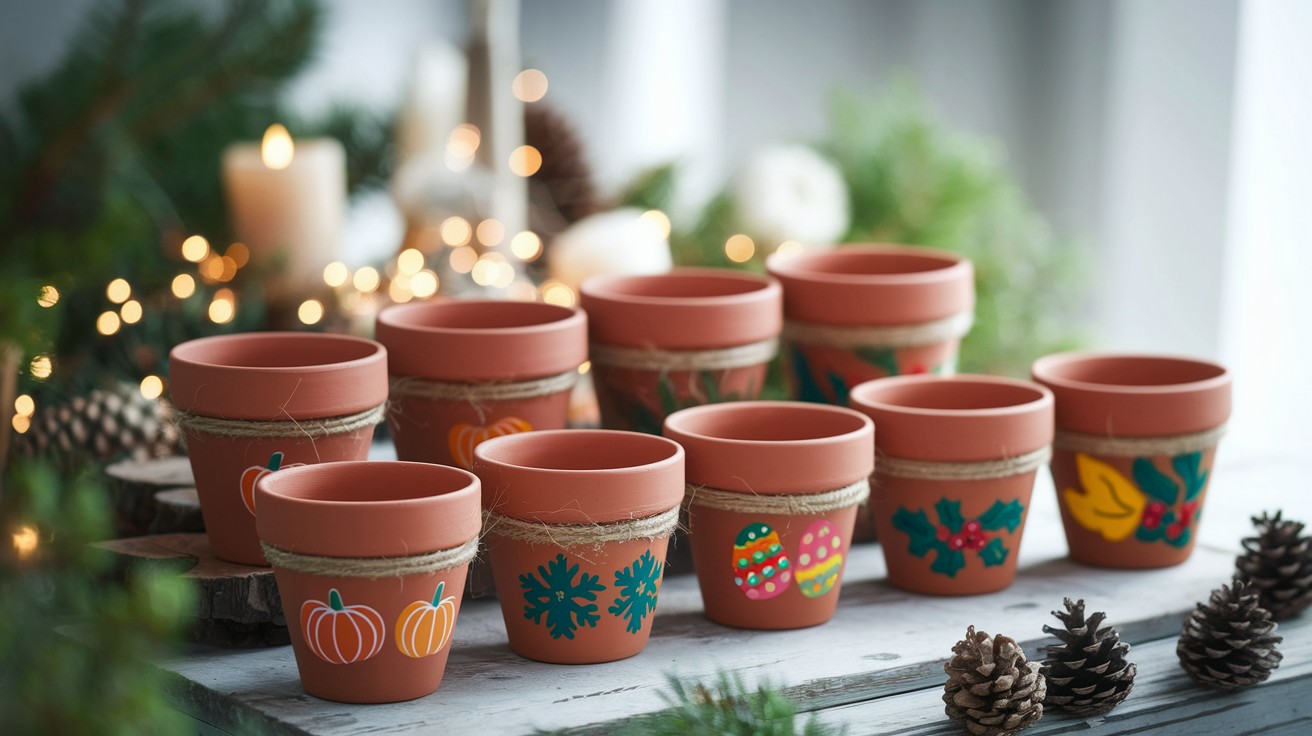
Seasonal pots let you change your decor throughout the year.
For Halloween, orange pots with black jack-o’-lantern faces are classic. Christmas calls for red and green with snowflake patterns. Easter pots can have pastel colors with simple egg shapes.
I keep several plain pots and repaint them for different seasons. It’s cheaper than buying new decorations every time.
The best part about seasonal designs is that they don’t have to last forever. You can be bold with your color choices.
Conclusion
Painting terracotta pots is one of those projects that delivers instant satisfaction. You start with something plain and finish with something uniquely yours.
There’s no wrong way to do it. Your first pot might not look perfect, but it will still brighten up your space. Each one you paint gets better than the last.
These painted pots make thoughtful gifts that people can use. They add personality to any garden or room. Plus, you’ll save money compared to buying expensive planters from stores.
Start with one simple design and see where your creativity takes you. Before you know it, you’ll have a collection of colorful pots that make you smile every time you see them.
Grab some paint and a pot. Your plants deserve something special to call home.
Frequently Asked Questions
What type of paint works best on terracotta pots?
Acrylic paint is your best choice. It sticks well to clay and comes in many colors. For outdoor plants, use outdoor acrylic paint since it handles weather better than regular acrylic.
Do I need to seal painted terracotta pots?
Yes, especially for outdoor use. Sealant protects your paint from fading and chipping. Use matte sealant for a natural look or glossy for colors that pop and easy cleaning.
Can I plant directly in painted pots?
Absolutely. Just make sure your paint and sealant are completely dry first. The paint won’t hurt your plants, but wet paint can be toxic until it cures.
How long does the paint take to dry?
Most acrylic paints dry to the touch in 30 minutes but need 2-4 hours to fully cure. Wait overnight before adding sealant. Thick paint layers take longer than thin ones.
What if I make a mistake while painting?
Fix wet mistakes immediately with a damp cloth. For dry paint, let it cure completely, then sand lightly and paint over it. Most “mistakes” actually add character to handmade projects.