
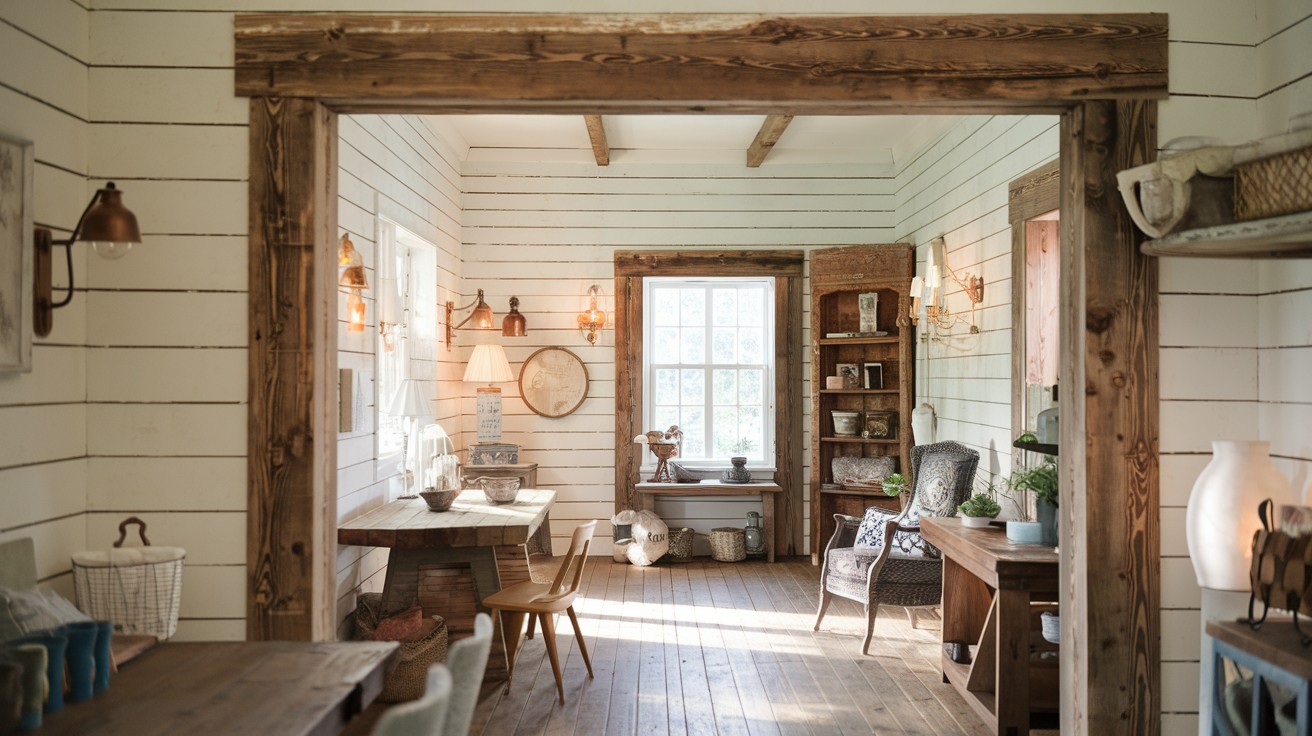
You’ve installed shiplap. Now you’re stuck.
What trim should you use? The wrong choice ruins everything. The right choice makes your walls look like custom millwork. I’ve seen every mistake possible. I’ve also found what actually works.
This article contains 37 proven shiplap trim ideas. You’ll find options for every style:
- Farmhouse and rustic looks
- Modern and minimalist designs
- Traditional and classic styles
- Budget-friendly solutions
- Creative DIY approaches
I’ll solve your trim problem today. Each idea includes specific materials, installation tips, and styling advice. No guesswork. No expensive mistakes.
You’re looking for shiplap trim ideas that work. I’m giving you 37 of them. Let’s get started.
Understanding Shiplap Trim Basics
Let’s get one thing straight. Shiplap trim isn’t just decoration. It covers gaps. It protects edges. And yes, it makes everything look finished.
The basic rule: Your trim should match your style. The farmhouse gets chunky wood. Modern gets clean lines. Traditional gets classic molding.
But rules are meant to be broken, right?
Here’s what you need to know before we dive into the ideas:
- Trim width matters more than you think
- Paint vs. stain changes everything
- Installation order affects the final look
- Budget doesn’t always limit creativity
Ready? Let’s explore your options.
Farmhouse & Rustic Styles
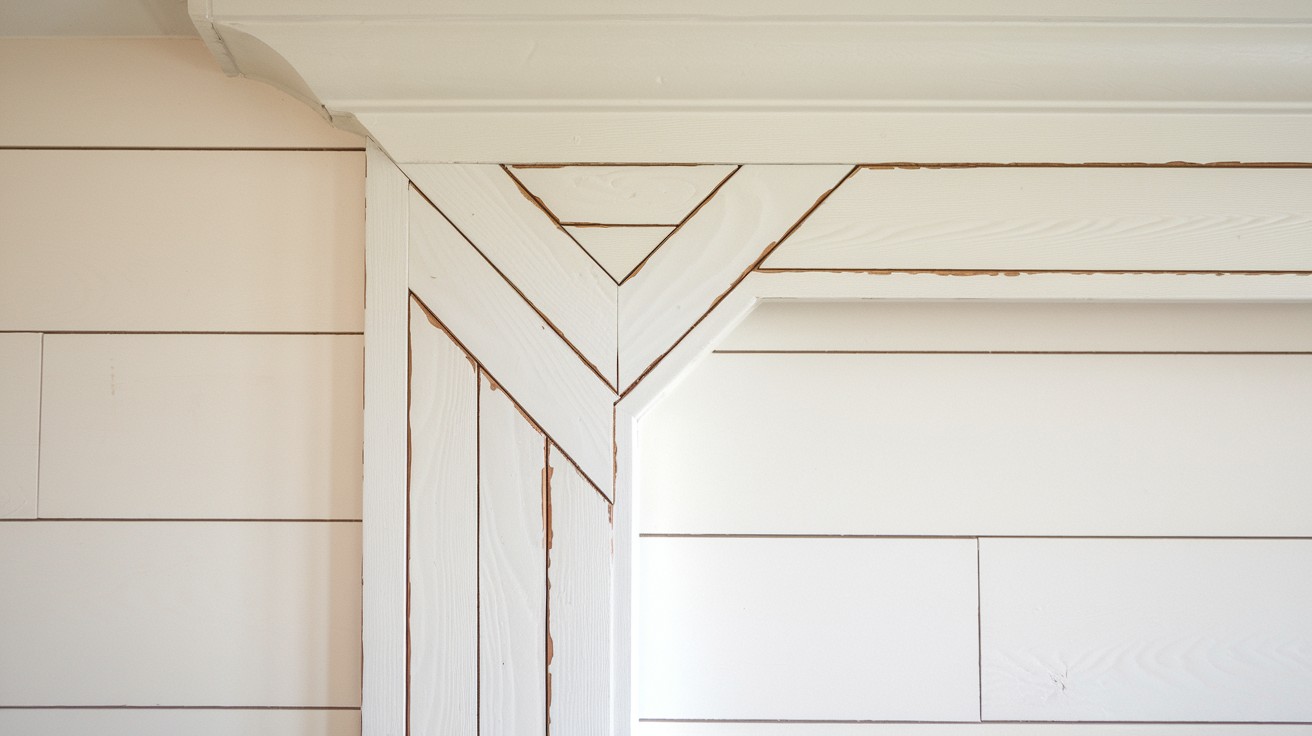
1. Rough-Cut Wood Trim for a Farmhouse Look
Nothing says farmhouse like rough lumber.
I use 2×4 or 2×6 boards with visible saw marks. The imperfections are the point. Sand them lightly – you want texture, not splinters.
Stain them dark walnut or leave them natural. Both work.
Key materials:
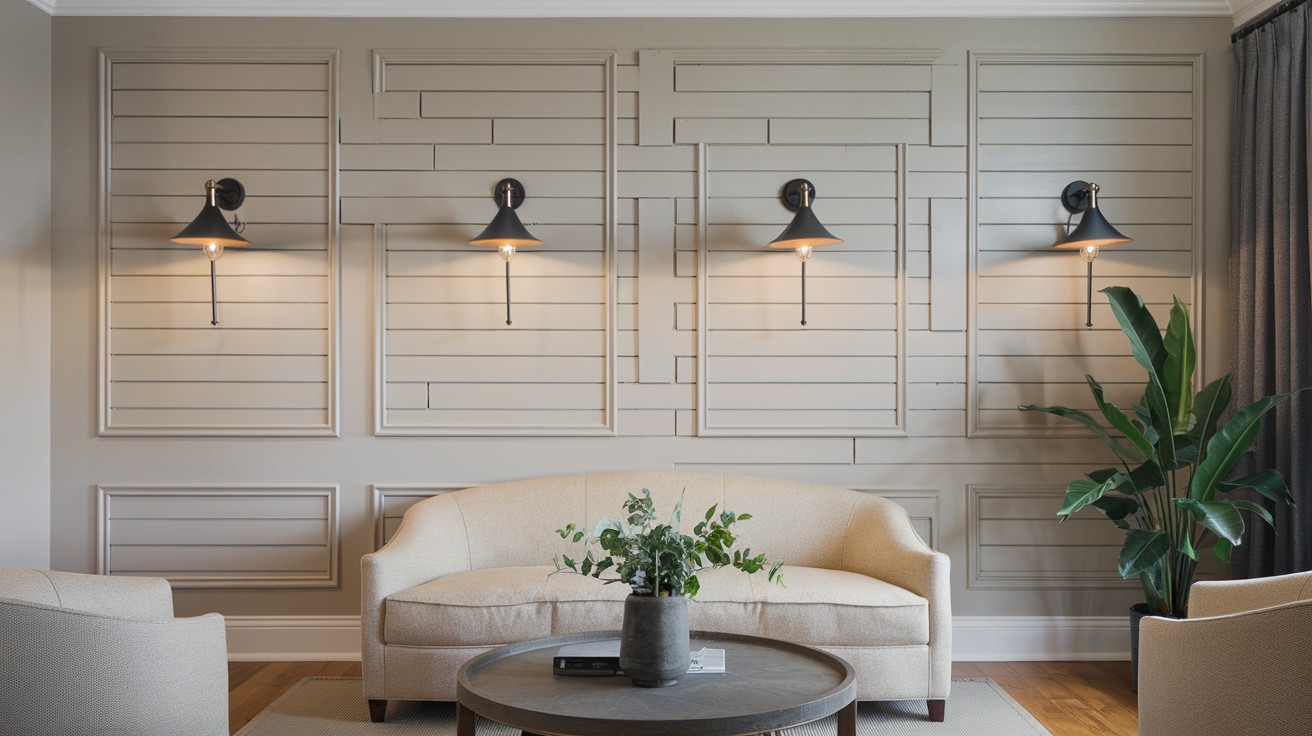
- Rough-cut pine or cedar boards
- 120-grit sandpaper for edges only
- Dark walnut stain or clear finish
- Heavy-duty construction adhesive
Pro tip: Hit the edges with 120-grit sandpaper. This prevents snags while keeping that rustic feel.
2. Beefy Crown Molding on Top of Vertical Shiplap
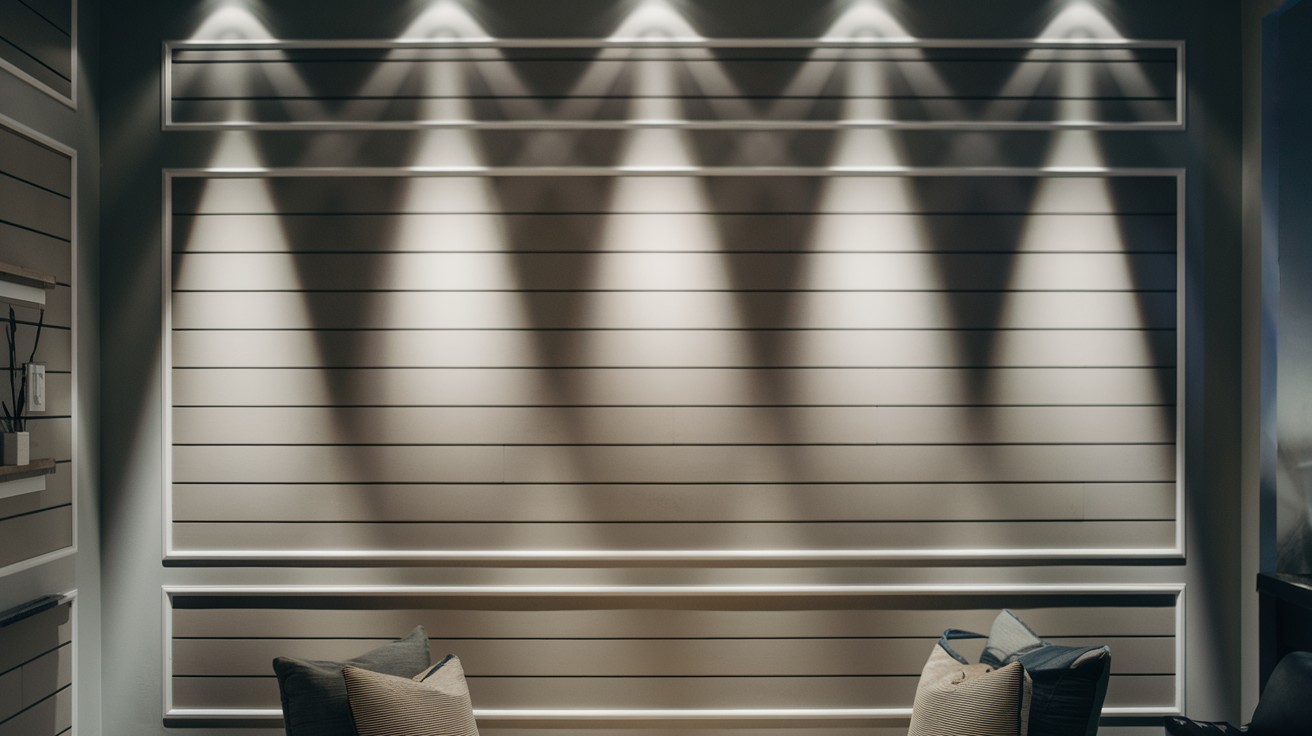
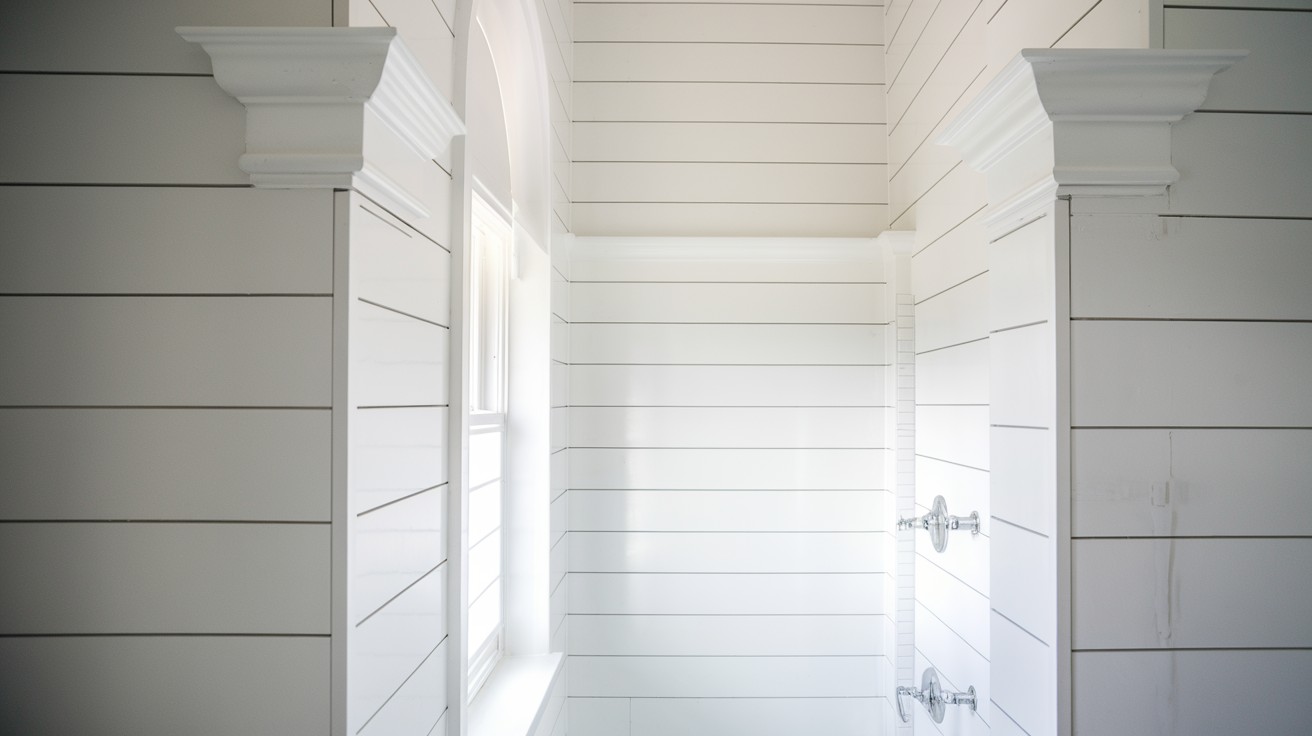
Vertical shiplap needs weight at the top. Standard crown molding looks wimpy. Go 4-6 inches tall minimum. Stack two pieces if needed.
Paint it the same color as your ceiling. This creates flow and makes rooms feel taller.
What you need:
- 4-6 inch crown molding profiles
- Miter saw for precise cuts
- Brad nailer with 2-inch nails
- Ceiling paint in semi-gloss finish
Pro tip: Install crown molding upside down on your miter saw. This matches the wall angle and gives perfect cuts every time.
3. Weathered Wood L-Corner Trim
Corner trim gets beat up fast.
Weathered wood embraces this reality. Start with cedar or pine. Let it sit outside for a few months. Or buy pre-weathered boards.
The gray patina hides future dings and scratches.
Materials needed:
- Cedar or pine L-shaped corner boards
- Exterior wood stain in gray tones
- Galvanized finishing nails
- Clear protective sealant
Pro tip: Speed up weathering by brushing boards with steel wool soaked in white vinegar. Let dry for 24 hours before sealing.
4. Board and Batten Base Trim Combo
Why choose between shiplap and board and batten?
Run horizontal shiplap on the upper wall. Add vertical battens as your baseboard trim. It’s like getting two looks in one room.
Keep the wood species consistent. Vary the finish for contrast.
Essential supplies:
- 1×4 boards for vertical battens
- Matching wood species to shiplap
- Level for precise batten placement
- Wood glue for extra holding power
Pro tip: Space battens 16 inches on center to hit wall studs. This gives you solid attachment points and looks intentional.
5. Stained Oak Trim with White Shiplap Walls
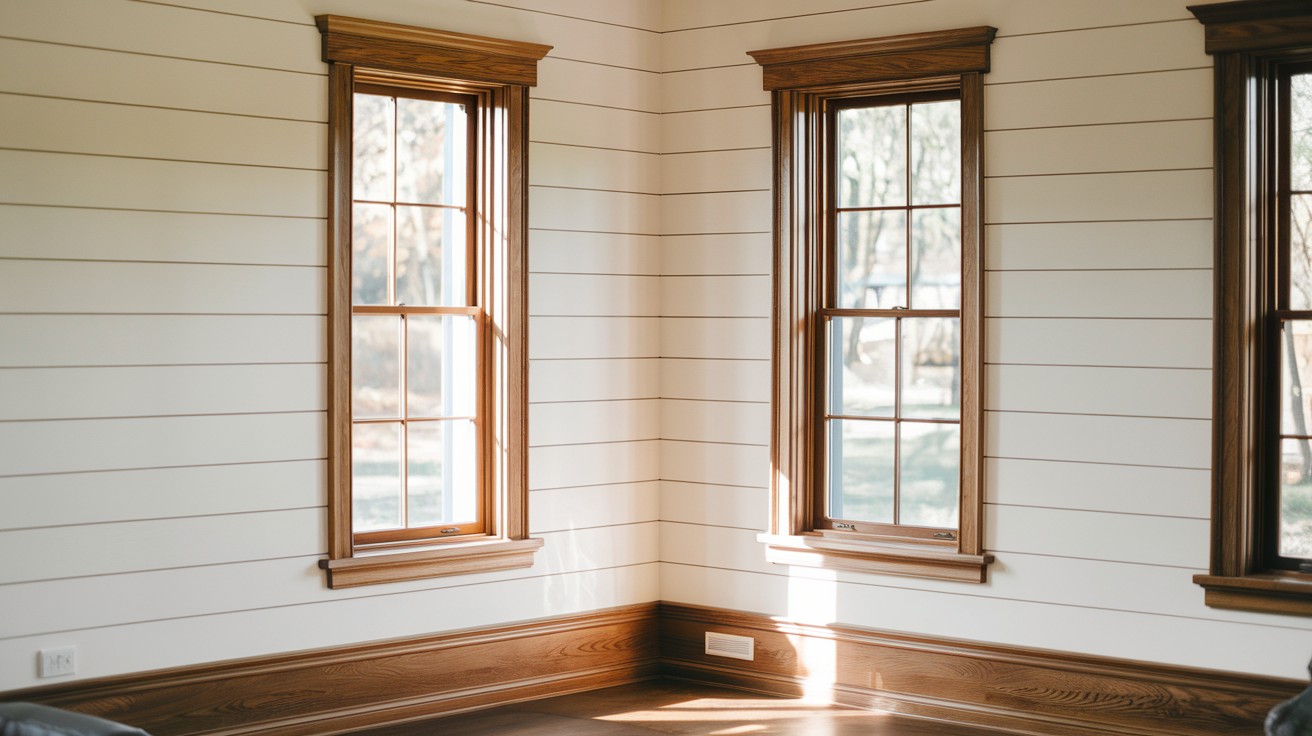
This combo never fails.
White shiplap keeps things bright. Rich oak trim adds warmth and weight. The contrast prevents that sterile feeling.
Use red oak for traditional homes. White oak for a modern farmhouse.
What to buy:
- Red oak or white oak trim boards
- High-quality wood stain in honey or walnut
- Polyurethane finish for protection
- Fine-grit sandpaper for smooth finish
Pro tip: Apply pre-stain conditioner to oak before staining. This prevents blotchy, uneven color that ruins the whole look.
6. Rustic Barnwood Frame Around Shiplap Fireplace
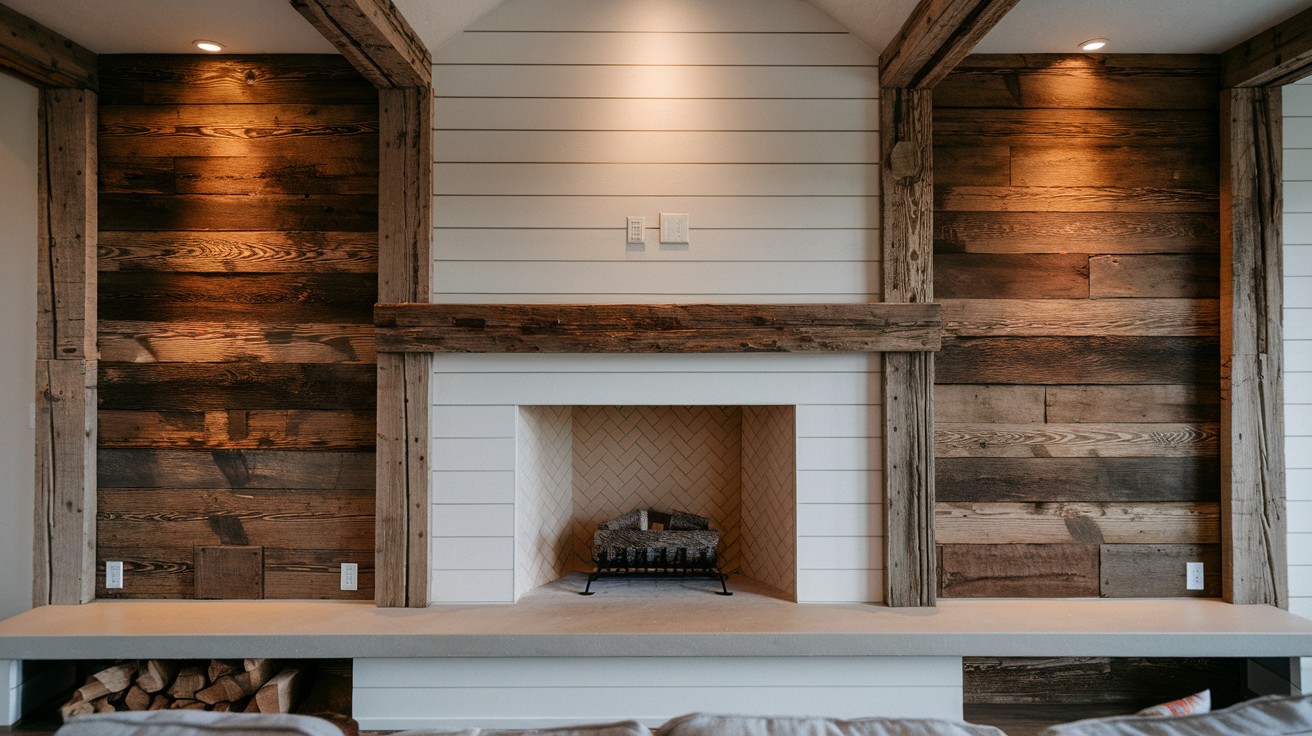
Fireplaces need drama.
Frame your shiplap surrounded with reclaimed barn beams. The chunky wood creates a focal point that grabs attention.
Secure these heavy pieces properly. Use lag bolts into studs, not just drywall anchors.
Required materials:
- Reclaimed barn beams or 4×4 posts
- 6-inch lag bolts for wall attachment
- Impact driver for heavy-duty fastening
- Construction adhesive for extra hold
Pro tip: Pre-drill pilot holes in barn beams to prevent splitting. Old wood is brittle and cracks easily with modern fasteners.
Modern & Minimalist Styles
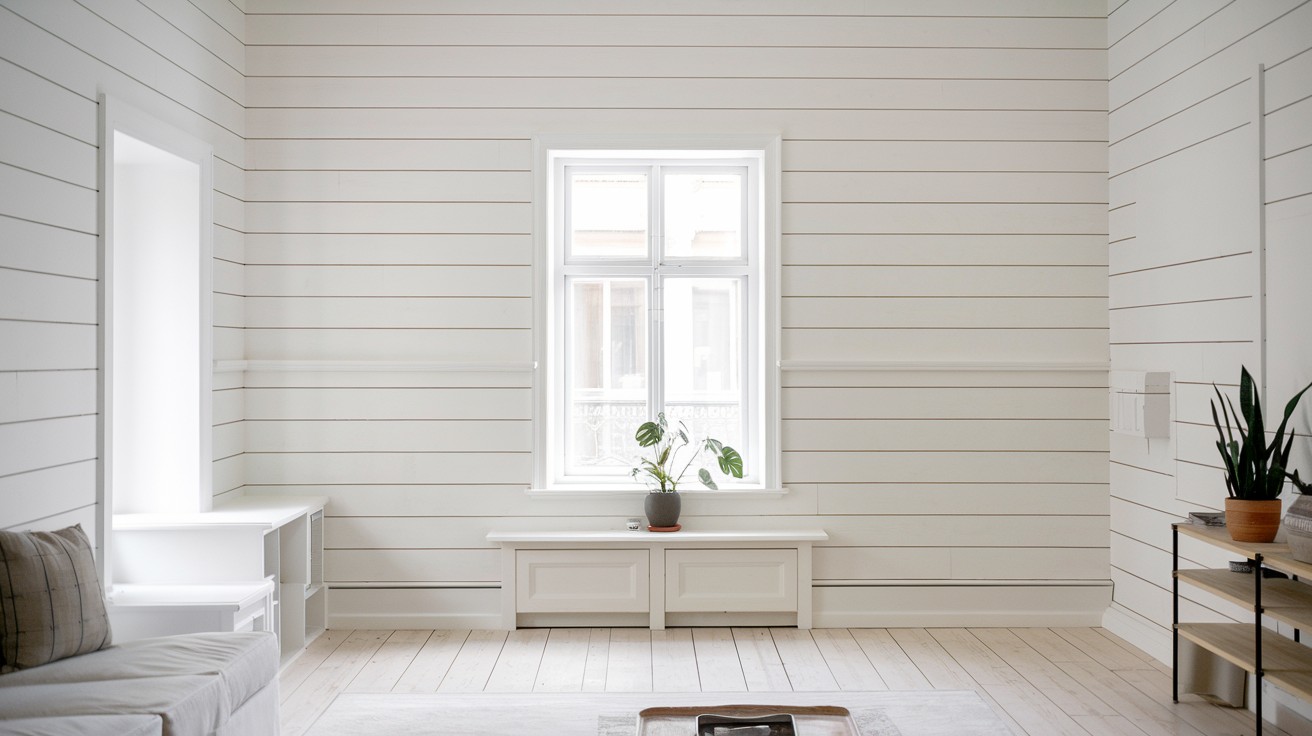
7. No-Trim (But Caulked Seamless) Shiplap Edges
Sometimes less is more.
Skip trim completely. Caulk every edge with a paintable caulk. Paint everything the same color. The result? Clean, seamless walls.
This only works with perfectly straight walls and precise installation.
Must-have supplies:
- High-quality paintable acrylic caulk
- Caulk gun with smooth trigger action
- Wet finger or caulk tool for smoothing
- Same-sheen paint for walls and edges
Pro tip: Run a thin bead of caulk, then smooth with a damp finger in one continuous motion. Stop-and-start smoothing creates visible lines.
8. Simple 1×2 Flat Stock Trim for Clean Lines
Modern doesn’t mean no trim.
1×2 flat boards give you definition without bulk. Paint them the same color as walls for subtle contrast. Or go bold with black trim on white shiplap.
Keep joints tight. Any gaps will show.
Shopping list:
- 1×2 pine or poplar boards
- Miter saw for precise 45-degree cuts
- 18-gauge brad nails
- Wood filler for nail holes
Pro tip: Cut all your trim pieces at once and dry-fit before nailing. One mis-cut piece can throw off your entire room layout.
9. Shadow Gap Reveal for Floating Trim Appearance
Here’s where it gets interesting.
Install trim 1/4 inch away from shiplap edges. This creates a shadow line that looks intentional and modern.
Paint the recessed area black for maximum drama.
Key components:
- 1×3 or 1×4 trim boards
- Spacer blocks for consistent gaps
- Black paint for recessed areas
- LED strip lights (optional upgrade)
Pro tip: Use temporary spacer blocks during installation to keep gaps consistent. Even 1/8-inch variations will be obvious in the final result.
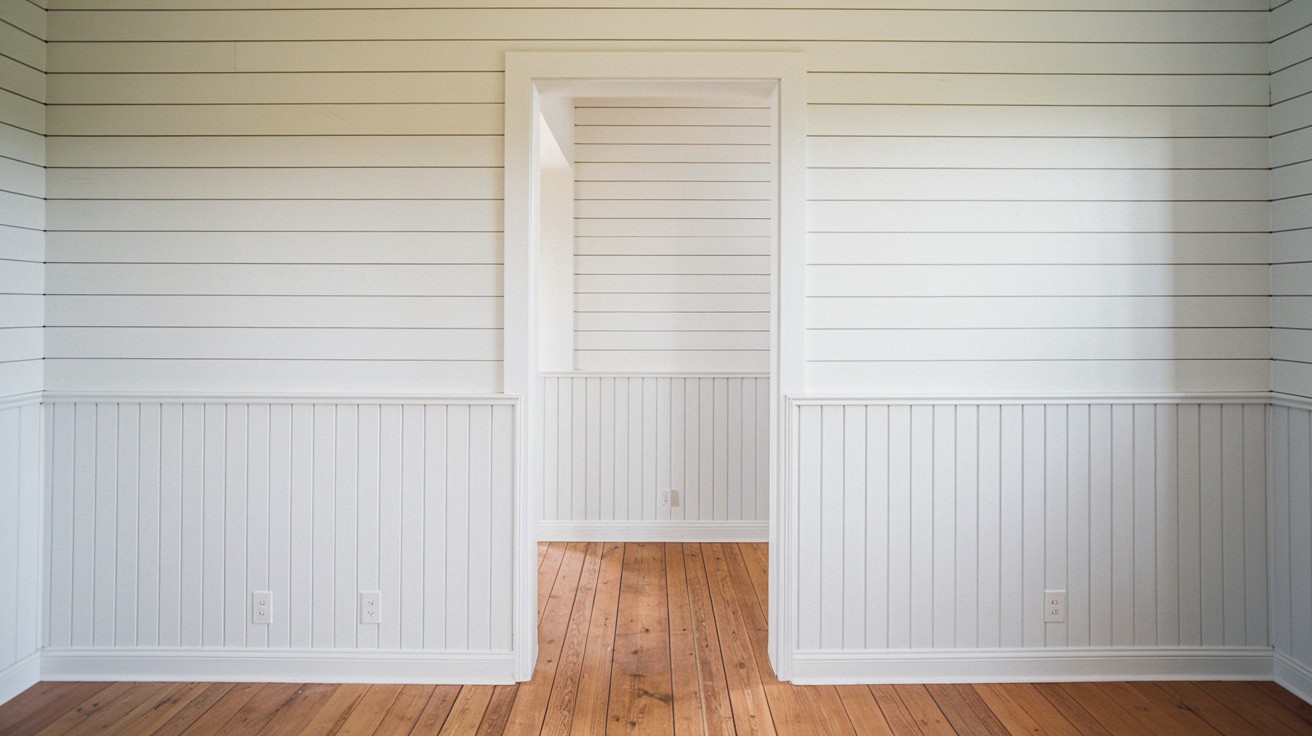
10. Flush Drywall-to-Shiplap Transition Trim
Mixing materials? Do it right.
Where shiplap meets drywall, use a flat transition strip. Make it the same thickness as your shiplap. Sand the joint smooth after installation.
This creates a seamless material change.
Materials needed:
- Flat transition strips (same thickness as shiplap)
- Fine-grit sandpaper for smooth joints
- Joint compound for minor gaps
- Primer designed for mixed surfaces
Pro tip: Install transition strips first, then butt shiplap against them. This hides cut ends and creates cleaner lines than the reverse method.
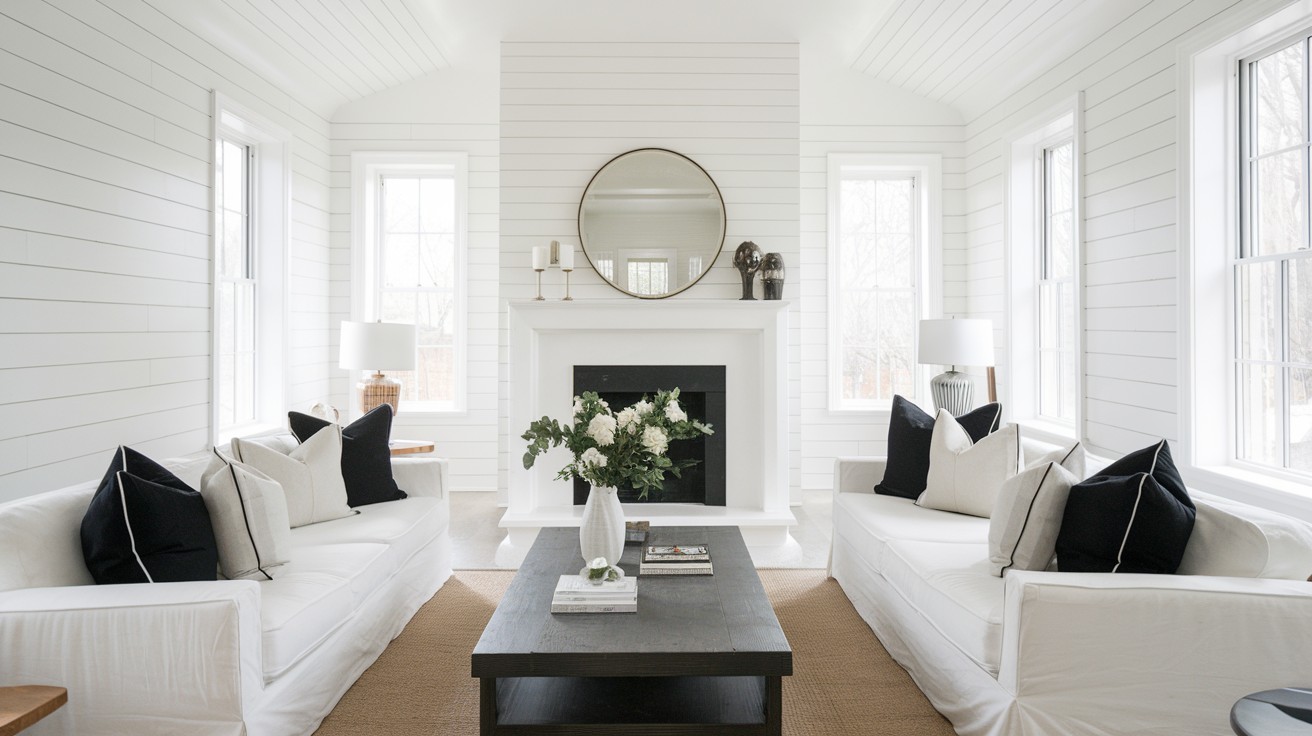
11. Paint-Matched Trim for Monochrome Finish
Monochrome is having a moment.
Paint everything the same color – shiplap, trim, even the ceiling. Use different sheens for subtle variation. Flat on walls, satin on trim.
This approach makes small rooms feel larger.
Essential supplies:
- Same paint color in different sheens
- High-quality brushes for smooth application
- Paint samples to test sheen differences
- Painter’s tape for crisp edges
Pro tip: Paint trim in satin or semi-gloss even when walls are flat. The sheen difference creates a subtle definition without color contrast.
12. Matte Black Metal Corner Edging
Metal trim might sound industrial.
Thin black steel strips actually look modern. They work especially well with white or light gray shiplap.
Source these from metal fabricators, not home centers.
What you’ll need:
- 1/8-inch thick steel strips
- Metal cutting snips or grinder
- Construction adhesive rated for metal
- Touch-up paint for cut edges
Pro tip: Order metal strips 1/4 inch longer than needed, then trim to exact length on-site. Metal fabricators can’t account for your wall irregularities.
Transitional & Classic Styles
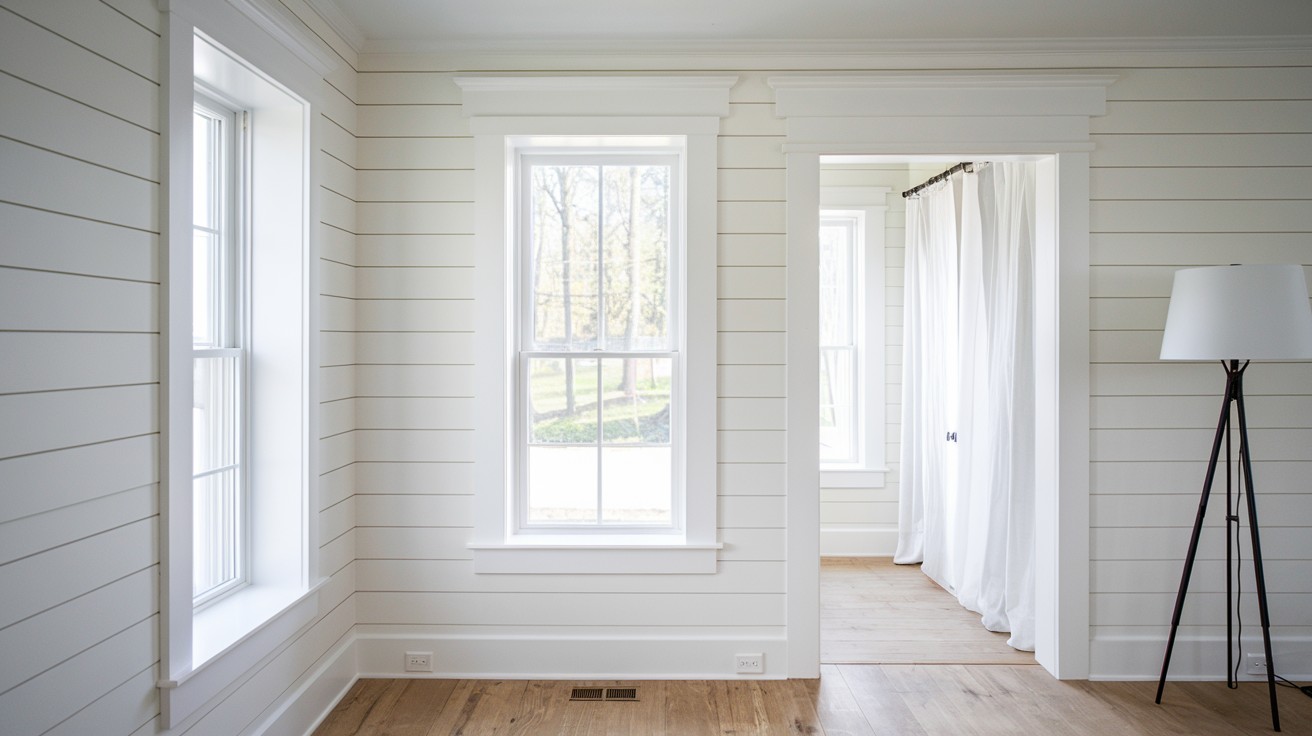
13. Colonial-Style Casing Around Doors and Shiplap
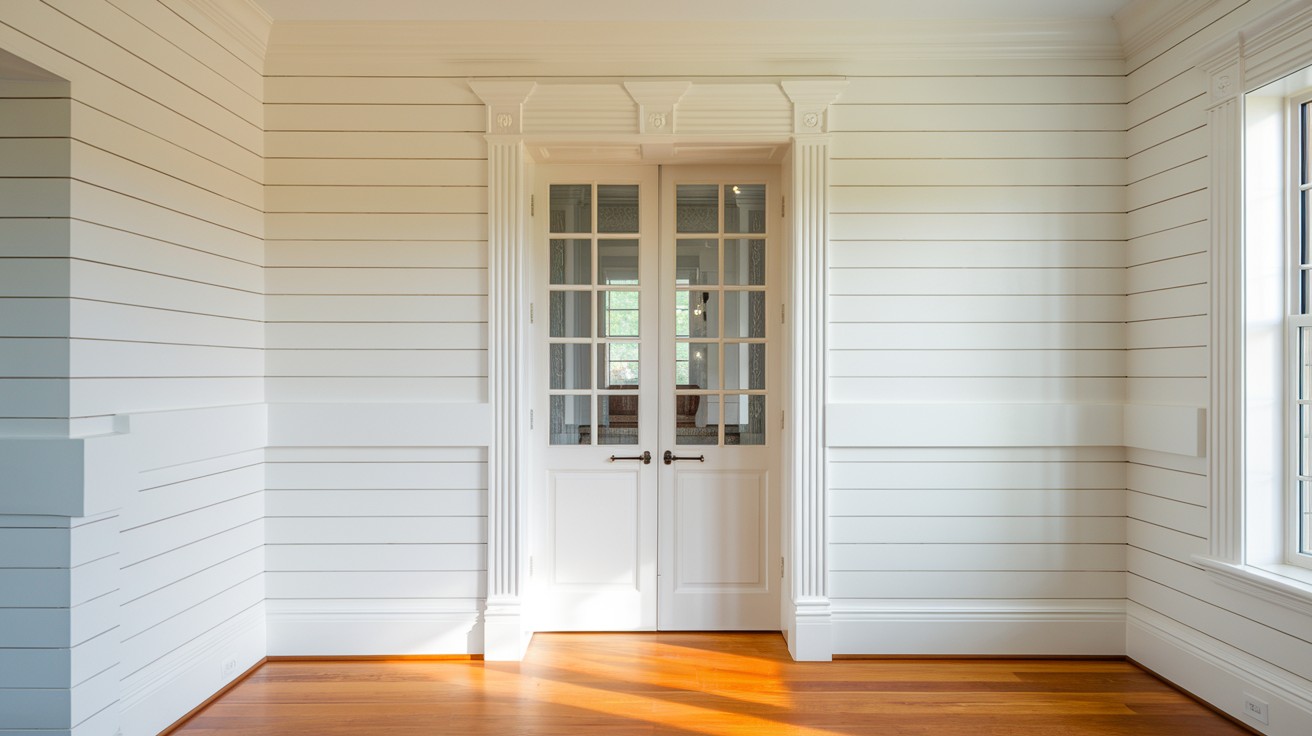
Colonial casing has staying power.
Use 3-4 inch wide casing with traditional profiles. The contrast between detailed trim and simple shiplap creates visual interest.
Miter corners carefully. Gaps show on white trim.
Required materials:
- Traditional casing profiles (3-4 inches wide)
- Miter saw with fine-tooth blade
- Wood glue for tight joints
- Finishing nails in appropriate length
Pro tip: Cut miters slightly long, then sand to perfect fit. This eliminates gaps that open over time as wood moves.
14. Thick Baseboards Under Horizontal Shiplap
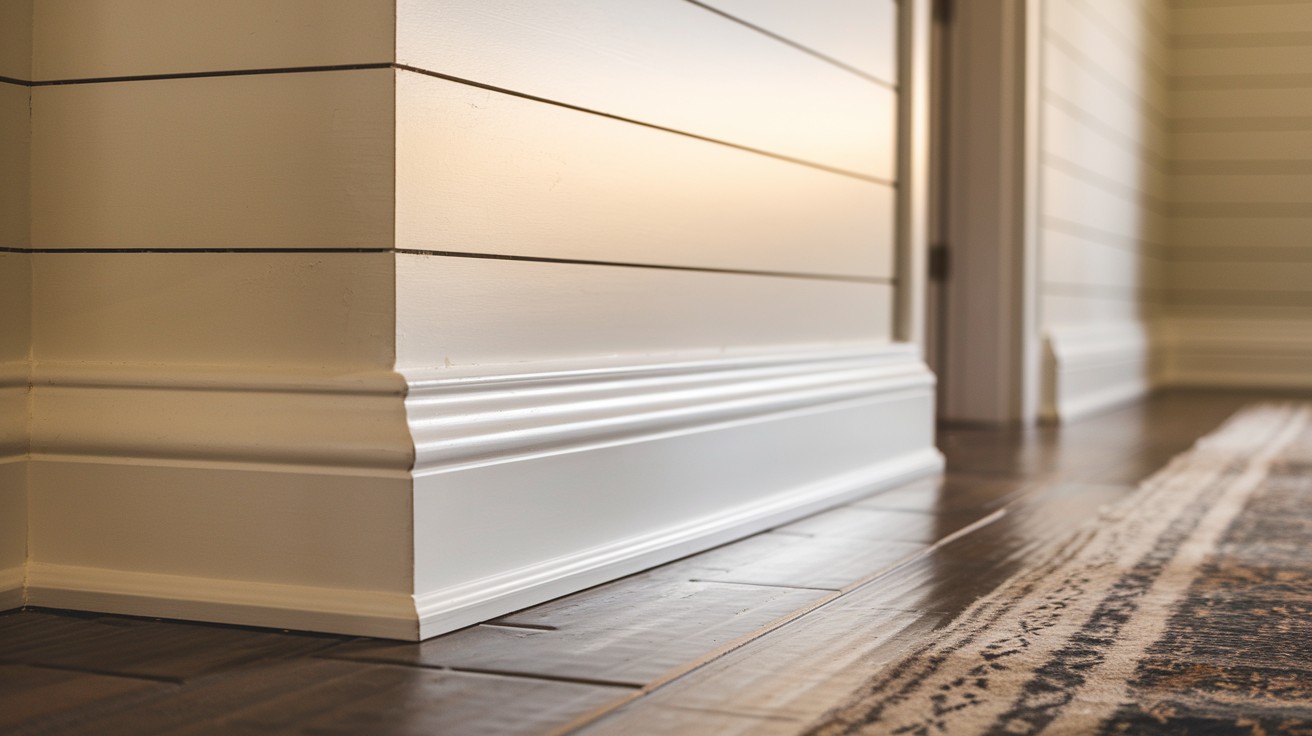
Baseboards anchor the whole look.
Go 6-8 inches tall minimum. Add a cap rail on top for extra detail. This creates a substantial base that balances the wall treatment.
Paint baseboards semi-gloss for easy cleaning.
Shopping checklist:
- 6-8 inch baseboard profiles
- Cap rail or quarter-round topping
- Semi-gloss paint for durability
- Caulk for floor gaps
Pro tip: Install baseboards after flooring but before shiplap. This lets you scribe baseboards to uneven floors for perfect fits.
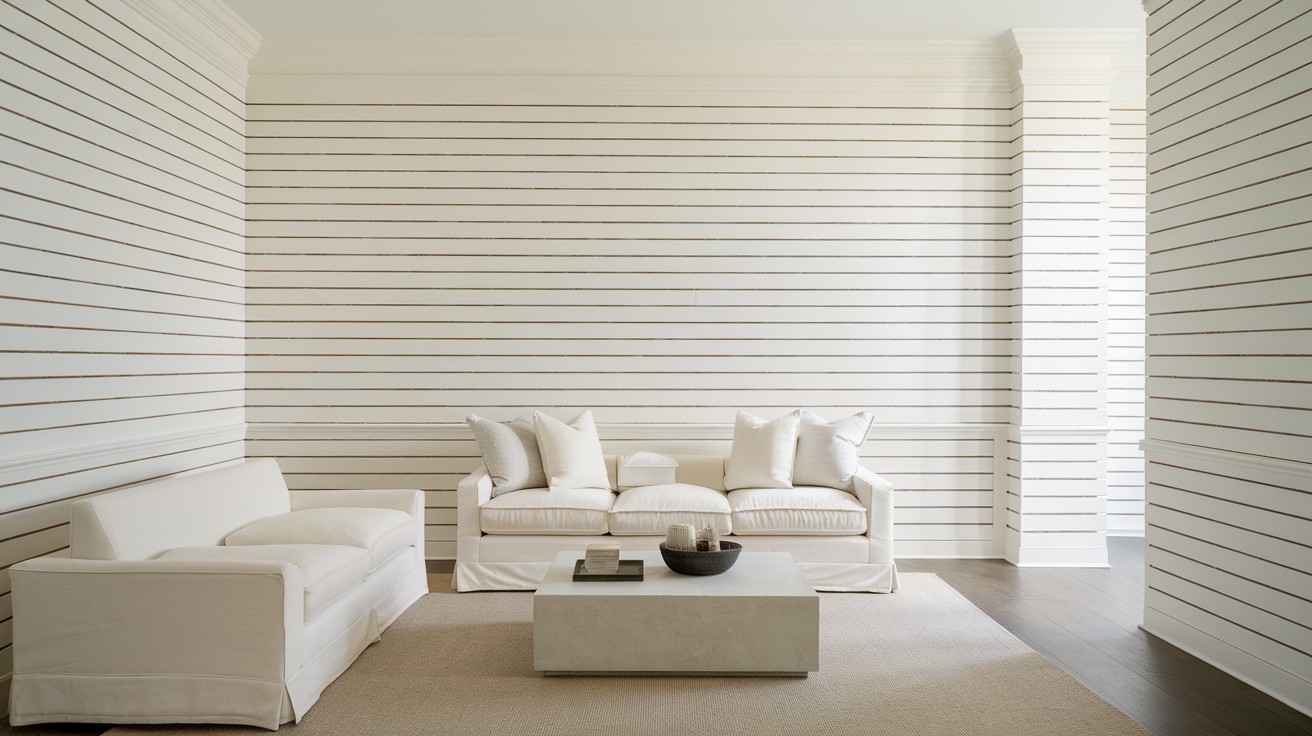
15. Chair Rail Style Divider Between Shiplap and Painted Wall
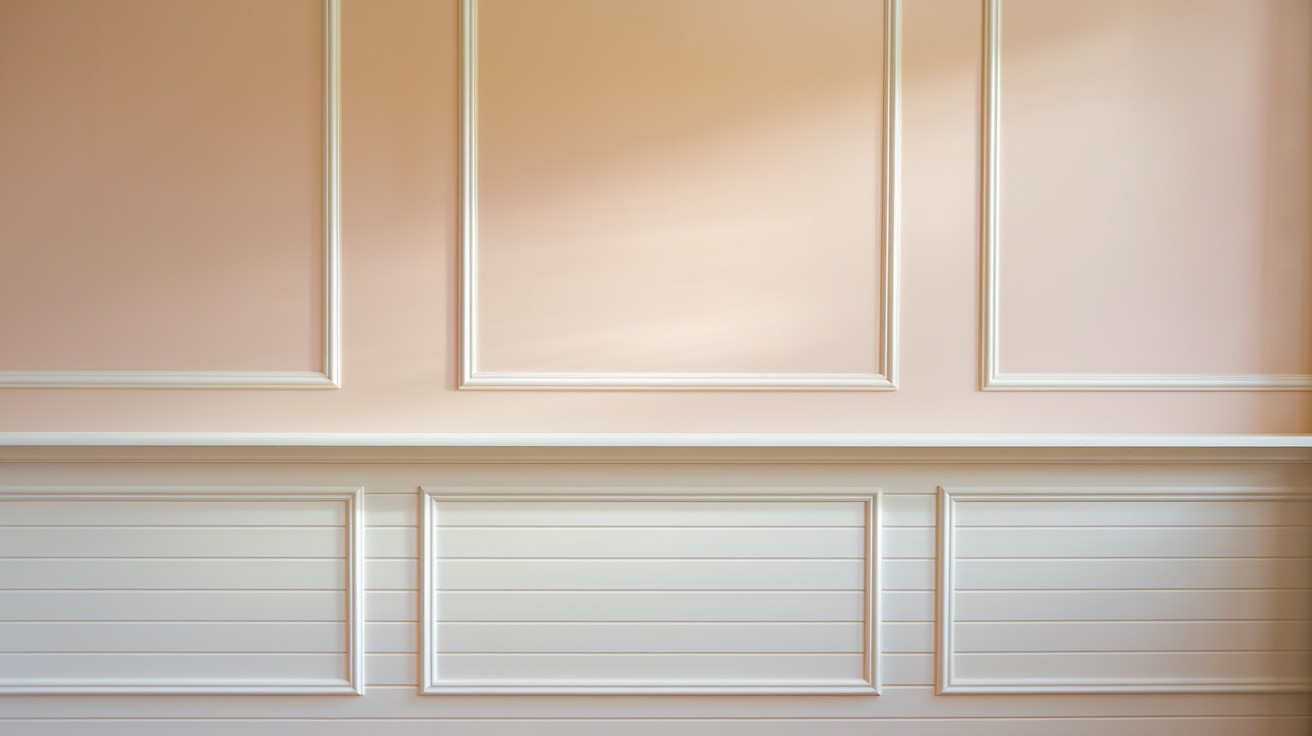
Wainscot height shiplap needs a cap.
Install chair rail molding at 36 inches high. Run shiplap below, paint above. This classic combination works in any home style.
Level the chair rail perfectly. Crooked lines are obvious.
Essential items:
- Traditional chair rail molding profile
- 4-foot level for straight installation
- Stud finder for secure mounting
- Different paint colors for upper/lower walls
Pro tip: Install chair rail first, then cut shiplap to fit underneath. This hides imperfect shiplap cuts and creates professional results.
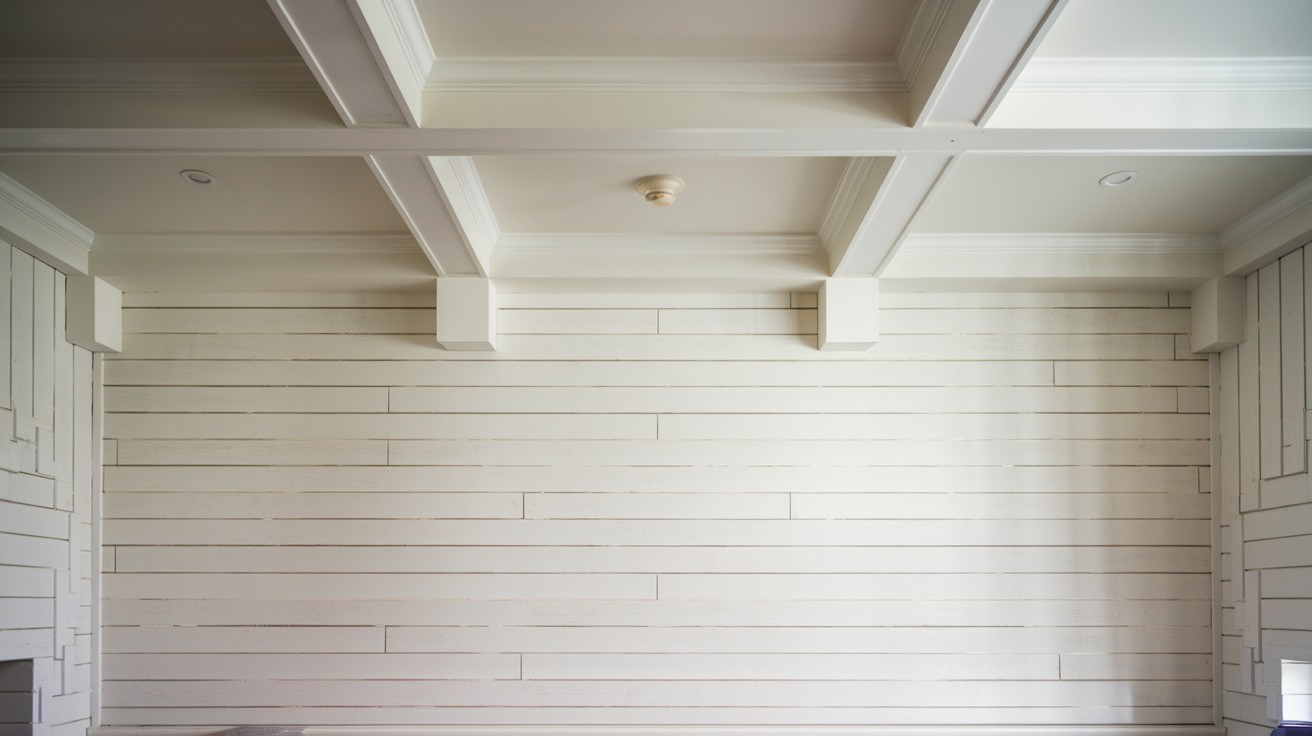
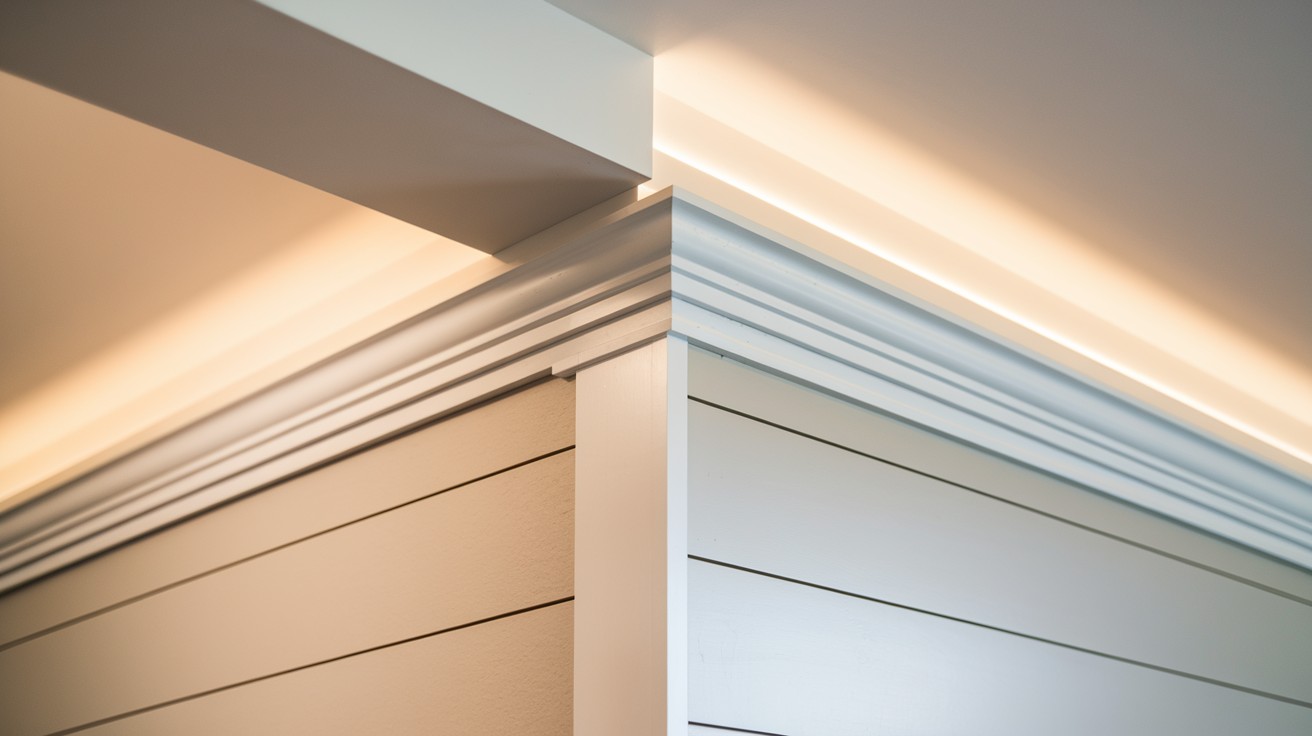
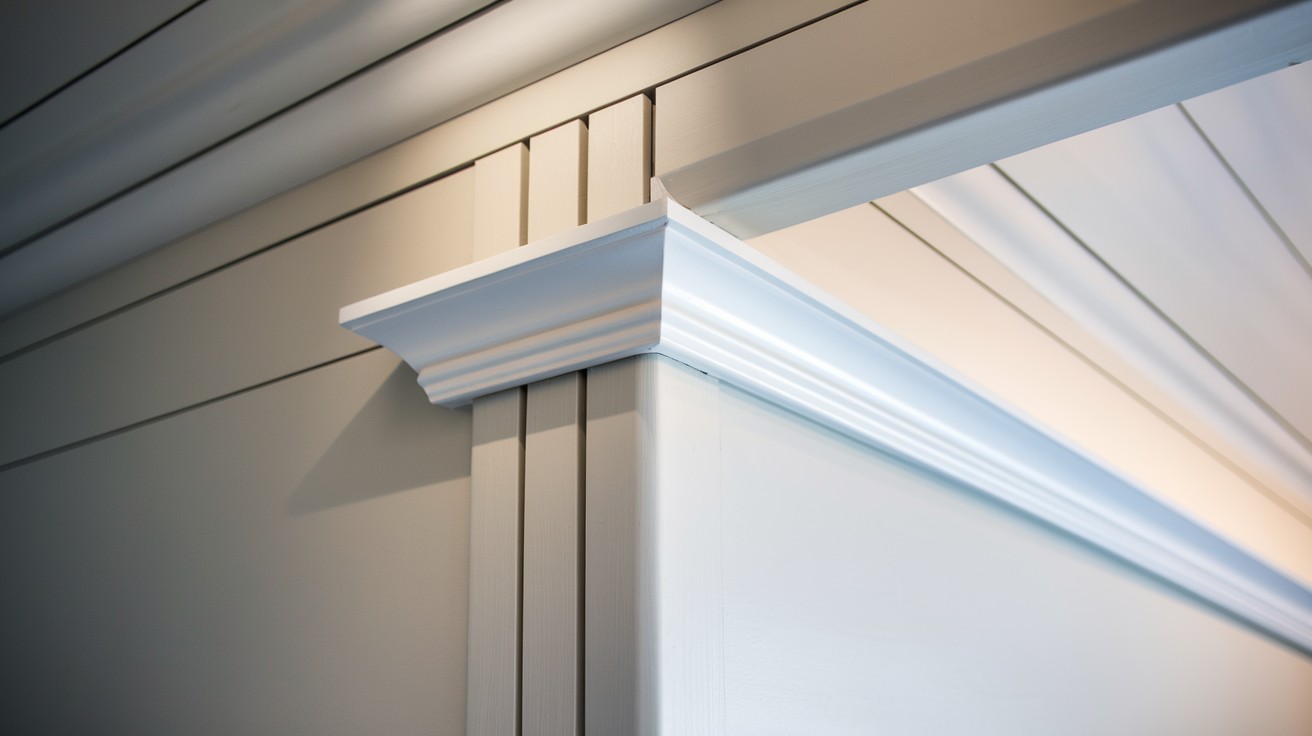
16. Double Crown Molding on Top of Full Shiplap Walls
Full-height shiplap needs dramatic trim.
Stack two pieces of crown molding. Use a 3-inch piece topped by a 2-inch piece. This creates depth and shadow lines.
Prime and paint before installation for best results.
Materials required:
- 3-inch crown molding (bottom layer)
- 2-inch crown molding (top layer)
- Blocking strips for mounting surface
- Brad nailer with 2.5-inch nails
Pro tip: Install a flat 1×2 blocking strip at the ceiling first. This gives you a solid nailing surface for both crown pieces.
17. Frame Trim for Shiplap Accent Walls
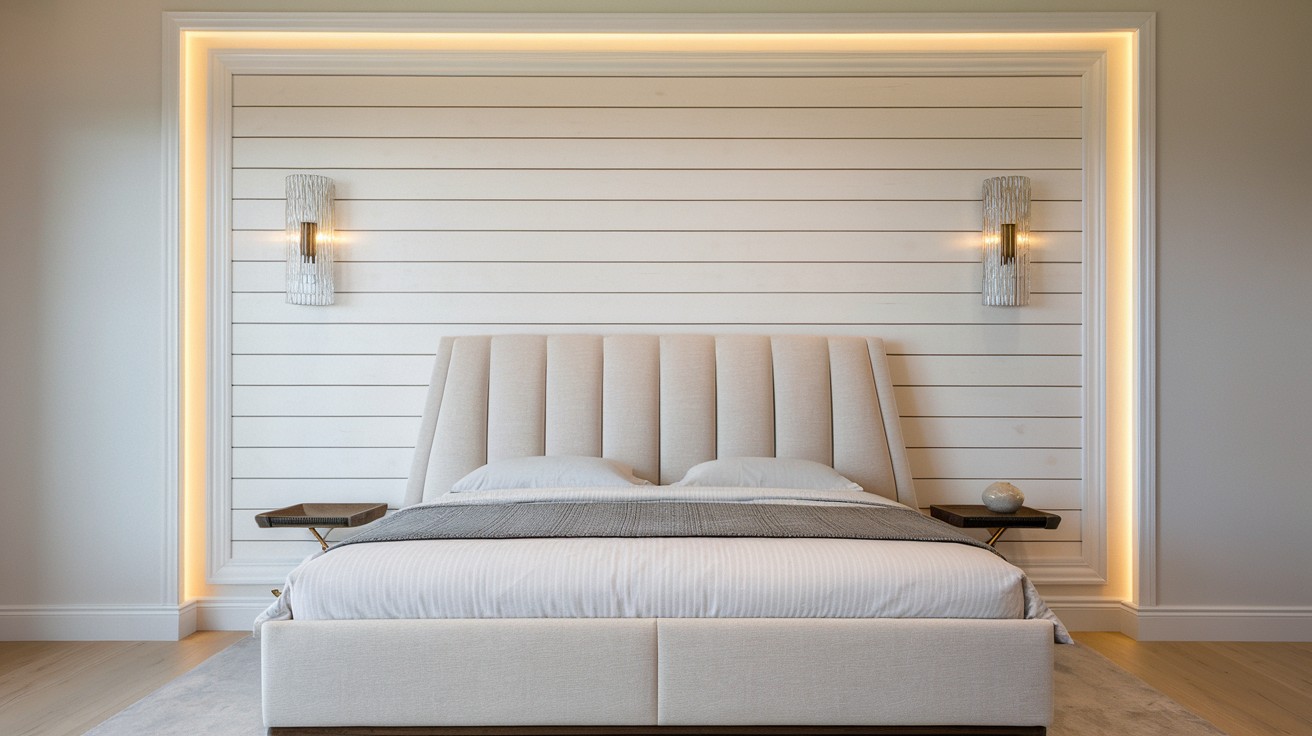
Turn your accent wall into art.
Frame the entire shiplap wall with frame molding. This technique works especially well behind beds or in dining rooms.
Keep the frame proportional to wall size.
What to gather:
- Picture frame molding or flat boards
- Miter box for perfect 45-degree cuts
- Wood glue for strong corners
- Small finishing nails
Pro tip: Make the frame 6 inches smaller than the wall on all sides. This creates better proportions than edge-to-edge framing.
Ceilings & Unique Spaces
18. Trimless Shiplap Ceilings with Recessed Lighting
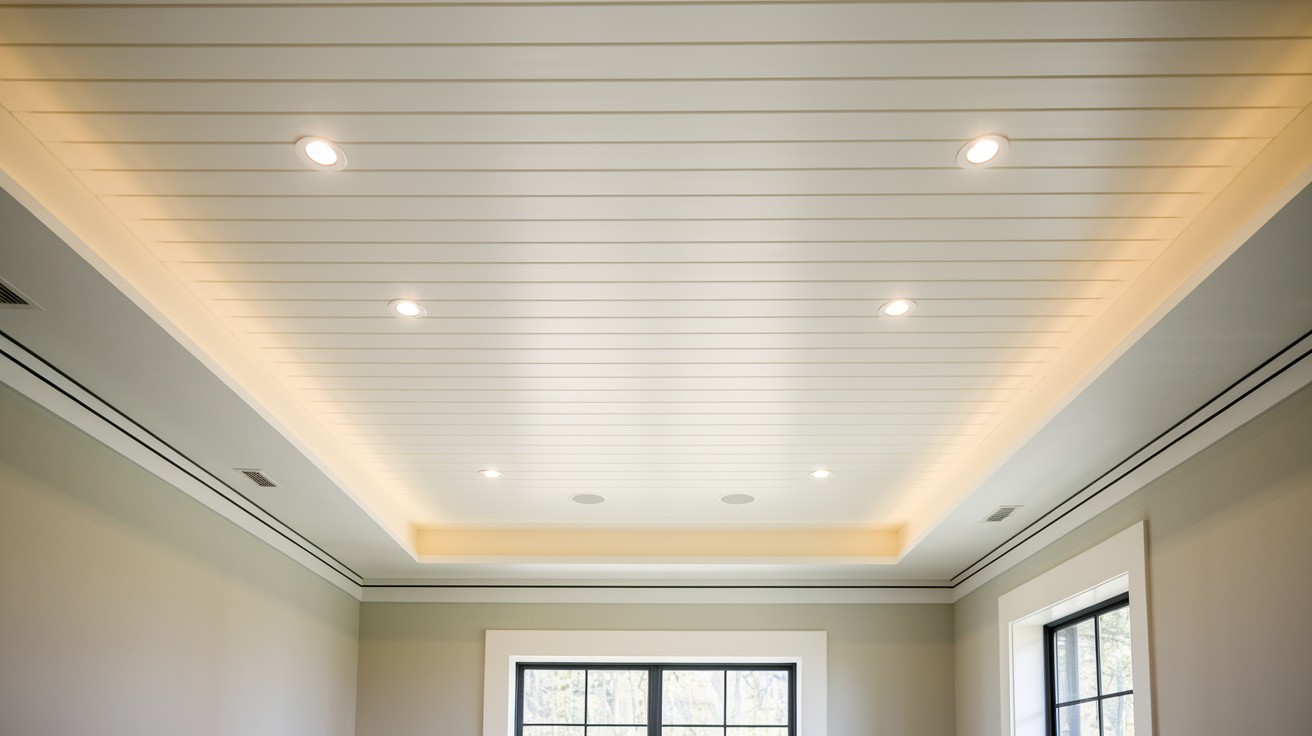
Ceiling shiplap changes everything.
Skip perimeter trim entirely. Butt shiplap tight against walls and caulk the gaps. Add recessed lights for a floating effect.
This only works with straight walls and perfect installation.
Ceiling essentials:
- Perfectly straight shiplap boards
- High-quality paintable caulk
- Recessed LED light fixtures
- Drywall anchors for light boxes
Pro tip: Install recessed lights before shiplap, then cut tight holes around each fixture. This prevents visible gaps around light trim rings.
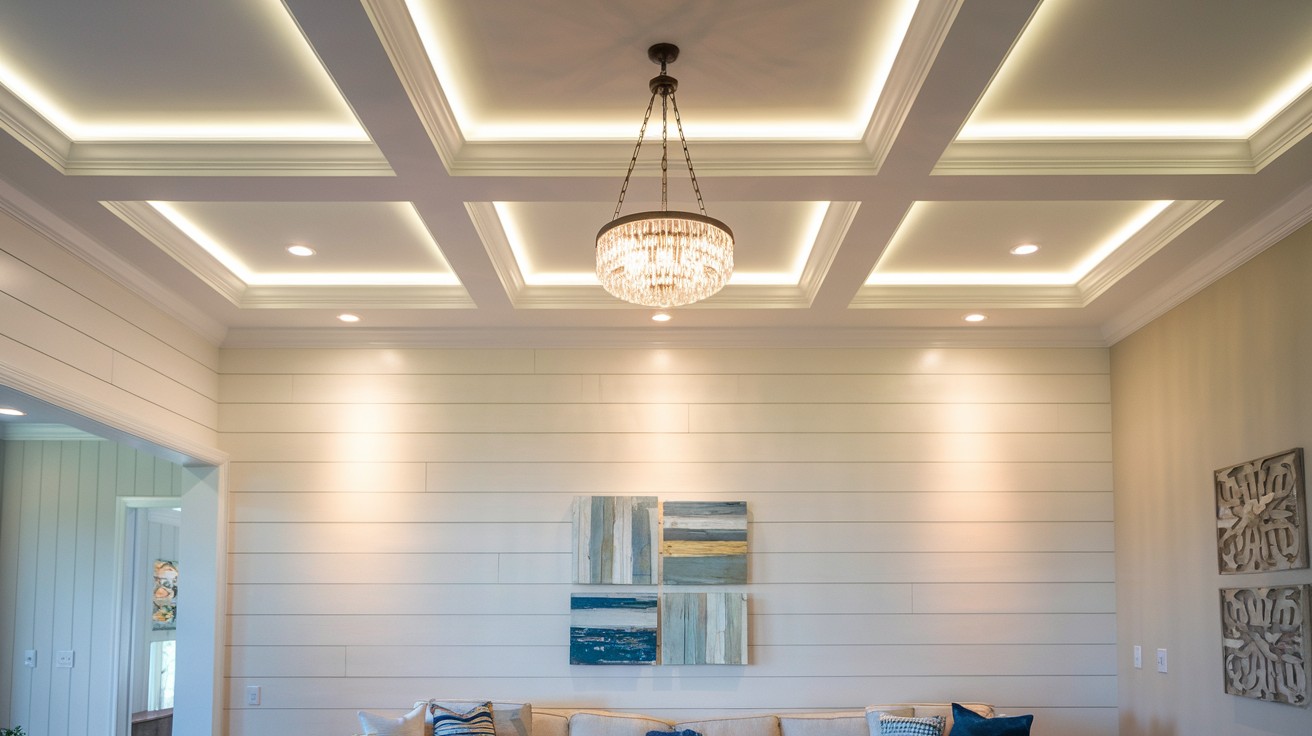
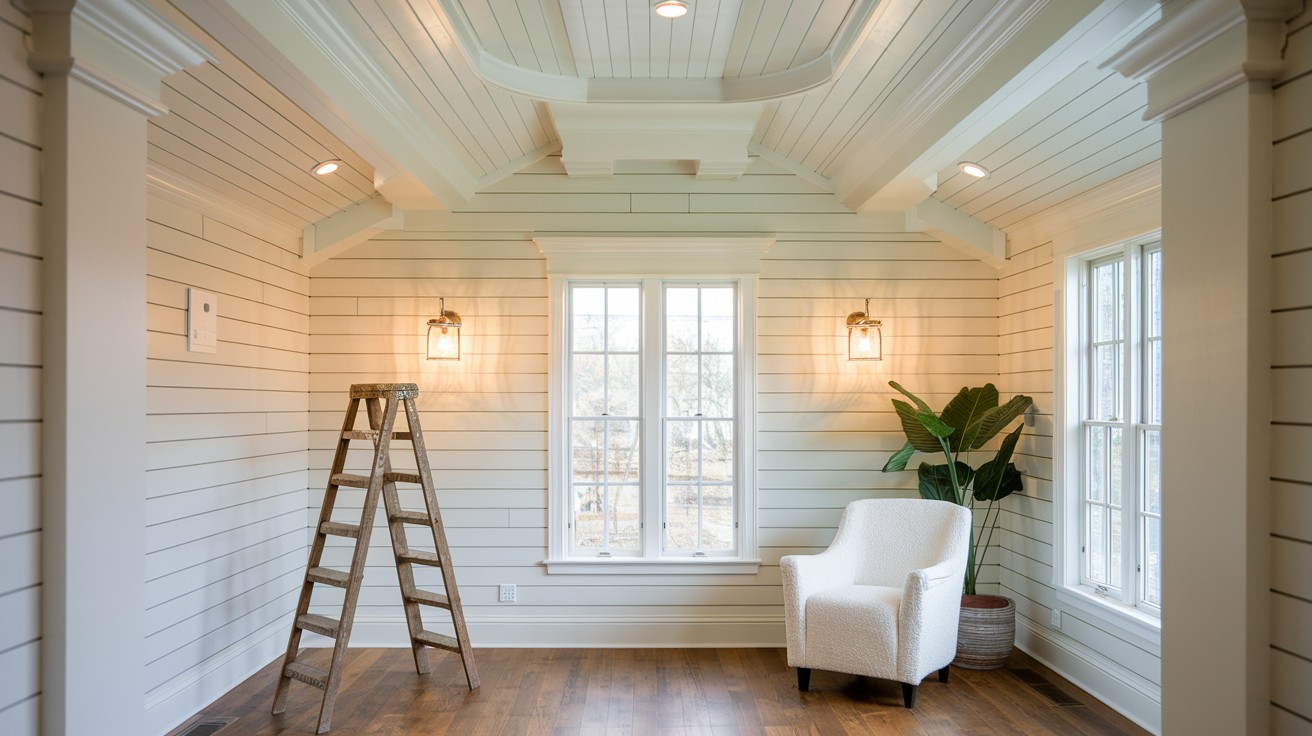
19. Box Beam Accents on Shiplap Ceiling
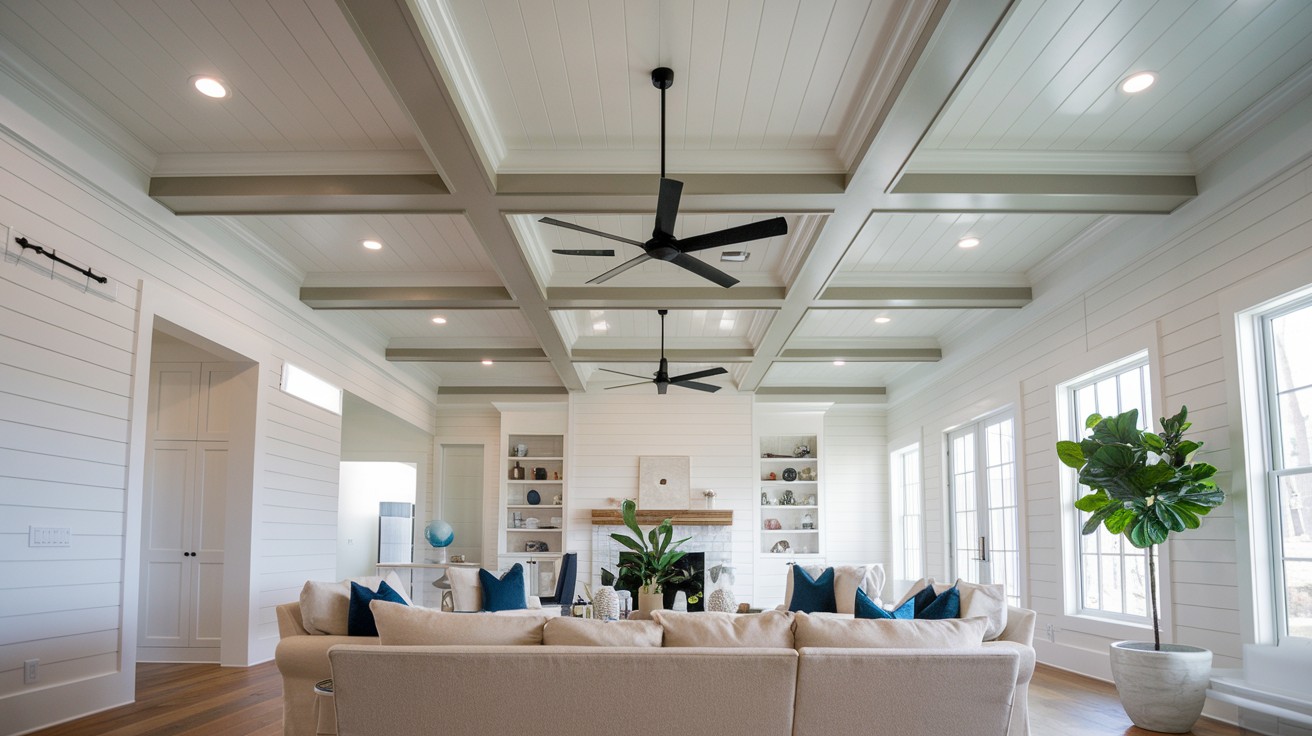
Add structure to flat ceilings.
Build box beams from 1×4 boards. Space them 4-6 feet apart across your shiplap ceiling. Paint them darker than the ceiling for contrast.
These aren’t structural – they’re purely decorative.
Beam building supplies:
- 1×4 boards for beam sides and bottom
- 2×4 nailers attached to ceiling joists
- Wood screws for assembly
- Paint in contrasting color
Pro tip: Build beams on the ground, then install as complete units. This gives you better joints than piecing them together overhead.
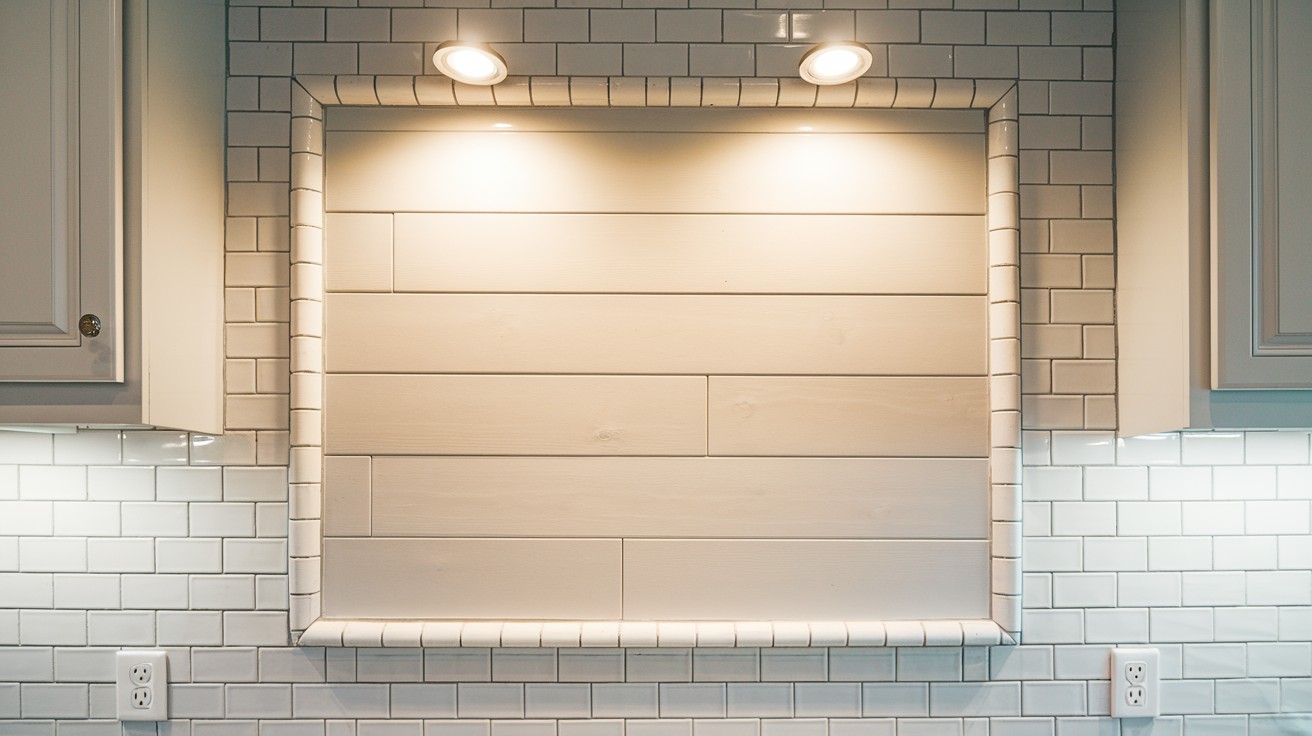
20. Shiplap Backsplash with Thin Metal Trim in Kitchens
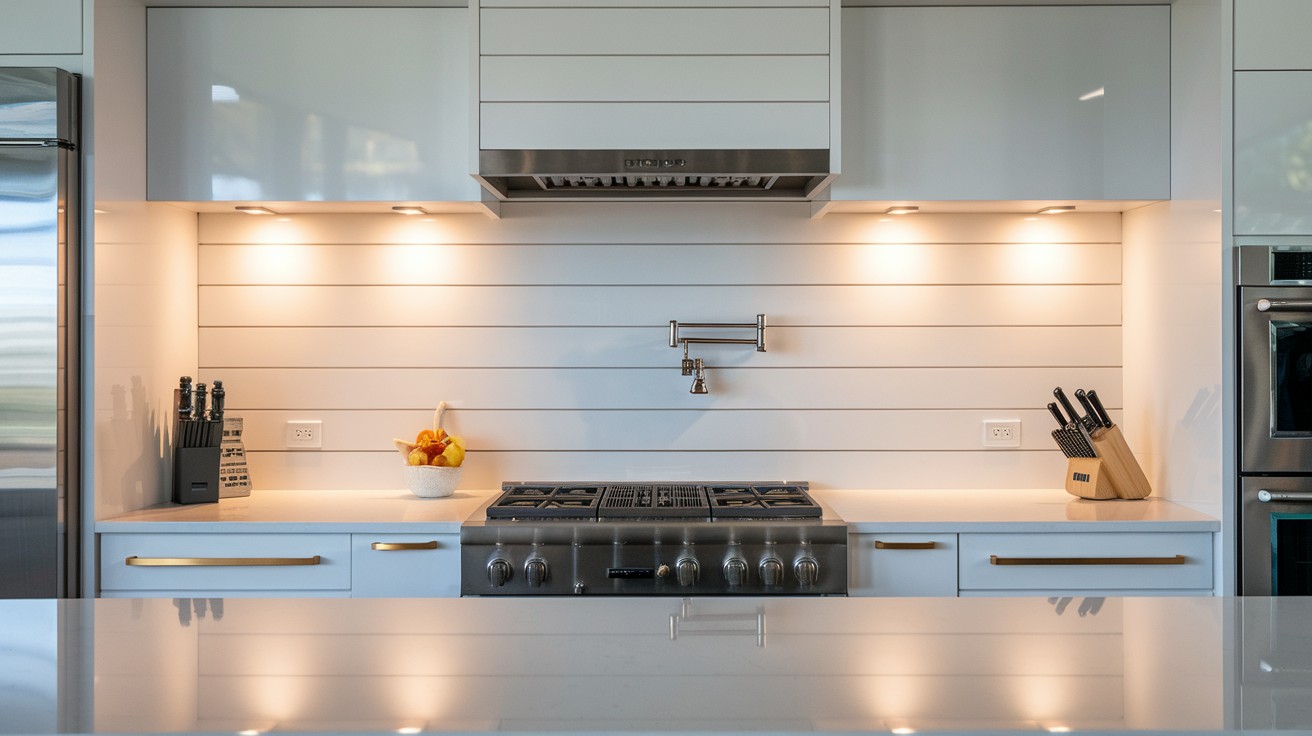
Kitchens need special consideration.
Use stainless steel trim strips around shiplap backsplashes. They handle moisture and grease better than wood. Plus they complement modern appliances.
Seal wood backsplashes with multiple coats of poly.
Kitchen-specific needs:
- Stainless steel edge strips
- Marine-grade polyurethane finish
- Silicone caulk for wet areas
- Grease-resistant primer
Pro tip: Apply three coats of marine-grade poly to wood backsplashes. Regular polyurethane fails in high-moisture, high-grease environments.
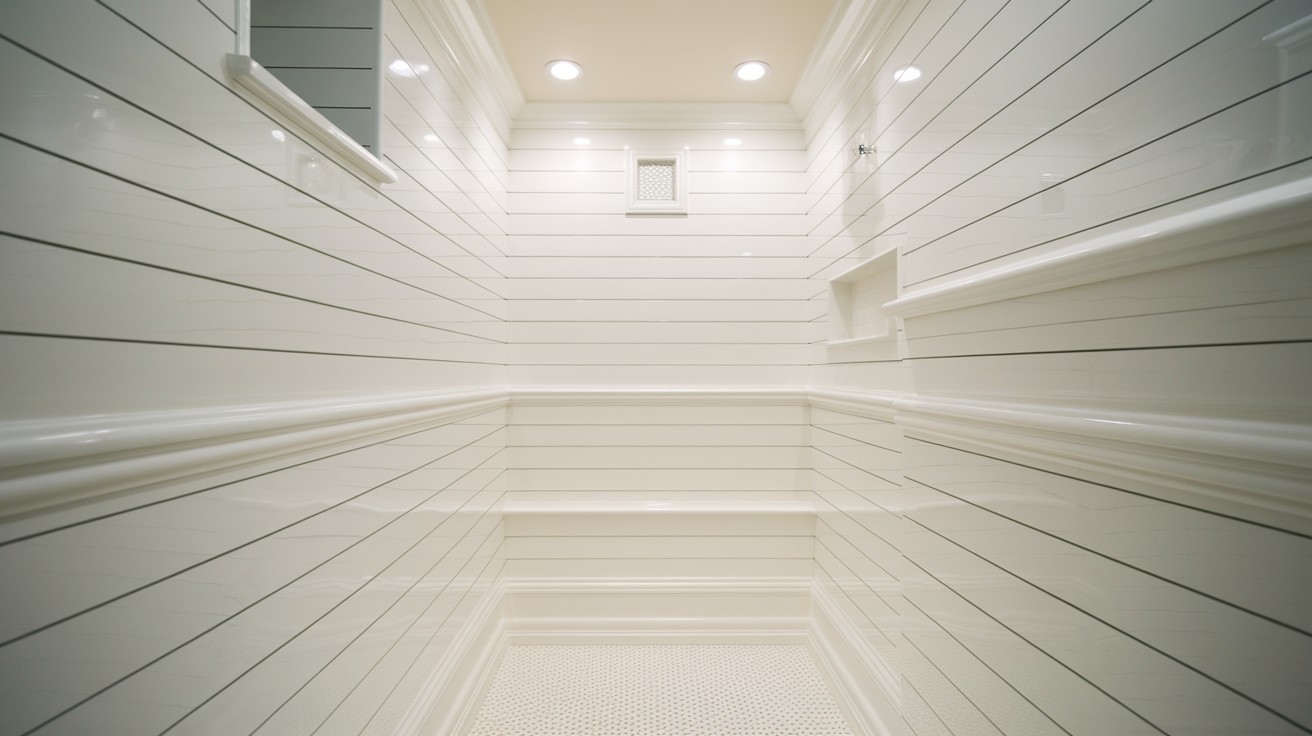
21. Quarter-Round Corners in Shiplap Bathrooms
Bathrooms are tough on trim.
Quarter-round molding in corners prevents water infiltration. Use PVC or composite materials, not wood. Paint with bathroom paint for mildew resistance.
Caulk every joint with mold-resistant caulk.
Bathroom-grade materials:
- PVC or composite quarter-round
- Mold-resistant caulk
- Bathroom paint with mildew inhibitors
- Stainless steel finishing nails
Pro tip: Pre-drill PVC trim to prevent cracking. Use stainless steel nails – regular nails rust and stain in bathroom humidity.
22. Tongue-and-Groove Style Crown Trim for Ceiling Shiplap
Match your ceiling treatment.
Use tongue-and-groove boards as crown molding on shiplap ceilings. This creates continuity while adding a finished edge.
Install the crown first, then butt ceiling boards against it.
Coordinated supplies:
- Tongue-and-groove boards (same species as ceiling)
- Blocking strips for mounting
- Finish nails sized for board thickness
- Matching stain or paint
Pro tip: Rip tongue-and-groove boards to 4-5 inches wide for crown trim. Full-width boards look too heavy at the ceiling line.
Creative DIY Finishing Ideas
23. Painted Accent Trim in Contrasting Color
Color creates personality.
Paint your trim a bold contrasting color. Navy trim on white shiplap. Forest green on cream walls. The contrast defines spaces and adds character.
Use painter’s tape for crisp lines.
Color contrast essentials:
- High-quality painter’s tape
- Small brushes for detailed work
- Primer designed for color changes
- Paint samples to test combinations
Pro tip: Remove painter’s tape while paint is still slightly wet. This prevents peeling and gives razor-sharp lines.
24. Rope Trim for Nautical-Themed Shiplap Rooms
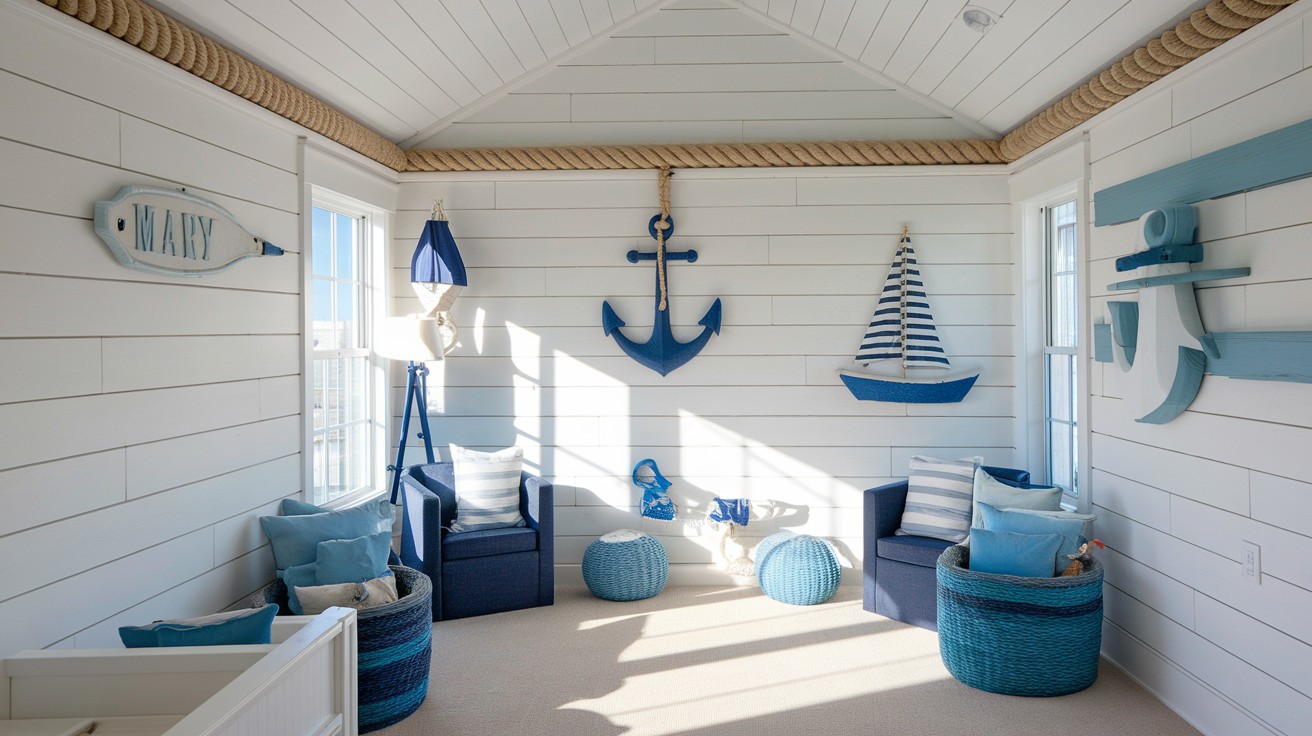
Coastal themes need special touches.
Manila rope makes trim. Secure it with finishing nails every 12 inches. This works great in beach houses or kids’ rooms.
Seal rope with a clear coat to prevent fraying.
Nautical supplies:
- Natural manila rope (1/2 to 3/4 inch diameter)
- Small finishing nails with large heads
- Clear polyurethane sealer
- Rope end caps or whipping twine
Pro tip: Wrap rope ends with thin wire or whipping twine before cutting. This prevents unraveling and gives clean, professional-looking ends.
25. Decorative Corner Brackets as Trim Accents

Add Victorian flair anywhere.
Install decorative brackets at shiplap corners or where walls meet ceilings. These cast shadows that create visual interest.
Paint them to match or contrast with your shiplap.
Bracket installation needs:
- Wood or metal decorative brackets
- Toggle bolts for hollow wall mounting
- Paint or stain to match decor
- Level for proper positioning
Pro tip: Install brackets slightly below the actual corner intersection. This creates better shadow lines and makes them look more intentional.
26. Shiplap Wall Frames with Built-in Sconces and Trim
Lighting changes everything.
Frame sections of shiplap with trim, then add built-in sconces within the frames. This creates a custom millwork appearance at DIY prices.
Plan electrical rough-in before installing shiplap.
Integrated lighting needs:
- Frame lumber for wall boxes
- Electrical boxes rated for sconces
- 12-2 or 14-2 electrical wire
- Dimmer switches for mood control
Pro tip: Install electrical boxes 6 inches off-center in frames. Centered sconces look amateur – slight asymmetry appears more intentional.
27. Integrated Shelving Units with Framed Shiplap Backs
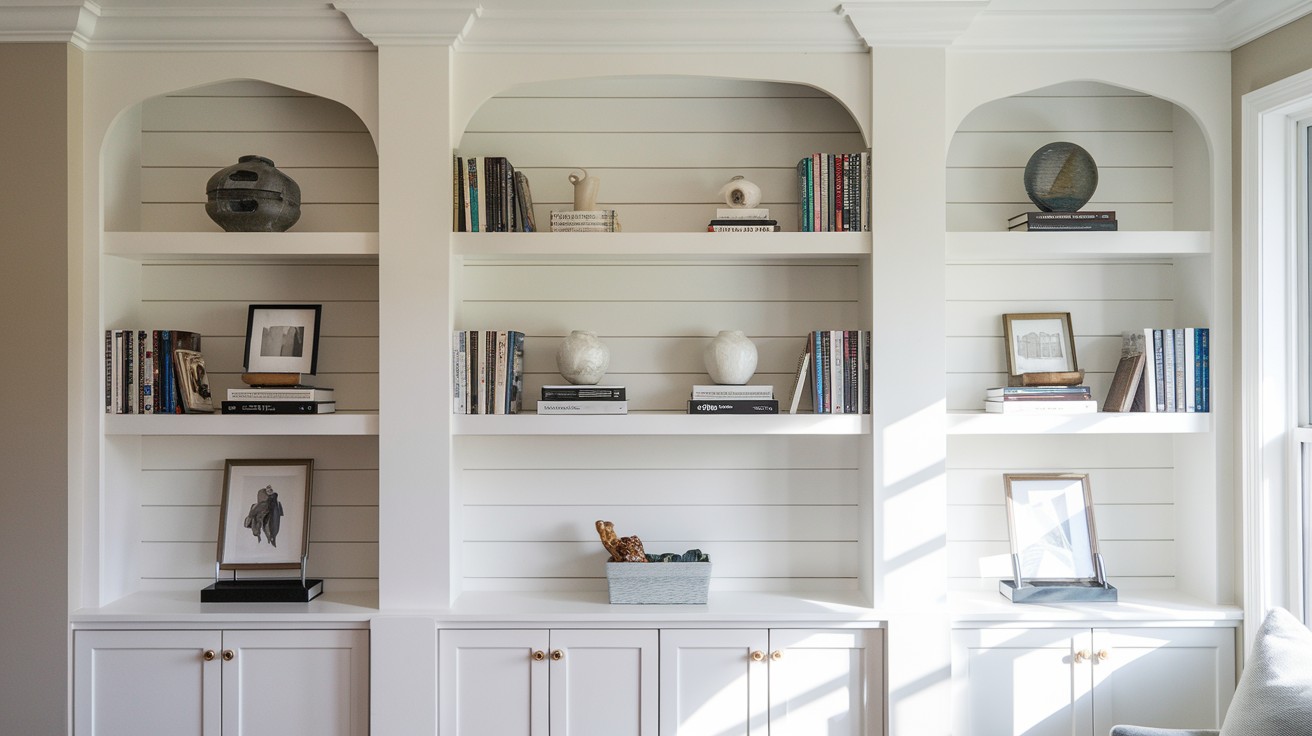
Storage meets style.
Build floating shelves with shiplap backing. Frame the entire unit with trim for a built-in look. Perfect for living rooms or home offices.
Use hidden brackets for clean lines.
Shelving system parts:
- Floating shelf brackets (hidden style)
- 1×8 or 1×10 shelf boards
- Matching shiplap for backing
- Frame trim to border the unit
Pro tip: Build the frame first, then install shiplap backing and shelves inside it. This sequence gives you better proportions and easier installation.
Budget-Friendly Ideas
28. 1×3 or 1×4 Pine Boards as DIY Trim

Basic lumber works fine.
Pine boards cost less than fancy molding. Rip them to width on a table saw. Sand smooth and paint. They look custom for a fraction of the cost.
Prime knots first to prevent bleed-through.
Budget lumber list:
- 1×3 or 1×4 pine boards
- Table saw or circular saw for ripping
- 120-grit sandpaper for smoothing
- Knot-sealing primer
Pro tip: Buy longer boards and cut multiple trim pieces from each one. This reduces waste and gives you better grain matching across the room.
29. PVC Trim for Moisture-Prone Spaces (Bathrooms, Laundry)
Moisture kills wood trim fast.
PVC trim boards never rot, warp, or split. They cost more upfront but last forever in wet areas. Paint them with a bonding primer first.
Cut with regular woodworking tools.
Moisture-resistant supplies:
- PVC trim boards in needed profiles
- Bonding primer for plastic surfaces
- High-quality exterior paint
- PVC cement for joints
Pro tip: Let PVC trim acclimate to room temperature before cutting. Cold PVC can crack, and hot PVC cuts poorly.
Cut with regular woodworking tools.
30. Drywall Corner Beads Painted to Match Shiplap
Think outside the box.
Metal corner beads create clean edges for pennies. Paint them to match your shiplap. They work especially well in modern spaces.
Use mesh tape for inside corners.
Corner bead essentials:
- Metal corner beads (outside corners)
- Mesh drywall tape (inside corners)
- Joint compound for smooth finish
- Paint matching your shiplap color
Pro tip: Install corner beads with setting-type compound, not regular mud. It dries harder and resists dings better in high-traffic areas.
31. Use Leftover Shiplap Boards as Border Trim
Waste nothing.
Cut leftover shiplap into trim pieces. This creates perfect color and texture matches. Rip boards to 2-3 inches wide for border trim.
Match grain direction for best appearance.
Scrap wood supplies:
- Leftover shiplap boards
- Table saw for consistent ripping
- Sandpaper for cut edges
- Extra stain or paint for touch-ups
Pro tip: Save the best-looking leftover pieces for the most visible trim locations. Use lower-grade scraps in corners and behind furniture.
32. Caulked and Painted MDF for Cheap Clean Lines
MDF gets a bad rap.
Medium-density fiberboard cuts clean and paints beautifully. Prime it first – raw MDF soaks up paint. Perfect for painted applications.
Don’t use MDF in wet areas.
MDF trim basics:
- Pre-primed MDF boards
- High-quality primer for raw edges
- Fine-tooth saw blade for smooth cuts
- Paintable caulk for joints
Pro tip: Seal all cut edges of MDF with primer before installation. Raw MDF edges absorb moisture and swell, ruining paint jobs.
Outside-the-Box Trim Ideas
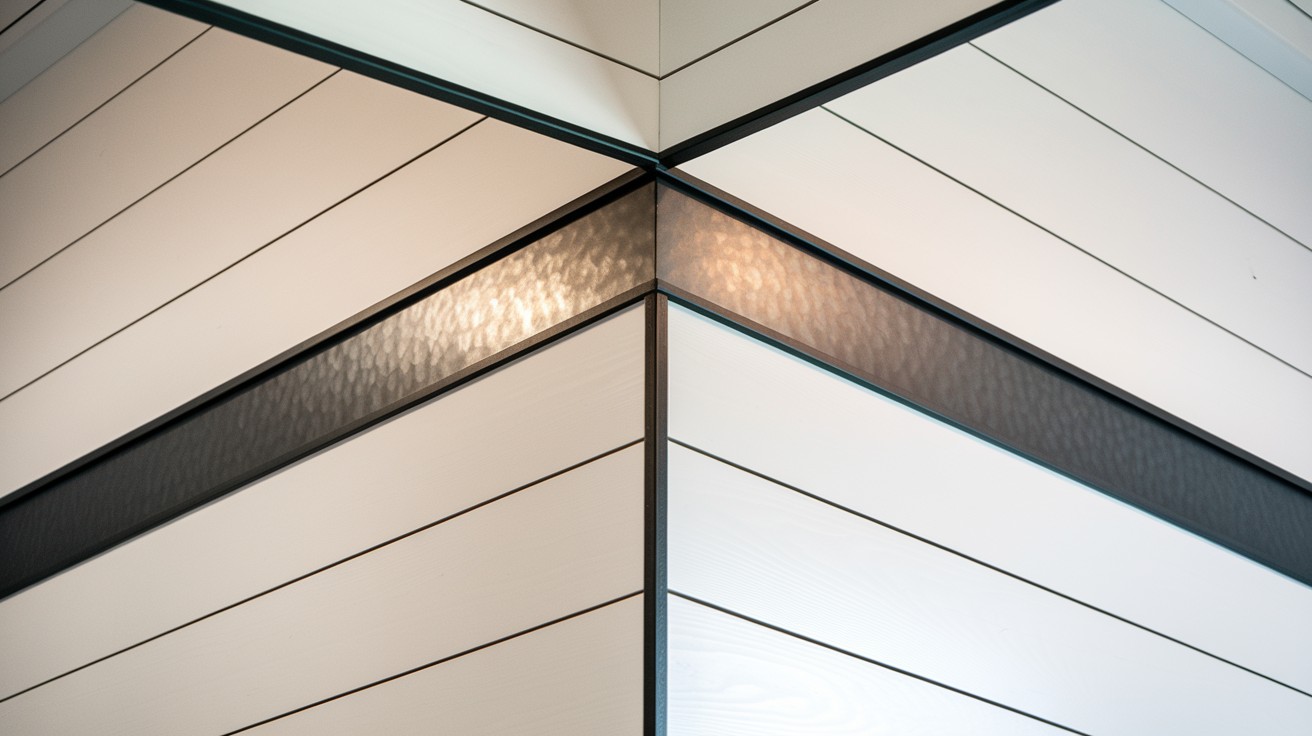
33. Gold or Brass Inlay Strips Between Shiplap Panels
Metallic accents add luxury.
Install thin brass strips between shiplap boards. This creates a custom millwork appearance that photographs beautifully. Use adhesive-backed strips for easy installation.
Keep metal strips thin – 1/8 inch maximum.
Luxury accent materials:
- Adhesive-backed brass strips
- Metal cutting snips for precise cuts
- Burnishing tool for smooth application
- Clear protective coating for metal
Pro tip: Install brass strips after painting shiplap. The metal protects paint edges and covers any minor color variations between boards.
34. Stone or Brick Edge Border Around Shiplap Fireplace
Mix materials for impact.
Frame shiplap fireplace surrounds with natural stone or thin brick. The texture contrast creates focal points that anchor entire rooms.
Use construction adhesive and mechanical fasteners.
Mixed material needs:
- Natural stone or thin brick veneer
- Construction adhesive rated for stone
- Masonry screws for mechanical attachment
- Grout or mortar for stone joints
Pro tip: Install stone borders first, then fit shiplap against them. Stone is harder to cut precisely than wood, so let the shiplap accommodate irregularities.
35. LED Light Strip Trim at the Top of Shiplap Accent Wall
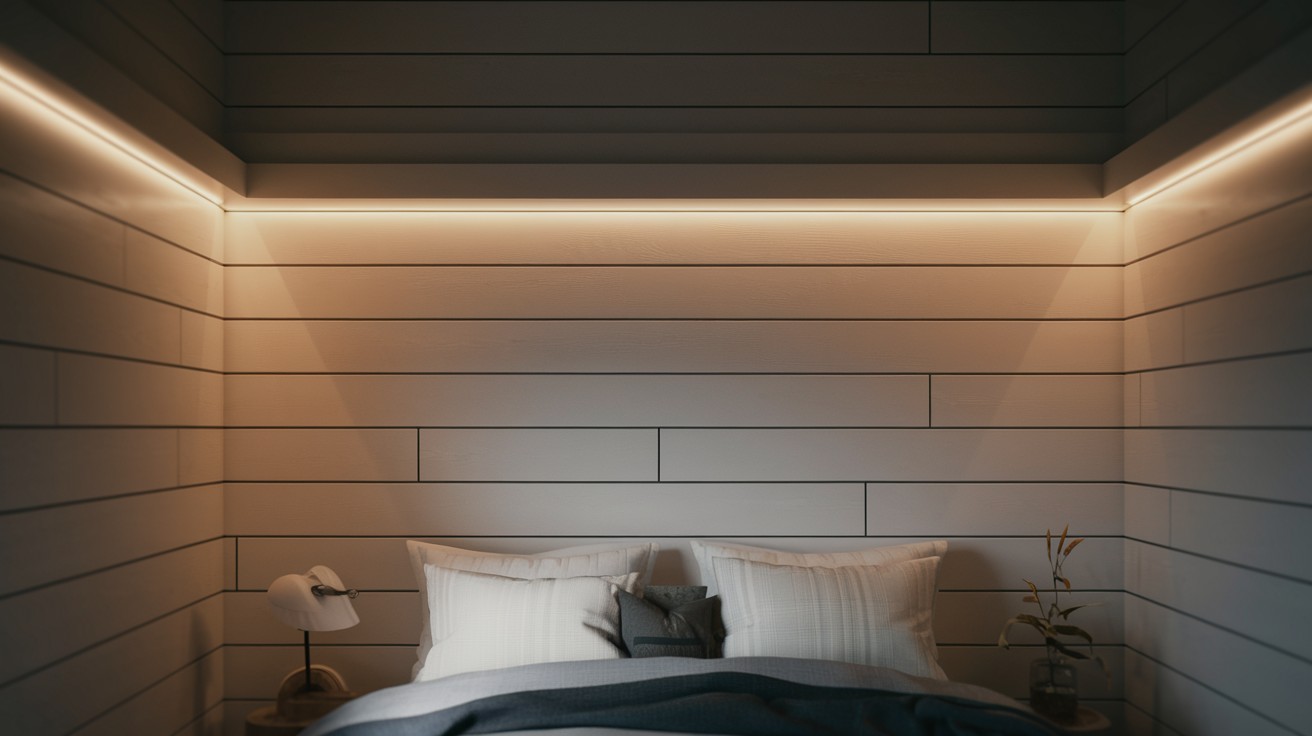
Lighting makes the trim disappear.
Install LED strip lights behind trim at ceiling lines. This creates ambient lighting that makes walls glow. Perfect for bedrooms or media rooms.
Use dimmable LEDs for mood control.
LED lighting components:
- Dimmable LED strip lights
- LED power supply and controller
- Aluminum channel for heat dissipation
- Low-voltage wire for connections
Pro tip: Install LED strips in aluminum channels behind trim. The channels dissipate heat and give more even light distribution than bare strips.
36. Framing Shiplap with Decorative Tiles
Tiles aren’t just for bathrooms.
Subway tiles or natural stone create borders around shiplap areas. This works especially well in kitchen backsplashes or bathroom wainscot.
Plan tile layout before installing shiplap.
Tile border supplies:
- Subway or natural stone tiles
- Tile adhesive appropriate for wall application
- Tile spacers for consistent gaps
- Grout and grout sealer
Pro tip: Use tile trim pieces at outside corners instead of trying to miter regular tiles. Trim pieces look more professional and install easier.
37. Framed Wallpaper Insert in Shiplap Inset with Trim
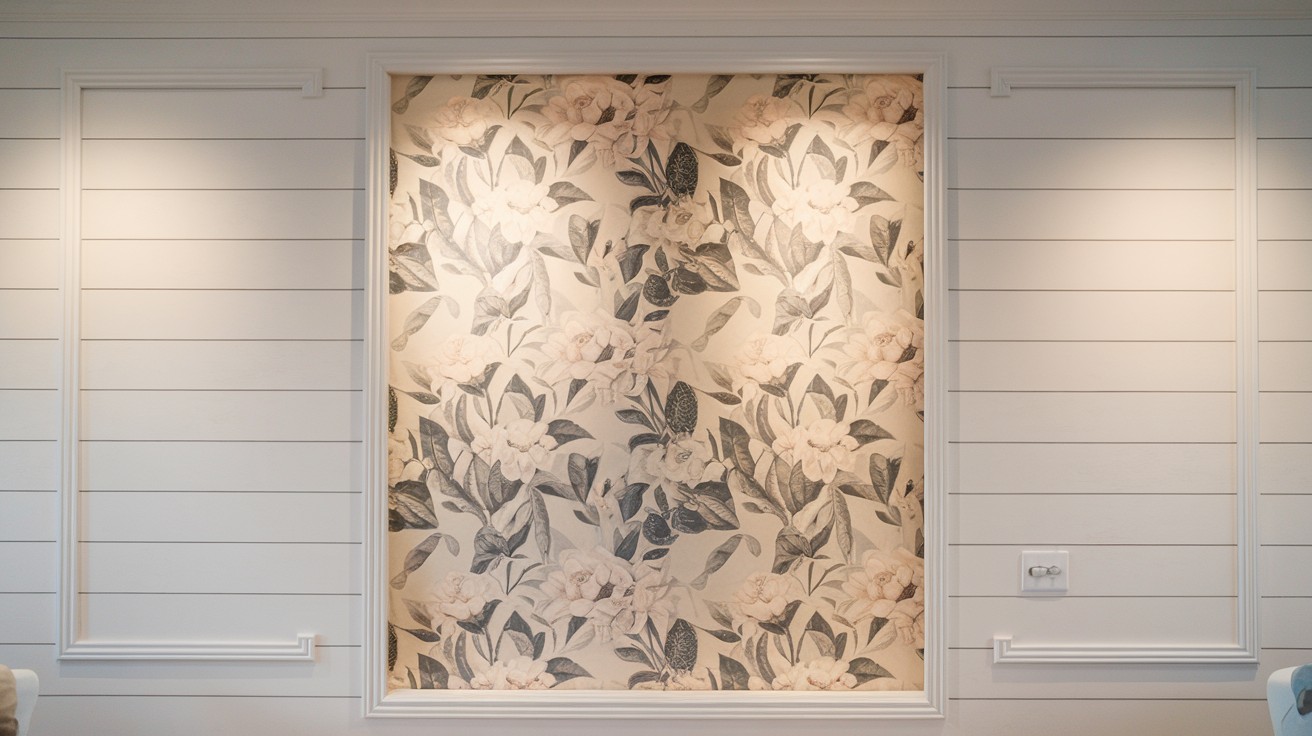
Wallpaper makes a comeback.
Create recessed panels in shiplap walls. Frame them with trim, then install wallpaper inside. This adds pattern and color without overwhelming the space.
Use removable wallpaper for easy changes.
Wallpaper panel needs:
- Removable or traditional wallpaper
- Frame lumber for panel borders
- Wallpaper adhesive or paste
- Smoothing tools for bubble-free application
Pro tip: Install wallpaper panels before final trim installation. This lets you hide any imperfect wallpaper edges under the trim for clean results.
Pro Tips for Installing & Finishing Shiplap Trim
Plan your installation order. Install shiplap first, then trim. This lets you hide cut ends and create tight joints. Pre-finish when possible. Prime and paint trim before installation. Touch up nail holes afterward. This saves hours of cutting around installed pieces.
Use the right fasteners. 15-gauge finish nails for most trim. 18-gauge brads for thin pieces. Pre-drill hardwoods to prevent splitting. Cope inside corners. Don’t miter inside corners on profile moldings. Cope the second piece to fit the profile of the first. This creates tight joints that won’t open.
Fill nail holes properly. Use paintable wood filler, not caulk. Overfill slightly, then sand smooth when dry. Caulk is your friend. Fill gaps between trim and walls with a paintable caulk. Smooth with your finger for professional results.
Paint technique matters. Use a brush for the first coat, roller for the second. This fills grain and creates smooth finishes. Check walls first. Shiplap only looks as good as the walls behind it. Fix any waves or bumps before installation.
Final Thoughts
You now have 37 real solutions for your shiplap trim problem.
I’ve given you options for every budget. From free leftover boards to luxury brass inlays. From simple caulk lines to complex crown molding stacks. Pick the style that matches your home. The farmhouse gets chunky wood. Modern gets clean lines.
Traditional gets detailed molding.
Start with one room. Test your choice before going house-wide. Buy samples first. Install a small section to see how it looks. Take your time with installation.
Rushed trim work looks amateur. Measure twice. Cut once. Fill every nail hole.
The right trim makes your shiplap look expensive. Your walls will thank you for choosing wisely.
Frequently Asked Questions
What’s the cheapest way to trim shiplap edges?
Use leftover shiplap boards ripped down to 2-3 inches wide. This creates a perfect color match for practically free.
Should I paint trim before or after installing it?
Paint trim before installation, then touch up nail holes afterward. This saves hours of cutting around installed pieces.
Can I use the same trim on walls and ceilings?
Yes, but make ceiling trim slightly wider for proper visual weight. Walls look best with 2-4 inch trim, ceilings need 4-6 inches.
How do I handle corners where shiplap meets regular walls?
Use flat transition strips the same thickness as your shiplap. Sand the joint smooth and paint for a seamless material change.
What’s the best trim for bathroom shiplap?
PVC or composite trim handles moisture better than wood. Use quarter-round corners and caulk every joint with mold-resistant caulk.