
Your roof is more than just shingles on top of your house. It’s a complex system of parts working together to keep you dry and comfortable. Each component has a specific job, from supporting weight to directing water away from your home.
This guide breaks down every roof part in simple terms. I’ll explain what each piece does and where you’ll find it. By the end, you’ll understand your roof like never before.
Are you a new homeowner? Renter curious about building basics? DIY enthusiast getting started? This guide is perfect for you. No construction experience needed. Just basic curiosity about how your home works.
Think of this as your roof’s instruction manual. Simple explanations, practical tips, and real-world examples throughout.
Let’s explore the anatomy of your roof together.
What Is a Roofing Structure?
Think of your roof as a protective shell with two main jobs. First, it holds everything up. Second, it keeps the weather out.
Every roof has two types of parts:
- Structural parts form the skeleton. These are the bones that give your roof its shape and strength. They include rafters, trusses, and support beams.
- Protective layers form the skin. These keep water, wind, and sun from getting inside. Shingles, underlayment, and flashing all fall into this category.
Both types work as a team. Remove one part, and the whole system suffers.
The structure starts from the inside and builds outward. Frame first, then deck, then protective layers. Each layer depends on the one below it.
The Core Structural Parts of a Roof
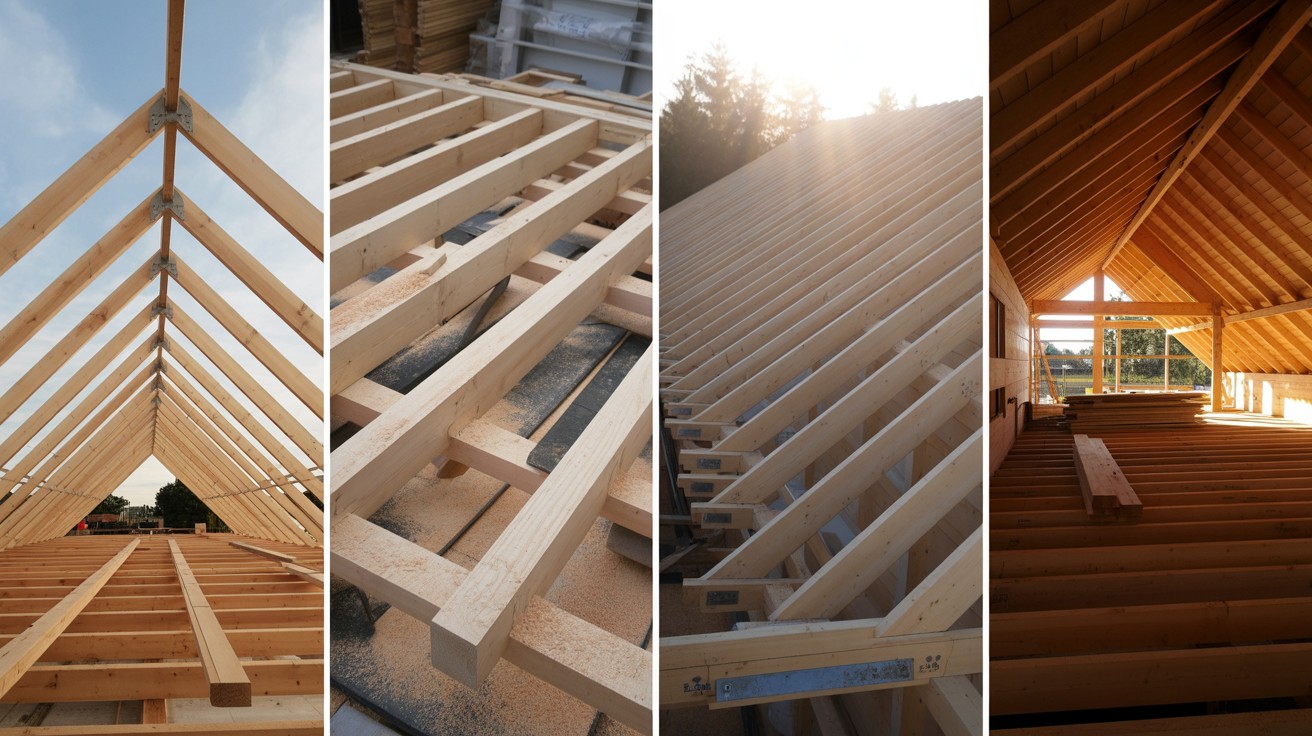
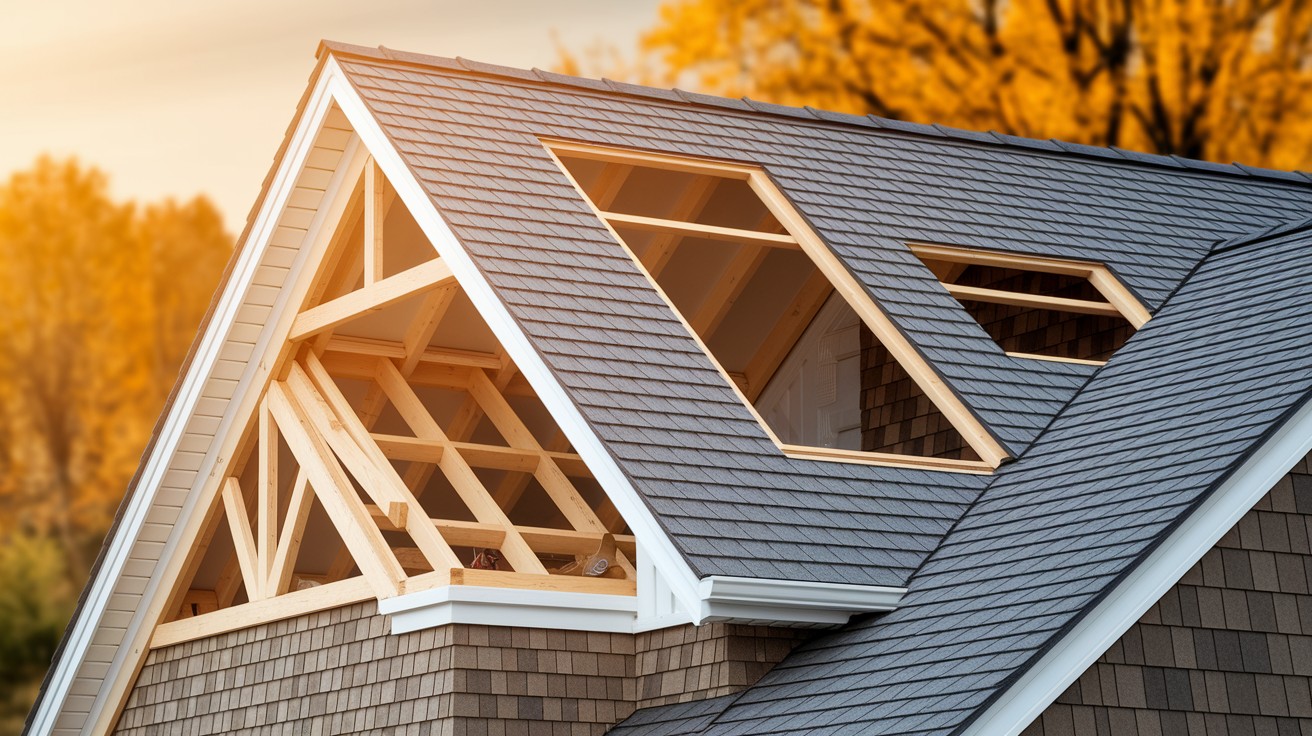
Rafters
Rafters are angled wooden beams that create your roof’s slope. They run from the bottom edge to the peak, forming triangular supports.
These boards carry serious weight—roof deck, shingles, snow, and wind loads. Most are 2×8 or 2×10 lumber spaced 16 to 24 inches apart.
Trusses
Trusses do the same job as rafters but work differently. They’re factory-made triangular units that arrive ready to install.
Each truss is engineered for your specific roof load. Installation is fast—a crane lifts each unit into place. Most modern homes use trusses because they’re stronger and cheaper.
Ridge Board / Ridge Beam
The ridge board runs horizontally along your roof’s peak where all rafters meet. It keeps everything aligned and prevents sagging.
Ridge beams are thicker versions that carry more weight across longer spans.
Ceiling Joists
Ceiling joists run horizontally across your home, supporting your ceiling and helping brace the rafters. They prevent walls from spreading under the roof’s weight.
In truss systems, the bottom chord serves as the ceiling joist. They also create your attic floor.
Roof Deck or Sheathing
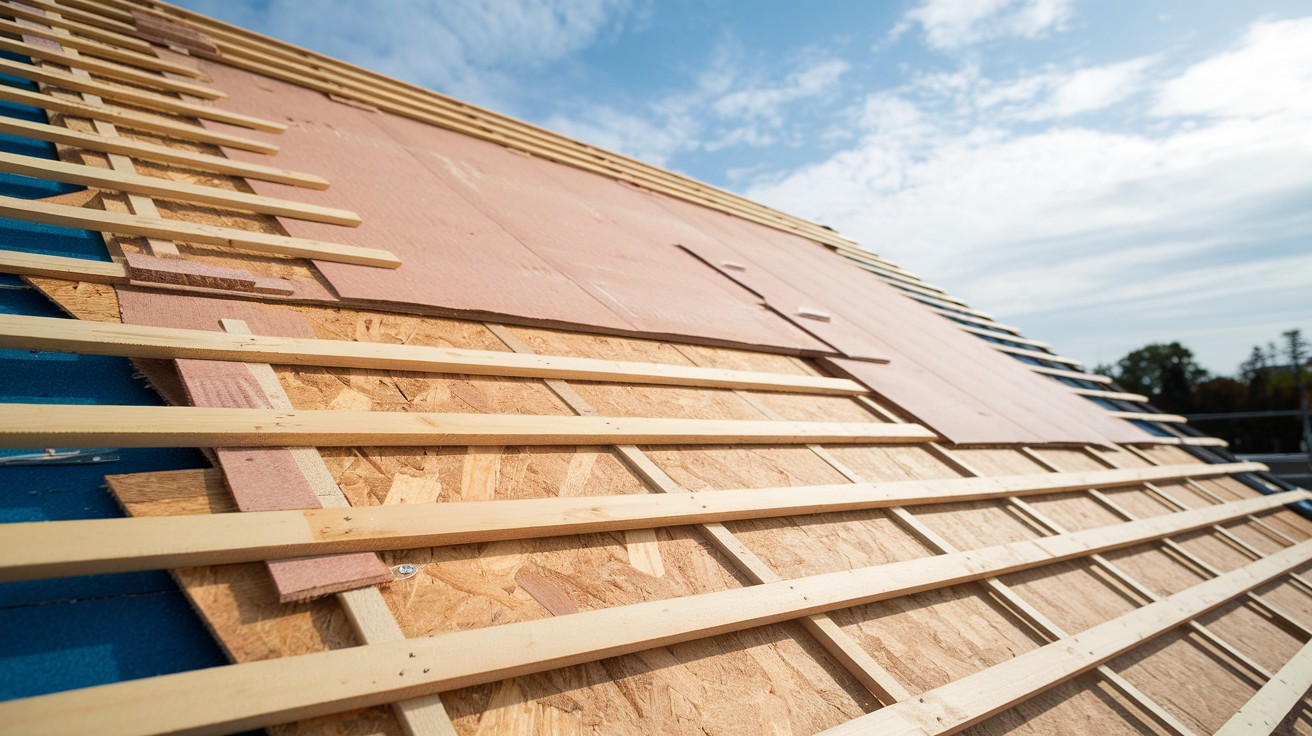
The roof deck is your roof’s foundation layer—usually plywood or OSB sheets nailed directly to rafters or trusses.
These create a solid, flat surface for everything else. Typical thickness is 1/2-inch or 5/8-inch.
Everything builds on this deck. Without proper decking, shingles would sag, and water would pool instead of running off.
Roof Covering: Layers of Protection
Underlayment
Underlayment is your roof’s second line of defense. It goes between the deck and shingles—waterproof protection if water gets past the shingles.
Common types include felt paper, synthetic materials, and rubber membranes. Modern synthetic versions last longer and work better than old tar paper.
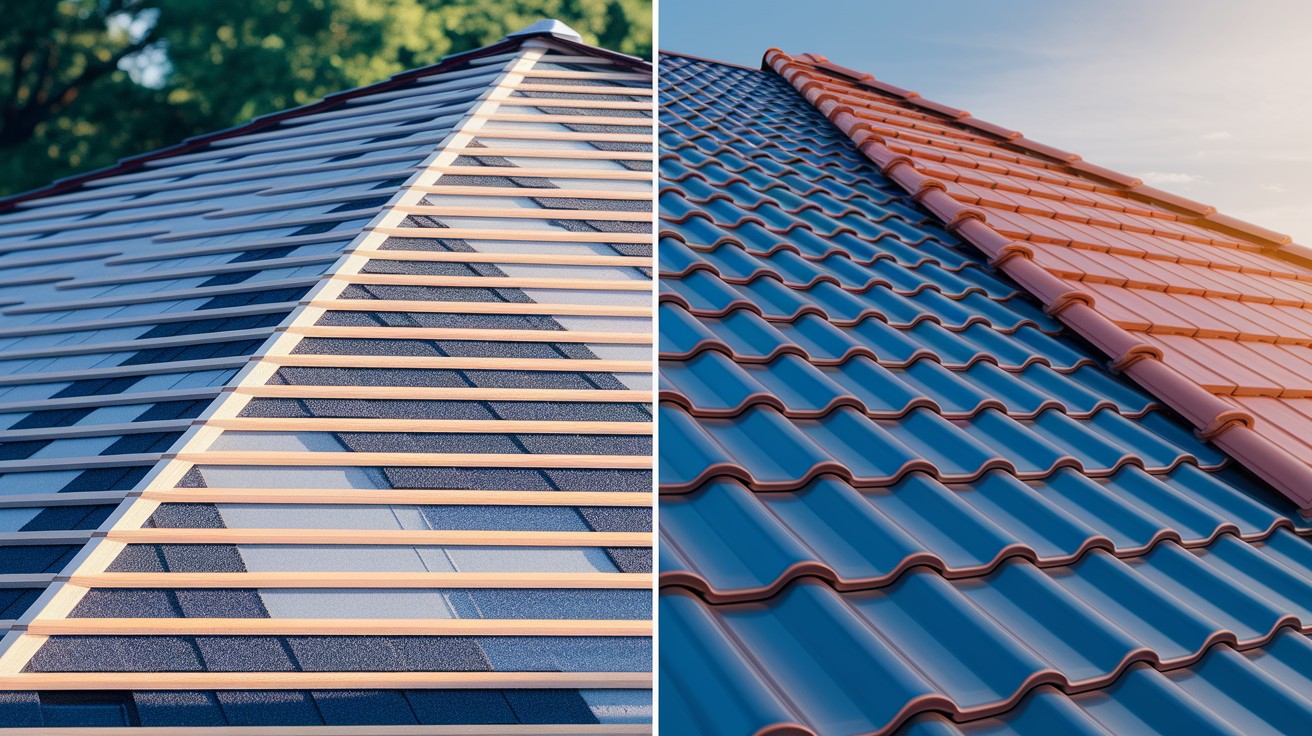
Shingles or Roofing Tiles
Shingles are the visible, outermost layer. Materials include asphalt (most popular), metal, clay tiles, wood, and slate.
Each material offers different looks, costs, and lifespans. Shingles overlap like fish scales to shed water effectively.
Roof Edges and Trim
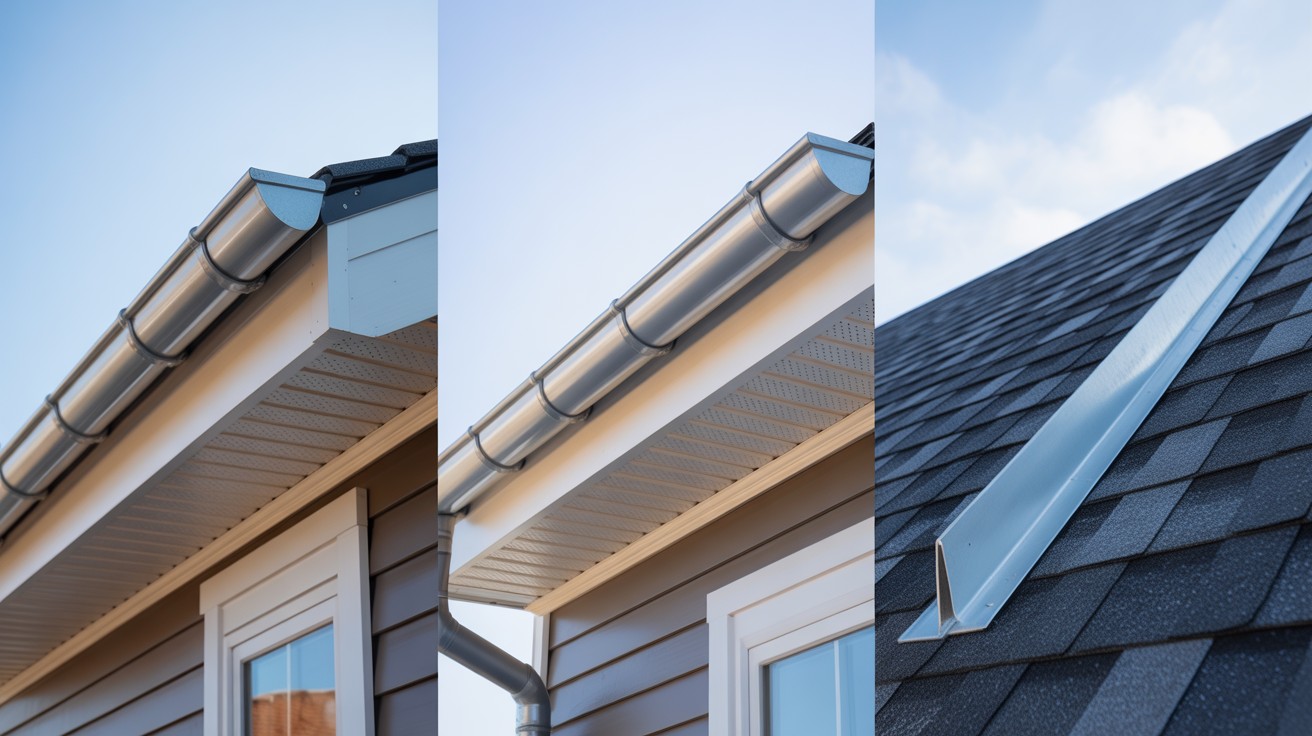
Fascia
Fascia boards run horizontally along your roof’s edge. They support gutters and give your roof a finished look.
Usually 1×6 or 1×8 lumber, painted to match your trim. Check regularly for rot or damage.
Soffit
Soffit covers the underside of your roof overhang. Many panels have ventilation holes for attic airflow.
Common materials include vinyl, aluminum, and wood. Vinyl is popular because it never needs painting.
Drip Edge
Drip edge is a thin metal flashing along roof edges. It guides water into gutters instead of behind them.
Without a drip edge, water runs back under shingles or down fascia boards, causing rot. It’s the cheap insurance every roof needs.
Ventilation Components
Proper ventilation prevents moisture buildup, reduces energy costs, and extends roof life.
Ridge Vents
Ridge vents run along your roof peak, letting hot air escape. They work with soffit vents to create airflow.
These vents are nearly invisible, covered with matching shingles. Most are about 2 inches wide.
Soffit Vents
Soffit vents bring fresh air into your attic as the intake side of ventilation. They’re built into soffit panels.
Rule of thumb: 1 square foot of ventilation per 300 square feet of attic space, split evenly between intake and exhaust.
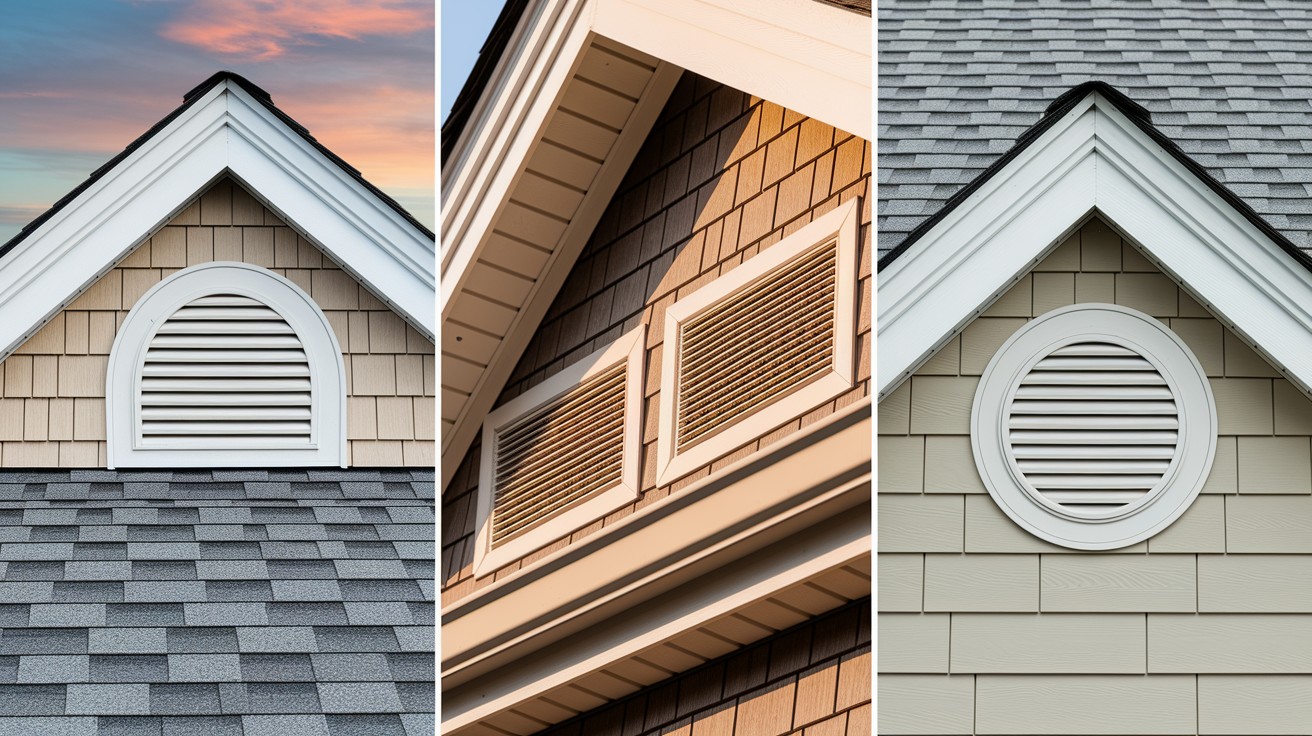
Gable/Turbine Vents
Gable vents mount on triangular wall sections. Turbine vents are spinning units on the roof slopes.
Both the supplement ridge and the soffit vents. Don’t mix too many types—it disrupts airflow patterns.
Water Management Features
Gutters
Gutters collect roof water and channel it away from your home. They attach to fascia boards and prevent foundation erosion.
Common materials include aluminum, vinyl, steel, and copper. Clean them regularly to prevent clogs.
Downspouts
Downspouts are vertical pipes carrying water from gutters to the ground. They should dump water at least 6 feet from your house.
One downspout handles about 600 square feet of roof area. Larger roofs need multiple downspouts.
Flashing: Invisible but Critical
Flashing is thin metal that seals gaps and joints in your roof—usually aluminum, steel, or copper.
You’ll find it around chimneys, vent pipes, skylights, and where roof sections meet. Valley flashing runs where slopes meet. Step flashing goes along walls in stair-step patterns.
Most roof leaks happen at flashing, not through shingles. Inspect regularly for damage or separation.
Extra Roof Features
Chimneys: Chimneys need special attention where they penetrate your roof. They require flashing, proper sealing, and sometimes cricket installation to direct water around them.
Skylights: Skylights bring natural light into your home but create potential leak points. They need careful flashing and high-quality installation.
Dormers: Dormers are small roof sections that project from the main roof. They add space and light to upper floors but create complex flashing situations.
Each of these features adds character to your home. They also require extra maintenance and careful installation.
Roof Shapes & Their Influence
Different roof shapes use the same basic components arranged in different ways.
- Gable roofs are simple triangular shapes. They’re easy to build and shed water well.
- Hip roofs slope on all four sides. They’re stronger in high winds but more complex to build.
- Shed roofs have a single slope. They’re simple and modern-looking.
- Flat roofs aren’t flat—they have a slight slope for drainage. They use different materials and techniques.
- Mansard roofs have two slopes on each side. The lower slope is steeper than the upper slope.
Each shape affects how you install gutters, flashing, and ventilation. But the basic parts remain the same.
Signs of Trouble: Beginner Clues to Look For
- Missing, cracked, or curling shingles
- Exposed nail heads or loose shingles
- Damaged or sagging fascia boards
- Clogged or overflowing gutters
- Water stains on ceilings or walls
- Granules from asphalt shingles in gutters
- Damaged or missing flashing around penetrations
- Ice dams form in winter
- Excessive moss or algae growth
- Sagging roof sections or ridge lines
Quick Roof Care Tips for Beginners
- Clean gutters twice yearly—spring and fall
- Trim tree branches away from your roof
- Check flashing around chimneys and vents annually
- Remove debris from the roof surface safely
- Inspect the attic for leaks after heavy storms
- Keep soffit vents clear of insulation and debris
- Schedule professional inspections every 3-5 years
- Address small problems before they become big ones
- Never walk on wet or steep roofs—call professionals
Conclusion
Understanding your roof’s parts makes you a smarter homeowner. You can spot problems early, communicate better with contractors, and make informed repair decisions.
Each component I’ve described serves a specific purpose. From rafters holding everything up to flashing keeping water out, every part matters. When one fails, others suffer too.
Regular maintenance keeps all these parts working together. Simple tasks like cleaning gutters and checking for damage can prevent expensive repairs later.
Keep this guide handy for reference. Share it with friends who are learning about their homes, too. The more you know about your roof, the better you can protect your biggest investment.
Your roof protects everything else in your home. Now you know how it does its job.
Frequently Asked Questions
How often should I inspect my roof?
Inspect your roof twice a year—once in spring and once in fall. Als,o check after severe storms. Look from the ground first, then consider professional inspection for r detailed assessment.
What’s the difference between rafters and trusses?
Rafters are individual boards cut and assembled on-site. Trusses are factory-made units that arrive ready to install. Trusses are typically stronger and faster to install, while rafters allow more attic space.
Do I need roof ventilation?
Yes, proper ventilation is essential. It prevents moisture buildup, reduces energy costs, and extends your roof’s life. Good ventilation combines intake vents (soffits) with exhaust vents (ridge vents).
When should I replace my roof instead of repairing it?
Consider replacement if your roof is over 20 years old, has widespread damage, needs frequent repairs, or has structural issues. A professional inspection can help you decide between repair and replacement.
Can I install roof parts myself?
Some tasks, like gutter cleaning and minor repairs, are DIY-friendly. However, structural work, flashing installation, and major repairs require professional expertise. Safety should always be your top priority.