
Have you ever stared at a blank plaster wall, wondering how to hang that heavy mirror without creating a disaster? You’re not alone. Plaster walls, common in older homes, present unique challenges that drywall simply doesn’t.
Unlike modern construction, these solid surfaces can crack or crumble when you use the wrong fasteners.
Choosing the correct anchor isn’t just about holding weight; it’s about preserving your beautiful walls from costly damage. That’s where Molly bolts come in.
These clever little fasteners expand behind the plaster, creating a secure grip that distributes weight evenly.
Ready to transform your wall-hanging anxiety into confidence? Let’s walk through everything you need to know about using Molly bolts effectively.
What Are Molly Bolts?
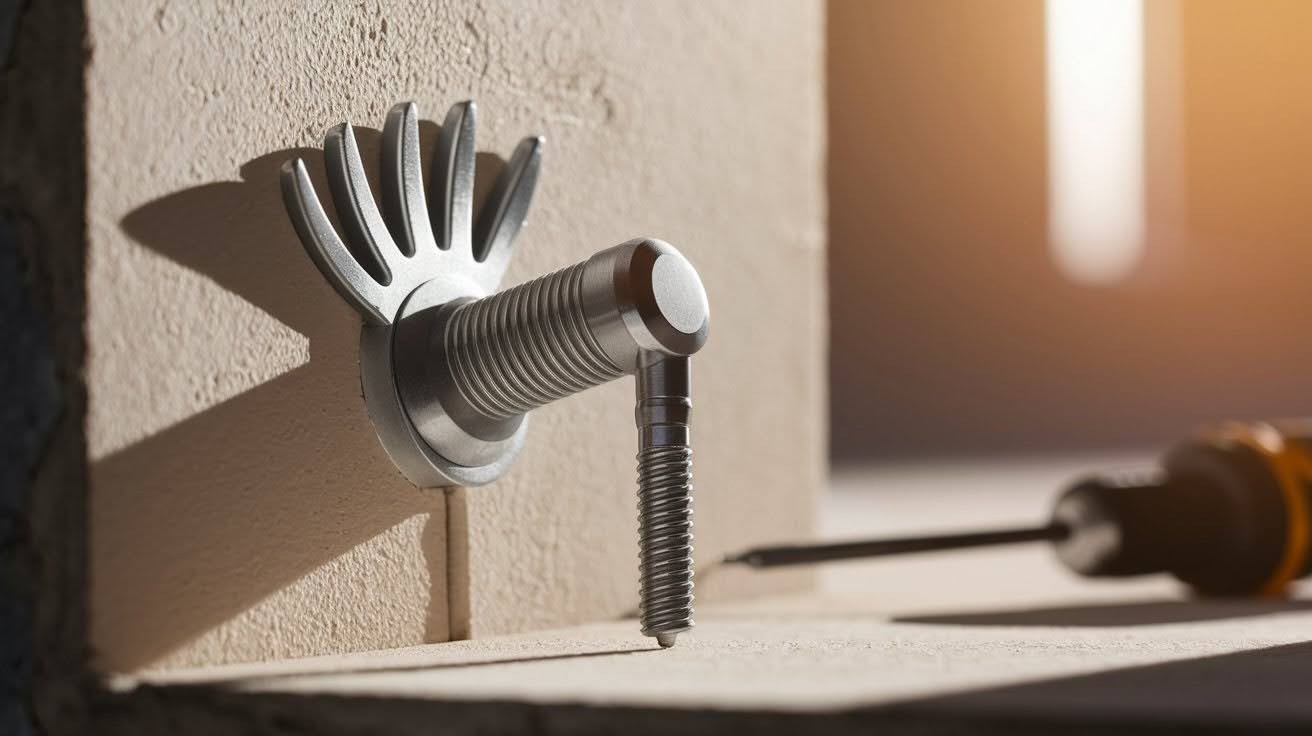
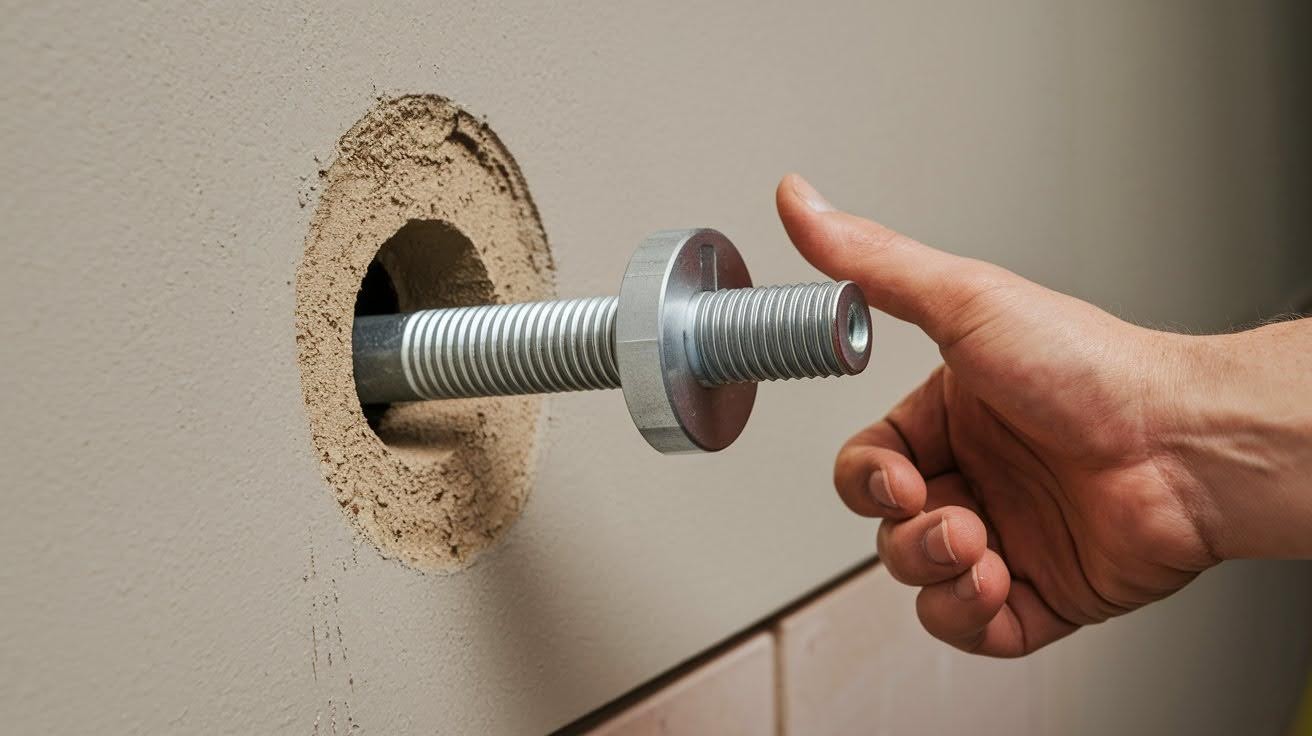
Think of Molly bolts as tiny metal umbrellas for your walls. A molly bolt consists of a metal sleeve with a special expanding mechanism inside. Nothing fancy. Just smart engineering. But here’s where it gets interesting.
When you insert the bolt and turn the screw, something cool happens. The metal sleeve spreads out like wings behind your plaster wall. This creates a broad, secure grip that won’t pull through.
The process is straightforward. You drill a pilot hole. Insert the molly bolt. Tighten the screw. Done.
The expanding sleeve grabs onto the plaster from behind, distributing weight across a larger area.
This prevents the concentrated stress that causes those dreaded cracks and holes. It’s like having a helping hand on the other side of your wall, holding everything in place.
Why Use Molly Bolts for Plaster Walls?
Your plaster walls deserve better than random screws and crossed fingers. Molly bolts offer three major advantages that make them worth every penny.
Strength and Reliability
First, they’re surprisingly strong. We’re talking about holding medium to heavy items without breaking a sweat.
That bathroom mirror you’ve been afraid to hang? No problem. Kitchen shelves loaded with dishes? They’ve got you covered. Towel racks that stay put? Absolutely.
Protects Plaster Walls
Here’s the real game changer. Molly bolts protect your walls from damage. Instead of creating stress points that lead to ugly cracks, they spread the load across a wider area. Your plaster stays intact. Your wallet stays happy.
Variety of Sizes
But wait, there’s more. Molly bolts come in various sizes to match your specific needs. Light picture frame? Use a smaller bolt. Heavy wooden shelf? Go bigger.
It’s all about matching the bolt size to your item’s weight. Smart sizing means better performance and longer-lasting results.
Step-by-Step Guide to Installing Molly Bolts
Ready to get your hands dirty? This process is easier than you think. Let’s break it down into simple steps that anyone can follow.
Step 1: Mark the Placement
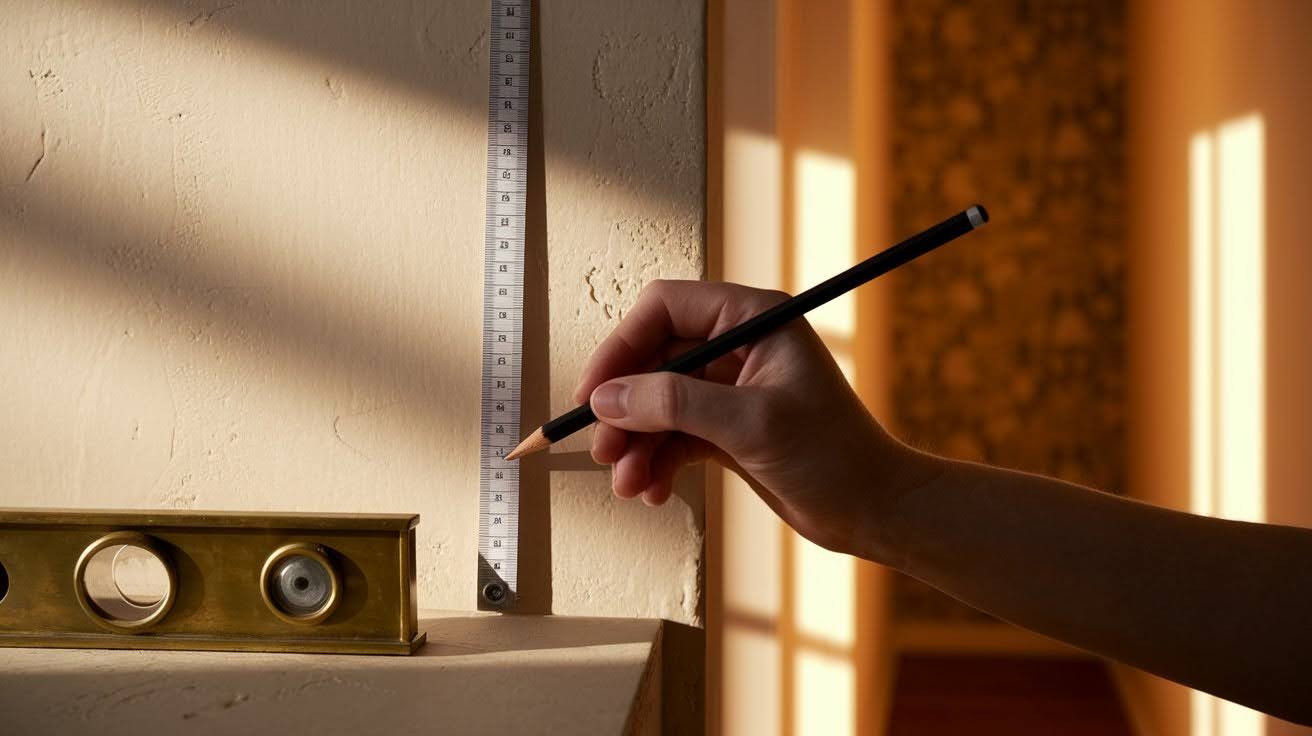
Grab your measuring tape and pencil. Measure twice, drill once. Mark the exact spot where your object will hang. Don’t skip the level here. A crooked shelf will haunt you forever. Take your time getting this right.
Step 2: Drill the Pilot Hole
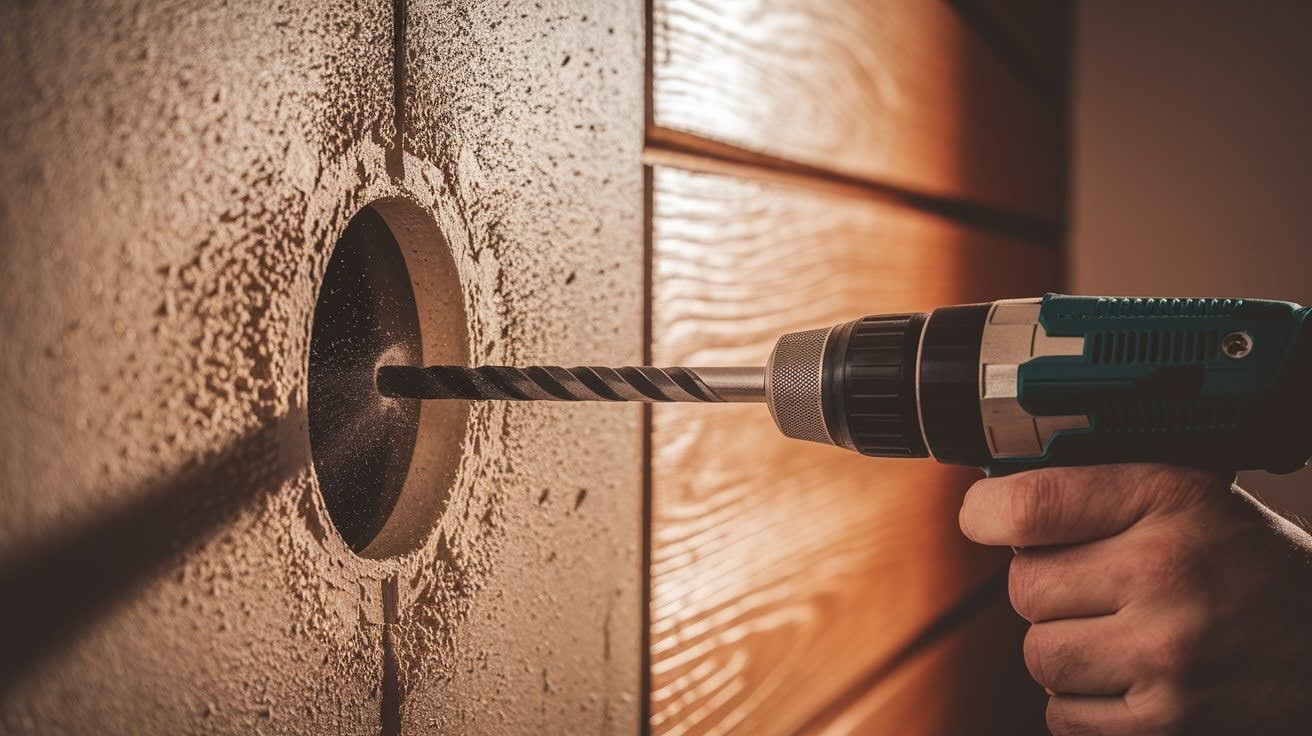
Choose a drill bit that matches your molly bolt size. This matters more than you think. Now comes the tricky part. Drill slowly into the plaster. Rushing here leads to ugly cracks that you’ll regret later.
Step 3: Insert the Molly Bolt
Push the molly bolt into your freshly drilled hole. The sleeve should sit flush against the wall surface. No gaps. No forcing it in. If it doesn’t fit easily, your hole might be too small.
Step 4: Tighten the Screw

Here’s where the magic happens. Turn the screw clockwise to expand the anchor behind the plaster. Feel for resistance. Once it’s snug, stop. Over-tightening will damage your wall and ruin your day.
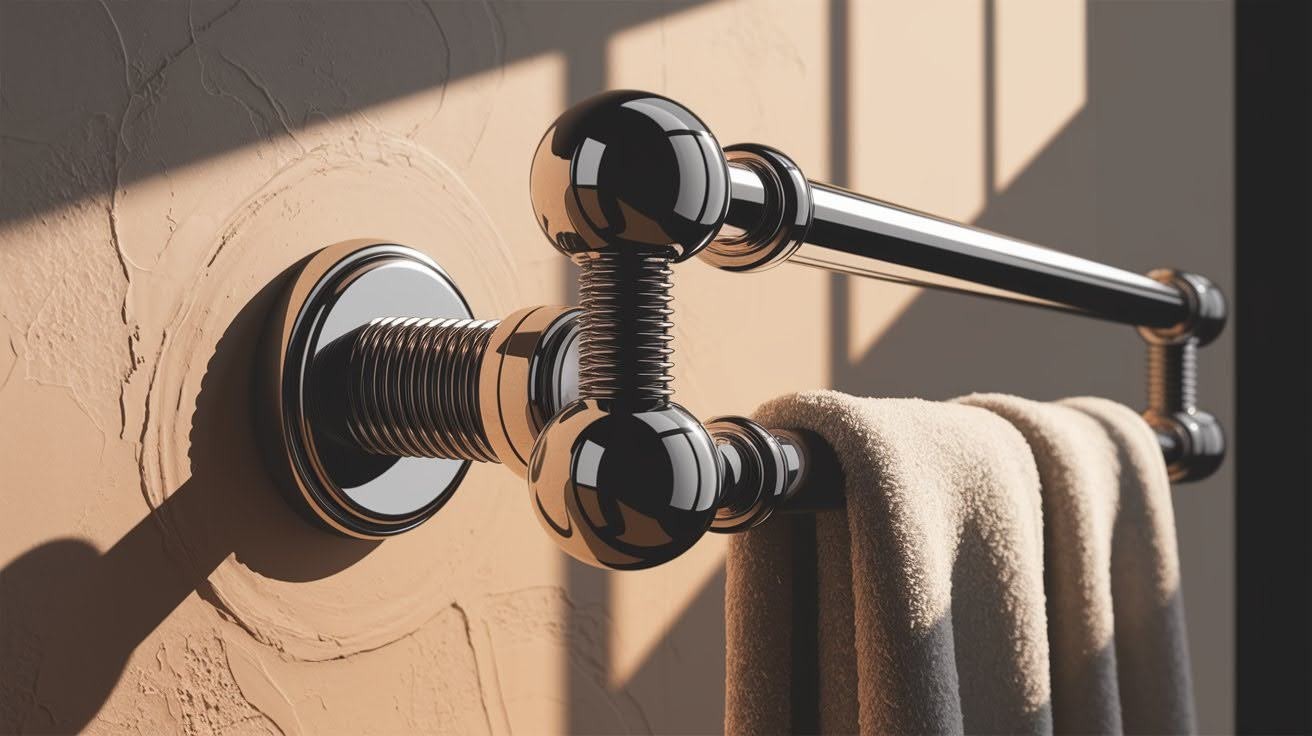
Step 5: Attach Your Object
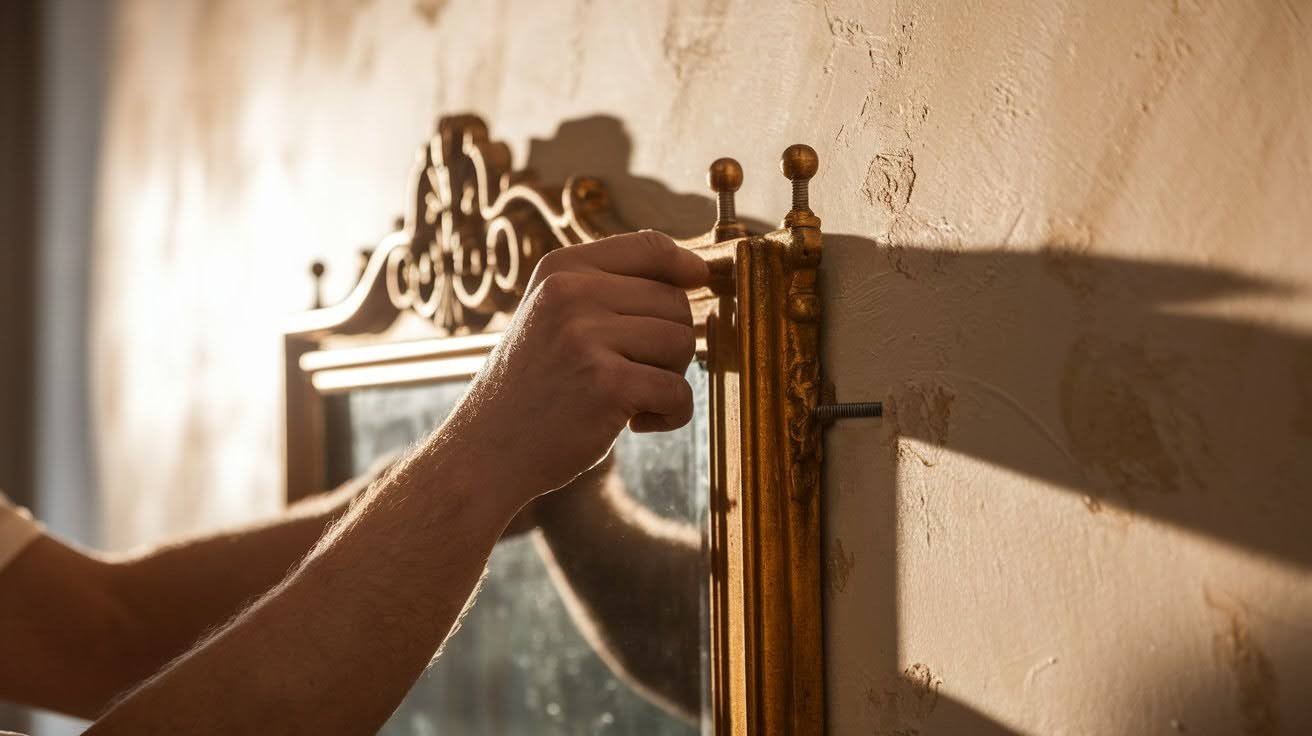
Mount your shelf, mirror, or frame onto the molly bolt. Give it a gentle shake test. Does it feel solid? Perfect. You just conquered plaster wall mounting like a pro.
Tools and Materials Needed
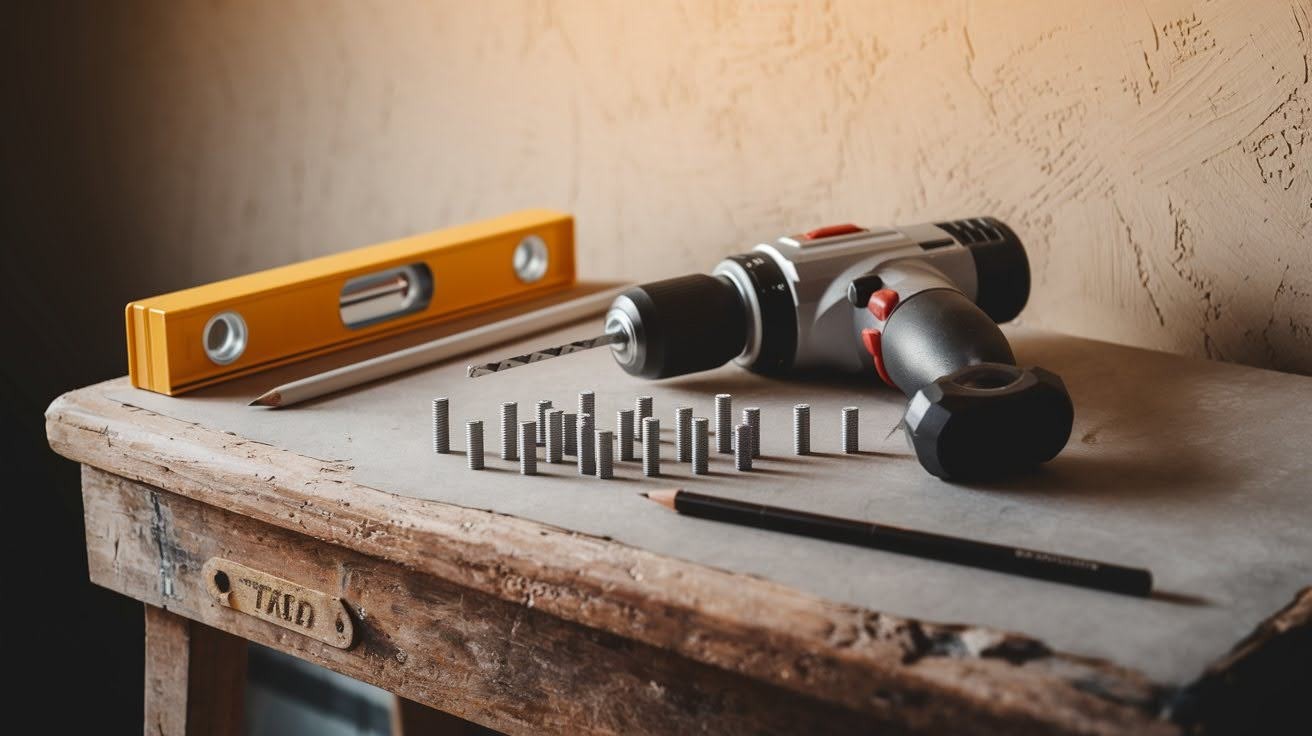
- Drill and appropriate drill bit – Match the bit size to your molly bolt diameter. This isn’t the time to guess.
- Molly bolts (correct size) – Too small and they won’t hold. Too big and you’ll damage your wall.
- Screwdriver or screw gun – A Manual screwdriver gives you better control. Screw gun works faster, but be careful not to overdo it.
- Pencil and level for marking – These simple tools make the difference between a professional-looking job and a DIY disaster.
Tips for Using Molly Bolts Effectively
Choosing the Right Size
Match your bolt size to the weight of your object. Check the package for weight ratings. When in doubt, go slightly bigger.
Avoiding Common Mistakes
Stop cranking that screw when it gets snug. Over-tightening will crush the plaster. Check your hole depth before inserting the bolt. The anchor needs room to expand properly.
For Heavier Objects
Use multiple molly bolts for large shelves, mirrors, or cabinets. Two or three bolts working together beat one stressed-out anchor every time.
Conclusion
After years of working with plaster walls, I can tell you that molly bolts are your best friend for secure installations.
They’re specifically designed to handle the unique challenges that plaster presents, giving you peace of mind when hanging everything from family photos to heavy shelving.
The key to success lies in proper installation and choosing the right size for your project. Take your time with each step, and your walls will reward you with years of reliable service.
Remember, a few extra minutes spent measuring and selecting the correct bolt size prevents costly repairs down the road.
Trust me, once you master this technique, you’ll wonder why you ever struggled with other fasteners. Your plaster walls deserve this level of care and attention.
Frequently Asked Questions
What weight can Molly bolts hold in plaster walls?
Most standard molly bolts can support 25-50 pounds in plaster walls, depending on their size. Always check the manufacturer’s weight rating on the package before installation.
Can I reuse a molly bolt hole if I remove the anchor?
No, once a molly bolt is installed and the sleeve expands, removing it leaves an oversized hole. You’ll need to patch the wall or use a larger anchor if mounting something in the same spot.
How do I know if my wall is plaster or drywall?
Push a small nail or pin into the wall in an inconspicuous area. Plaster feels hard and may chip, while drywall gives way easily and feels softer with a powdery texture.
What happens if I drill the pilot hole too big?
An oversized hole prevents the molly bolt from gripping properly, reducing its holding power significantly. Fill the hole with spackling compound, let it dry, then drill a new hole nearby.
Do I need special drill bits for plaster walls?
Regular twist drill bits work fine for most plaster installations. However, masonry bits can help prevent chipping and provide cleaner holes, especially in harder plaster surfaces.