
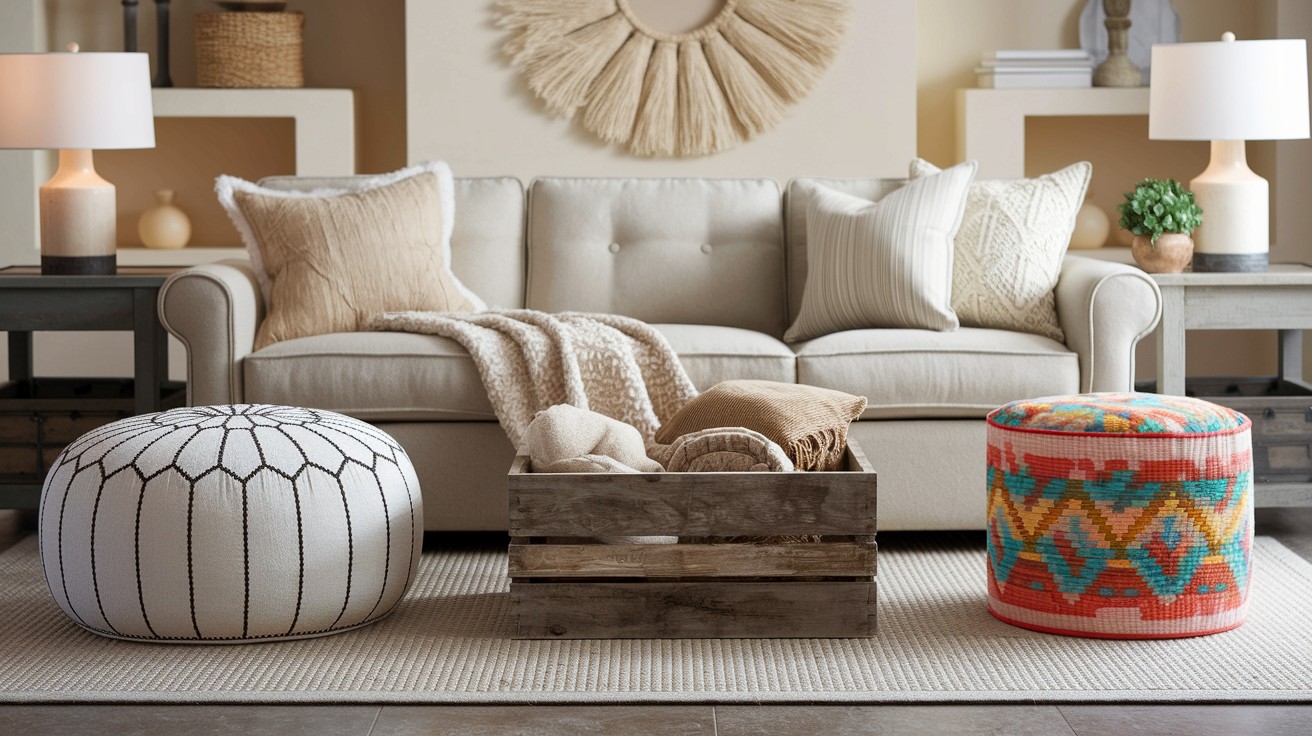
An ottoman is a versatile piece of furniture that serves multiple functions in any living space.
This padded, upholstered furniture can transform from a comfortable footstool to extra seating, storage solution, or even a coffee table alternative.
Creating your own ottoman offers significant advantages over purchasing ready-made options.
Customization allows you to select fabrics, colors, and dimensions that perfectly match your home’s décor.
You gain complete control over functionality, choosing between storage compartments or solid construction based on your needs.
Cost-effectiveness makes DIY ottomans an attractive option, often costing half the price of store-bought alternatives.
Modern ottomans serve various purposes: providing foot support while relaxing, offering additional seating for guests, concealing household items within storage compartments, or functioning as low tables for books and drinks.
Materials and Tools You’ll Need
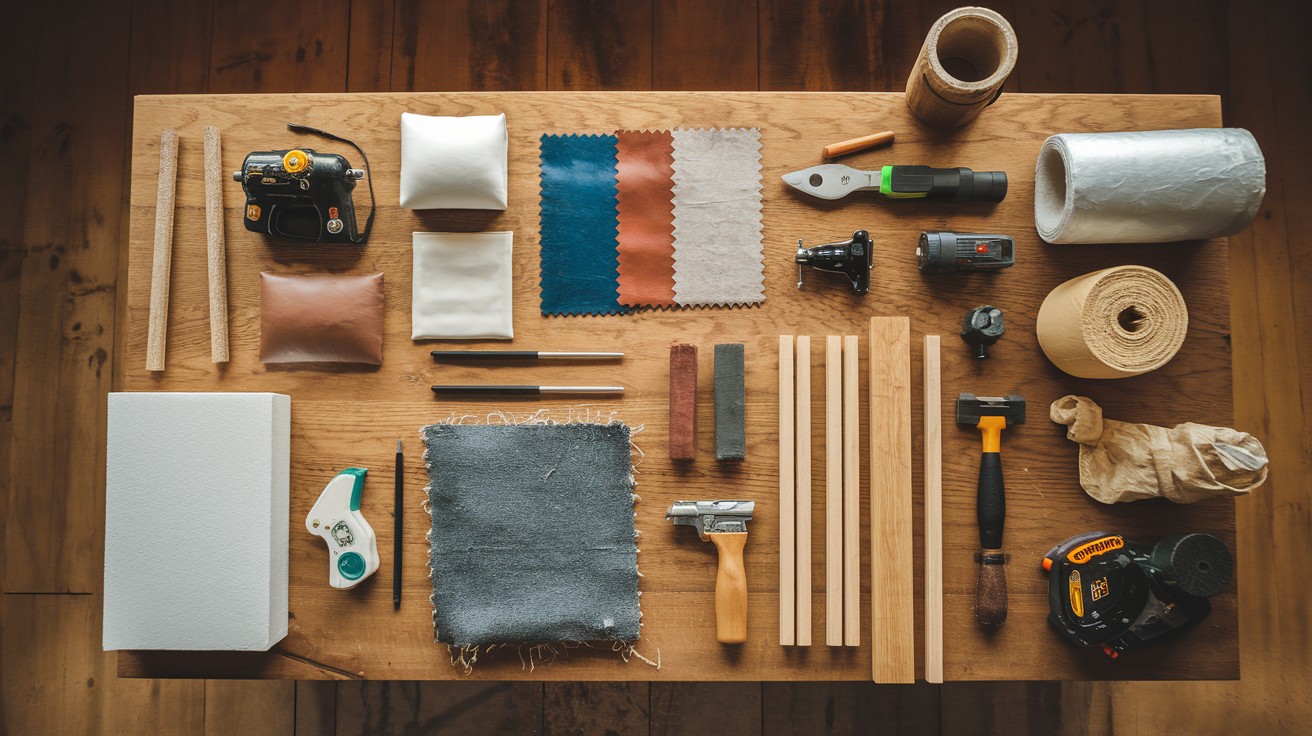
Creating a quality ottoman requires specific materials and tools that ensure both durability and professional results. The right combination of components will determine your project’s success and longevity.
Common Materials
Foam Selection
High-density foam provides the foundation for comfort and durability in your ottoman project.
Medium-firm foam ranging from 2-4 inches thick works best for seating applications, while softer variations suit footrests and light-use scenarios.
Memory foam offers premium comfort but comes at a higher cost, whereas polyurethane foam provides an excellent budget-friendly alternative for basic projects without compromising basic functionality.
Upholstery Fabric Options
Fabric selection significantly impacts both appearance and performance of your finished ottoman.
Leather provides exceptional durability and timeless appeal for high-end projects, while denim offers casual charm with easy maintenance perfect for family rooms.
Canvas delivers sturdy performance ideal for high-traffic areas, and faux leather combines affordability with authentic leather appearance.
Cotton blends provide comfort and versatility, available in countless patterns and colors to match any décor.
Base Construction Materials
The structural foundation determines your ottoman’s stability and weight capacity.
Solid wood creates robust foundations capable of supporting heavy-duty use, while plywood offers cost-effective structural support for lighter applications.
MDF provides exceptionally smooth surfaces that simplify upholstering processes, and pre-made wooden crates work excellently for quick assembly projects requiring minimal woodworking skills.
Batting and Stuffing
Proper padding materials ensure smooth finishes and enhanced comfort in your completed ottoman.
Polyester batting effectively smooths rough edges while adding overall softness, and cotton batting provides natural feel with excellent breathability.
Dacron wrap prevents foam compression over time, significantly extending your ottoman’s lifespan and maintaining its original shape and comfort level.
Essential Tools
Basic Equipment
- Sewing machine enables professional-quality seams
- Glue gun offers quick fabric attachment option
- Sharp fabric scissors ensure clean cuts
- Heavy-duty staple gun secures fabric to frames
- Standard hammer helps with assembly tasks
Power Tools for Wooden Components
- Electric drill creates precise holes for screws and hardware
- Circular saw or jigsaw cuts lumber to required dimensions
- Sander smooths rough surfaces before upholstering
Step-by-Step Guide to Make an Ottoman
Step 1: Choose Your Ottoman Style
Select your style based on function and skill level.
Upholstered ottomans offer classic comfort for seating and footrests.
Storage ottomans provide hidden compartments for blankets and items.
Upcycled base ottomans transform old tables, crates, or tires into unique pieces.
No-sew options use buckets with slipcovers for quick weekend projects.
Step 2: Prepare the Base
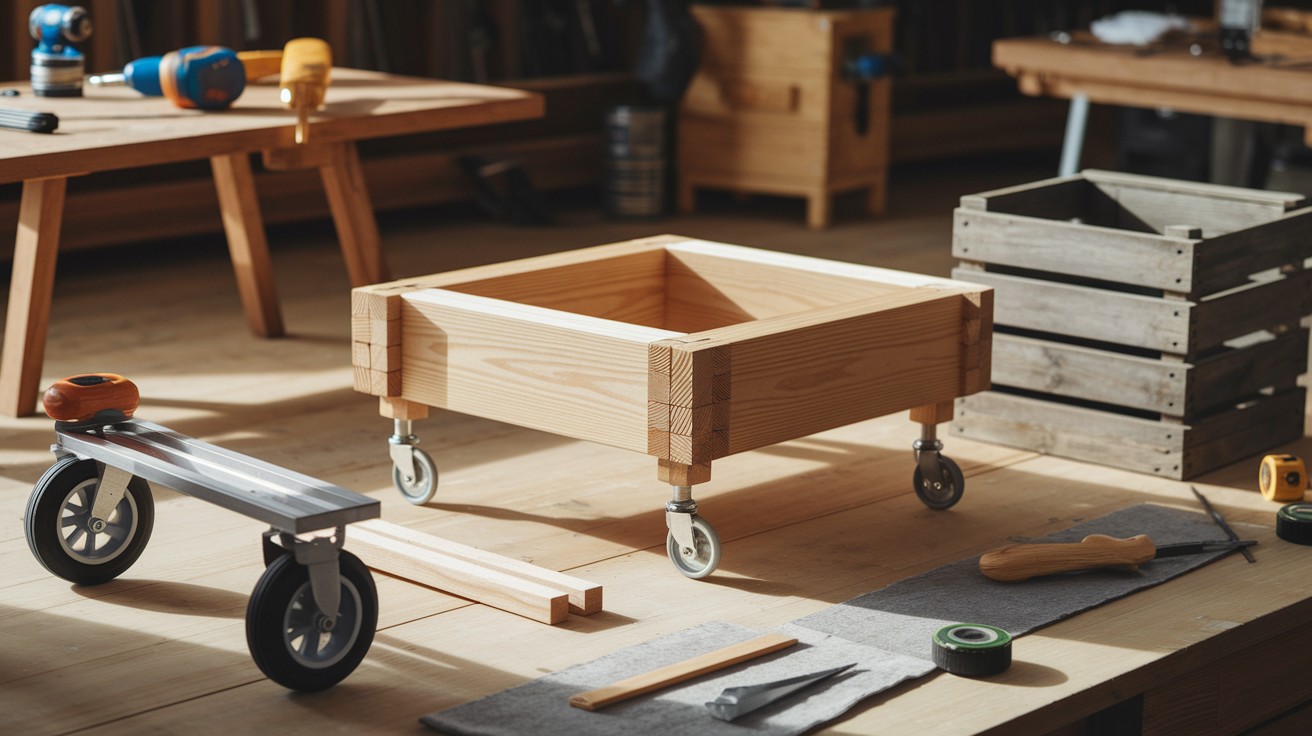
Building a Wooden Frame: Cut 2×4 lumber to size and join with screws. Sand smooth and apply stain or paint before upholstering.
Repurposing Items: Modify old coffee tables by shortening legs or use wooden crates for instant storage bases.
Adding Wheels: Install furniture casters at corners for mobility. Choose rubber wheels for hardwood floors, larger wheels for carpet.
Step 3: Cut and Attach Foam
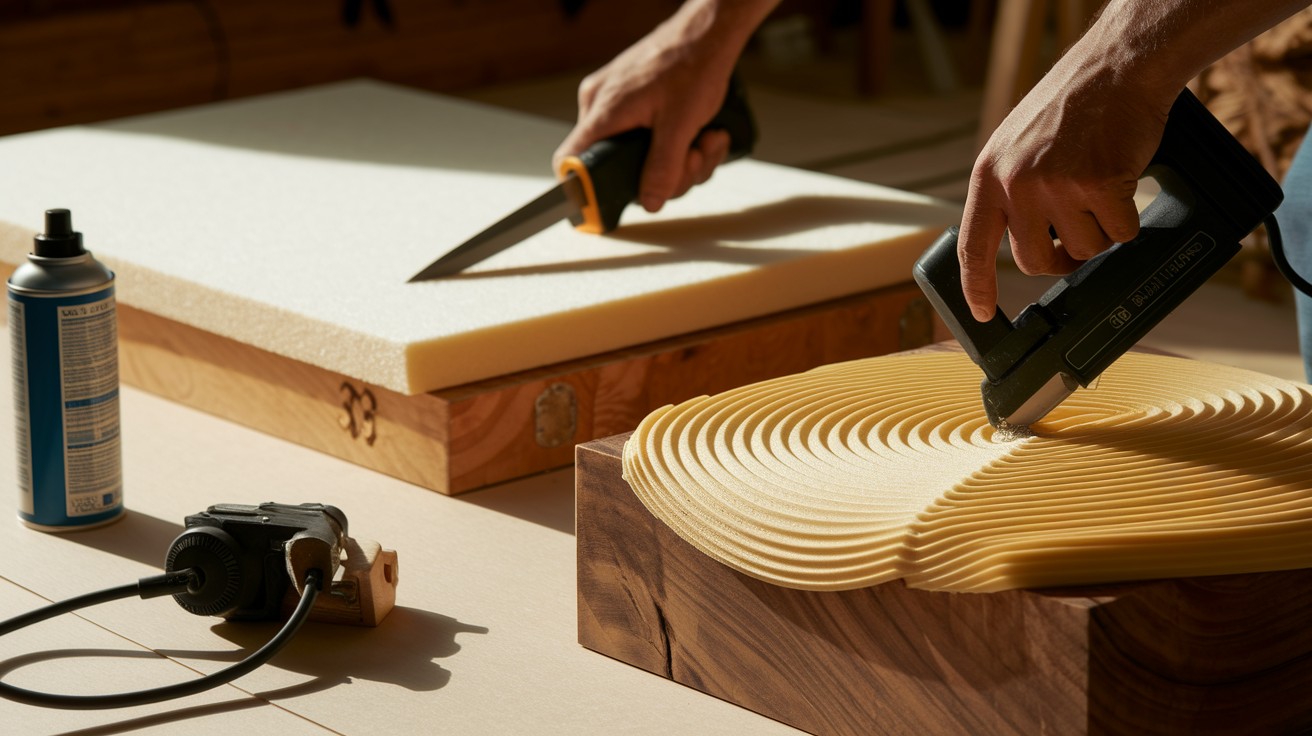
Selecting Foam: Use high-density foam (2.5-3.0 lbs/cubic foot) in 3-4 inch thickness for seating, 2-3 inches for footrests.
Cutting: Measure base precisely and cut foam slightly larger than dimensions using electric or serrated knives.
Securing: Apply spray adhesive to base and foam, or use heavy-duty staples around perimeter for attachment.
Step 4: Upholster Your Ottoman
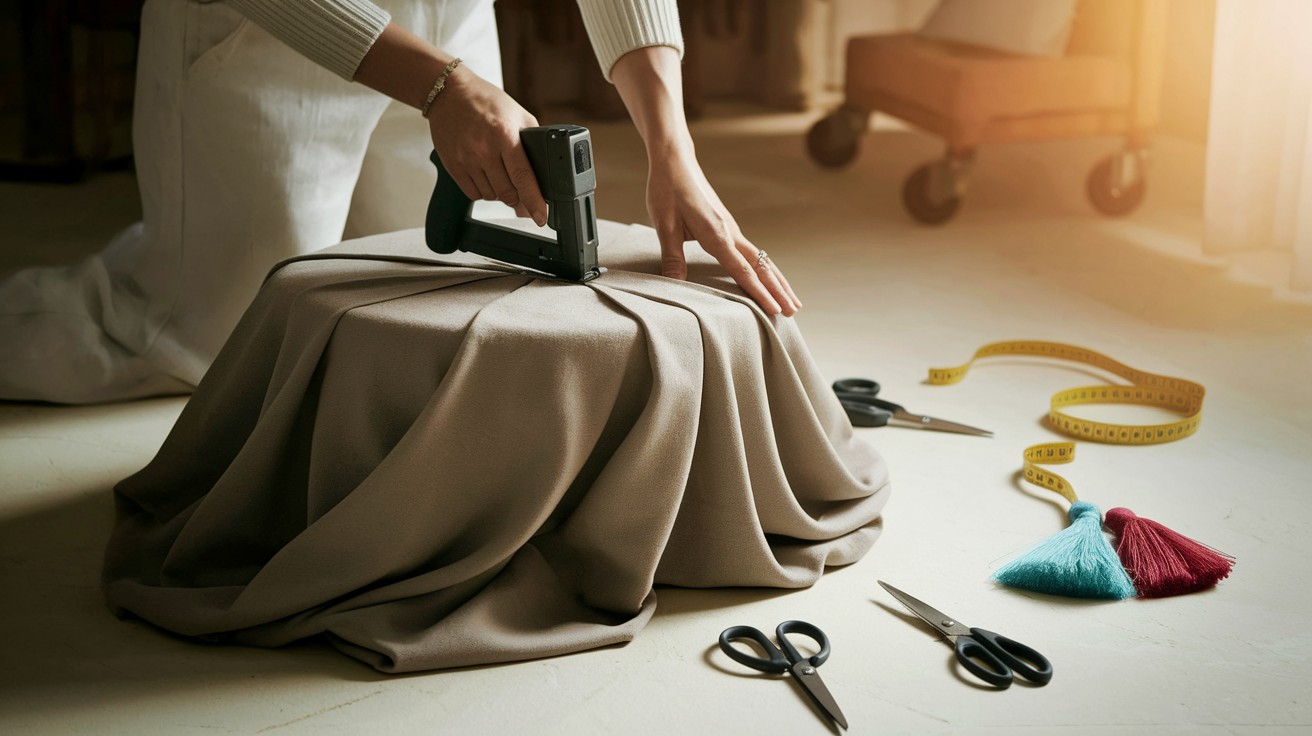
Fabric Selection: Choose heavy-duty upholstery fabrics for durability. Consider stain-resistant treatments for family areas.
Application: Cut fabric with 4-6 inches excess. Pull taut while stapling from center outward. Create neat corner folds and trim excess.
Details: Add tufting with buttons and cord, decorative tassels at corners, or zippers for removable covers.
Step 5: Add Functional Features
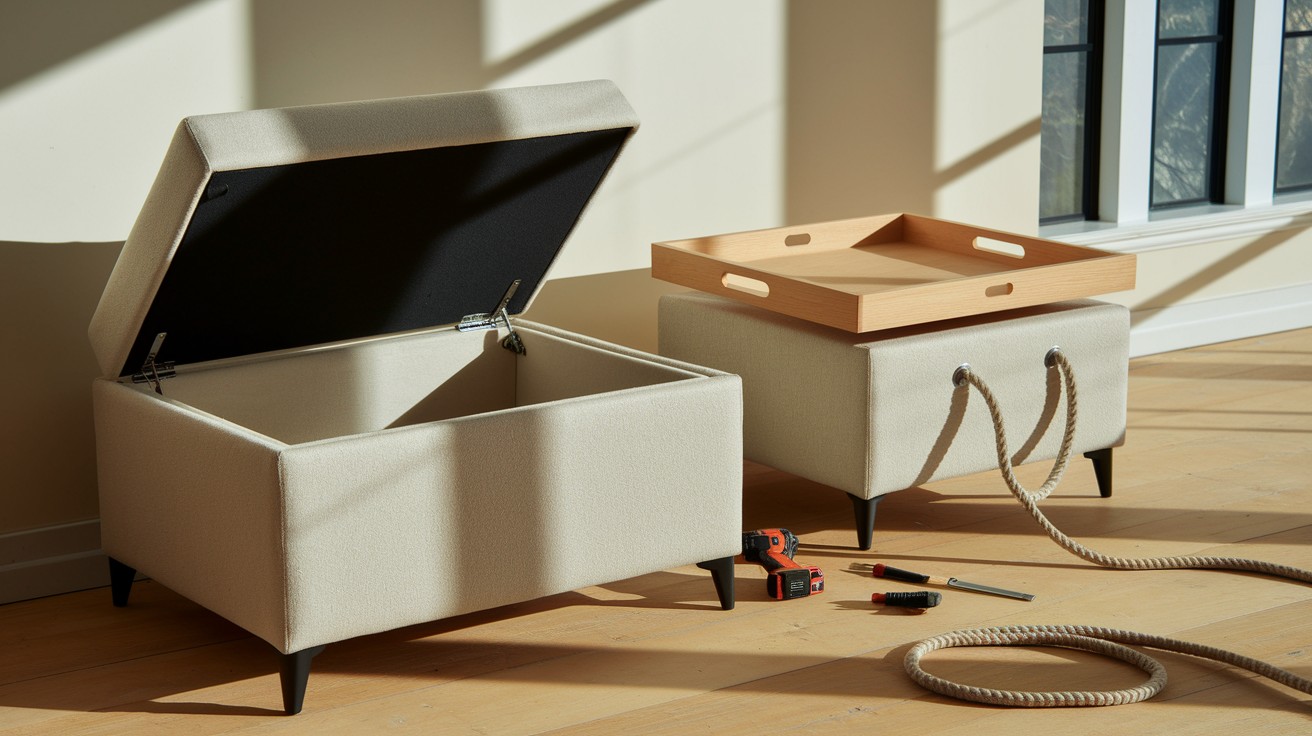
Storage: Install piano hinges for flip-top lids or add finger pulls for removable tops. Line interiors with fabric.
Flat Surfaces: Add thin plywood panels covered with fabric to create stable surfaces for trays or laptops.
Mobility: Install rope handles or retractable wheels for easy repositioning.
Step 6: Finishing Touches
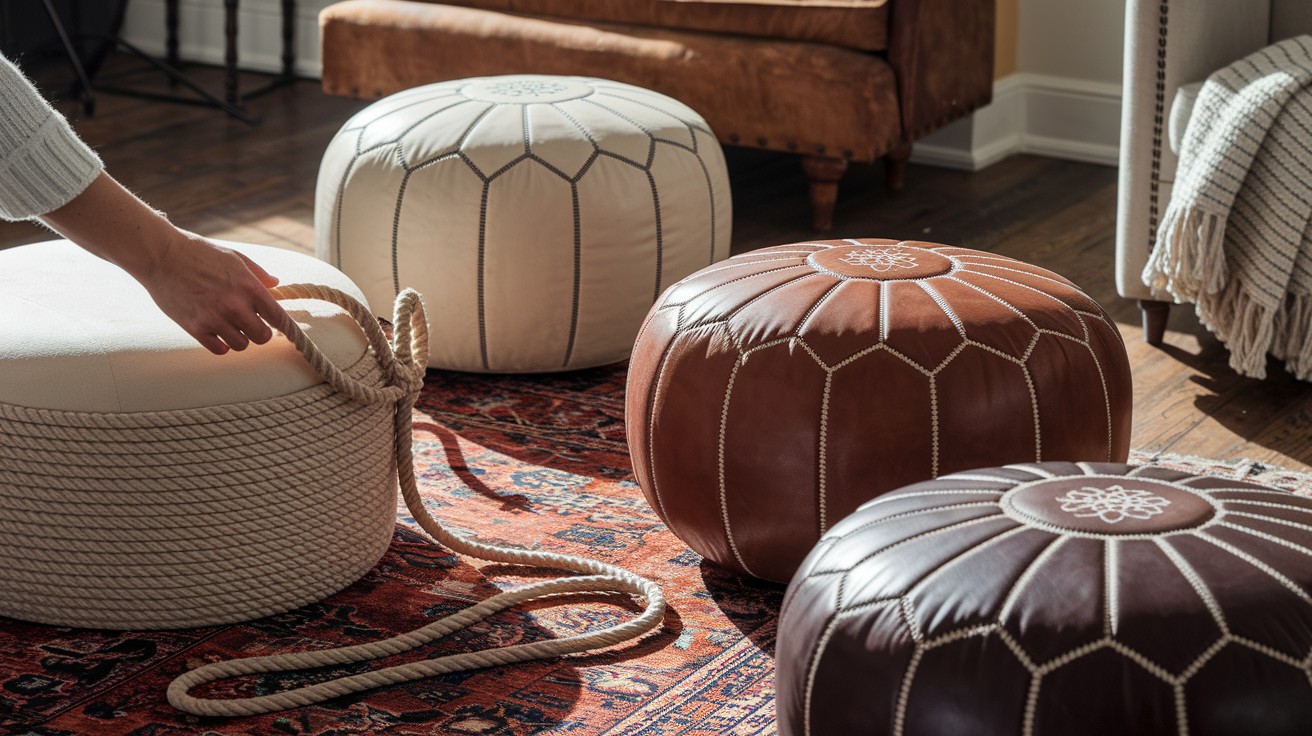
Decoration: Wrap bases with rope for rustic themes, paint wooden elements, or layer vintage rugs for protection and style.
Protection: Apply fabric protector sprays and leather conditioners. Reapply annually for continued effectiveness.
Placement: Position for maximum function and visual appeal. Use as coffee table alternatives or group for flexible seating.
Tips for Beginners
Starting your first ottoman project can feel overwhelming, but these practical strategies will help you achieve professional results while building confidence.
Start with Simple Projects Begin with basic floor poufs or slipcover designs before attempting complex storage ottomans.
Floor poufs require minimal construction – simply stuff fabric covers with batting or foam scraps.
Slipcover ottomans allow you to practice fabric techniques on existing furniture without permanent modifications.
These projects teach fundamental skills without major time or material investments.
Use Glue Guns for No-Sew Solutions Hot glue guns provide excellent alternatives to sewing machines for fabric attachment.
Apply glue in small sections to prevent cooling before fabric placement.
This method works particularly well for securing trim, attaching decorative elements, or creating quick prototypes. Keep extra glue sticks on hand and work in well-ventilated areas for safety.
Upcycle Old Furniture for Budget-Friendly Options Transform existing pieces rather than building from scratch to reduce costs and complexity.
Old footstools, coffee tables, or storage cubes make excellent starting points. Simply add foam padding and new fabric to create fresh looks.
Thrift stores and garage sales offer inexpensive furniture perfect for practice projects. This approach lets you experiment with techniques without significant financial risk.
Conclusion
Creating your own ottoman involves six essential steps: selecting your preferred style, preparing a solid base, cutting and attaching comfortable foam, upholstering with quality fabric, adding functional features, and applying finishing touches.
Each stage builds upon the previous one to create furniture that perfectly matches your home’s needs and aesthetic.
Don’t hesitate to customize designs and experiment with different materials, colors, and techniques.
Your creativity can transform basic instructions into unique pieces that reflect your personal style.
Try combining various fabric patterns, mixing textures, or incorporating unexpected elements that make your ottoman truly one-of-a-kind.
We’d love to see your completed projects! Share photos of your handmade ottomans and inspire others to start their own furniture-making adventures.
Your success stories and creative variations help build a community of DIY furniture enthusiasts.
Frequently Asked Questions
What type of foam should I use for my ottoman?
High-density foam between 2.5-3.0 pounds per cubic foot provides the best durability and comfort for regular use. Choose 3-4 inch thickness for seating applications or 2-3 inches for footrests and decorative pieces.
Can I make an ottoman without sewing skills?
Yes, you can create ottomans using hot glue guns, staple guns, or no-sew slipcover methods. These techniques work well for beginners and produce professional-looking results with proper application.
How much fabric do I need for a standard ottoman?
Most ottomans require 1-2 yards of fabric depending on size and style. Add extra fabric for pattern matching, mistakes, or future repairs when calculating your material needs.
What’s the easiest ottoman style for beginners?
Floor poufs and slipcover ottomans offer the simplest starting points for new DIY furniture makers. These projects require minimal tools and construction skills while teaching basic upholstery techniques.
How do I add storage to my ottoman?
Install piano hinges on one edge to create flip-top access or design removable tops with finger pulls. Line the interior with fabric and ensure adequate support for the lid mechanism.