
A well-built porch transforms your home’s exterior while creating a perfect space for outdoor relaxation.
This valuable addition enhances your property’s curb appeal and provides a comfortable area to enjoy fresh air, morning coffee, or evening conversations with family and friends.
Building your own porch may seem like a complex project, but with proper planning and the right guidance, it becomes an achievable goal for dedicated homeowners.
This comprehensive guide will walk you through every essential step of porch construction, from initial planning and material selection to foundation work, framing, and final finishing touches.
By following these detailed instructions, you’ll gain the knowledge and confidence needed to create a beautiful, functional porch that adds lasting value to your home.
Before You Begin
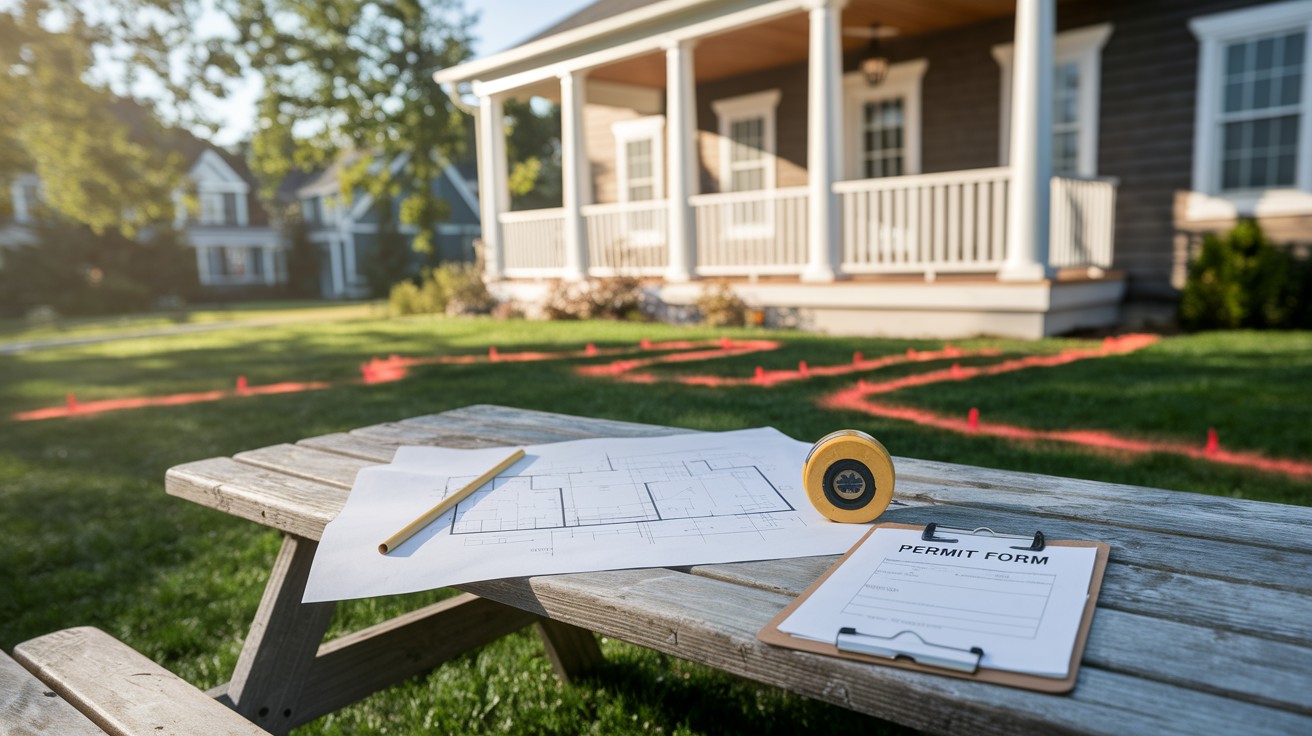
Proper preparation is crucial for a successful porch construction project. Taking care of these essential steps before breaking ground will save you time, money, and potential legal issues down the road.
Obtain a Building Permit
Building permits are required for most porch construction projects because they ensure your structure meets local safety codes and zoning regulations.
These permits protect both you and future homeowners by guaranteeing the work follows established construction standards.
Contact your local building department to determine specific requirements for your area, as regulations vary by municipality.
Some jurisdictions may require detailed plans, while others accept simple sketches.
The permit process typically takes several days to weeks, so apply early to avoid project delays.
Call Before You Dig
Before any excavation begins, you must identify the location of underground utilities such as gas lines, electrical cables, water pipes, and telecommunications equipment.
Accidentally striking these utilities can result in serious injuries, expensive repairs, and service disruptions to your neighborhood.
Contact 811 or your local utility marking service at least 48-72 hours before digging.
This free service will send representatives to mark underground lines with colored flags or spray paint, ensuring your safety during construction.
Choose a Porch Style
Select a porch design that complements your home’s existing architectural features.
Consider elements like roofline angles, column styles, and material choices that will create visual harmony with your house.
Popular options include wraparound porches for colonial homes, covered front porches for craftsman styles, or simple stoops for modern residences.
You can always add roofing or protective coverings in future phases if budget constraints require a phased approach to construction.
Tools and Materials Needed

Having the right tools and materials ready before starting your porch project ensures smooth construction and professional results. Gather everything on these lists to avoid interruptions during the building process.
Tools
- Post-hole digger or auger for creating foundation holes
- Circular saw and miter saw for lumber cutting tasks
- Power drill with various bits for assembly work
- Hammer and nail gun for fastening materials
- Tape measure, carpenter’s square, and level for accurate measurements
- Safety glasses, work gloves, and hearing protection for personal safety
- Chalk line and speed square for marking and alignment
- Adjustable wrench set for bolt connections
- Extension cords for powering tools at the work site
Materials
- Pressure-treated lumber for framing and decking boards
- Concrete mix and gravel for foundation work
- Galvanized post anchors or brackets for structural connections
- Galvanized or stainless steel screws, nails, bolts, and washers
- Joist hangers and metal connectors for frame reinforcement
- Railing materials, balusters, and post caps for finishing
- Construction adhesive for additional bonding strength
- Wood stain or paint for protection and appearance
- Weatherproofing sealers to guard against moisture damage
Step to Build a Porch
Step 1: Pour the Concrete Footers
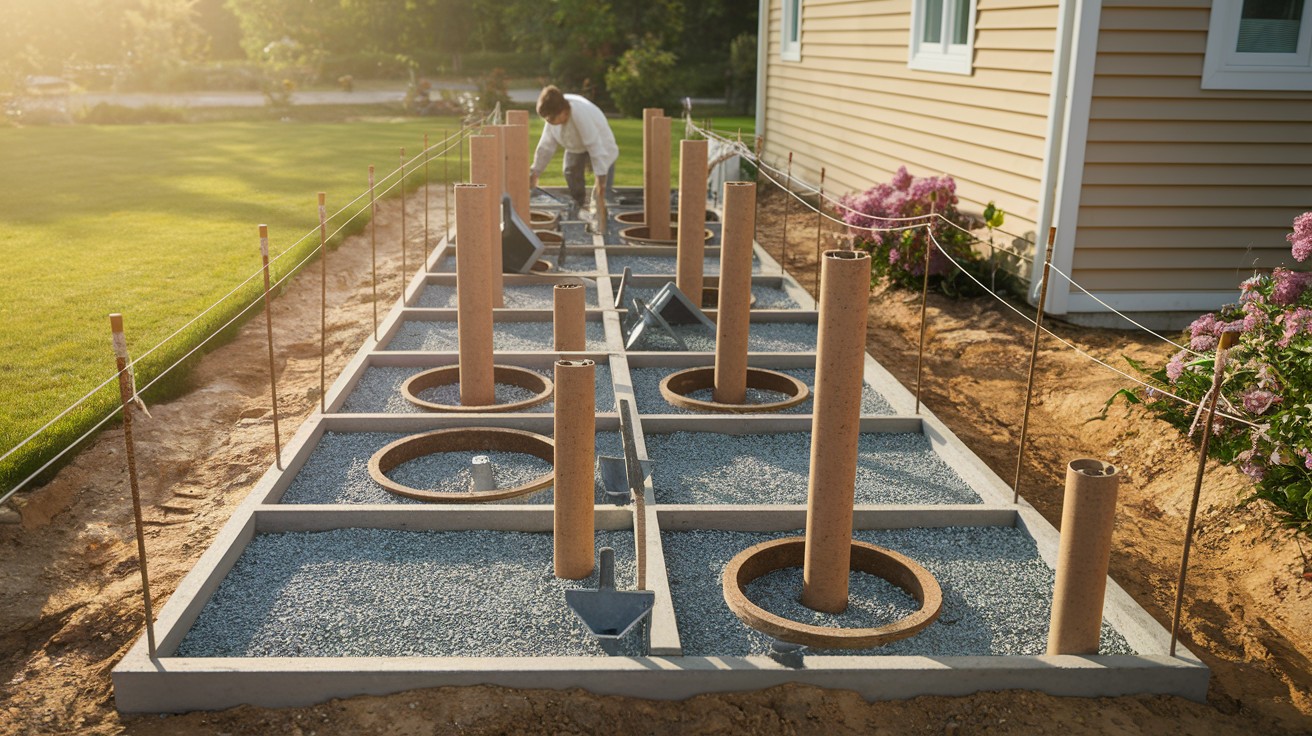
Begin your porch construction by marking the locations for your concrete footers using stakes and string lines to ensure proper alignment.
Dig holes at each marked location, making them deep enough to extend below the frost line in your area, typically 2-3 feet deep and 12 inches wide.
Add a 4-inch layer of gravel at the bottom of each hole and compact it thoroughly to create a stable drainage base.
Place cardboard form tubes in the holes, ensuring they extend 6 inches above ground level. Mix and pour concrete into the tubes, filling them completely.
While the concrete is still wet, embed galvanized metal column bases or anchor bolts at the center of each footer, making sure they remain plumb and at the correct height.
Step 2: Attach Posts to Footers
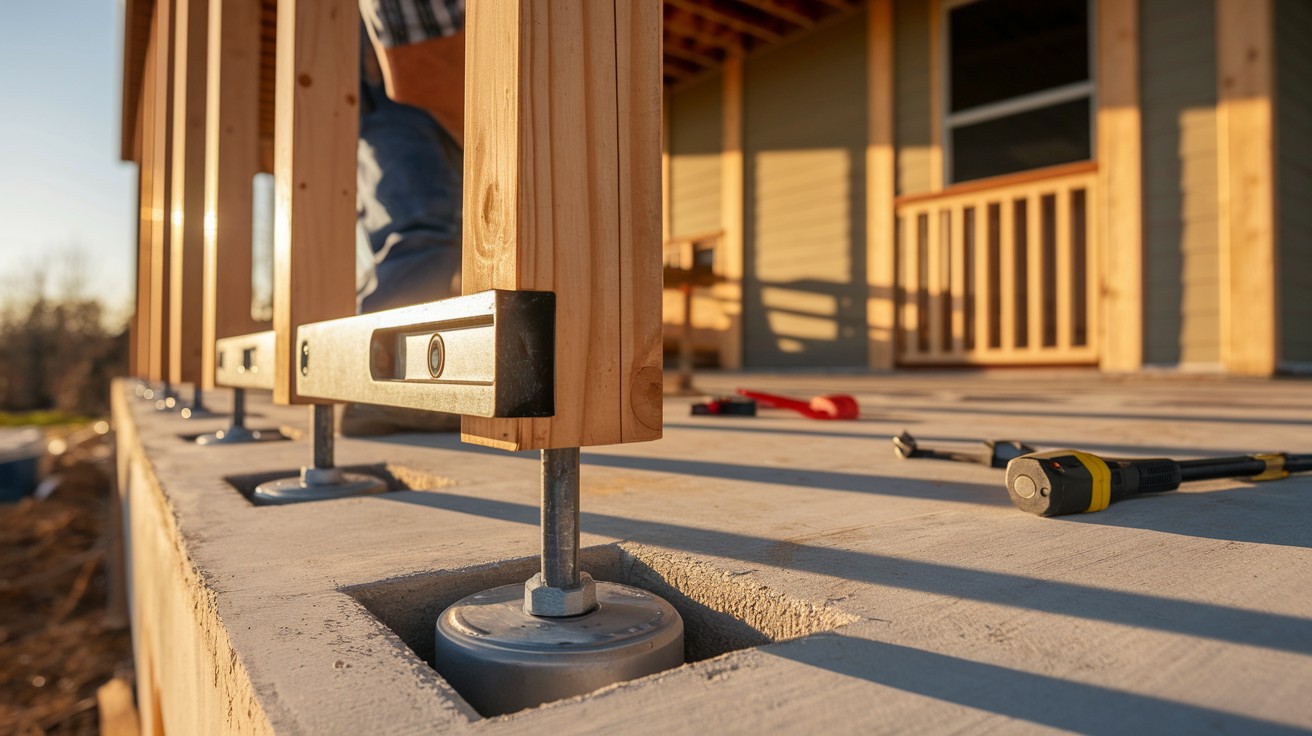
Once the concrete has cured for at least 24 hours, measure and cut your support posts to the appropriate length.
Calculate the correct post height by considering your desired porch floor level and door threshold height, ensuring proper water drainage away from the house.
Position each post on its corresponding metal base and check for plumb using a level.
Secure the posts to the column bases using the manufacturer’s recommended bolts or fasteners, tightening them firmly to create a solid connection.
Step 3: Attach the Ledger Board

Locate the area on your house wall where the porch will connect and mark a level line using a water level or laser level.
This ledger board will support one end of your porch joists, so accuracy is critical. Remove any siding or trim material where the ledger will attach, exposing the house’s structural framing.
Position the ledger board along your marked line and secure it to the house using galvanized lag screws driven into the rim joist or wall studs.
Install double joist hangers along the ledger board at 16-inch intervals to receive the porch joists.
Step 4: Create the Porch Outer Perimeter
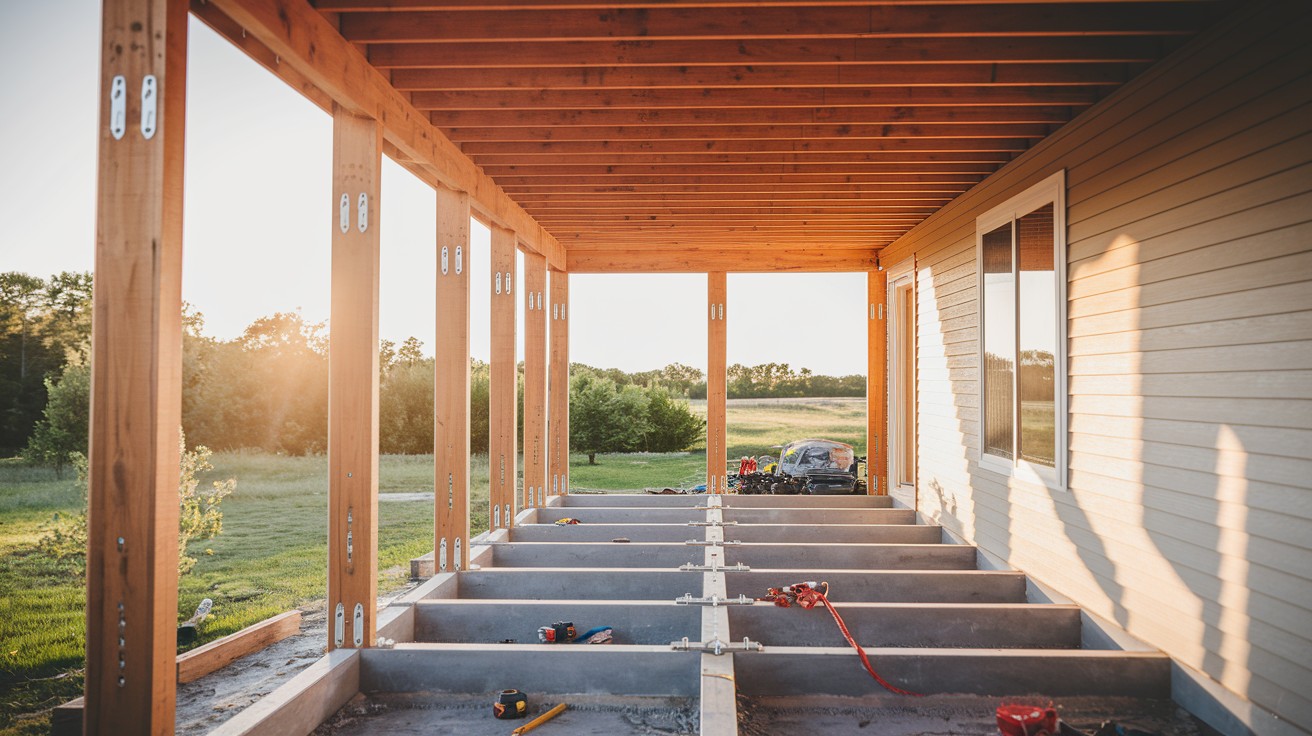
Connect the outer edge of your porch by attaching rim joists between the support posts. These boards form the perimeter frame that will support the outer ends of your floor joists.
Secure the rim joists to the metal bases at each footer location using appropriate fasteners.
Install double joist hangers on the inside face of the rim joists, spacing them to align with the hangers on your ledger board.
Step 5: Attach the Porch Joists

Cut your floor joists to span the distance between the ledger board and rim joist, typically spacing them 16 inches on center for adequate support.
Install each joist by placing one end in the hanger attached to the ledger board and the other end in the corresponding hanger on the rim joist.
Secure all joists with galvanized nails or screws according to the joist hanger manufacturer’s specifications, ensuring each connection is tight and properly fastened.
Step 6: Install the Porch Flooring

Begin installing your decking boards starting with a full board at one end of the porch.
Use pressure-treated lumber designed for outdoor use, and maintain consistent spacing between boards using deck spacers or nails as guides.
Secure each board to the joists with galvanized deck screws or nails, driving fasteners at every joist location.
For hardwood decking materials, pre-drill holes to prevent splitting and consider using hidden fastening systems for a cleaner appearance.
Step 7: Finish the Porch Flooring

Protect your new porch flooring with an appropriate finish based on your wood type and local climate conditions.
Pressure-treated lumber benefits from a clear water-repellent sealer applied annually, while cedar and redwood can be left natural or treated with penetrating oil finishes.
For painted surfaces, use high-quality exterior paint designed for horizontal surfaces that receive foot traffic.
Allow adequate drying time between coats and follow manufacturer recommendations for maintenance schedules.
Step 8: Add the Railing (Optional)

Check local building codes to determine if railings are required for your porch height, as most jurisdictions mandate railings for surfaces more than 30 inches above grade.
Install railing posts at regular intervals, typically 6-8 feet apart, securing them to the rim joists or directly to the porch structure.
Add horizontal rails between posts, then install balusters to meet code requirements for spacing.
Design your railing system with proper drainage in mind, sloping horizontal surfaces slightly to shed water and prevent moisture accumulation.
Tips for a Successful Porch Build
Save money by choosing simple, rectangular designs and purchasing standard-length lumber during off-season sales. Simple designs work best for DIY builders since they involve fewer complicated cuts and reduce costly mistakes.
Porch kits provide pre-cut materials, detailed instructions, and all necessary hardware in one package, making assembly more straightforward for first-time builders. While slightly more expensive upfront, they save time and reduce waste.
Plan your timeline realistically, allowing extra days for weather delays. Work in stages, completing foundation work first, then framing, and finally finishing tasks to maintain quality throughout the project.
Protect your investment by applying stain or paint within a few weeks of completion. Choose high-quality exterior finishes designed for your wood type and climate to ensure long-lasting protection and maintain your porch’s appearance.
Conclusion
Building your own porch is an achievable project that adds significant value and functionality to your home.
By following proper planning steps, obtaining necessary permits, and working through each construction phase systematically, you can create a beautiful outdoor space that enhances your property’s appeal and provides years of enjoyment.
Remember the key elements for success: secure foundations, level framing, proper material selection, and quality finishing work.
Take your time with each step, prioritize safety throughout the process, and don’t hesitate to consult professionals when needed.
The satisfaction of completing this project yourself, combined with the long-term benefits of increased home value and outdoor living space, makes the effort worthwhile.
Your new porch will serve as a comfortable retreat for relaxation and a welcoming entrance that makes a lasting impression on visitors.
Frequently Asked Questions
Do I need a building permit to build a porch?
Yes, most municipalities require building permits for porch construction to ensure compliance with local building codes and safety standards. Contact your local building department to determine specific requirements and application procedures for your area.
How deep should porch footers be?
Porch footers should extend below the frost line in your area, typically 2-3 feet deep in most climates. The width should be approximately 12 inches to provide adequate support for the porch structure.
What type of lumber is best for porch construction?
Pressure-treated lumber is recommended for porch framing and structural components due to its resistance to moisture and insects. For decking, you can choose pressure-treated boards, cedar, or composite materials based on your budget and maintenance preferences.
How far apart should porch joists be spaced?
Porch joists should be spaced 16 inches on center for standard residential construction. This spacing provides adequate support for typical foot traffic and meets most building code requirements.
How long does it take to build a porch?
A basic porch typically takes 3-5 days for an experienced DIYer, depending on size and complexity. Allow extra time for permit approval, material delivery, weather delays, and any unexpected challenges during construction.