
There’s nothing quite like the smooth glide of a drawer you built with your own hands. That satisfying whoosh as it opens and closes perfectly? Pure magic.
If you’ve struggled with storage space or wanted custom furniture without the custom price tag, you’re in the right place. This guide will walk you through building a drawer that actually works like no sticking, no jamming, just smooth sliding every time.
If you’re new to DIY or have some woodworking experience, I’ve broken down this process into simple steps anyone can follow. You’ll learn how to measure, cut, assemble, and install drawer slides that work perfectly.
I’ve built dozens of drawers for kitchens, workshops, and bedrooms. The techniques in this guide have solved storage problems for me and countless others. Let me show you how to create something functional and lasting for your home.
Tools & Materials You’ll Need
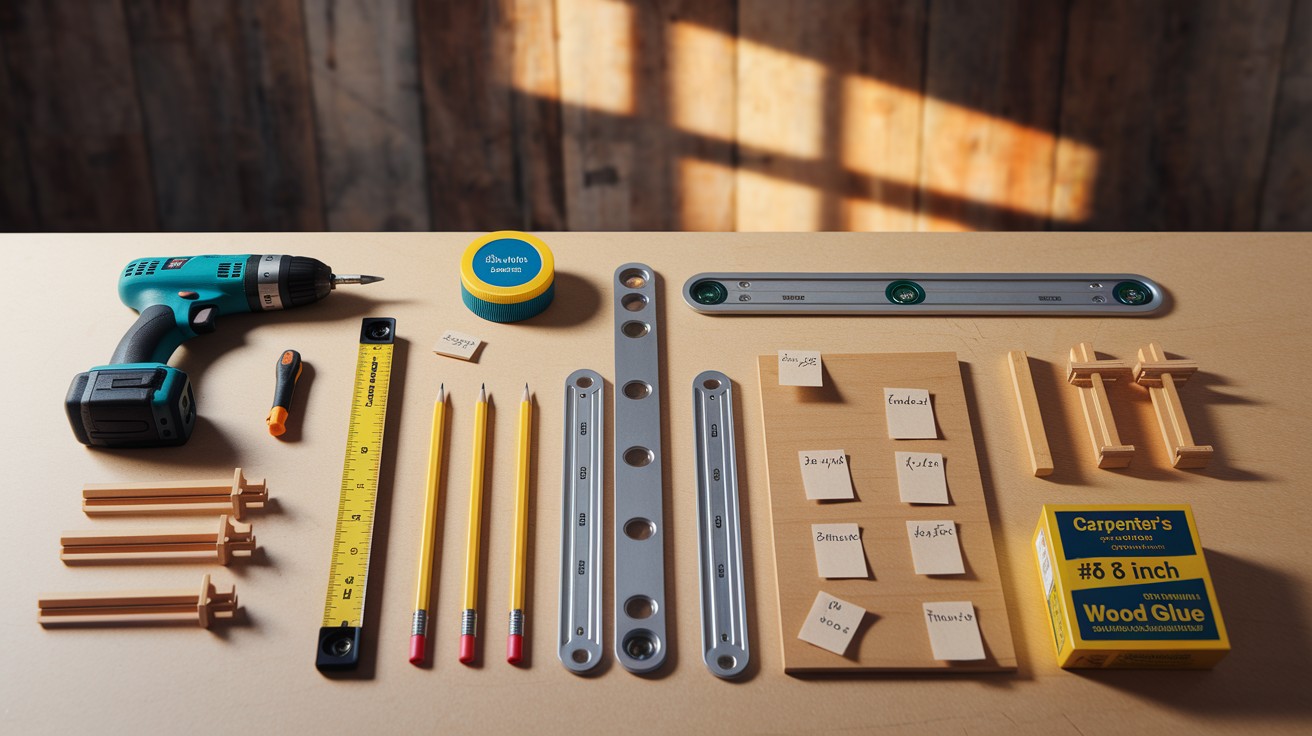
Let’s get ready to build! First, gather these tools and materials. Don’t worry if you’re missing something, I’ll suggest alternatives along the way.
Must-Have Tools:
- Power drill (a screwdriver works too, but your wrists will thank you for using a drill)
- Tape measure (the wider the better – at least 12 feet long)
- Pencil (keep a few sharpened)
- Level (I prefer a 24-inch level for drawer work)
Materials for Your Drawer:
- Wood for the box (¾-inch plywood works great for most drawers)
- Drawer slides (more on choosing these later)
- Wood screws (I recommend #6 × ¾-inch for attaching slides)
- Wood glue (yellow carpenter’s glue is perfect)
- Clamps (at least 4 will make your life easier)
Choosing the Right Drawer Slides

Drawer slides might seem boring, but they’re the magic behind that smooth glide. Let’s make sense of your options.
Side-mount slides attach to the sides of your drawer and cabinet. They’re the most common and easiest to install. Perfect for beginners! These typically hold 75-100 pounds when properly installed.
Under-mount slideshide underneath the drawer for a cleaner look. They cost more but look fantastic. I use these in kitchens and bathrooms where appearance matters most.
Center-mount slides attach to the bottom center of the drawer. They’re cheaper but can’t hold as much weight. Skip these for heavy items like pots and pans.
Measuring and Planning
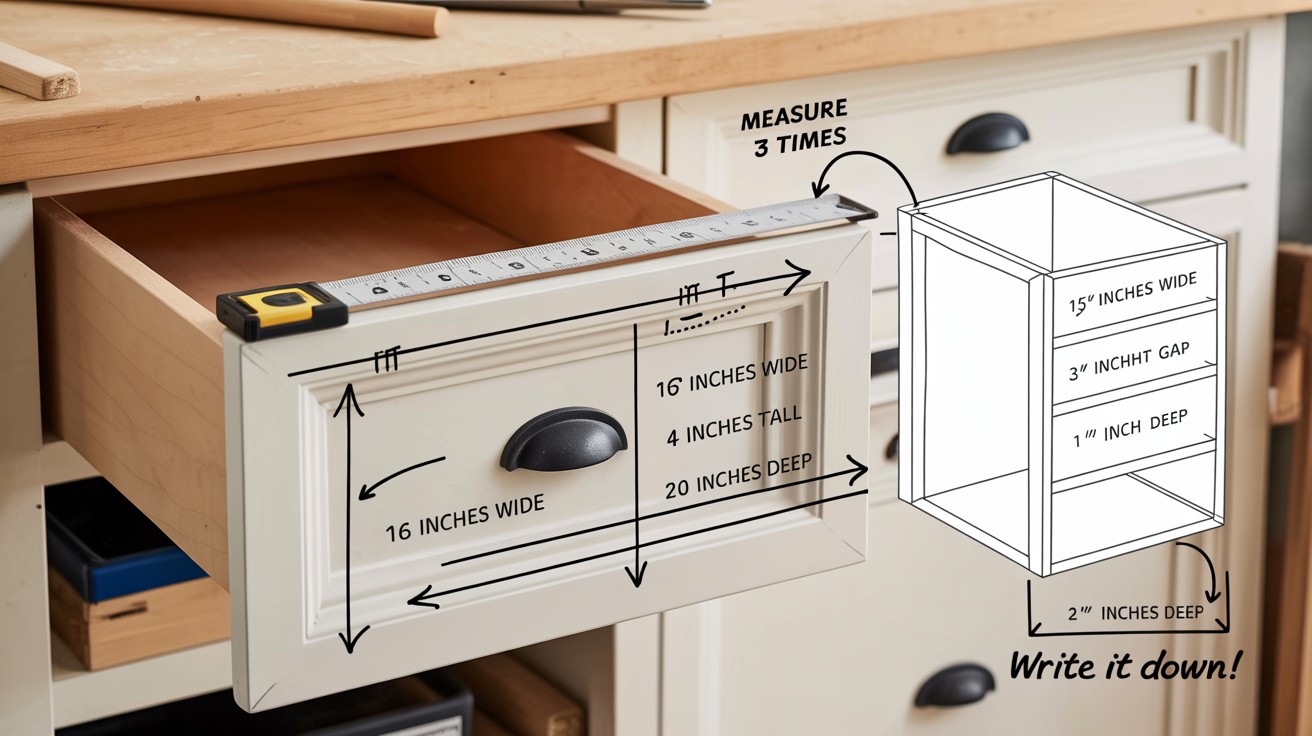
Measure twice, cut once. Actually, measure three times. I’m not kidding.
Start by measuring the opening where your drawer will go:
- Width (left to right)
- Height (top to bottom)
- Depth (front to back)
Now comes the tricky part. Your drawer box must be:
- ½-inch narrower than the opening (¼-inch gap on each side)
- At least ½-inch shorter than the opening height
- 1 inch shorter than the full depth (for most slides)
Here’s a real example: If your opening is 16 inches wide, 4 inches tall, and 20 inches deep, your drawer box should be 15½ inches wide, 3½ inches tall, and 19 inches deep.
Write these numbers down. Seriously, don’t trust your memory. I once rebuilt three drawers because I forgot my measurements.
Building the Drawer Box
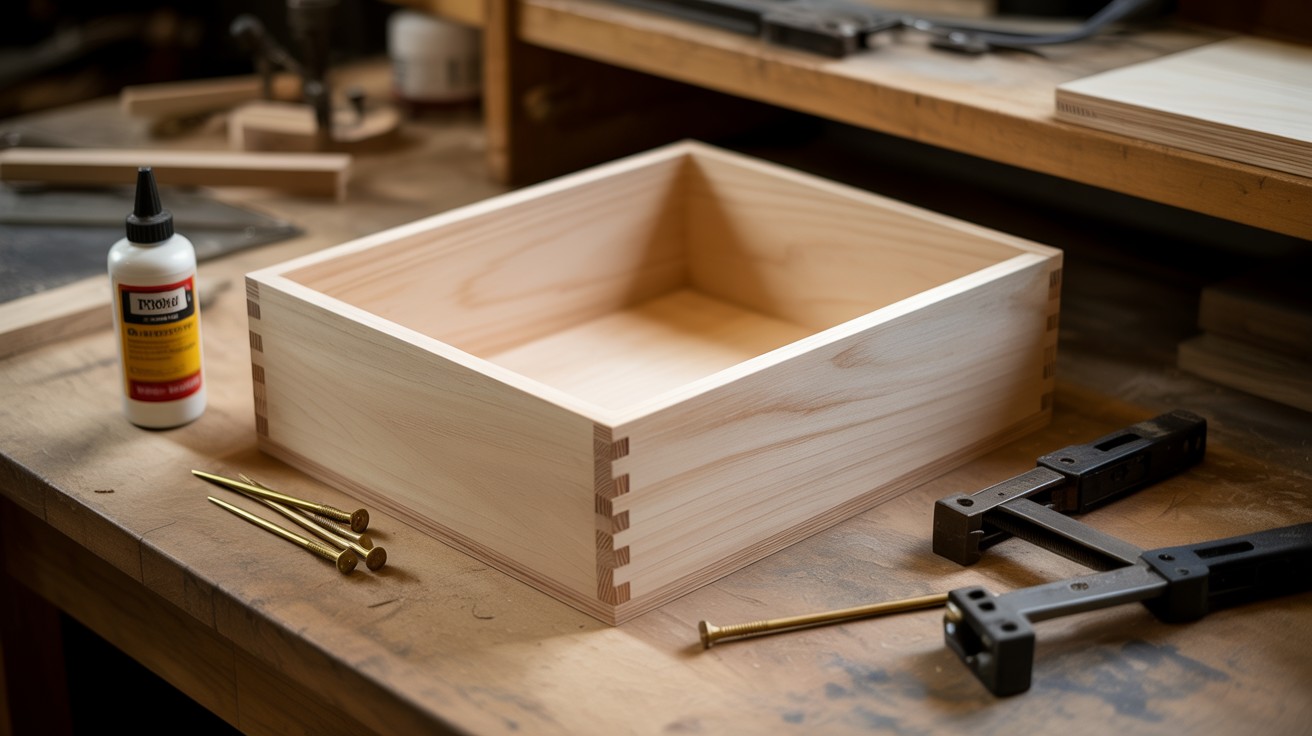
Time to build! This is where your project takes shape.
First, cut these pieces from your wood:
- 2 sides (the depth of your drawer by the height)
- 2 ends (the width of your drawer by the height)
- 1 bottom (the width by the depth)
The bottom piece should be ¼-inch plywood for lighter drawers or ½-inch for heavier ones.
Assembly steps:
- Apply glue to the ends of your front and back pieces
- Connect them to the side pieces, forming a rectangle
- Clamp everything and check that corners are square
- Drive screws through the sides into the ends
- Slide the bottom into grooves (if you made them) or attach from underneath
Take a break. Let the glue dry for at least 30 minutes. A rushed drawer falls apart, and nobody wants that.
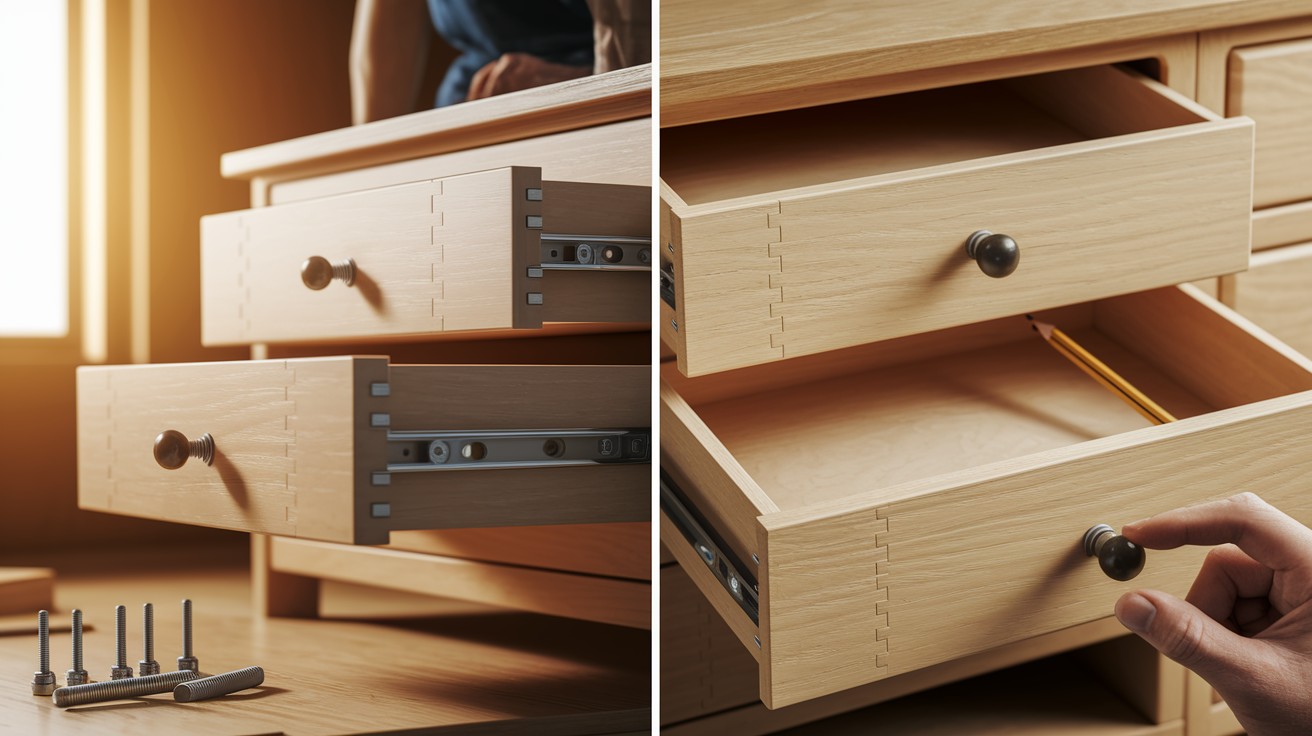
Installing the Drawer Slides

This is where most people mess up. Let’s get it right the first time.
Start with your cabinet:
- Mark where your slides will go on both sides
- Make sure your marks are level and the same height on both sides
- Attach the cabinet part of your slides with screws
- Double-check they’re level!
Now for the drawer box:
- Measure carefully where slides need to attach to the drawer sides
- Mark these spots clearly with a pencil
- Attach slides to the drawer with screws
- Make sure they’re parallel and the same distance from the drawer bottom
Want my secret? I use a scrap piece of wood as a spacer to position slides at the exact same height. Works like a charm every time.
Fitting and Final Adjustments
Now for the moment of truth! Slide your drawer into the cabinet. Does it slide smoothly? Great! No? Don’t panic.
Common issues and fixes:
- Drawer won’t go in: Check if slides are perfectly aligned
- Drawer binds in the middle: Look for warped wood or protruding screws
- Drawer tilts when pulled out: Slides aren’t level with each other
Most drawer slides have adjustment screws. They’re tiny miracles. Turn them slightly to move your drawer up, down, or sideways until it glides perfectly.
I once spent two hours adjusting a drawer that wouldn’t close right. It turned out there was a pencil stuck behind the slide! Check for obstructions before making adjustments.
Finishing Touches

Your drawer works! Let’s make it look good too.
If you’re adding a separate drawer front:
- Center it on your drawer box
- Attach it with screws from inside the drawer
- Fill any visible holes with wood putty
For handles or knobs:
- Measure and mark the center (or centers for longer pulls)
- Drill holes all the way through
- Attach hardware with the provided screws
Want to paint? Sand with 150-grit paper first, then 220-grit for smooth results. Apply primer before painting for the best finish.
Staining instead? Sand with progressively finer grits up to 320. Apply pre-stain conditioner first if using pine or other soft woods.
Bonus Tips for a Professional Look
- Cut a simple wood block to the exact size of the gap you need between drawer slides – this homemade jig helps you install multiple drawers at the same height
- Soft-close slides cost a bit more but stop drawers from slamming shut – great for early mornings and protecting little fingers
- Test stain colors on scrap wood from your drawer project to make sure the finish matches your existing furniture perfectly
- Create a drawer front slightly larger than the opening to hide gaps and give your project a built-in look
- Add thin wood strips inside your drawer to create sections for better organization – perfect for kitchen utensils or workshop tools
Conclusion
Building your own drawers with slides isn’t just about storage, it’s about creating something useful with your own hands. That first smooth pull of a drawer you built yourself is genuinely satisfying.
Remember, perfect drawers aren’t built in a day. If your first attempt isn’t flawless, that’s okay. Each drawer you build will be better than the last. The skills you’ve learned here transfer to countless other projects around your home.
Start simple, measure carefully, and soon you’ll be the person friends call when their drawers stick. From kitchen organization to workshop storage, custom drawers solve problems while adding value to your home.
So grab that tape measure, pick up some slides, and build something that will last for years. Your future self will thank you every time you reach for something stored in that smooth-gliding drawer you crafted with your own two hands.
Frequently Asked Questions
Can I build drawers if I don’t have power tools?
Yes! While power tools make the job faster, you can build drawers with just a hand saw, screwdriver, and measuring tape. Pre-cut wood from hardware stores can eliminate the need for cutting large pieces. The process will take longer, but the results can be just as good. Many stores will even cut your wood to size for a small fee.
How do I fix a drawer that sticks or doesn’t slide smoothly?
First, check if the drawer is rubbing against the cabinet frame and sand down any contact points. Next, inspect the slides for debris or damage. Often, simply cleaning the slides with a damp cloth removes built-up dust. Make sure the slides are perfectly parallel and level on both sides. Finally, try applying a small amount of silicone spray or wax to the slides—this often solves sticking issues instantly.
What’s the best wood to use for drawers?
For drawer boxes, ¾-inch Baltic birch plywood is ideal because it’s strong and doesn’t warp easily. For drawer fronts, solid wood like maple, oak, or cherry provides durability and looks great. If you’re painting your drawers, poplar is an excellent, less expensive option. MDF works well for painted fronts too, though it’s heavier and less durable for the drawer box itself.
How much weight can drawer slides hold?
Standard side-mount drawer slides typically support 75-100 pounds, which is plenty for most household items. For heavier storage needs like tools or files, look for heavy-duty slides rated for 100-200 pounds. Always check the manufacturer’s weight rating before purchasing. Remember that exceeding the weight limit not only damages the slides but can also cause the drawer to sag or break over time.