
Building a fence on a slope feels impossible. Trust me, I’ve been there.
You stare at that hill in your yard. Your mind races with questions. How do I make this look good? Will the posts stay straight? Can horizontal boards even work on slopes?
Here’s what you’ll find in this guide:
- 33 proven horizontal fence designs for slopes
- Step-by-step installation tips from a pro
- Budget-friendly DIY options that actually work
- Modern, rustic, and privacy fence solutions
I’ll solve your sloped fencing problems. No more crooked posts. No more wasted materials. No more frustration.
I’ve built hundreds of fences on slopes. Made every mistake possible. Learned what works and what doesn’t. You can trust this advice because it comes from real experience, not theory.
Your slope doesn’t have to be a problem. It can be your fence’s best feature.
What to Know Before Building a Horizontal Fence on a Slope
Let’s get real for a second. Sloped fencing isn’t like flat-ground fencing.
Your biggest enemy? Gravity.
Water runs downhill. Soil shifts. Posts lean. Boards sag.
Here’s what you need to know:
- Measure twice, dig once. Your post holes need to be deeper on slopes
- Choose your style early. Stepped fences work differently than raked fences
- Budget for extra materials. Slopes eat up more lumber than you think
- Consider drainage. Water will find every weak spot
The good news? Once you understand these basics, you’re golden.
Modern & Clean Fence Ideas
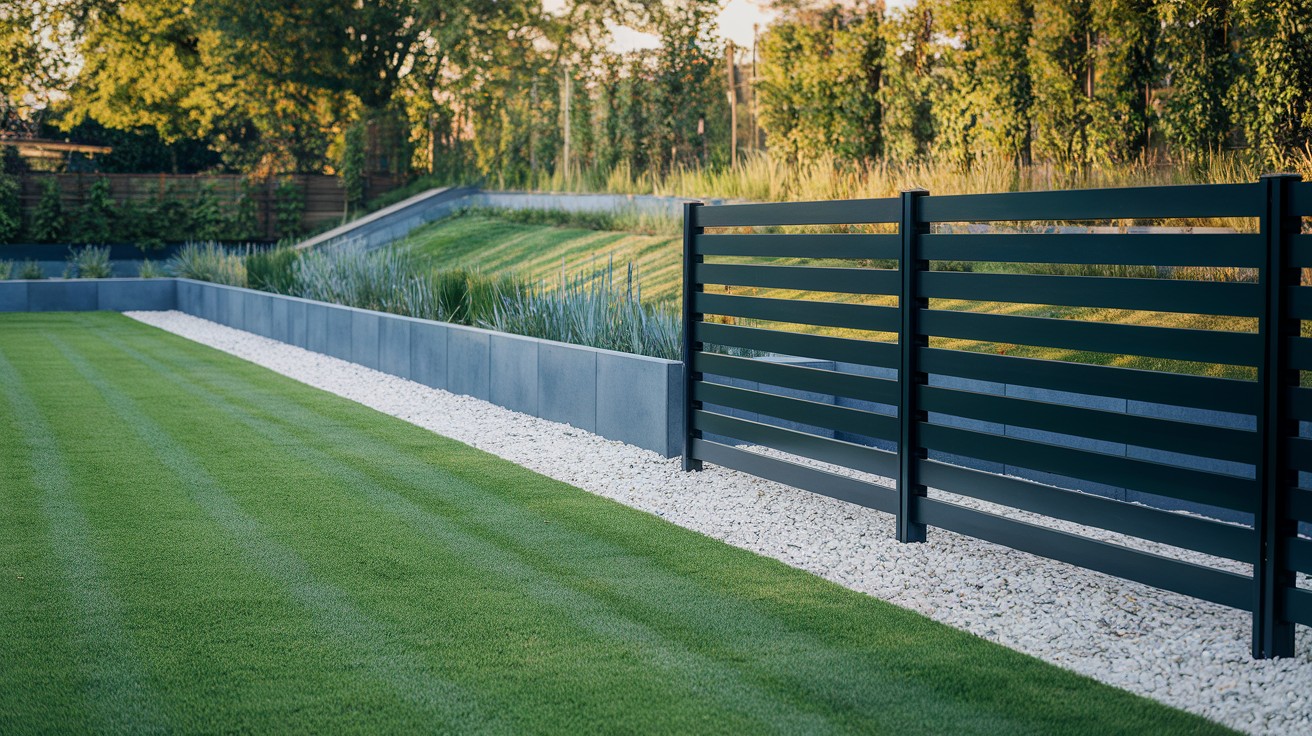
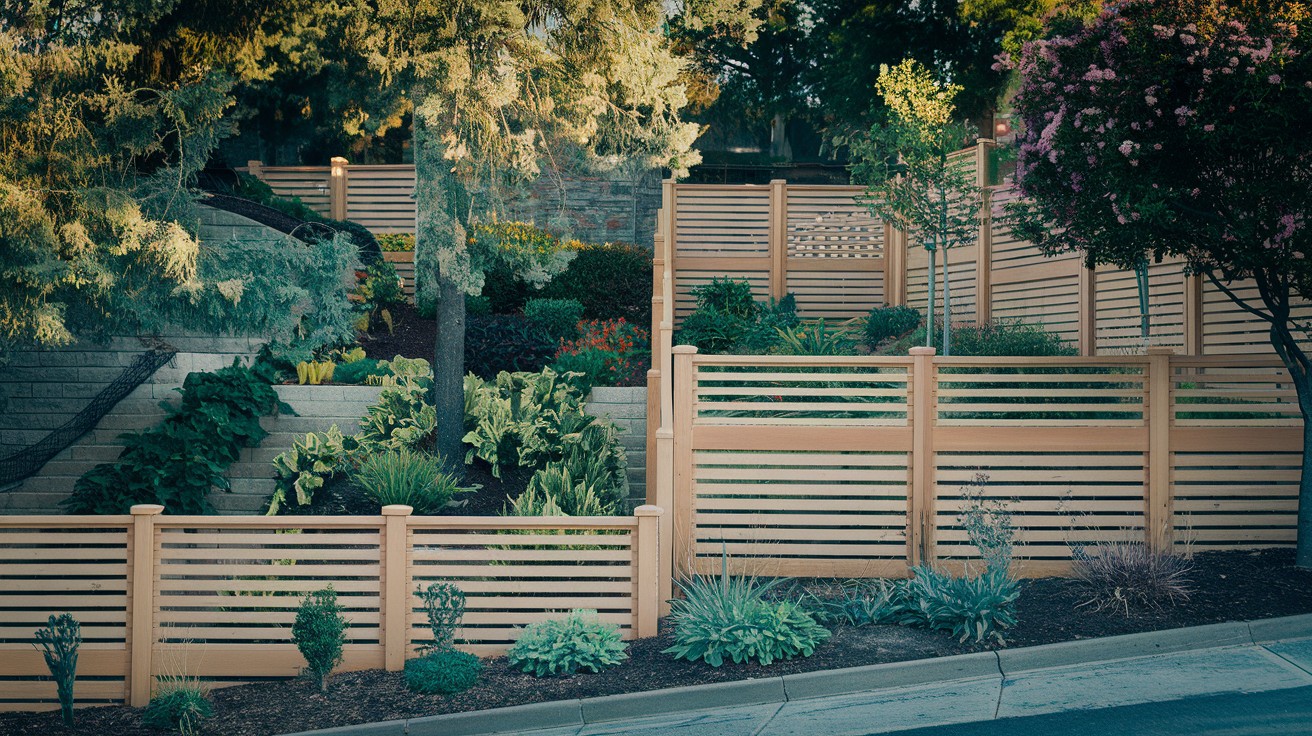
1. Stepped Cedar Horizontal Fence with Black Steel Posts
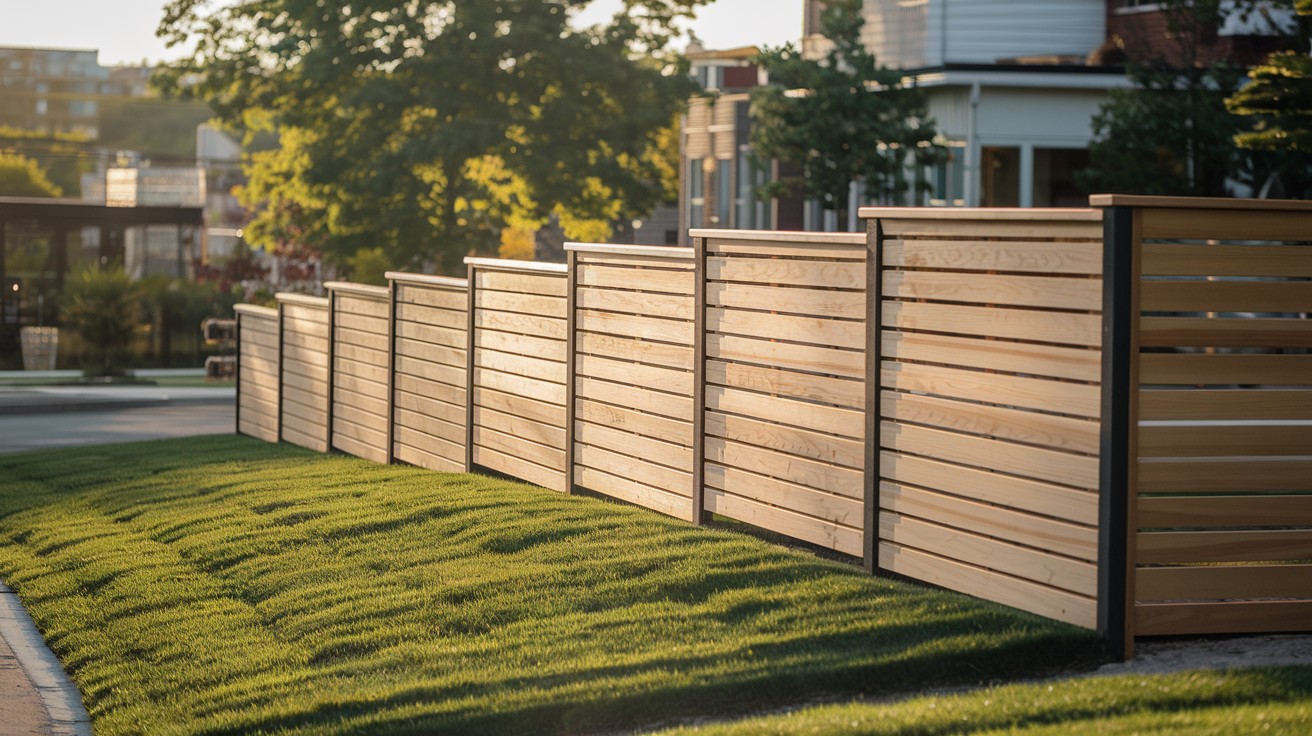
This combo stops people in their tracks.
Why it works:
- Cedar ages beautifully
- Black steel posts create clean lines
- Steps follow your slope naturally
Install each panel level. Let the steps create the slope transition. Your fence stays straight while following the hill.
Pro tip: Use galvanized bolts to attach cedar to steel. Rust happens fast otherwise.
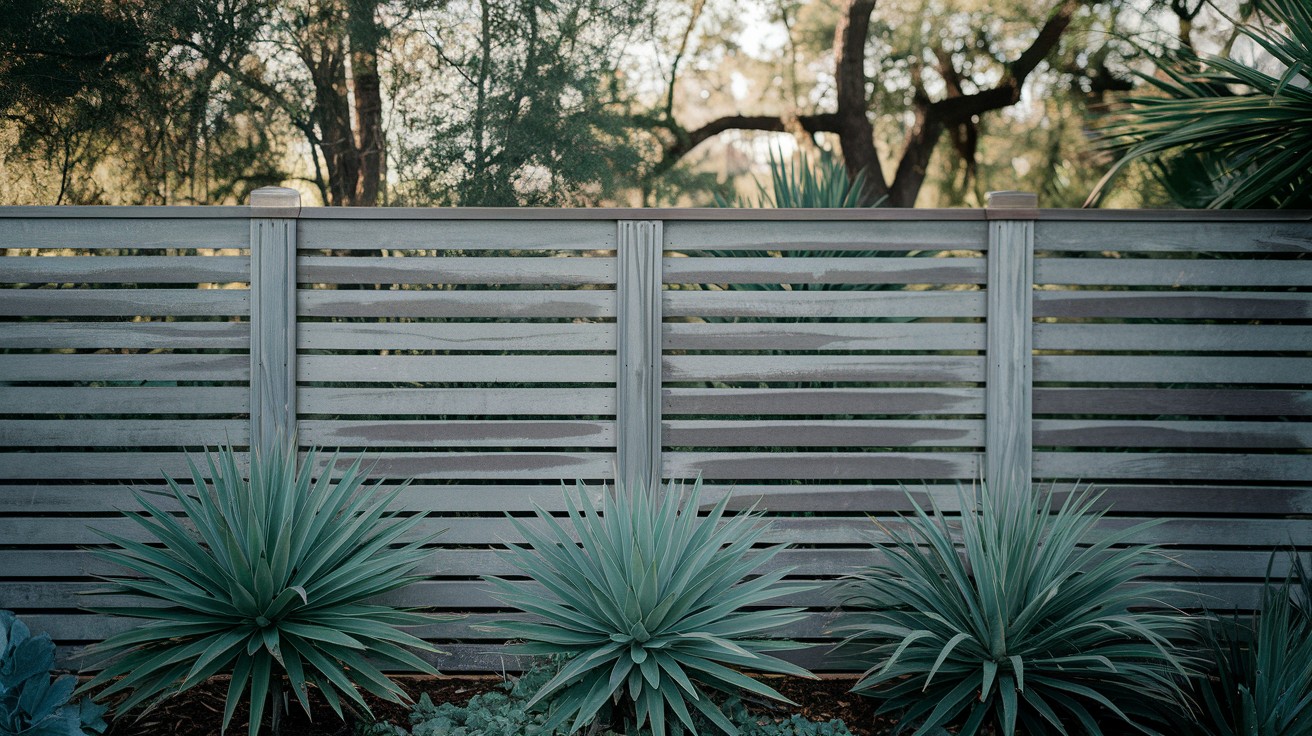
2. Slatted Fence with Varying Board Thickness for Movement
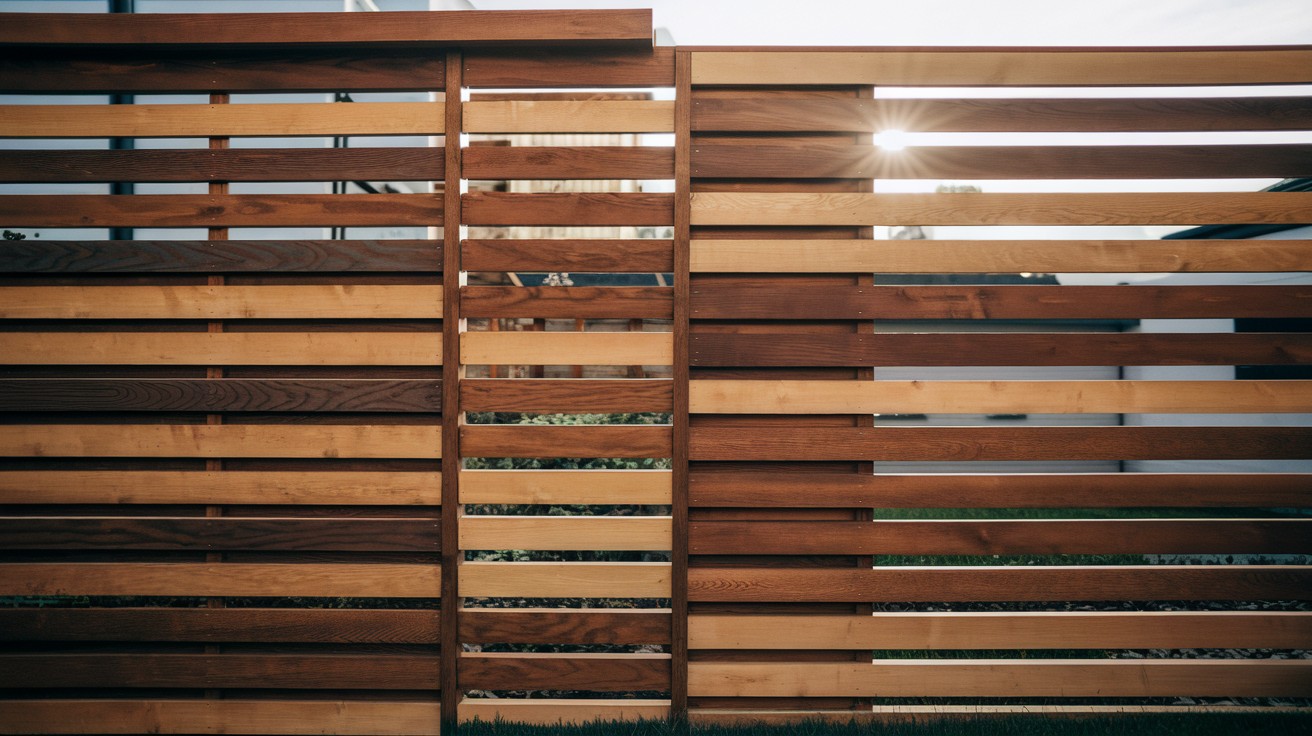
Boring fences all look the same. This one doesn’t.
Mix 1x4s with 1x6s. Some thick, some thin. The variation creates visual interest that tricks the eye.
Board spacing options:
- 1/2 inch gaps for privacy
- 1 inch gaps for airflow
- Random spacing for modern look
- Consistent spacing for clean lines
The magic happens when sunlight hits those different board widths. Shadows dance. Your fence becomes art.
3. Cable + Horizontal Wood Hybrid Fence for a Modern Hillside
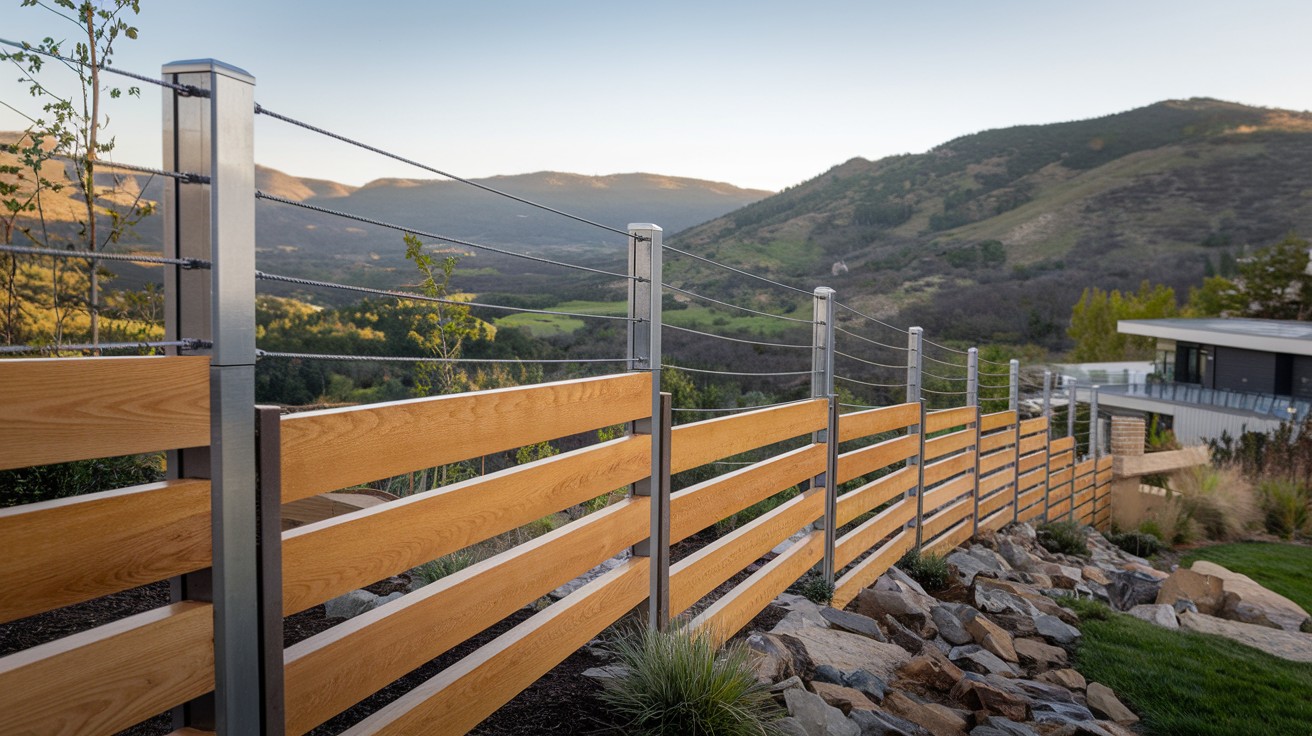
Half fence, half sculpture.
Here’s the breakdown:
- Horizontal wood boards on bottom half
- Stainless steel cables on top half
- Views preserved, privacy maintained
Cable specifications:
- 1/8 inch stainless steel cable
- Turnbuckles for tensioning
- Eye bolts every 8 feet
- Cable spacing 6 inches apart
Perfect for slopes that overlook something beautiful. Why block a good view?
4. Horizontal Stained Hardwood with Minimal Post Visibility
Posts can ruin a clean look. This design hides them.
The secret: Notch your boards to fit around posts. From the front, you see solid wood. No interruptions.
Tools required:
- Router with straight bit
- Circular saw
- Chisel set
- Measuring tape
Use a router to cut perfect notches. Takes extra time but looks professional.
5. Black Composite Horizontal Boards on a Gentle Incline
Maintenance-free fencing that looks like real wood.
Composite advantages:
- Won’t warp or split
- Stays straight on slopes
- Costs more upfront, saves money long-term
Best composite brands:
- Trex for durability
- TimberTech for color options
- Fiberon for budget-friendly choice
- Azek for premium quality
Perfect for busy homeowners who want beauty without the upkeep.
Privacy Fence Solutions
6. Overlap Board-on-Board Horizontal Panels for No Gaps
Privacy means no gaps. Period.
This technique works perfectly:
- First board goes on the front
- Second board overlaps on the back
- Creates a solid barrier with visual interest
Installation sequence:
- Mark board locations first
- Install front-facing boards
- Add back-facing boards with 2-inch overlap
- Check for gaps at every step
Wind flows through slightly. Complete privacy stays intact.
7. Frosted Acrylic Top Panels Over Horizontal Boards
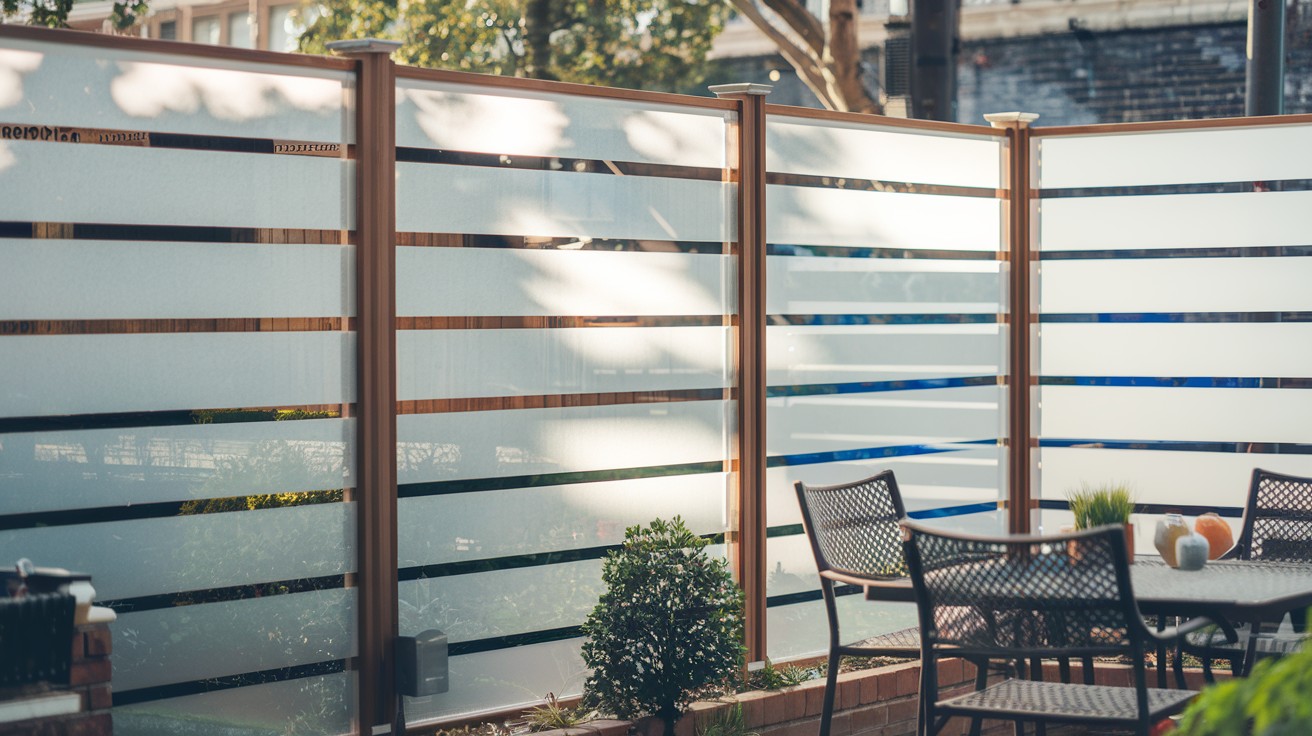
Sometimes you need privacy but still want light.
The solution: Frosted acrylic panels above your wood fence. Light gets through. Prying eyes don’t.
Acrylic panel options:
- 1/4 inch thickness for standard use
- 3/8 inch for high wind areas
- Clear bottom, frosted top design
- Full frosted for maximum privacy
Installation tip: Use H-channel to hold acrylic panels. Allows for expansion and contraction.
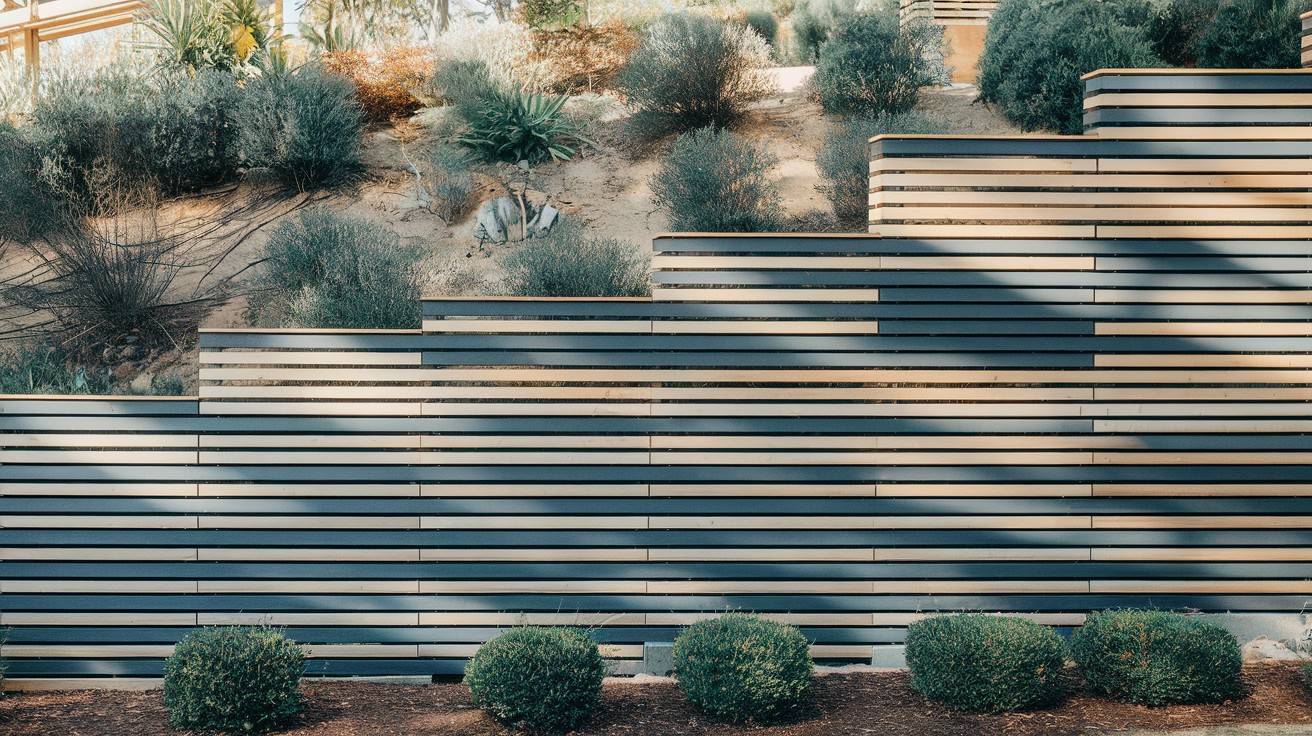
8. Tall Horizontal Fence with Offset Levels for Steeper Grades
Steep slopes need creative solutions.
Offset levels work like this:
- Each section sits at a different height
- Creates a cascading effect
- Maintains privacy throughout
Height variations:
- 6 feet for standard privacy
- 7 feet for extra screening
- 8 feet for maximum coverage
- Vary heights by 12-18 inches between sections
Looks intentional, not accidental.
9. Double-Sided Horizontal Fence for Neighbor-Friendly Privacy
Good fences make good neighbors. This one makes great neighbors.
Both sides look identical:
- No “ugly” back side
- Shared maintenance responsibility
- Everyone stays happy
Construction benefits:
- Stronger overall structure
- Better wind resistance
- Easier repair access
- Increased property value
Construction note: Use alternating boards. One side, then the other. Creates the double-sided effect.
10. Shadowbox Horizontal Fence Following Natural Slope
Shadowbox creates depth and interest.
How it works:
- Boards alternate sides of the frame
- Creates gaps that let air through
- Provides privacy from direct angles
Design specifications:
- 2-inch board overlap minimum
- 4-inch spacing between alternating boards
- 6×6 posts for extra strength
- Pressure-treated frame rails
On slopes, this style adds dramatic shadows that change throughout the day.
DIY & Budget-Friendly Ideas
11. Reclaimed Pallet Wood Horizontal Fence on Slope
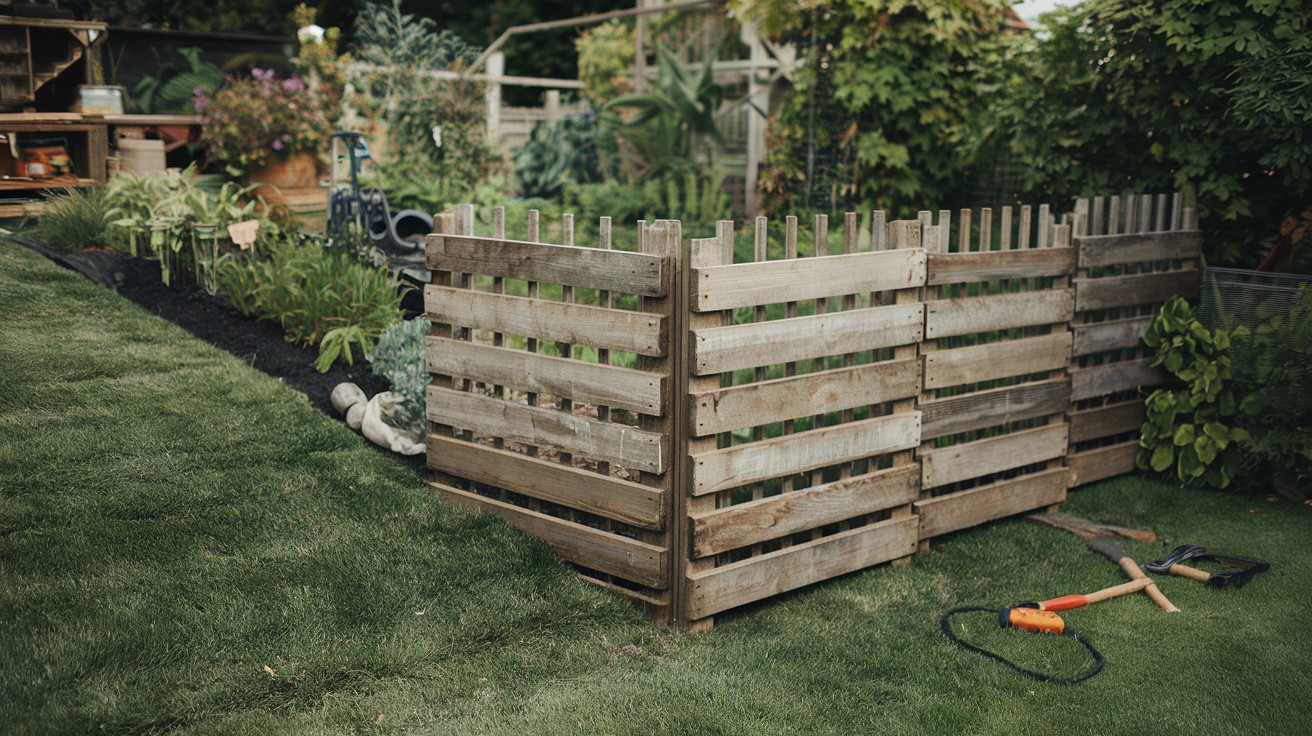
Free wood + creativity = amazing fence.
Pallets are everywhere. Most businesses give them away.
Prep work required:
- Remove all nails carefully
- Sand rough spots
- Treat for insects and rot
Best pallet sources:
- Home improvement stores
- Grocery stores
- Manufacturing facilities
- Construction sites
The payoff: Wood grain patterns that cost almost nothing.
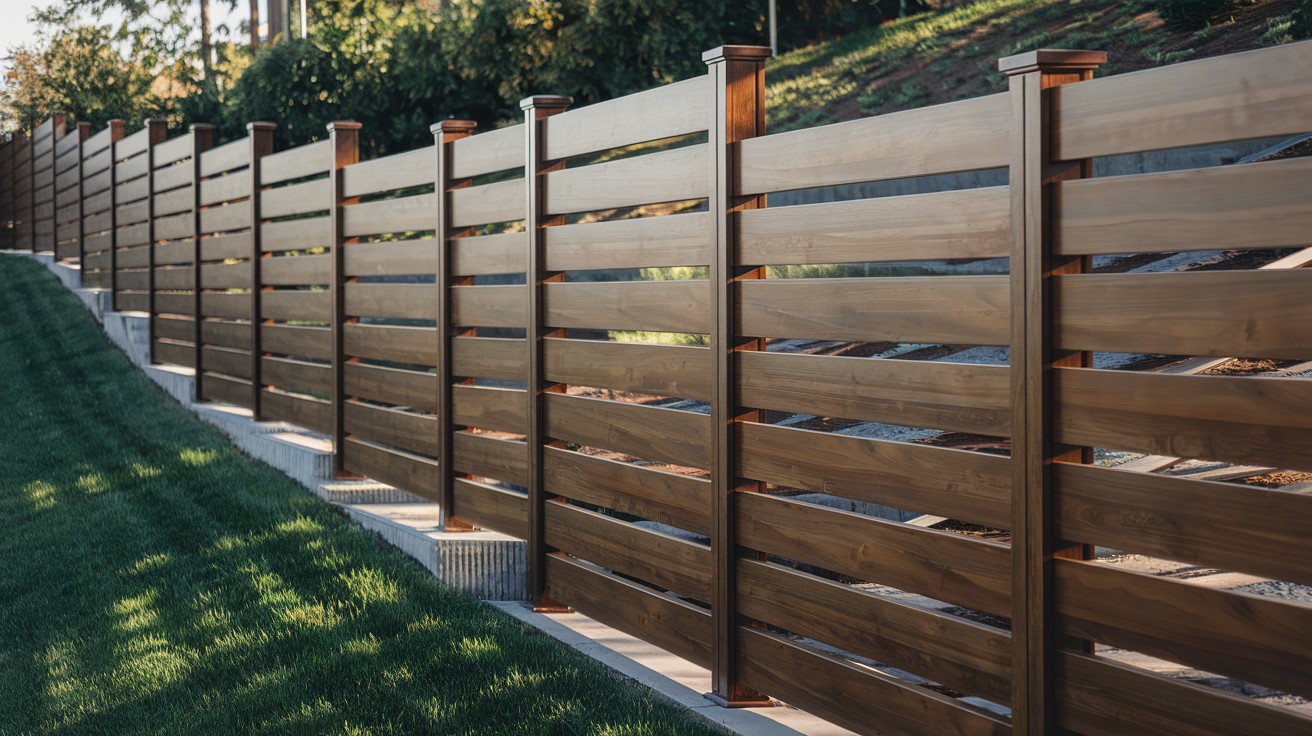
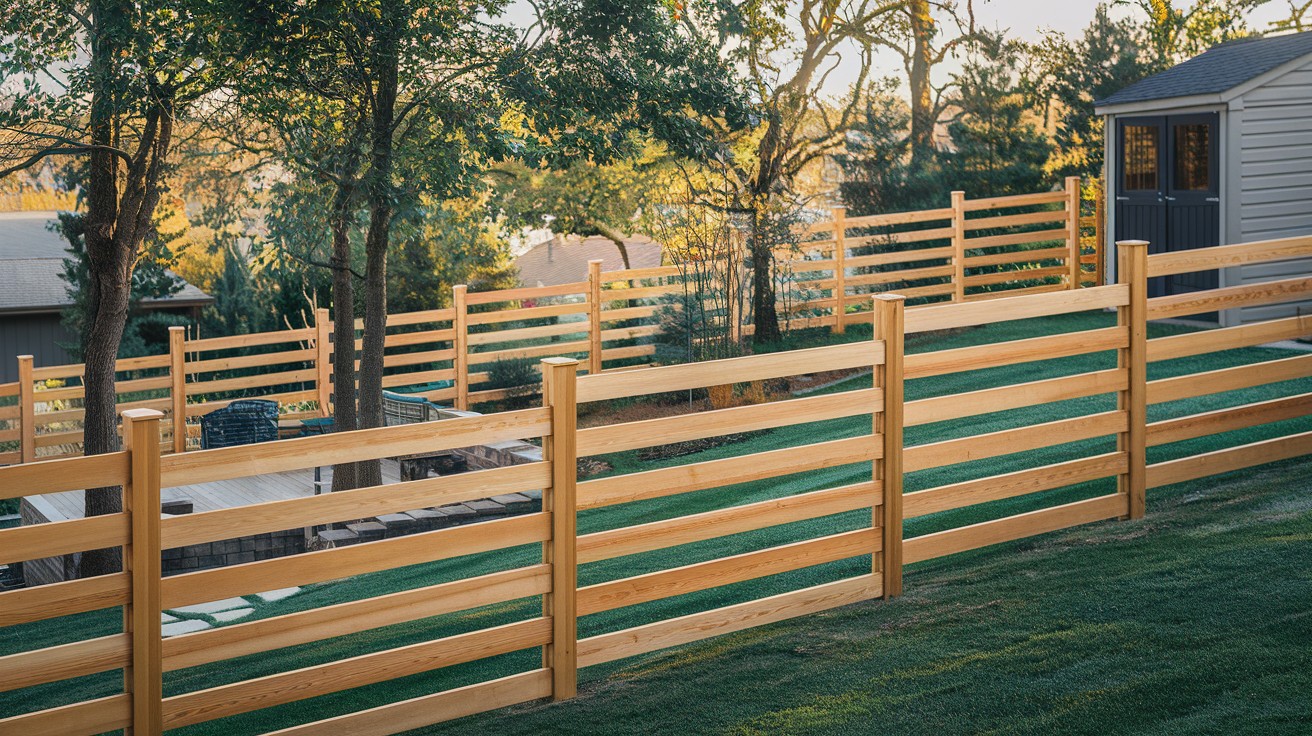
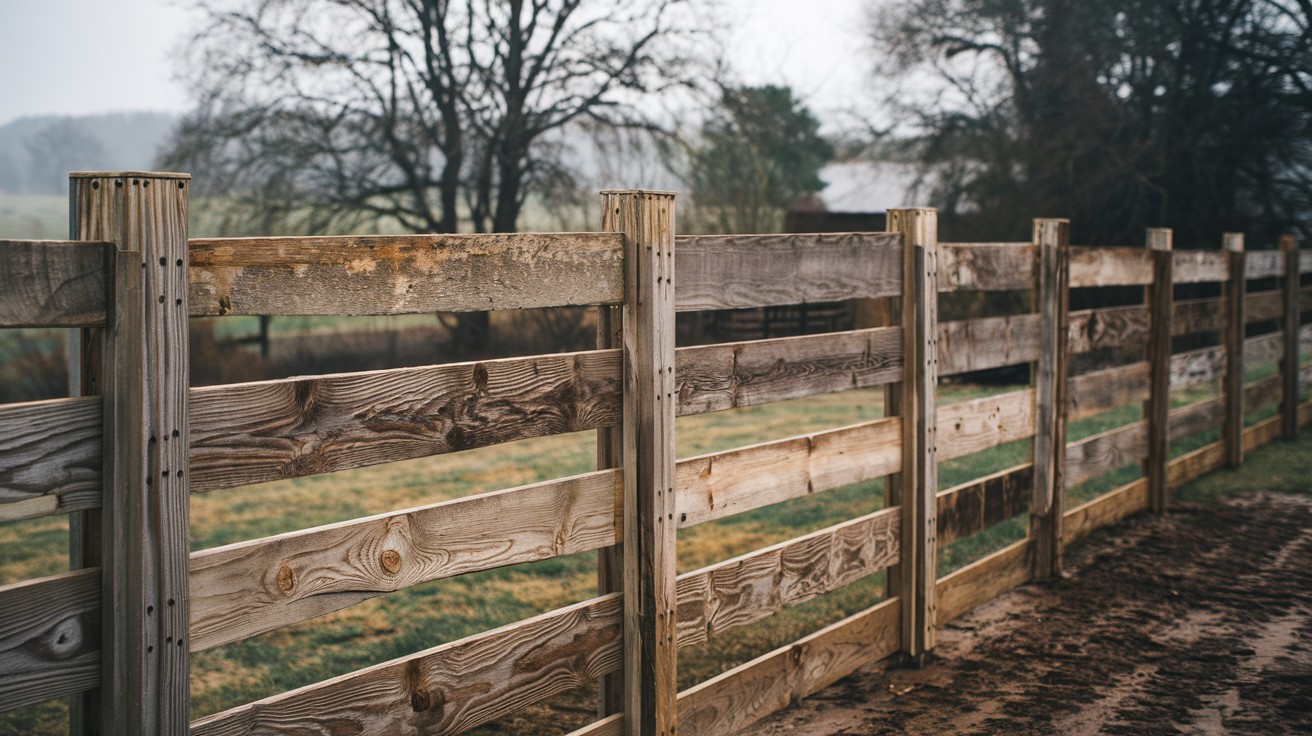
12. Pressure-Treated Pine with Stair-Step Leveling
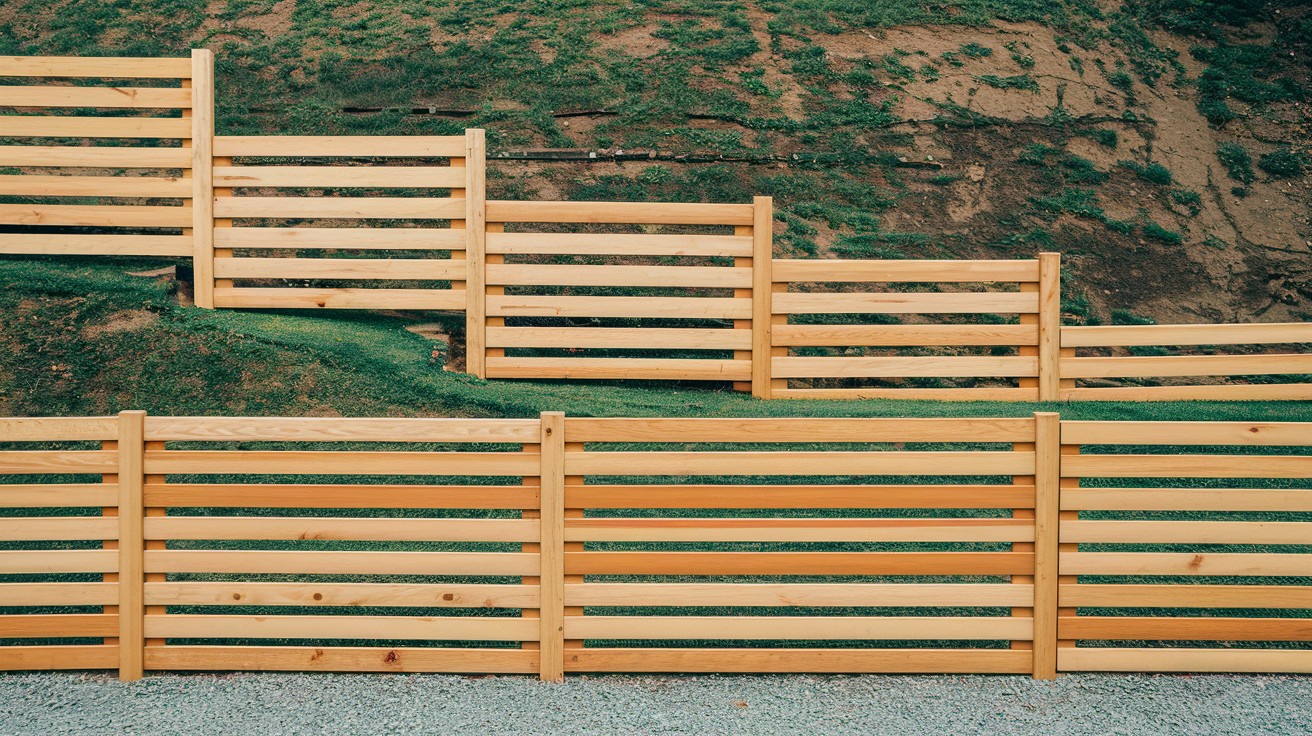
Basic materials, professional results. Pressure-treated pine costs less than cedar. Stair-step leveling handles any slope.
Cost breakdown:
- Pine boards: $3-5 per linear foot
- Cedar boards: $8-12 per linear foot
- Savings: 40-60% on materials
- Same installation time
Key to success: Keep each panel level. Let the steps handle the slope transition.
13. DIY 2×4 and 1×6 Combo on Posts Adjusted to Terrain
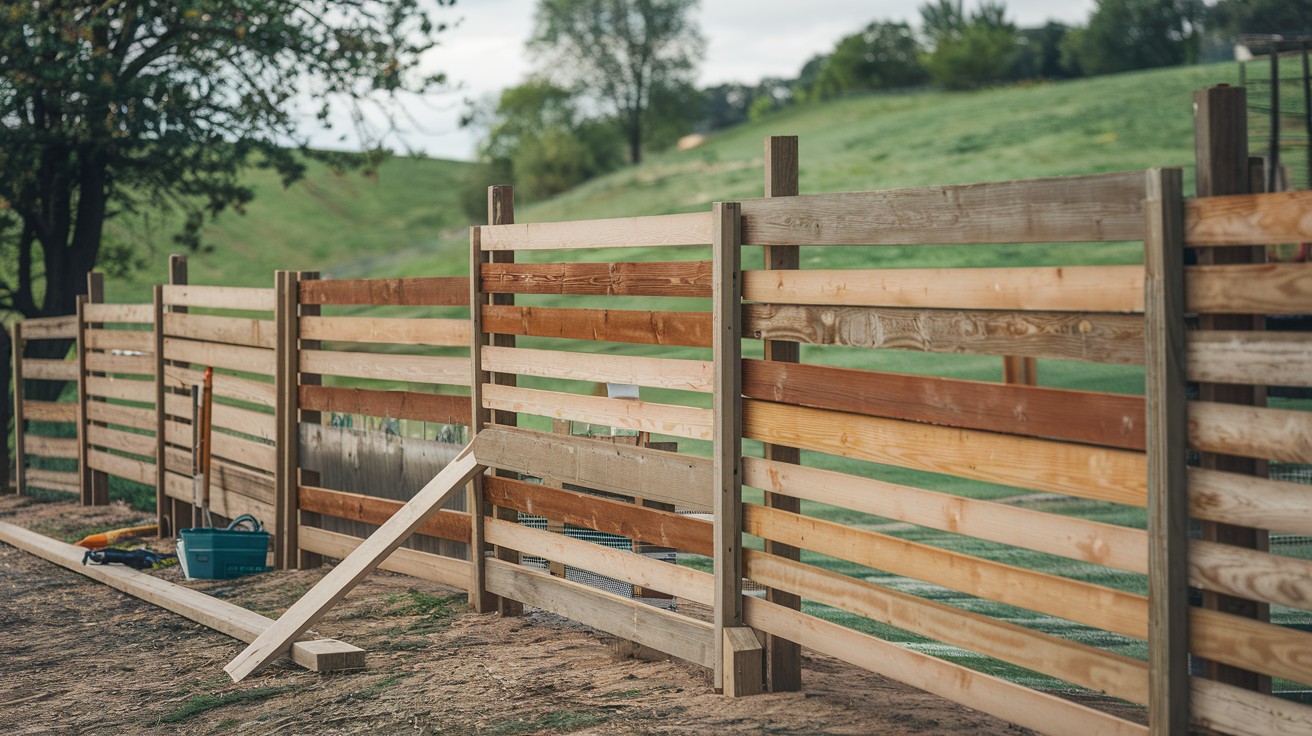
Mix lumber sizes for visual interest. Use 2x4s for structure. Add 1x6s for beauty. Adjust post heights to follow your terrain.
Lumber combinations:
- 2×4 frame with 1×6 boards
- 2×6 frame with 1×4 boards
- Mix 1×4 and 1×6 boards randomly
- Use 2×2 for accent strips
Money-saving tip: Buy lumber in bulk. Most yards offer discounts for large orders.
14. Basic Horizontal Fence Panels on Concrete Blocks for Leveling
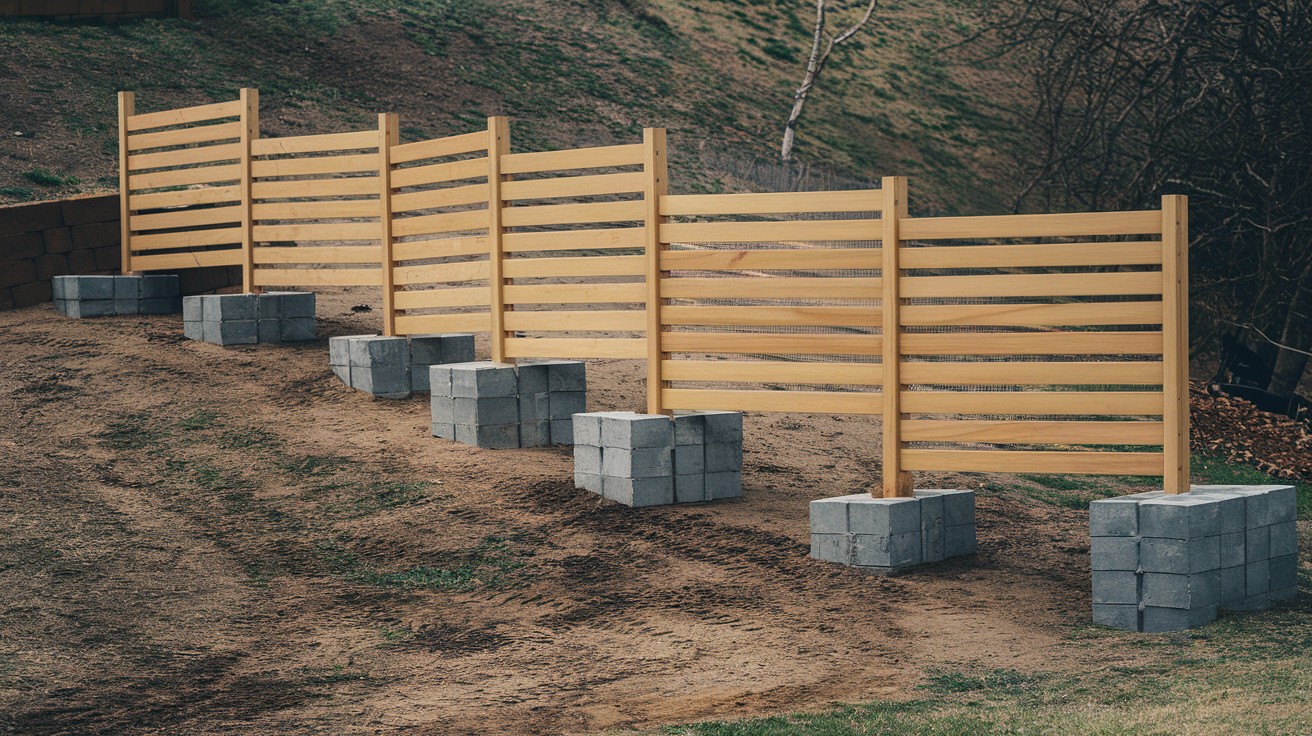
No concrete footings? No problem. Concrete blocks create instant leveling. Perfect for renters or temporary fences.
Block setup options:
- Single blocks for minor adjustments
- Double-stacked for major leveling
- Gravel base for drainage
- Rebar pins for stability
Stability trick: Use rebar through the block holes. Drives into the ground for extra support.
15. Corrugated Metal and Wood Mix Fence on a Slope
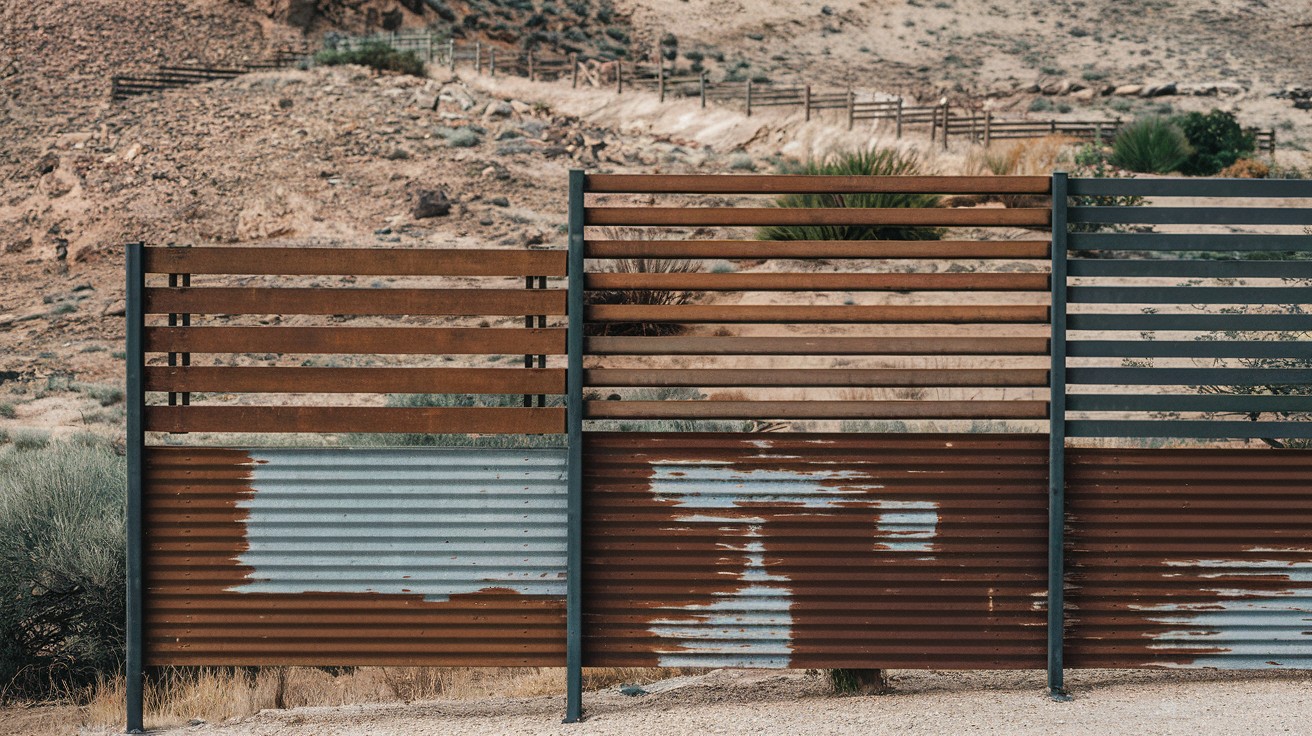
Industrial meets rustic. Corrugated metal costs less than wood. Mix them for style and savings.
Material combinations:
- Metal bottom, wood top
- Alternating metal and wood panels
- Wood frame with metal inserts
- Metal posts with wood boards
Design idea: Metal on bottom, wood on top. Prevents rot at ground level.
Rustic & Natural Designs
16. Horizontal Cedar Planks with Live Edge Detailing

Nature’s artwork in your fence. Live edge means keeping the bark edge on one side. Each board becomes different.
Live edge benefits:
- Natural curves and patterns
- No two boards look alike
- Rustic character
- Connection to nature
Source tip: Local sawmills often have live edge pieces for less money.
17. Untreated Redwood Boards That Weather Naturally
Let nature do the staining. Redwood naturally resists rot. Weathers to beautiful silver-gray.
Weathering timeline:
- Year 1: Original red color
- Year 2: Fading to brown
- Year 3: Silver-gray patina
- Year 5+: Stable silver color
Patience required: Takes 2-3 years to reach full silver color. Worth the wait.
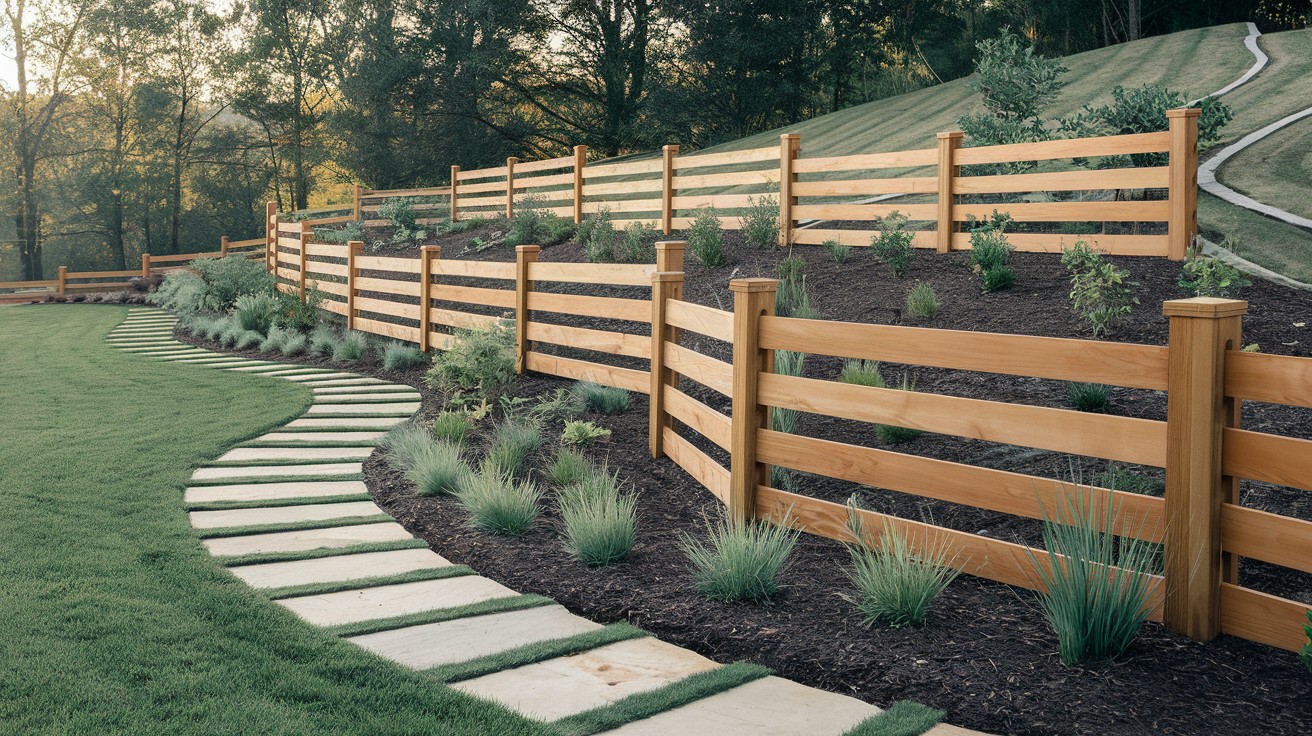
18. Rail and Board Fence Blending into a Forested Slope
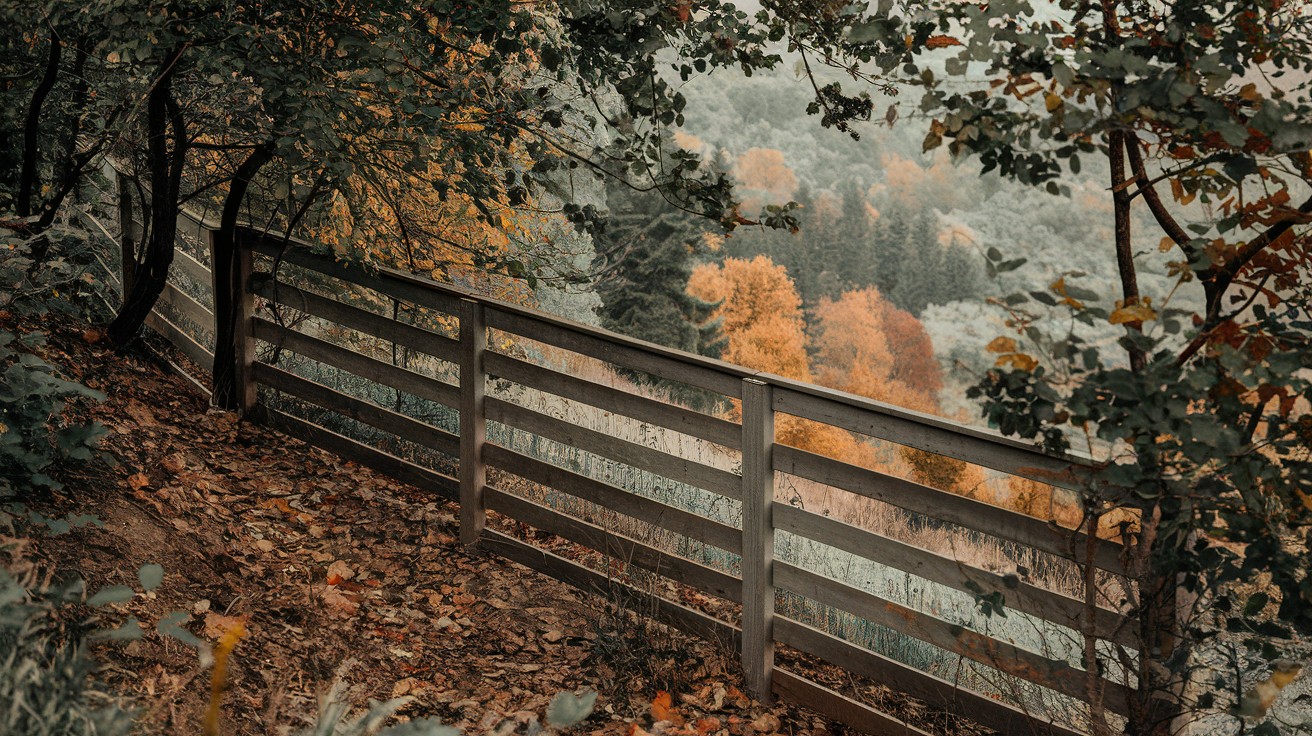
Disappears into the landscape. Use natural wood tones. Space boards to mimic tree spacing. Your fence becomes part of the forest.
Blending techniques:
- Match wood stain to tree bark
- Vary board spacing randomly
- Use natural post materials
- Plant native shrubs around base
19. Reclaimed Barn Wood Staggered on Hillside
History in every board. Barn wood tells stories. Each piece has character from decades of use.
Barn wood characteristics:
- Hand-hewn saw marks
- Square nail holes
- Weathered gray patina
- Unique grain patterns
Authenticity check: Real barn wood has square nail holes. Modern “barn wood” has round holes.
20. Log-Style Horizontal Fencing on a Rural Slope
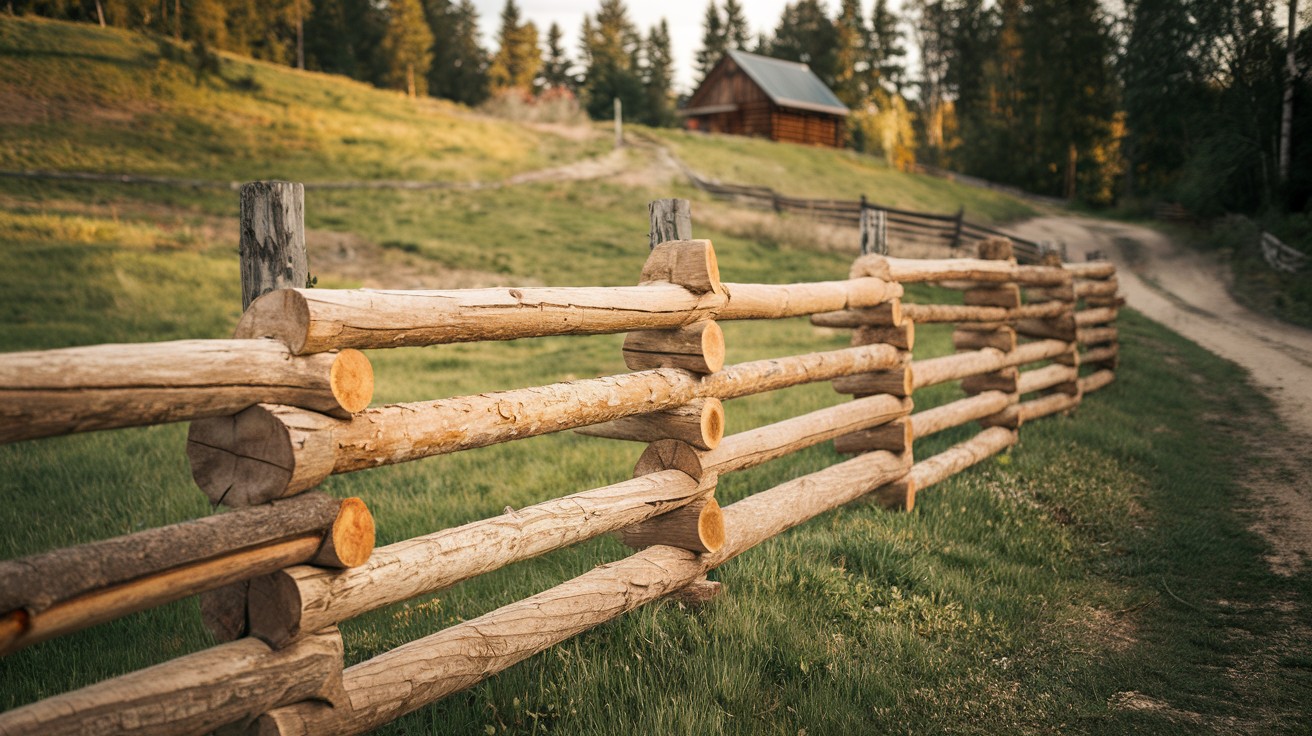
The cabin vibes without the cabin. Half-logs create the look of log construction. Costs less than full logs.
Log style options:
- Half-logs for authentic look
- Landscape timbers for budget choice
- Milled logs for consistency
- Natural logs for rustic feel
Installation tip: Use landscape timbers. Pre-cut and ready to install.
Functional + Stylish Additions
21. Built-in Horizontal Fence Bench Along Sloped Patio
Seating that doesn’t take up space.
Two functions in one structure:
- Privacy fence
- Built-in seating
Bench specifications:
- 18-inch seat height
- 16-inch seat depth
- Back support at 15-degree angle
- Weather-resistant cushion storage
Perfect for sloped patios where furniture slides around.
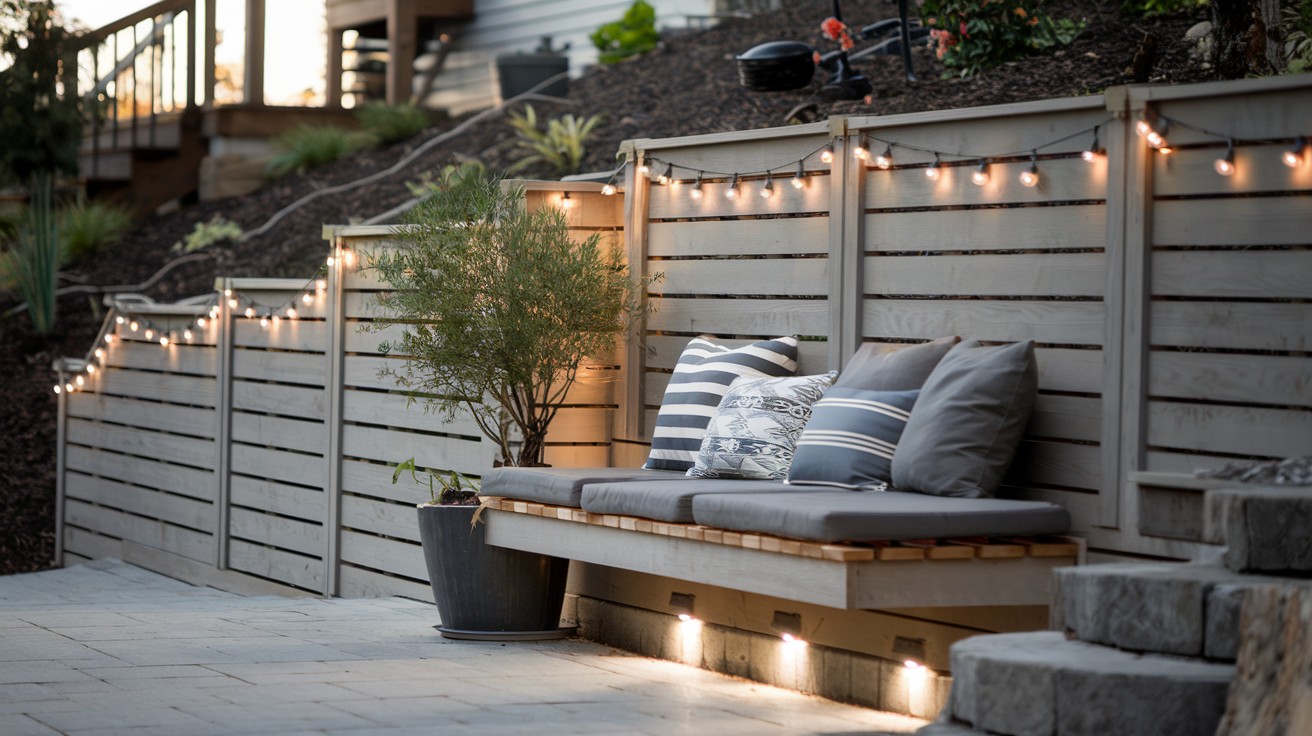
22. Lighting Integrated into Horizontal Slats on a Slope
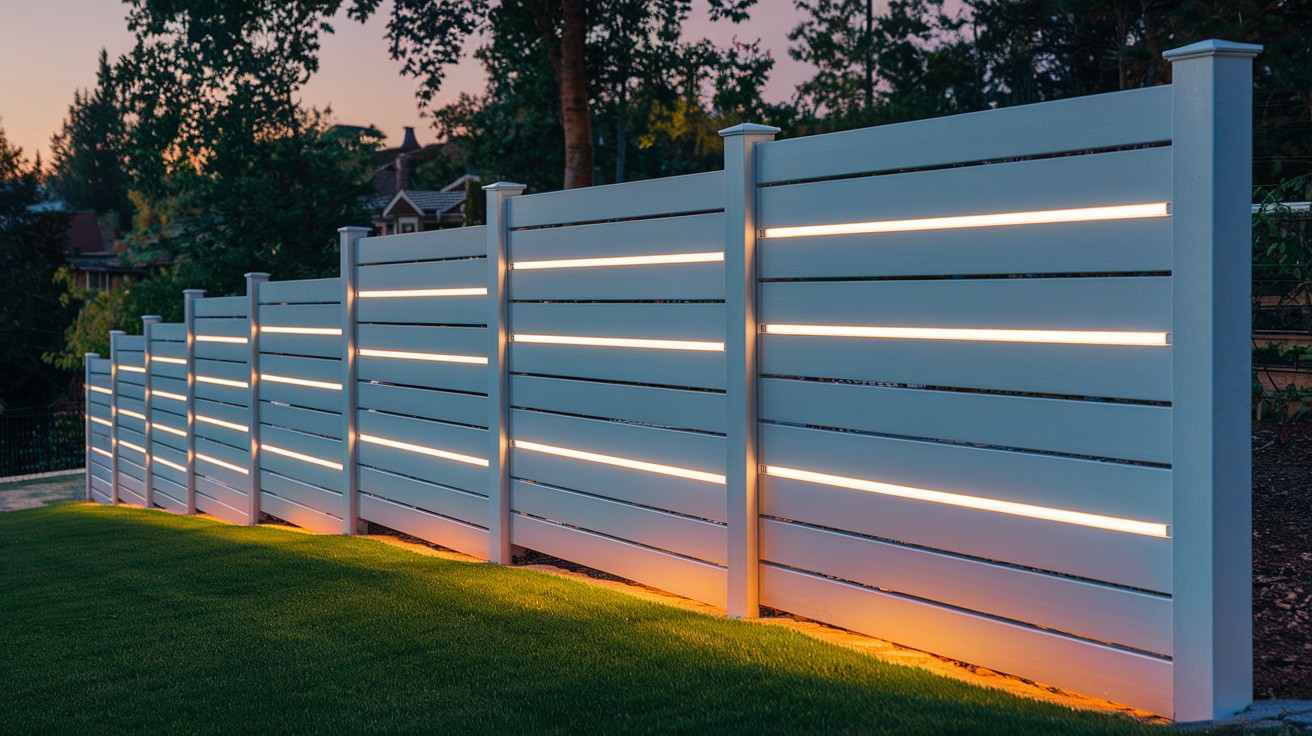
Safety meets style. LED strips between fence boards create amazing nighttime effects.
Lighting options:
- LED strip lights between boards
- Solar post cap lights
- Low-voltage pathway lighting
- Motion sensor security lights
Power tip: Use low-voltage LED systems. Safer and easier to install.
23. Planter Boxes Attached at Stepped Levels
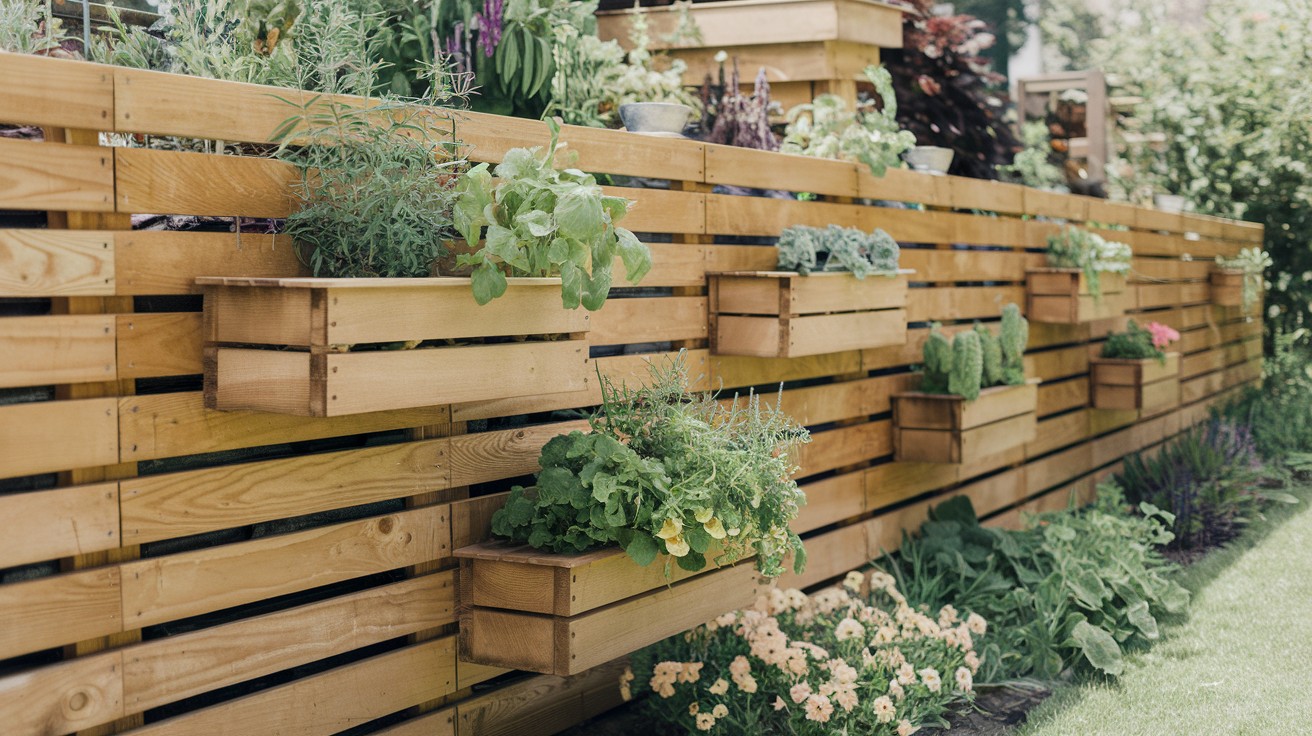
Gardening on a slope was easy. Attach planter boxes to your fence. Creates gardening space without flat ground.
Planter specifications:
- 8-inch minimum depth
- 12-inch width for herbs
- 18-inch width for vegetables
- Drainage holes every 6 inches
Drainage essential: Drill holes in box bottoms. Add a gravel layer.
24. Trellis Extensions Above for Vines or Privacy on Incline

Grow your privacy. Add trellis sections above your fence. Vines grow up, privacy grows thicker.
Fast-growing options:
- Hops for quick coverage
- Grapes for fruit and privacy
- Clematis for flowers
- Ivy for year-round green
Trellis materials:
- Lattice panels
- Wire mesh
- Cable systems
- Bamboo screening
25. Movable Panels or Sliding Gates for Slope-Side Access
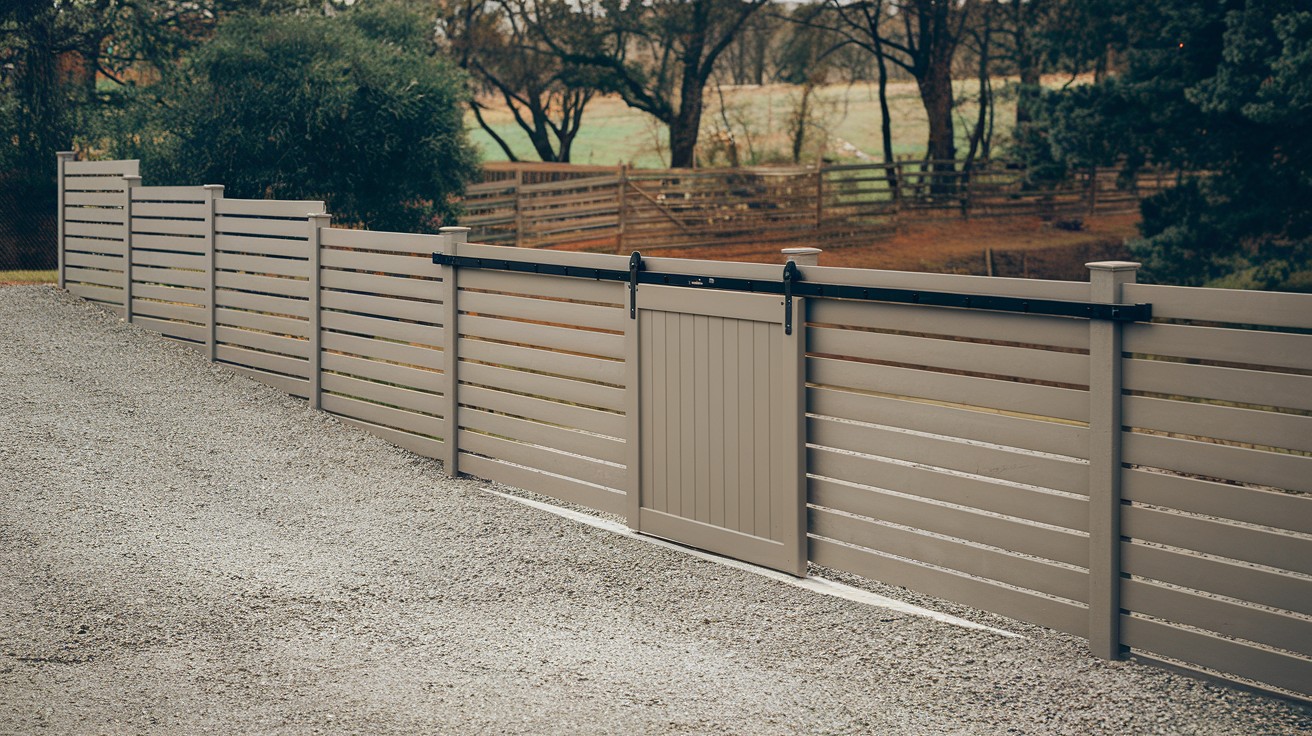
Don’t fence yourself in. Sliding panels work better than swing gates on slopes. No clearance issues.
Hardware options:
- Barn door tracks
- Commercial gate hardware
- DIY roller systems
- Ground-mounted guides
Track system: Use barn door hardware. Handles weather and weight.
Split Level & Multi-Tiered Solutions
26. Double-Height Horizontal Fence with Planter in Between
Visual break in tall fencing. Tall fences can feel overwhelming. Break them up with planter sections.
Design ratios:
- Bottom fence: 3 feet high
- Planter section: 2 feet high
- Top fence: 3 feet high
- Total height: 8 feet
Proportion rule: Keep planter height at 1/3 the total fence height.
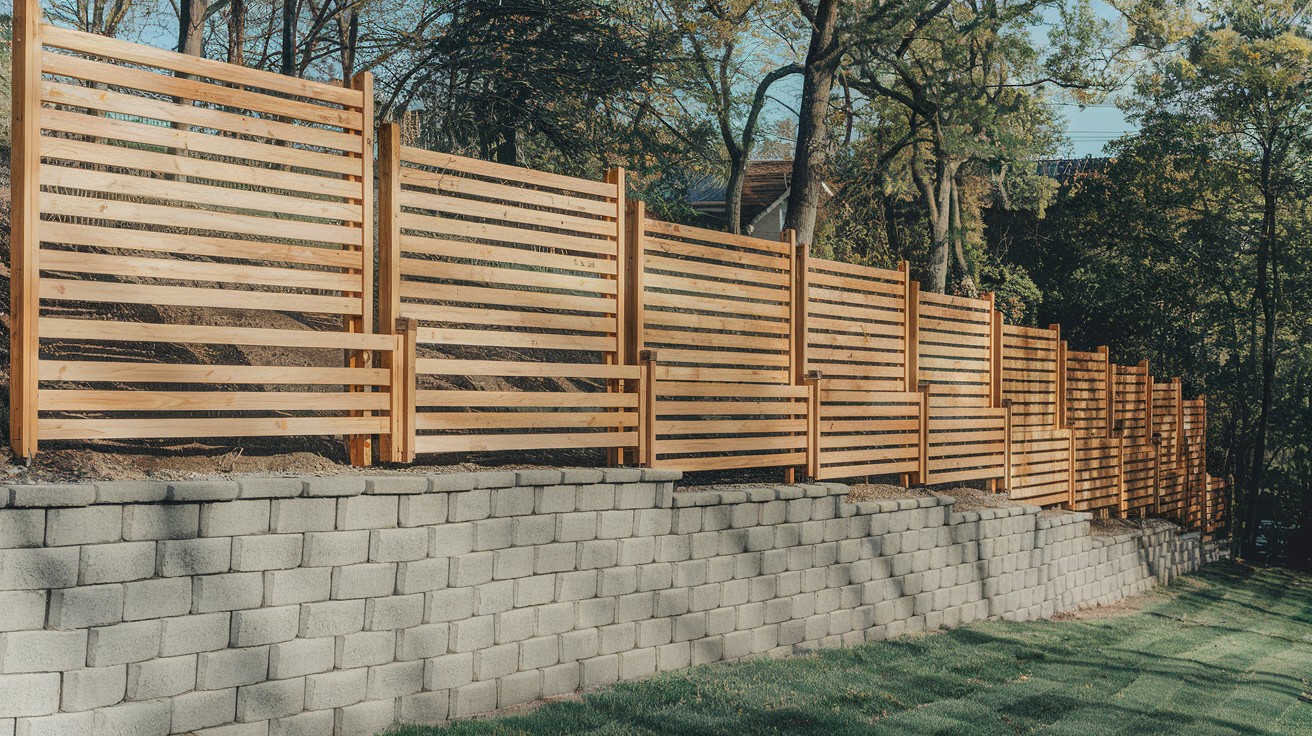
27. Multi-Level Retaining Wall + Horizontal Fence Combo
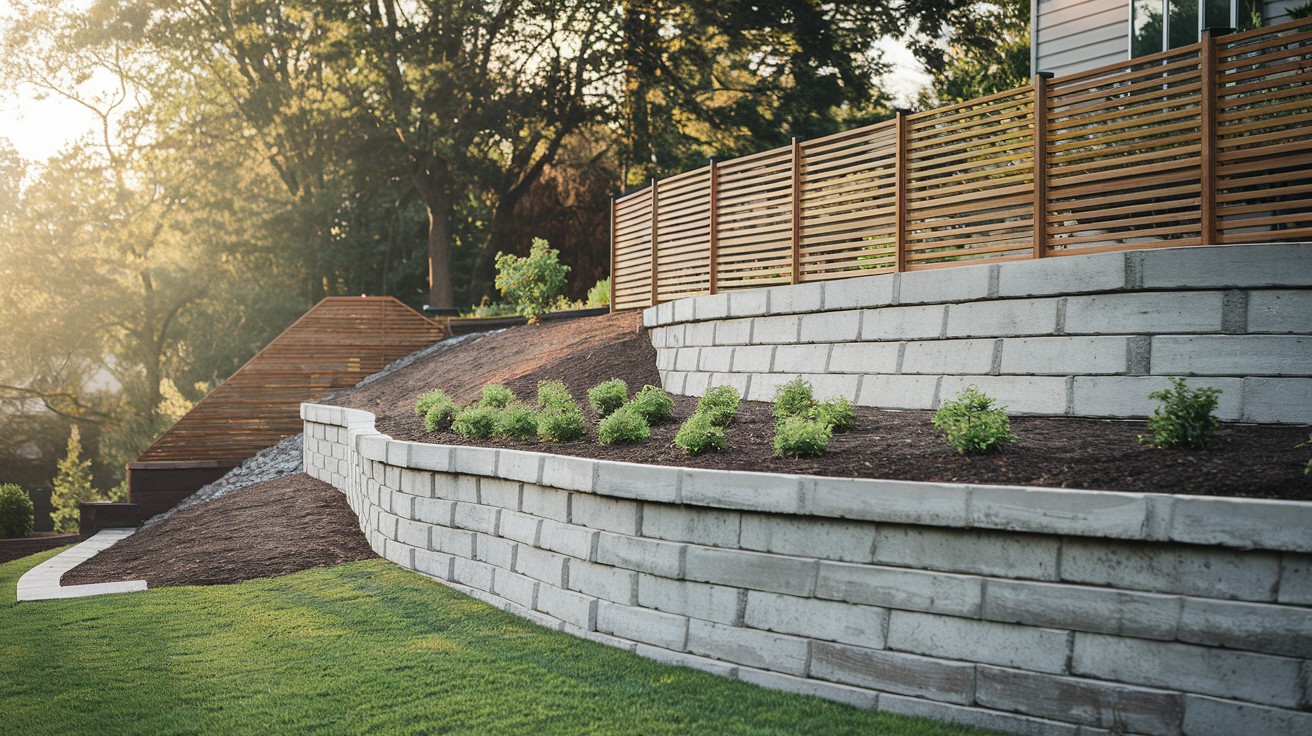
Two problems, one solution. Combine retaining wall function with fence privacy. Your slope gets stabilized and enclosed.
Wall materials:
- Concrete blocks for strength
- Natural stone for beauty
- Timber walls for budgets
- Poured concrete for permanence
Engineering note: Check local codes. Some areas require permits for retaining walls over 4 feet.
28. Tiered Deck Railings with Horizontal Slats
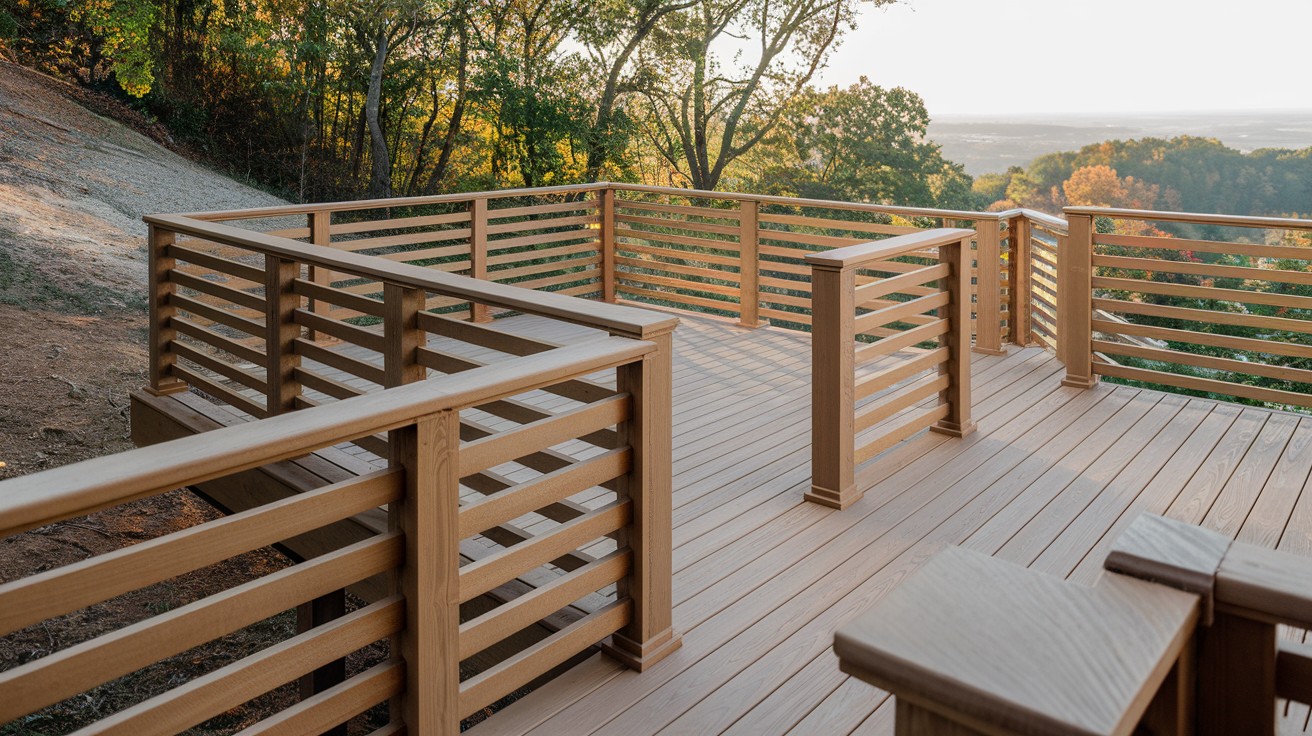
Deck railings that look like fencing. Use horizontal slats instead of vertical balusters. Creates a unified look with your fence.
Railing requirements:
- 36-inch height minimum
- 42-inch for elevated decks
- 4-inch maximum gap between slats
- Grippable handrail on top
29. Offset Panel Design That Follows Natural Contours
Work with your slope, not against it. Let fence panels follow the natural land contours. Creates organic, flowing lines.
Contour following tips:
- Survey your slope first
- Mark natural high and low points
- Plan panel breaks at elevation changes
- Use flexible connection methods
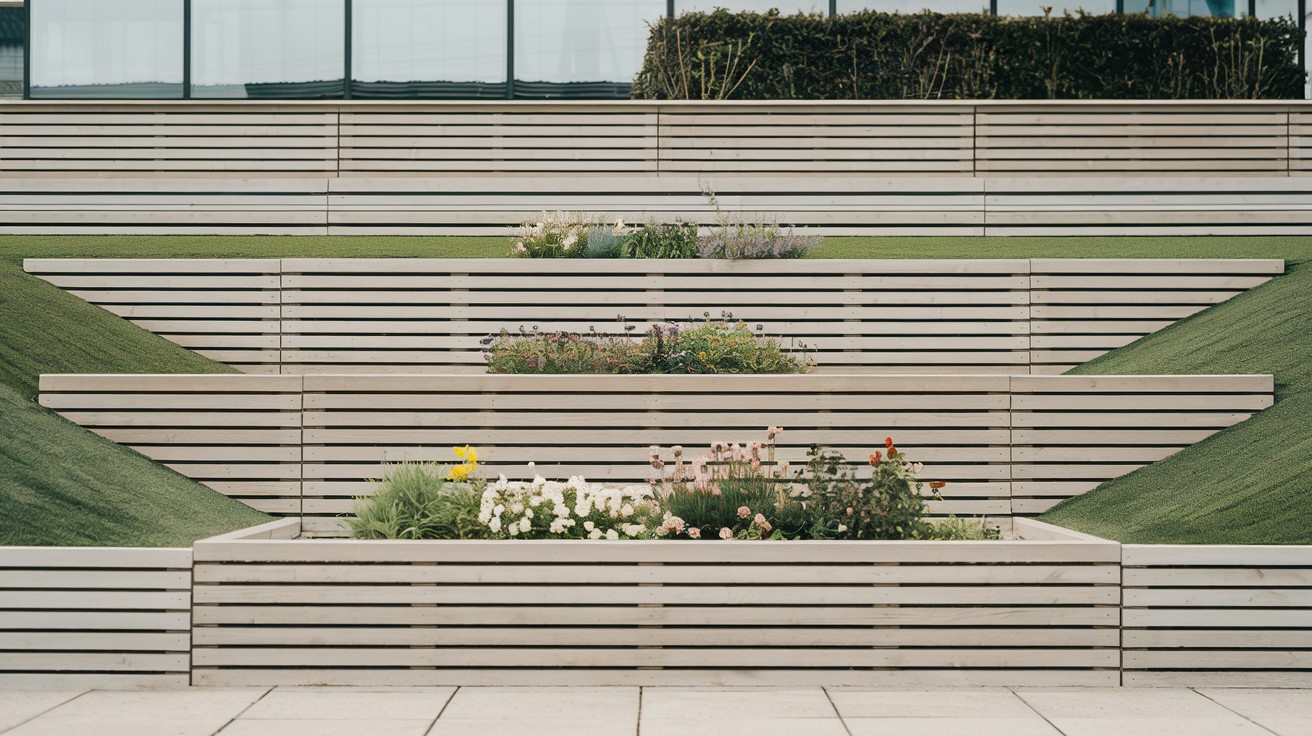
30. Layered Horizontal Screens Cascading with Slope

Multiple fence layers for complex slopes.
Perfect for:
- Very steep slopes
- Multiple level changes
- Creating garden rooms
Layer spacing:
- 3-4 feet between screen layers
- Stagger heights for visual interest
- Plant between layers for softening
- Include walkways for maintenance
Bonus Unique Concepts
31. Horizontal Bamboo Panel Fence That Bends with Terrain
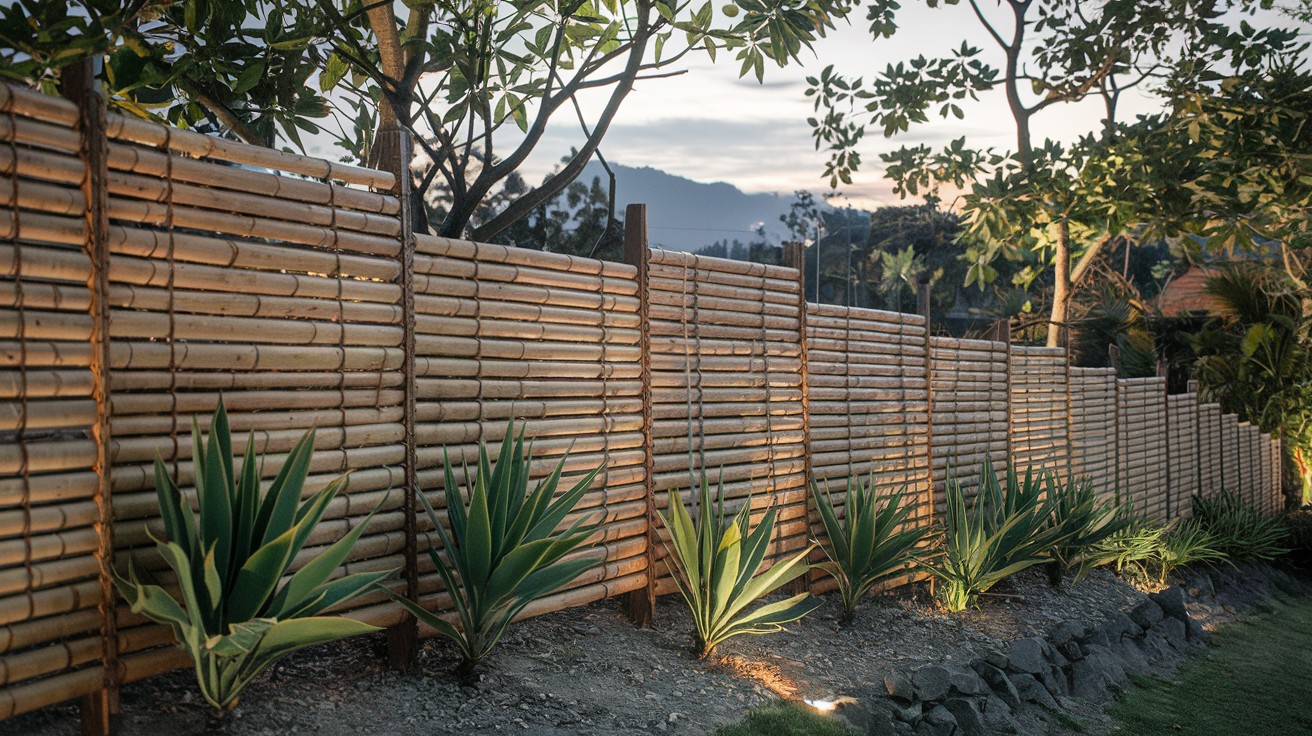
Flexibility is strength. Bamboo bends without breaking. Perfect for slopes that shift or settle.
Bamboo advantages:
- Natural flexibility
- Fast growth rate
- Eco-friendly material
- Natural pest resistance
Installation tips:
- Pre-drill all holes
- Use stainless steel fasteners
- Allow for movement
- Treat cut ends
Sustainability bonus: Bamboo grows fast. Environmentally friendly choice.
32. Gabion Base with Wood Horizontal Top for Erosion Control
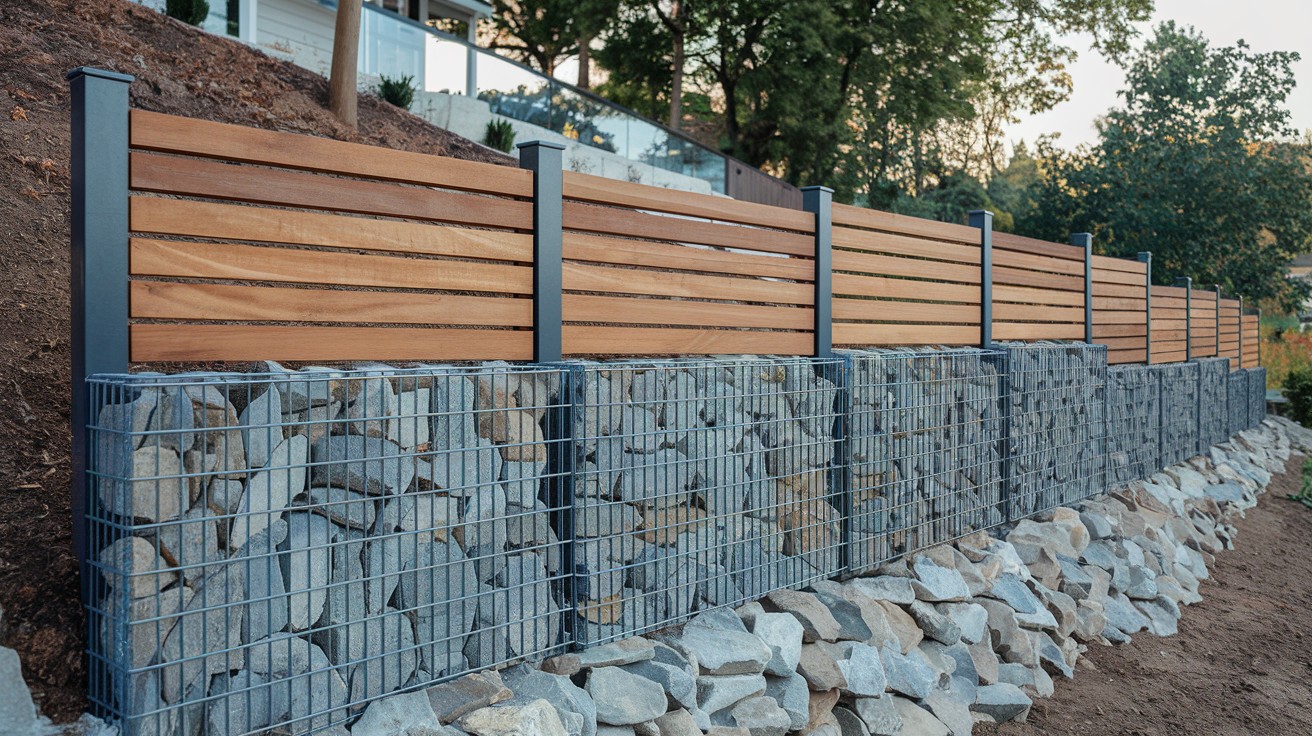
Function meets beauty. Gabion baskets filled with rocks control erosion. The wood fence on top provides privacy.
Gabion specifications:
- 12-inch basket height minimum
- 3-inch rock size maximum
- Galvanized wire mesh
- Proper drainage behind
Two-for-one solution: Slope stabilization and privacy in one structure.
33. Mixed-Material Fence: Stone at Base, Horizontal Planks on Top
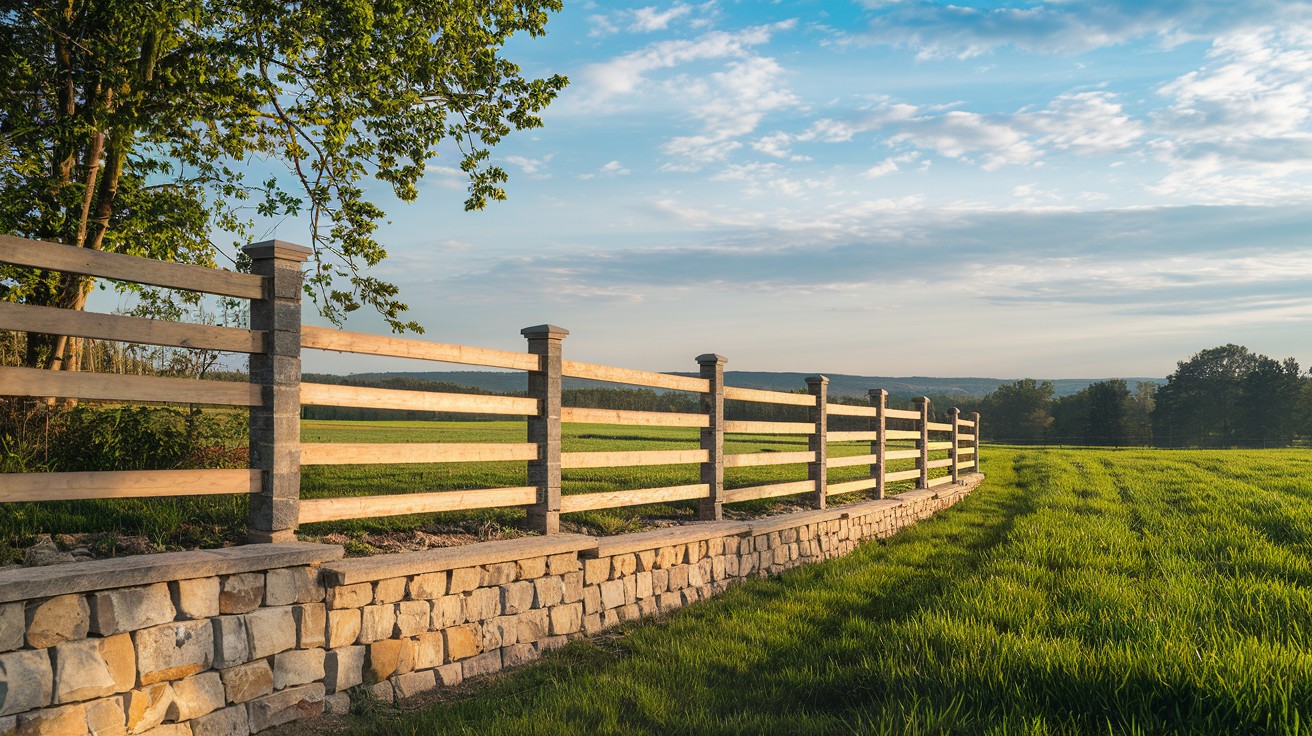
Permanent base, replaceable top. Stone or concrete base lasts forever. The wood top section can be replaced when needed.
Base material options:
- Natural fieldstone
- Concrete block
- Poured concrete
- Manufactured stone veneer
Design flexibility: Change wood style without rebuilding the entire fence.
Pro Tips for Installing Horizontal Fence on a Slope
Post placement is everything. Set posts plumb (straight up), not perpendicular to the slope. This keeps your fence looking right. Dig deeper on slopes. Gravity works against you. Add 6 inches to standard post hole depth.
Use a water level. String lines don’t work on slopes. Water levels show true levels across distances. Plan for drainage. Water will collect behind your fence. Install drainage or drill weep holes.
Buy extra materials. Slopes eat up 15-20% more materials than flat ground. Better to have too much than too little. Consider renting tools. Augers, levels, and saws make the job easier. Rental costs less than buying.
Check your work twice. Slopes hide mistakes until it’s too late. Measure and check everything twice.
Conclusion
Your sloped yard isn’t a problem anymore. It’s an opportunity. You now have 33 proven horizontal fence ideas. Each one tested on real slopes. Each one designed to work.
The secret? Choose the right design for your situation. Gentle slopes need different approaches than steep ones. Your budget matters. Your skill level matters too.
Here’s your action plan:
- Measure your slope first
- Pick a design that matches your skills
- Buy quality materials
- Take your time
Don’t rush the job. Mistakes on slopes cost money to fix. Get help when you need it.
Trust the process. I’ve seen countless homeowners change problem slopes into beautiful fence features. Your slope can be your fence’s best asset. Start planning today.
Frequently Asked Questions
What’s the biggest mistake people make with horizontal fences on slopes?
They try to rake the boards instead of stepping them. Raked horizontal boards look awkward and unprofessional.
How deep should fence posts be on a slope?
Add 6 inches to standard depth for slopes. Gravity works against you, so deeper posts prevent leaning and failure.
Can I use regular fence panels on a slope?
No, regular panels won’t work properly. You need custom-cut boards or stepped panels designed for sloped installation.
What’s the cheapest way to build a horizontal fence on a slope?
Use pressure-treated pine with concrete block leveling. This method costs 40% less than cedar with concrete footings.
Do horizontal fences work better than vertical on slopes?
Yes, horizontal boards hide uneven ground better. They create clean sight lines that make slopes look intentional, not accidental.