
Grey wood stain transforms ordinary timber into sophisticated surfaces with minimal effort. This subtle finish has become increasingly popular in home design for its contemporary appeal and ability to highlight natural wood textures.
In this article, I’ll walk you through the complete process of applying grey stain correctly. You’ll learn proper preparation techniques, application methods, and finishing steps that professional woodworkers use.
I’ve spent over 15 years working with various wood finishes and have tested dozens of grey stain products across different wood types. The techniques shared here work consistently on projects ranging from furniture to flooring.
Whether you’re refreshing an old piece or starting from scratch, this guide addresses the specific challenges of working with grey stain, including preventing blotchiness and ensuring even coverage that showcases the natural beauty of your wood.
Let me show you how to get professional results without specialized equipment or years of experience.
Choosing the Right Grey Stain for Wood
Types of Grey Stains
Not all grey stains are created equal. The type you choose affects how your project turns out and how long it lasts.
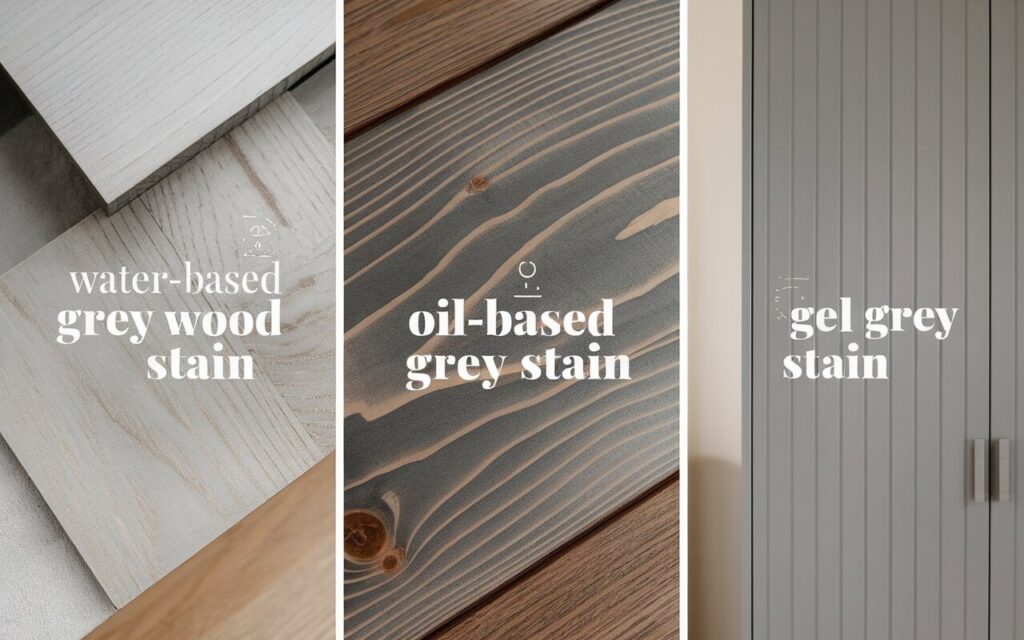
Water-based grey stains dry quickly, usually within 2-3 hours. I like them because they have less odor and clean up easily with soap and water. They’re good for indoor projects where you need to finish fast, but they might not be as tough as other options.
Oil-based grey stains take longer to dry (often 8-24 hours), but they soak deeper into the wood. You’ll get richer color and better protection, especially for items that get heavy use. I recommend these for furniture you’ll use daily.
Gel stains have a thick consistency like pudding. They don’t drip or run, making them perfect for vertical surfaces like doors or cabinets. They sit more on top of the wood rather than soaking in, which helps create even color on tricky woods like pine or maple.
How to Pick the Best Grey Stain for Your Project
Match the stain to your wood type:
- Soft woods (pine, cedar) – Use a pre-stain conditioner to prevent blotchy results
- Hardwoods (oak, maple) – Can handle most stains, but might need different application techniques
- Exotic woods – Test in a hidden spot first, as some react unexpectedly with stains
Consider where your project will live:
- Indoor items need less weather protection
- Outdoor projects require stains with UV blockers and water repellents
Popular grey stain brands I’ve had success with:
- Minwax “Classic Gray” – Good middle-of-the-road grey that works on most woods
- Varathane “Weathered Gray” – Creates an aged, reclaimed wood look
- General Finishes “Driftwood” – Premium option with excellent coverage
Before you buy a full can, grab a small sample and test it on scrap wood from your project. Different woods can change how the color looks. What appears silver-grey on oak might look bluish on pine.
The finish you want matters too. Looking for a light wash of color that shows lots of grain? Choose a lighter grey and wipe it off quickly after applying. Want deeper, more dramatic color? Select a darker shade or apply multiple coats.
Preparing Your Wood Surface
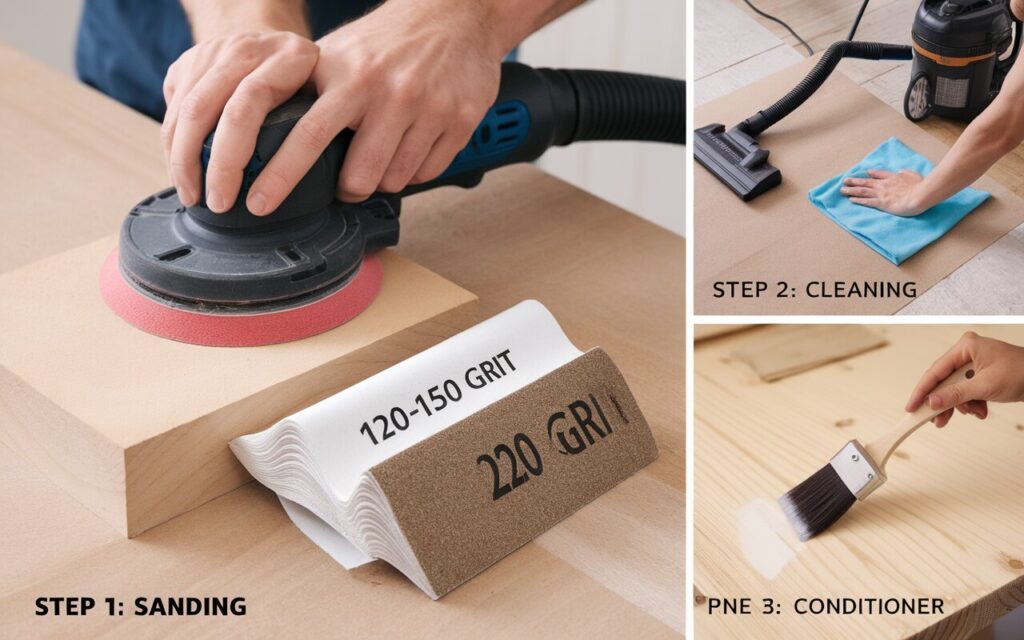
Step 1: Sanding the Wood
Proper sanding makes or breaks your project. Skip this step, and your grey stain will look spotty and rough.
Start with 120-150 grit sandpaper to remove any old finish, stains, or rough spots. I always sand in the direction of the wood grain, never against it or in circles. This prevents scratches that will show up when you stain.
After initial sanding, switch to 220 grit for a final pass. This finer grit creates a smooth surface that absorbs stain evenly.
Quick tip: Don’t press too hard when sanding. Let the sandpaper do the work.
For flat surfaces, I recommend using a sanding block or orbital sander. For curved areas or details, hand sanding works best.
Step 2: Cleaning the Surface
Dust is your enemy when staining. Even tiny particles can ruin your finish.
After sanding, clean the wood thoroughly:
- Vacuum the entire surface
- Wipe with a tack cloth to pick up fine dust
- For stubborn areas, use a slightly damp cloth (not wet!)
Avoid touching the clean wood with your bare hands. Natural oils from your skin can create spots that resist stains. I wear clean cotton gloves if I need to handle the wood after cleaning.
Let the surface dry completely before moving to the next step. Even slight moisture can affect how the stain looks.
Step 3: Applying Wood Conditioner (Optional)
Some woods need extra help. Pine, maple, birch, and other soft or porous woods tend to absorb stain unevenly, creating blotchy patches.
I always use pre-stain wood conditioner on these types of wood. It:
- Seals the most absorbent parts of the grain
- Creates a more uniform surface for staining
- Results in more consistent color
Apply conditioner with a clean brush or cloth, following the product directions exactly. Most require you to apply the stain within 2 hours after the conditioner.
Don’t skip this step for softwoods. The 15 minutes it takes can save you from disappointing results, especially with grey stains, which tend to highlight imperfections.
For hardwoods like oak or walnut, conditioner is usually not needed. These woods naturally accept stain more evenly.
Applying Grey Stain for Wood

Step 1: Choose the Right Applicator
Match your tool to your stain type:
- Oil-based stains: Natural bristle brushes hold more product
- Water-based stains: Foam or synthetic brushes work best
- Most projects: Lint-free cloth (old t-shirt) for maximum control
- Detail work: Small artist’s brush for tight spaces
Step 2: Stirring and Testing the Stain
Stir thoroughly – never shake the can as this creates bubbles.
Test on scrap wood from your project to check color, absorption, and coats needed before starting.
Step 3: Apply the First Coat of Stain
Work in small sections (2-3 feet wide) to prevent drying before wiping.
Apply generously in the direction of the grain. For vertical surfaces, start at the top and work down to avoid drip marks.
Step 4: Wipe Off Excess Stain
Let the stain sit based on the desired darkness:
- 5 minutes: lighter finish
- 10-15 minutes: medium tone
- 15+ minutes: darker result
Wipe firmly with a clean cloth in long, grain-following strokes. If you see streaks, reapply the stain to that area and wipe again.
Step 5: Drying and Curing
Water-based stains:
- Dry to touch: 1-2 hours
- Before topcoat: 24 hours
Oil-based stains:
- Dry to touch: 6-8 hours
- Before topcoat: 24-48 hours
- Full cure: 72 hours
Optimal conditions: 65-75°F, 50-60% humidity, good airflow, and a dust-free environment. Poor conditions significantly extend drying time.
Common Mistakes to Avoid
Over-application or Under-application of Stain
Too much stain causes:
- Sticky surfaces that never dry
- Blotchy, uneven finishes
- Peeling or flaking later
Too little stain creates:
- Pale, washed-out appearance
- Uneven coverage with light spots
Get it right: Apply generously but wipe thoroughly. The wood should look wet without puddles. Use consistent pressure when wiping to avoid light and dark patches.
Skipping the Sanding or Conditioning Step
When you skip sanding:
- Stain can’t penetrate evenly
- Old finishes block absorption
- Surface roughness becomes more visible
When you skip conditioning (on woods that need it):
- Pine turns blotchy
- Maple develops dark, irregular patches
- Birch absorbs stain unevenly
The difference between professional and amateur results often comes down to these simple prep steps that many people rush through.
Not Testing the Stain First
Every wood reacts differently to stain, even pieces from the same tree.
Always test on a hidden spot or scrap piece to see:
- The actual color (often different from the can)
- How many coats do you need
- Any unexpected reactions with your wood
- Drying time in your conditions
Different wood species absorb stain differently. A grey stain might look silver on oak but bluish on pine. Testing lets you adjust before it’s too late.
Conclusion
Applying grey stain to wood transforms ordinary pieces into striking, modern creations when done correctly. The key steps, proper preparation, choosing the right stain type, careful application, and adequate drying time, make all the difference between amateur and professional results.
Remember that patience is essential throughout the process. Take time with sanding, test your stain before committing, and allow proper drying between coats. These simple but crucial steps will help you avoid common problems like blotchiness and uneven color.
With the techniques covered in this guide, you now have the knowledge to confidently tackle your next grey stain project and achieve that sophisticated, contemporary look that showcases the natural beauty of your wood.
FAQs
How long does grey stain take to dry?
Water-based stains usually dry in 1-2 hours, while oil-based stains may take 4-6 hours to dry. Always check the product’s instructions for specific drying times.
Can I apply grey stain over a previous finish?
Yes, but you will need to strip or sand the old finish to allow the new stain to adhere properly.
How many coats of grey stain should I apply?
One coat is often enough for most projects, but you can apply a second coat if you desire a deeper color or more uniform coverage.
What if my grey stain looks too dark or too light?
If the stain is too dark, you can lightly sand the surface to remove some of the stain or wipe it off sooner. If it’s too light, consider applying a second coat.
Can I use grey stain on any type of wood?
Grey stain works well on most woods, but the final color can vary based on the wood type. Hardwoods, like oak, may absorb the stain differently than softwoods, like pine.