
Have you ever walked into a room with a beautiful wood slat wall and thought, “I wish I could have that in my home”?
Creating your own DIY wood slat wall is much simpler than you might think, and it’s a project that can completely transform any space in your home without breaking the bank.
In this step-by-step guide, I’ll show you how to build a beautiful wood slat wall that will have your friends thinking you hired a professional.
Whether you want to add warmth to your living space, create an eye-catching feature in your bedroom, or give your entryway some personality, a DIY wood slat wall is perfect for weekend warriors of all skill levels.
By the end of this post, you’ll have all the knowledge you need to create a designer-worthy wood slat wall that perfectly fits your style and space.
What is a Wood Slat Wall?
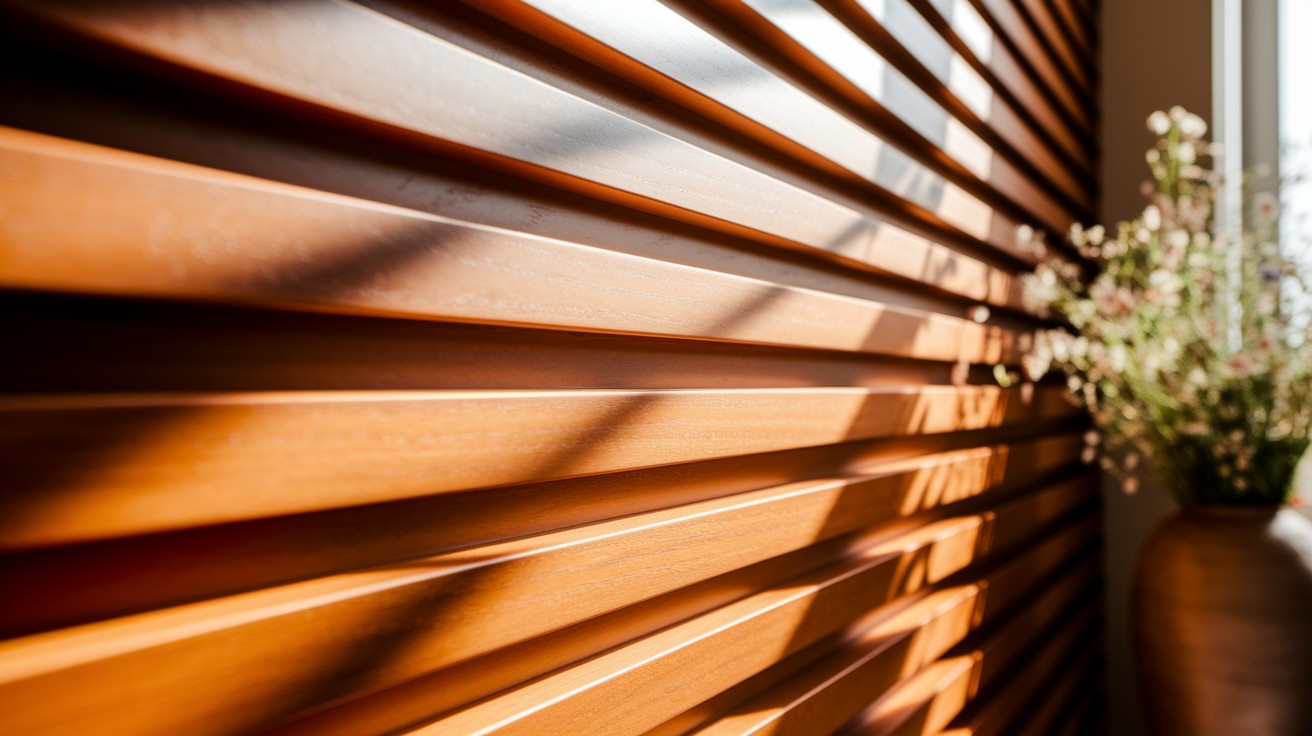
A DIY wood slat wall is a stylish home feature made of thin wooden boards attached to your wall with small gaps between them.
These vertical or horizontal wooden strips create texture, depth, and warmth in any room.
Popular in modern homes, a wood slat wall transforms plain walls into eye-catching focal points without major renovation. Perfect for living rooms, bedrooms, or entryways!
Tools and Materials You’ll Need
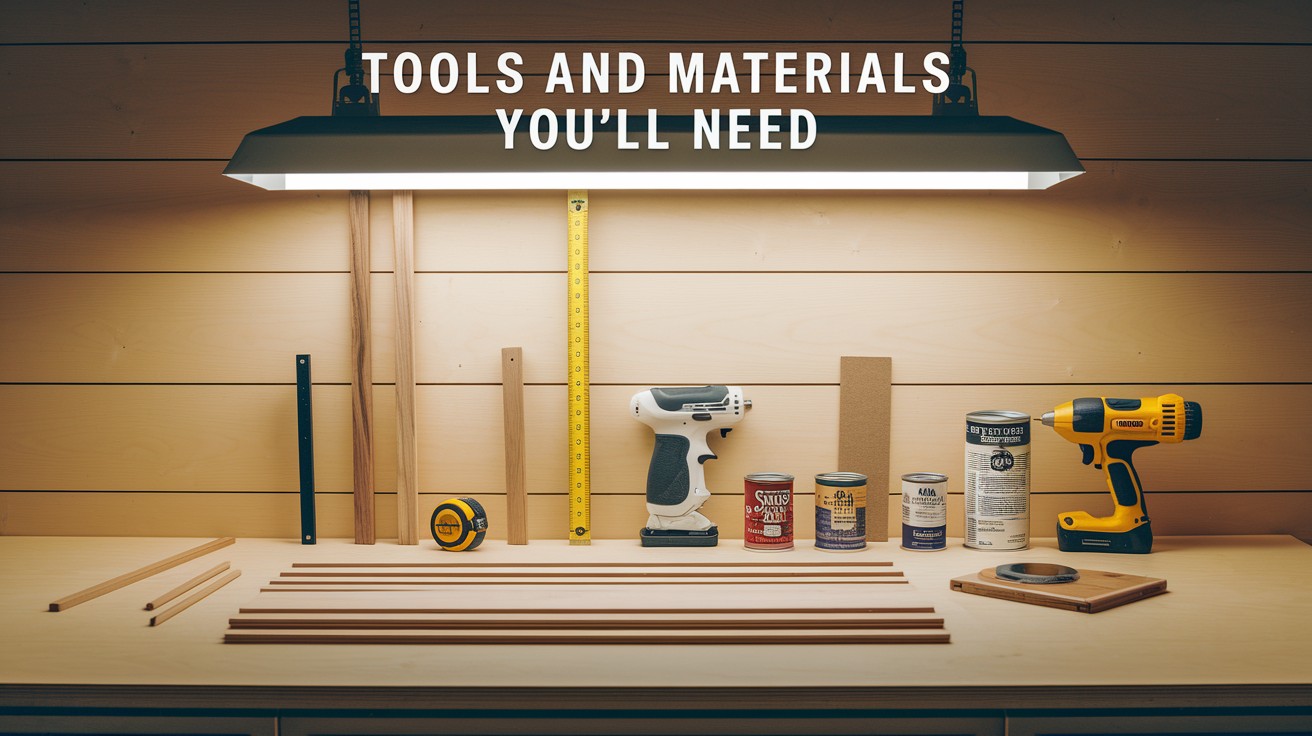
Here are the essential tools and materials you’ll need to get started on your DIY wood slat wall project. Having everything prepared will make the process smooth and enjoyable!
Basic Tools:
- Tape measure & level
- Stud finder
- Saw for cutting (circular saw, miter saw, or hand saw)
- Nail gun or hammer
- Caulking gun
- Sandpaper (medium and fine grit)
- Paint supplies (brushes, rollers, trays)
- Pencil for marking
Materials Checklist:
- MDF boards or pine boards (1×2, 1×3, or 1×4 for battens)
- Wider MDF or pine (1×6 or 1×8 for horizontal rails, if needed)
- Wood glue or construction adhesive
- Finishing nails (1.5″ to 2″)
- Caulk & wood filler
- Primer & paint
- Painter’s tape
- Drop cloths to protect your floor
Step-by-Step Guide to Creating Your DIY Wood Slat Wall
Follow these simple steps to build your own beautiful wood slat wall, adding texture and style to any space. Take your time and enjoy the transformation process!
Step 1: Measure and Plan

- Decide on the pattern and spacing for your slats (vertical, horizontal, or grid)
- Measure your wall dimensions accurately
- Calculate how many slats you’ll need based on your spacing preference
- Create a sketch with measurements and mark stud locations
- Add up the total wood needed and purchase materials
Pro tip: Use painter’s tape to mark where slats will go on the wall before buying materials. This helps visualize the final look and confirm spacing.
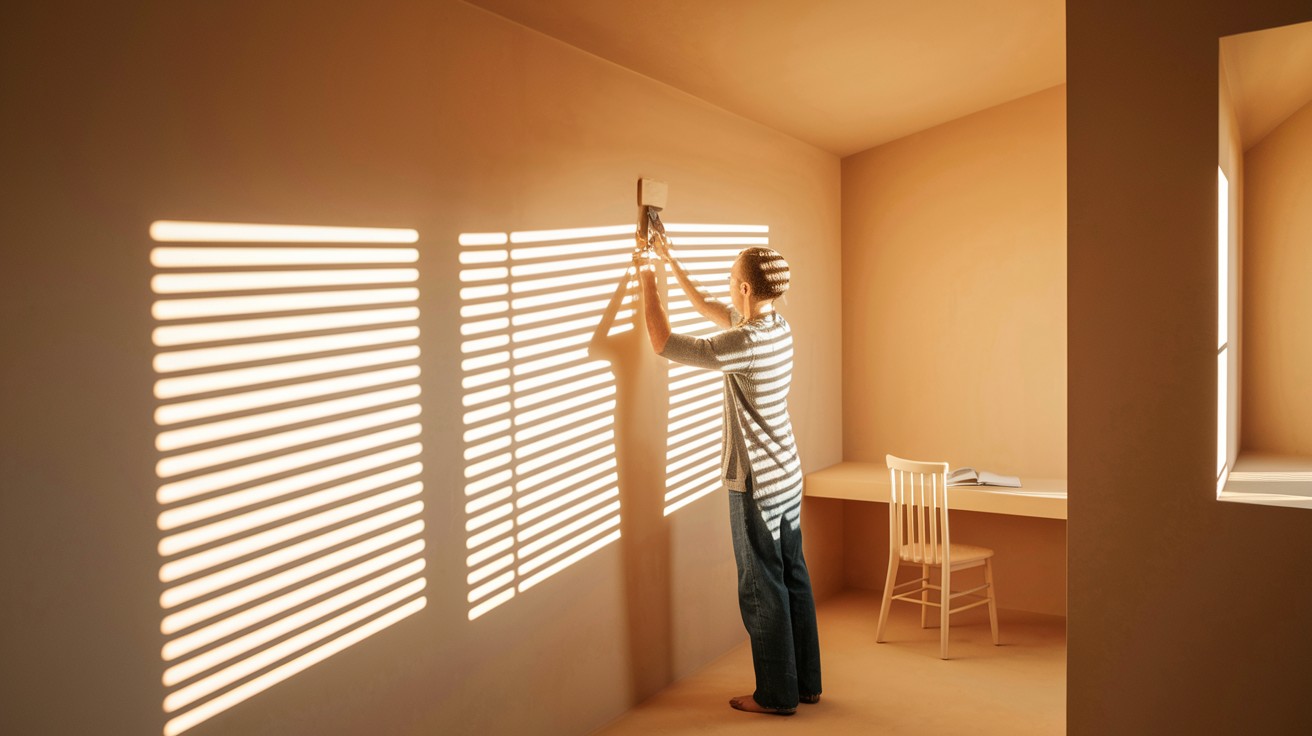
Step 2: Prepare the Wall

- Remove any outlet covers or switch plates
- Fill any holes or imperfections with spackle
- Sand the wall smooth
- Clean the wall to remove dust and debris
- Paint the wall the same color you’ll use for the finished project (this saves time later and ensures no gaps show)
Step 3: Install the Frame (for Wainscoting Style)
If you’re doing a partial wall treatment:
- Determine the height (typically 32-40 inches from the floor)
- Install the top horizontal board first, making sure it’s level
- Install the bottom board (if not using existing baseboards)
- Use a level constantly to ensure everything is straight
Step 4: Add the Vertical Slats
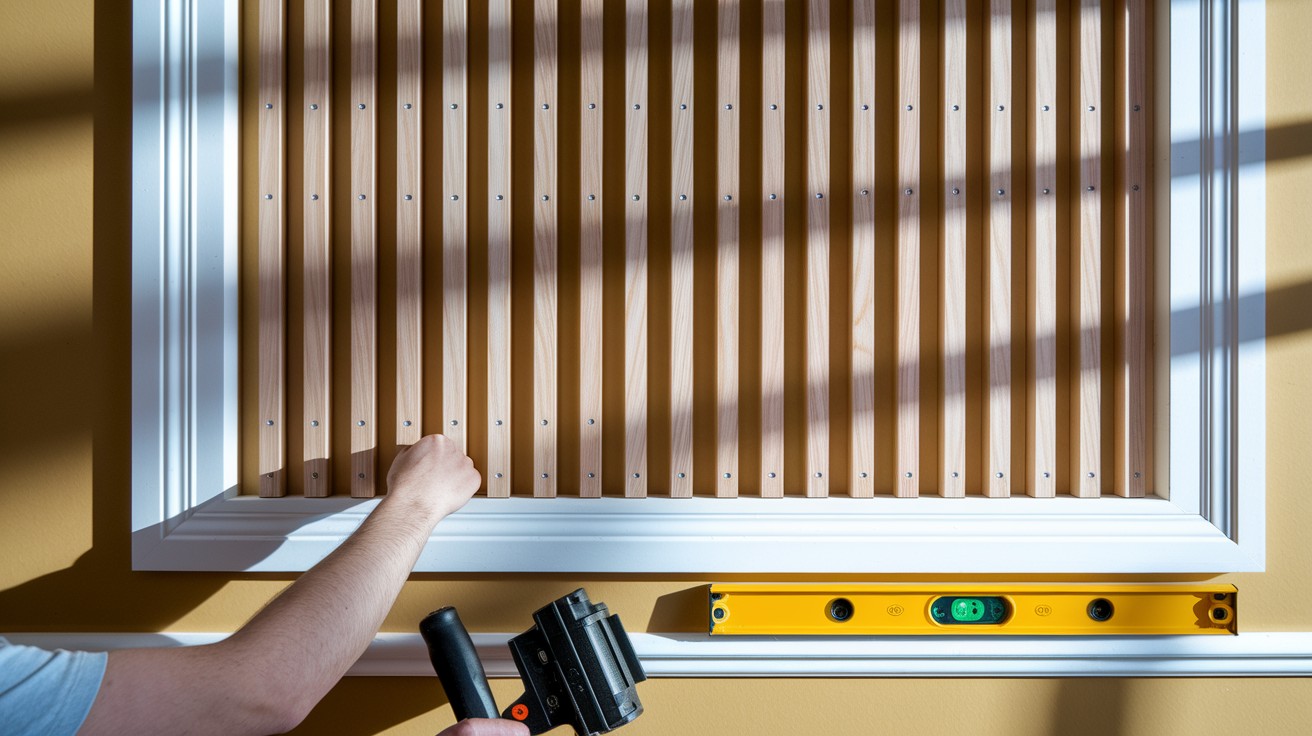
- Mark the placement of each slat according to your plan (typically 16-24 inches apart)
- Use a level to ensure each slat is perfectly straight
- Apply wood glue to the back of each slat
- Secure with finishing nails (ideally into wall studs where possible)
- Continue until all vertical slats are installed
- Double-check level and alignment frequently
Step 5: Add Horizontal Slats (Optional)
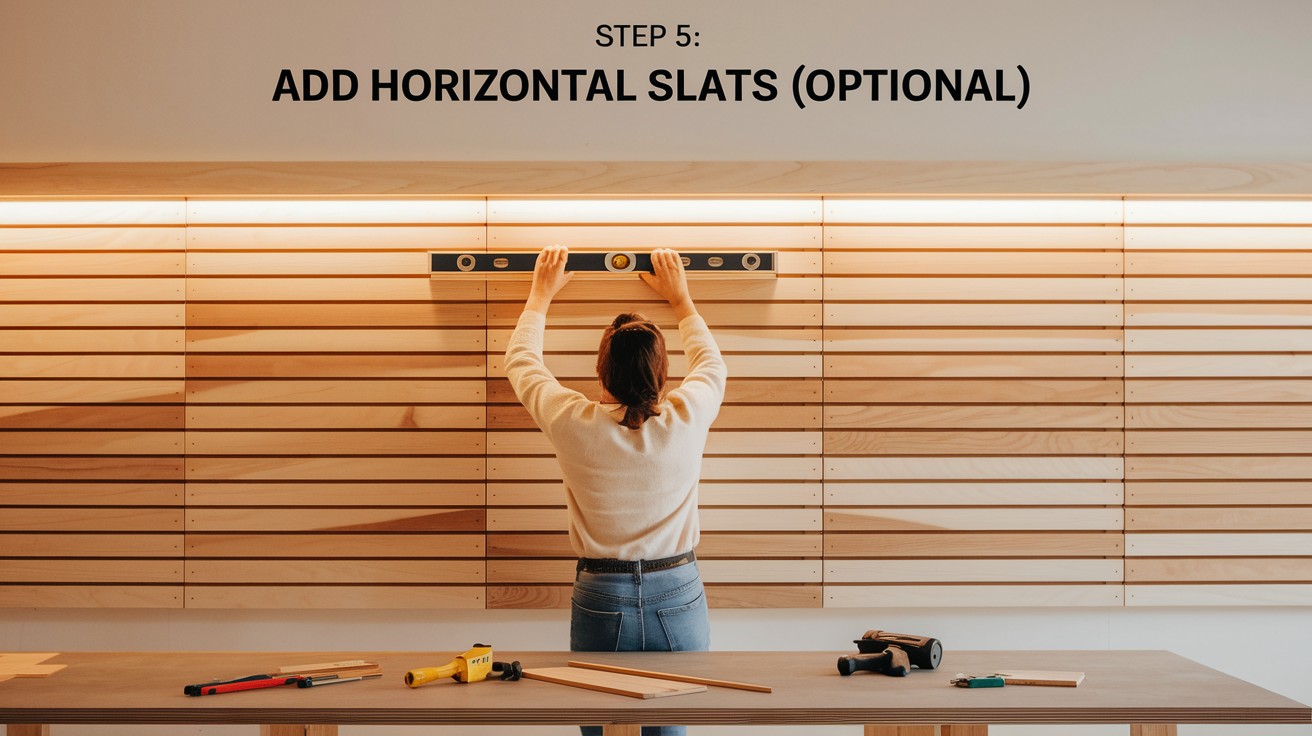
If you’re creating a grid pattern:
- Measure and mark where horizontal slats will go
- Cut pieces to fit between vertical slats
- Apply wood glue and secure with nails
- Check that everything is level and aligned
Step 6: Finish the Project
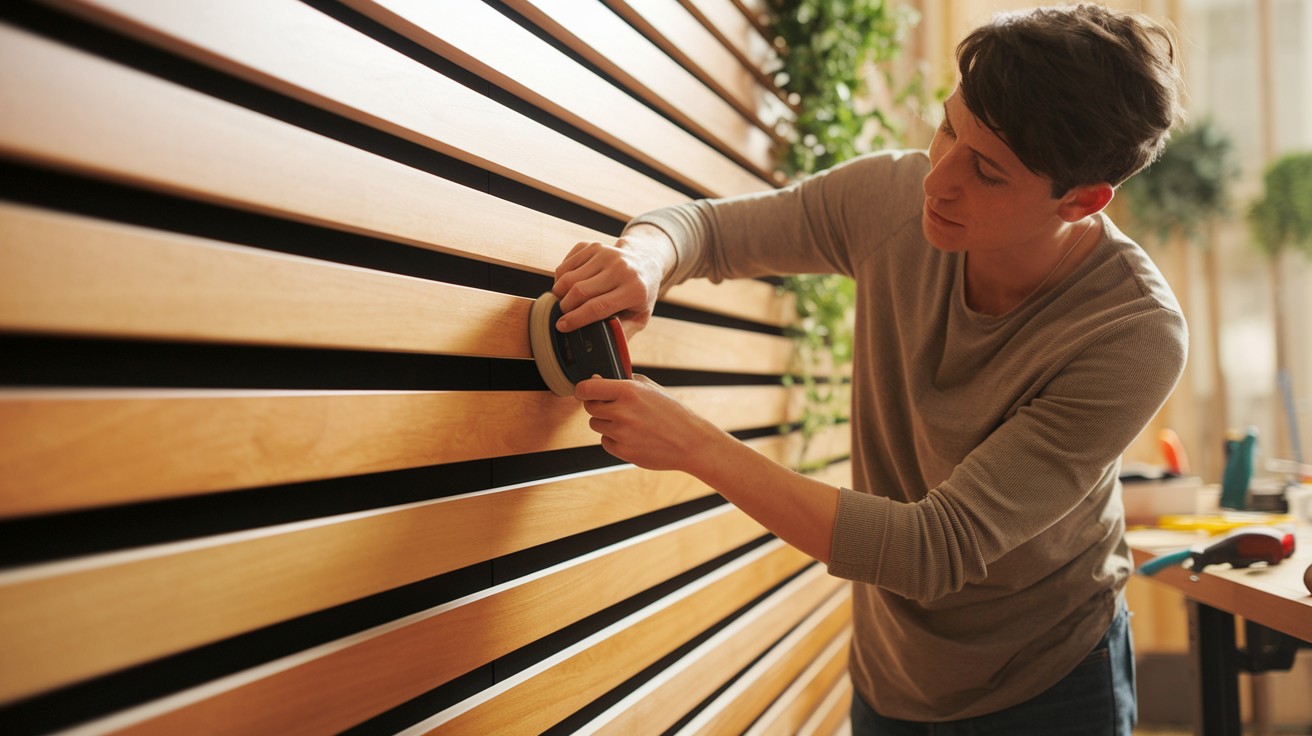
- Fill nail holes with wood filler
- Apply caulk along all edges where wood meets the wall
- Sand everything smooth once dry
- Apply primer if needed (especially important for raw wood)
- Paint the entire wall and all slats with 2 coats of paint
- Reinstall outlet covers and switch plates
Design Ideas for Your DIY Wood Slat Wall
Here are some simple design ideas to style your wood slat wall. Choose colors, patterns, or finishes that match your room and personality.
Modern Farmhouse Style
- White wood slats with light gray or beige wall color
- Wider spacing between slats (16-24 inches)
- Decorated with simple, rustic accessories
Contemporary Look
- Black or dark navy slats
- Clean, geometric grid patterns
- Minimal décor to let the wall shine
Traditional Elegance
- Cream or soft white color
- Wainscoting style (partial wall)
- Paired with wallpaper or a bold paint color above
Mid-Century Modern
- Warm wood tones (stained instead of painted)
- Horizontal slat arrangement
- Clean lines with minimal molding
Kid’s Room Fun
- Bright, playful colors
- Lower height wood slat wall that can serve as a display ledge
- Can be combined with nearby shelves for toy storage
Cost Breakdown at a Glance
|
Item |
Quantity |
Estimated Cost (USD) |
|
1×4 MDF/wood boards |
8–10 boards |
$40–$60 |
|
1×6 MDF/wood baseboard |
1 board |
$10–$15 |
|
Construction adhesive |
1 tube |
$4–$6 |
|
Brad nails/finish nails |
1 box |
$5–$8 |
|
Caulk |
1 tube |
$3–$5 |
|
Spackle |
1 small tub |
$4–$6 |
|
Paint & primer |
1 quart each |
$20–$30 |
|
Sandpaper |
2 sheets |
$2 |
|
Total |
$88–$132 |
The total cost for a standard 8×10 foot wall typically ranges from $100-$150, making this one of the most affordable high-impact DIY home improvements you can do.
Maintenance Tips for Your Wood Slat Wall
- Dust your wood slat wall weekly with a soft cloth or feather duster.
- Clean any spots with a slightly damp cloth and mild soap when needed.
- Apply a fresh coat of sealant once a year to protect the wood.
- Keep your slat wall away from direct sunlight to prevent fading.
- Check for loose slats every few months and secure them with wood glue.
- Avoid hanging very heavy items that might pull the slats away from the wall.
- Touch up any scratches with matching wood stain as soon as you notice them.
Conclusion
There you have it, everything you need to create and maintain your very own DIY wood slat wall!
We’ve covered the materials, step-by-step installation process, and simple maintenance tips to keep your wall looking fresh for years.
This weekend project not only adds incredible visual interest to your home but also gives you the satisfaction of creating something beautiful with your own hands.
Ready to transform your space? Grab your supplies and get started on your DIY wood slat wall today!
Don’t forget to share photos of your finished project in the comments below – we’d love to see your creative twist on this modern classic.
For more home improvement ideas that won’t break the bank, subscribe to our newsletter and never miss a post!
Frequently Asked Questions
How Long does a Wood Slat Wall Project Typically Take?
For an average-sized wall, expect to spend one full weekend (2-3 days) including drying time between steps.
Can I Install a Wood Slat Wall on any Type of Wall?
Yes, this technique works on drywall, plaster, and even concrete walls (though concrete requires special fasteners).
Should I Remove Baseboards before Installation?
It depends on your design. Many people work with existing baseboards, while others remove and replace them for a completely custom look.
What’s the Difference Between MDF and Real Wood for this Project?
MDF is cheaper, comes pre-primed, and is more stable, but real wood has a natural beauty and can be stained rather than painted.
Can I do this Project Alone or do I Need Help?
While possible to do alone, having a helper makes it much easier, especially when checking for level and handling longer pieces of wood.