
Creating a privacy wall for your outdoor space offers numerous advantages.
This structure provides effective noise reduction from nearby streets or neighbors, forms a visual barrier that shields your yard from outside views, and adds a sophisticated design element to your property.
This guide walks you through constructing your own privacy wall, a project that requires some woodworking experience and is ideal for those with advanced DIY skills.
With the right approach and materials, you’ll transform your outdoor area into a more private, quiet, and visually appealing space.
In the following sections, we’ll cover all necessary tools, materials, and step-by-step instructions to help you complete this project successfully. Let’s begin with what you’ll need to gather before starting construction.
Why Build a DIY Privacy Wall?
Enhance Outdoor Privacy A well-constructed privacy wall creates a personal sanctuary by blocking unwanted views from neighbors and passersby. This boundary gives you freedom to fully enjoy your outdoor activities without concern about being observed.
Boost Backyard Aesthetics Privacy walls serve as striking visual components that complement your landscaping. They provide a clean background for plants and outdoor furniture while adding structure and style to your yard’s overall look.
Increase Property Value Thoughtfully designed outdoor improvements, including privacy walls, can boost your property’s market appeal. Potential buyers often value well-defined outdoor spaces that offer both function and visual appeal.
Tools and Materials You’ll Need
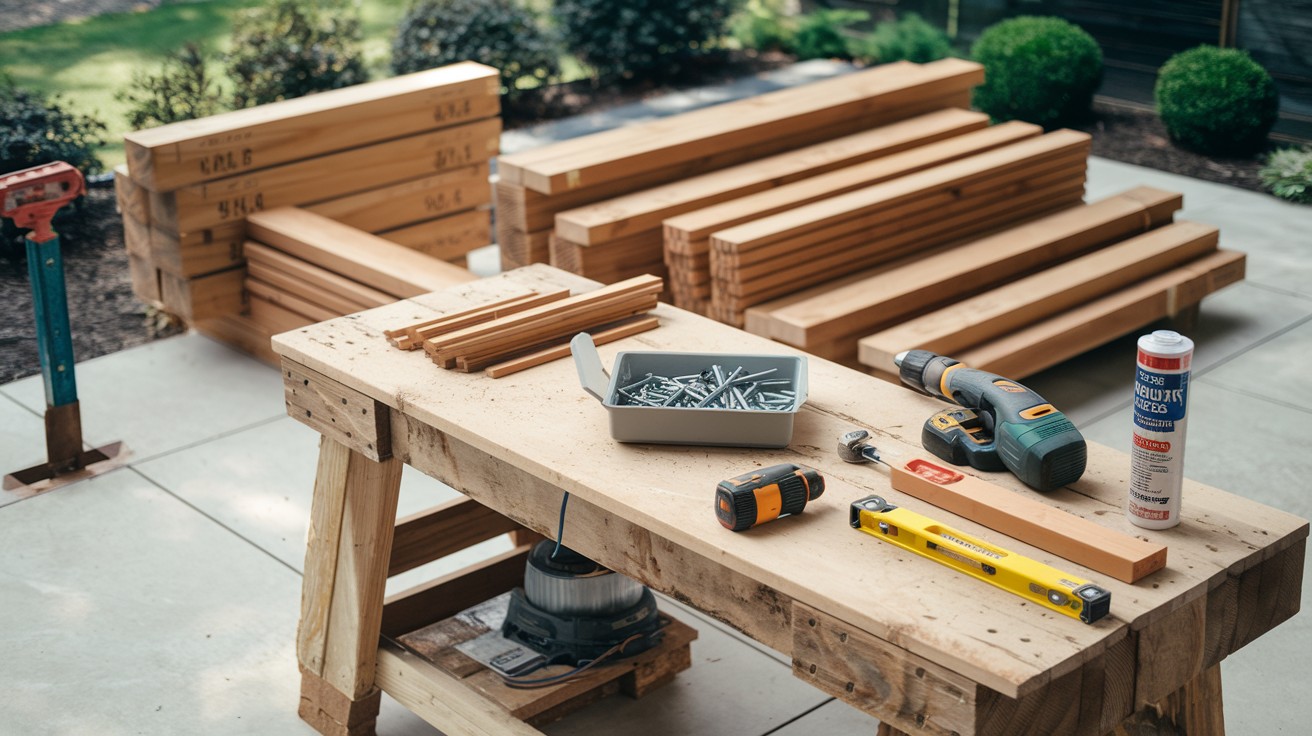
Gathering the right supplies before starting your privacy wall project ensures smooth construction. The following items provide durability and weather resistance while keeping the structure stable for years.
Lumber and Fasteners
- Pressure-treated posts
- Cedar planks
- 2×4 boards
- Stainless or coated screws/nails
Tools Required
- Post hole digger
- Power saw
- Drill/driver
- Level
- Construction adhesive
Guide to Building a DIY Privacy Wall
Step 1 – Plan and Mark Your Layout
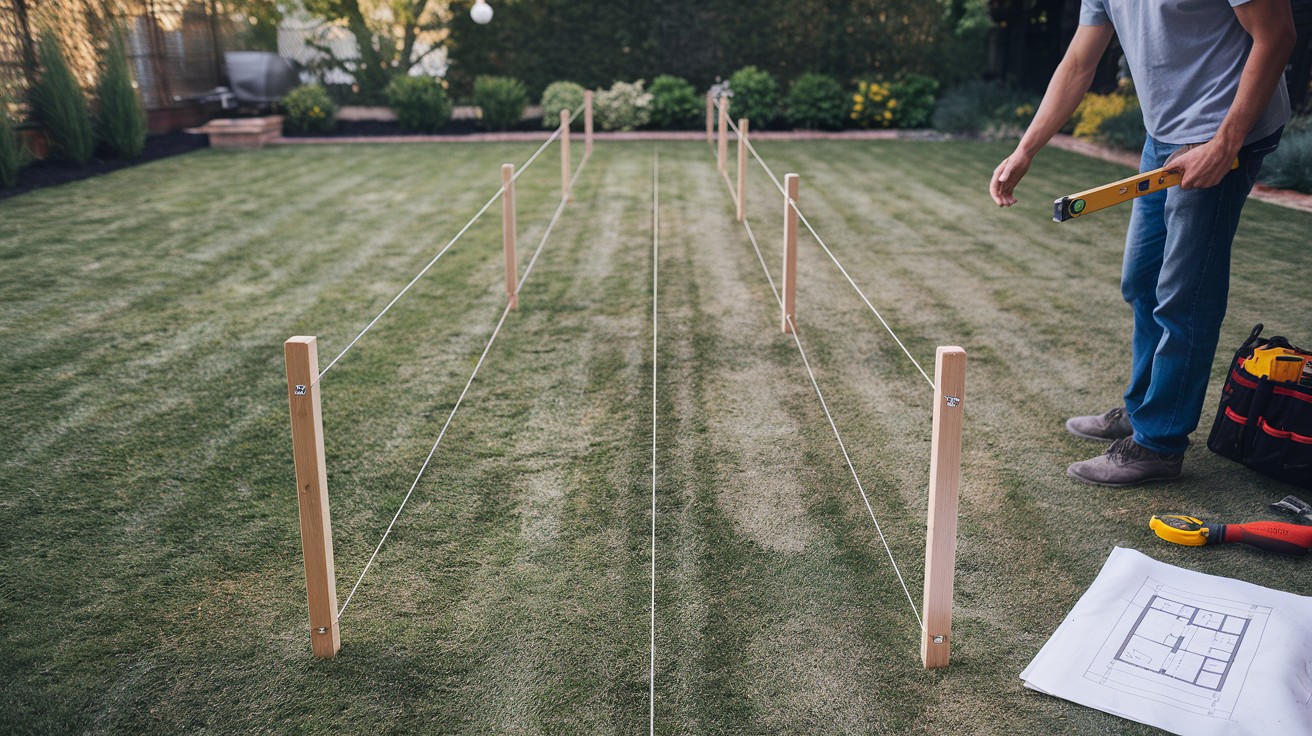
The first step involves planning your wall dimensions and marking post positions on the ground. For a standard wall (about 16 feet long), you’ll typically need 5 posts spaced evenly. Use string lines and stakes to visualize the final placement and ensure your wall follows the desired path.
Step 2 – Dig the Post Holes
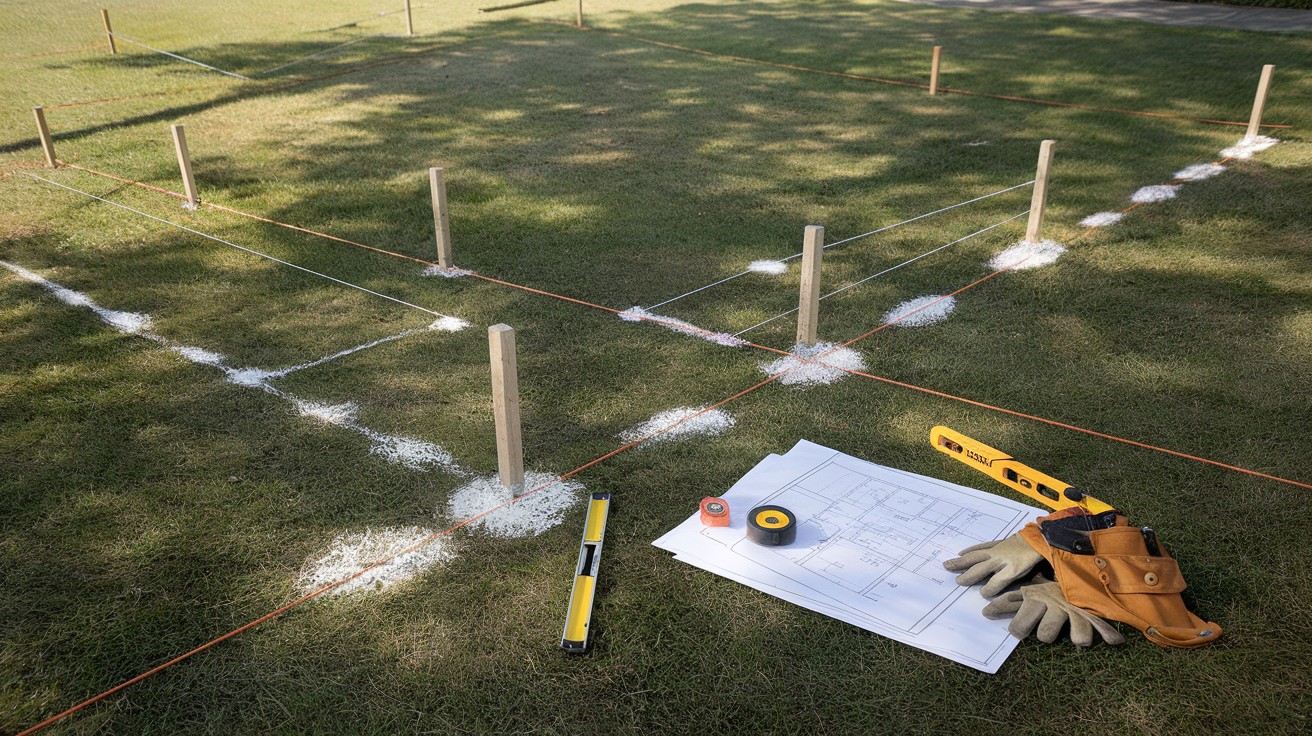
Safety comes first – contact 811 to check for underground utilities before any digging begins. Once cleared, dig holes that extend below your local frost line (typically 30-48 inches deep) and about three times the width of your posts to provide adequate stability and prevent frost heave.
Step 3 – Pour Concrete and Set Post Brackets
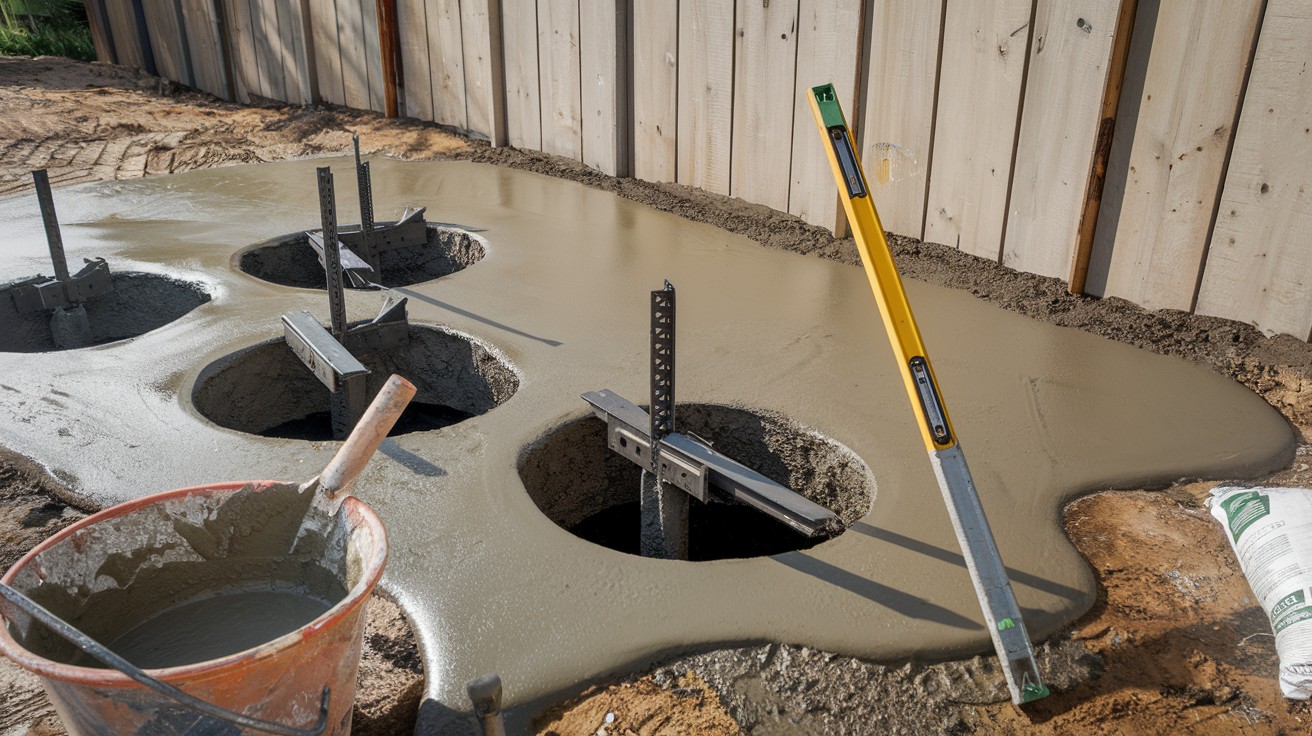
Mix concrete according to package instructions and pour into each hole. While the concrete remains wet, insert and position your post brackets. Use a level to ensure perfect vertical alignment and allow the concrete to cure completely (usually 24-48 hours) before moving forward.
Step 4 – Attach and Level the Posts
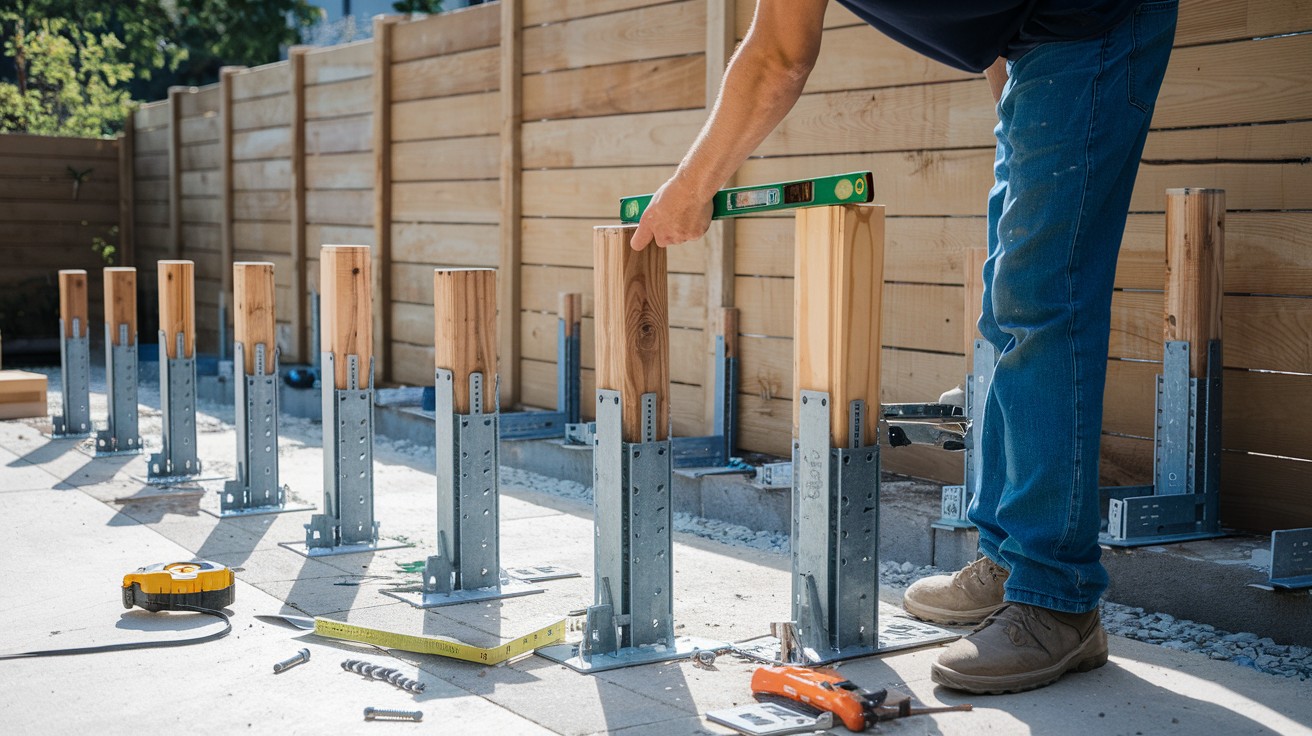
Cut your posts to the desired height, accounting for any ground slope. If your yard isn’t level, step the posts accordingly. Secure each post to its bracket using the appropriate bolts, checking with a level from multiple angles to confirm proper alignment.
Step 5 – Build the Frame
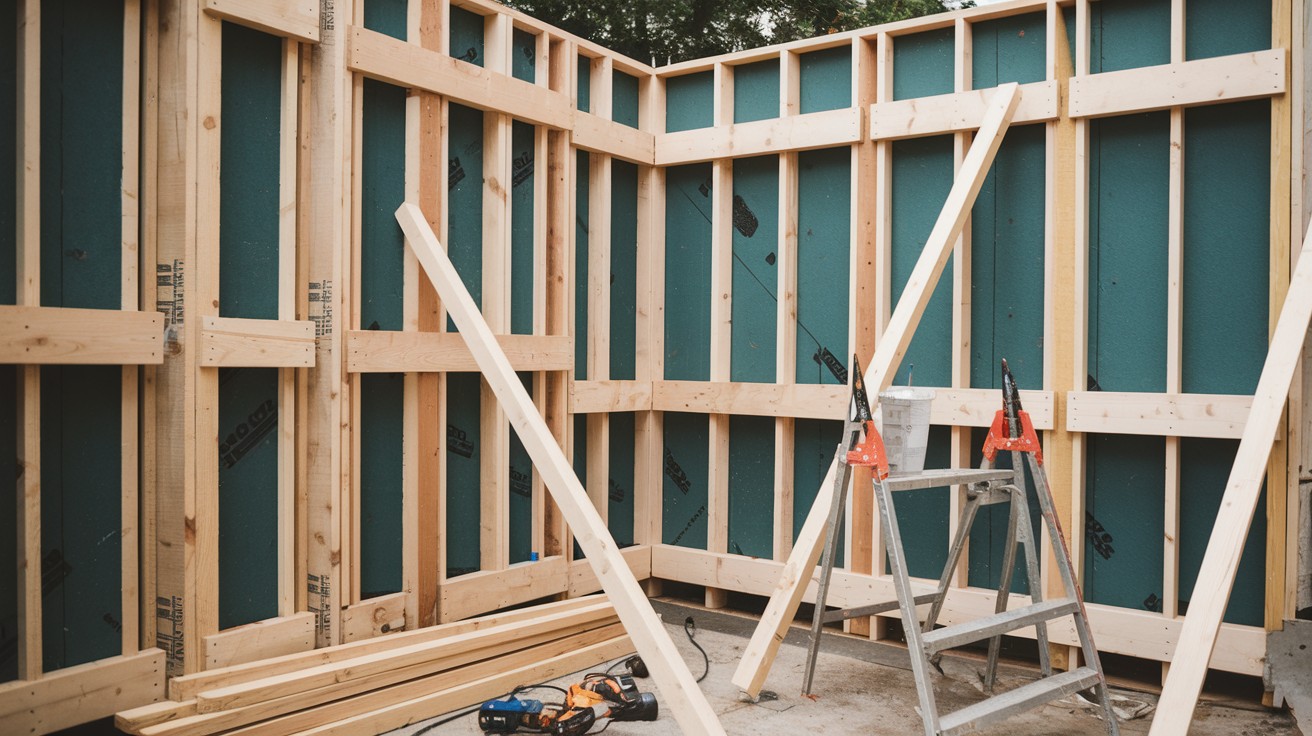
Create a sturdy framework by attaching horizontal 2x4s between posts at top and bottom positions. Add vertical supports every 16-24 inches and include diagonal bracing to prevent the wall from swaying or warping over time. This frame provides the structure for your wall.
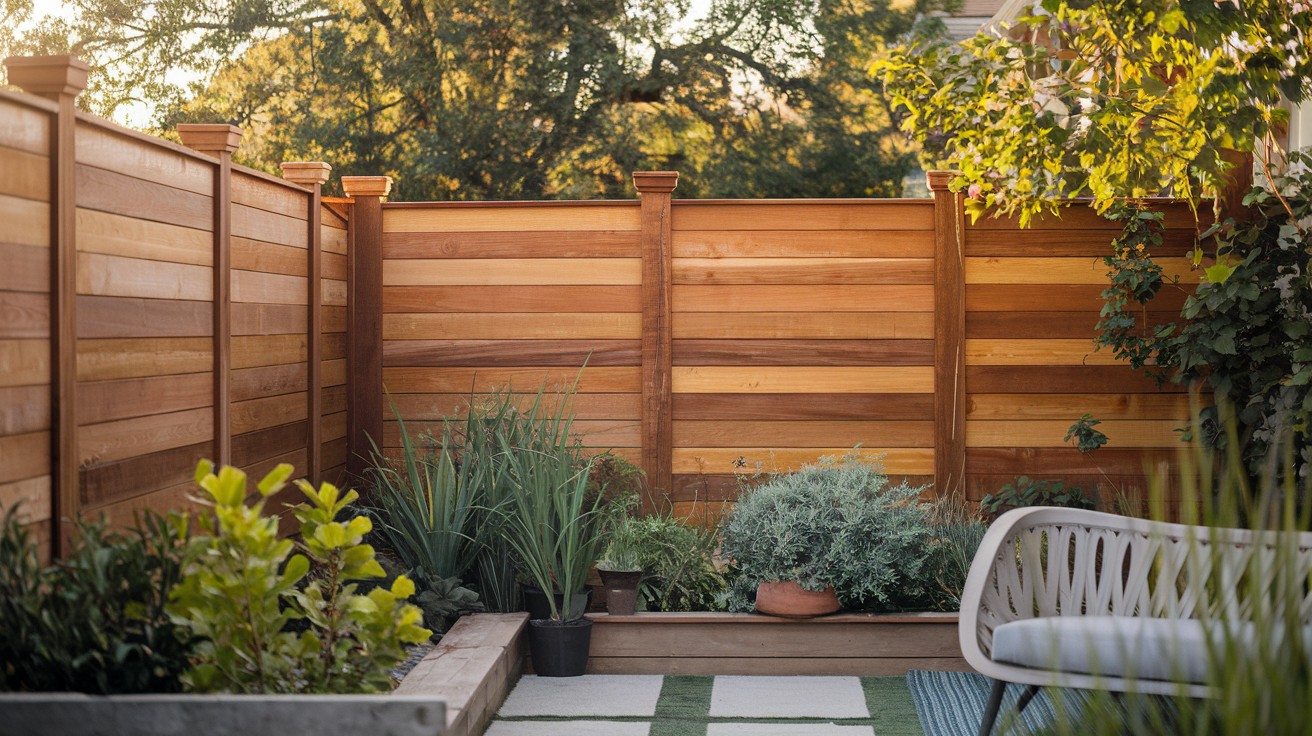
Step 6 – Install the Cedar Planks
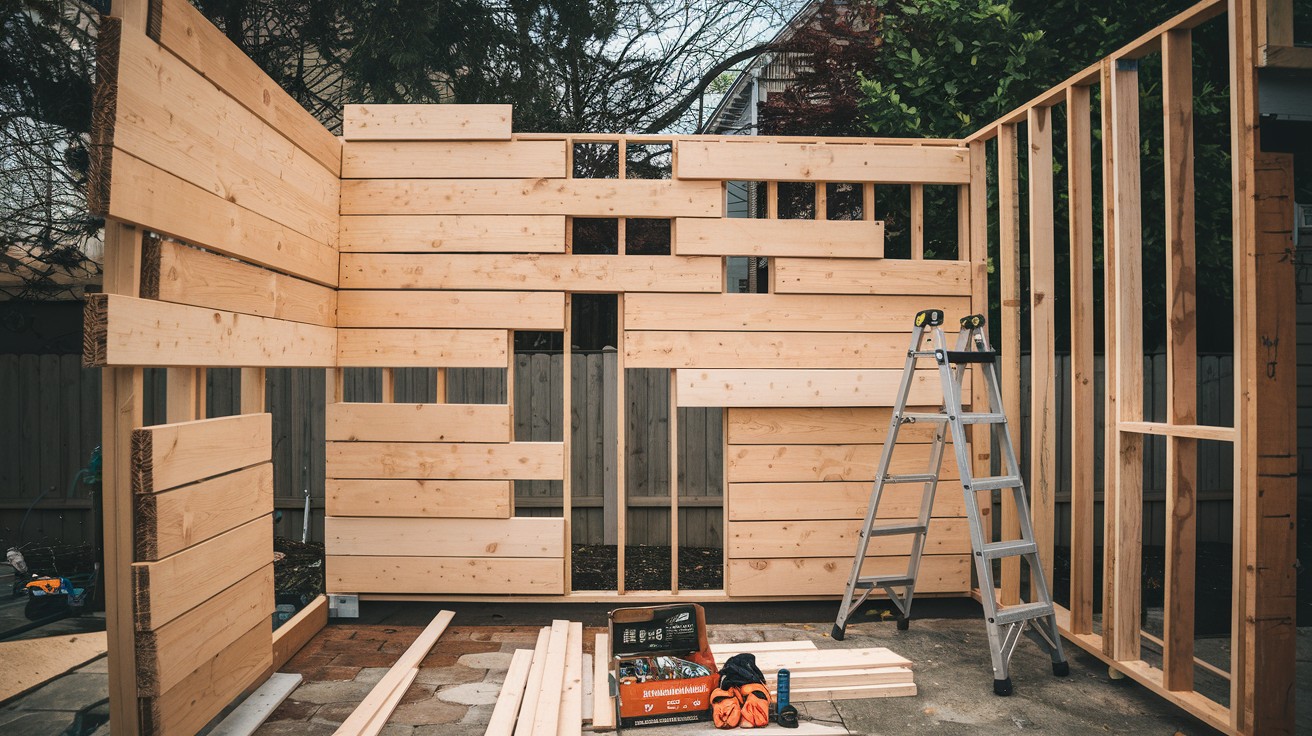
Attach cedar planks to your frame using appropriate fasteners. For visual interest, consider staggering the joints and mixing different plank widths.
This approach creates a more natural, custom appearance while maintaining structural integrity.
Step 7 – Add 3D Design Elements (Optional)
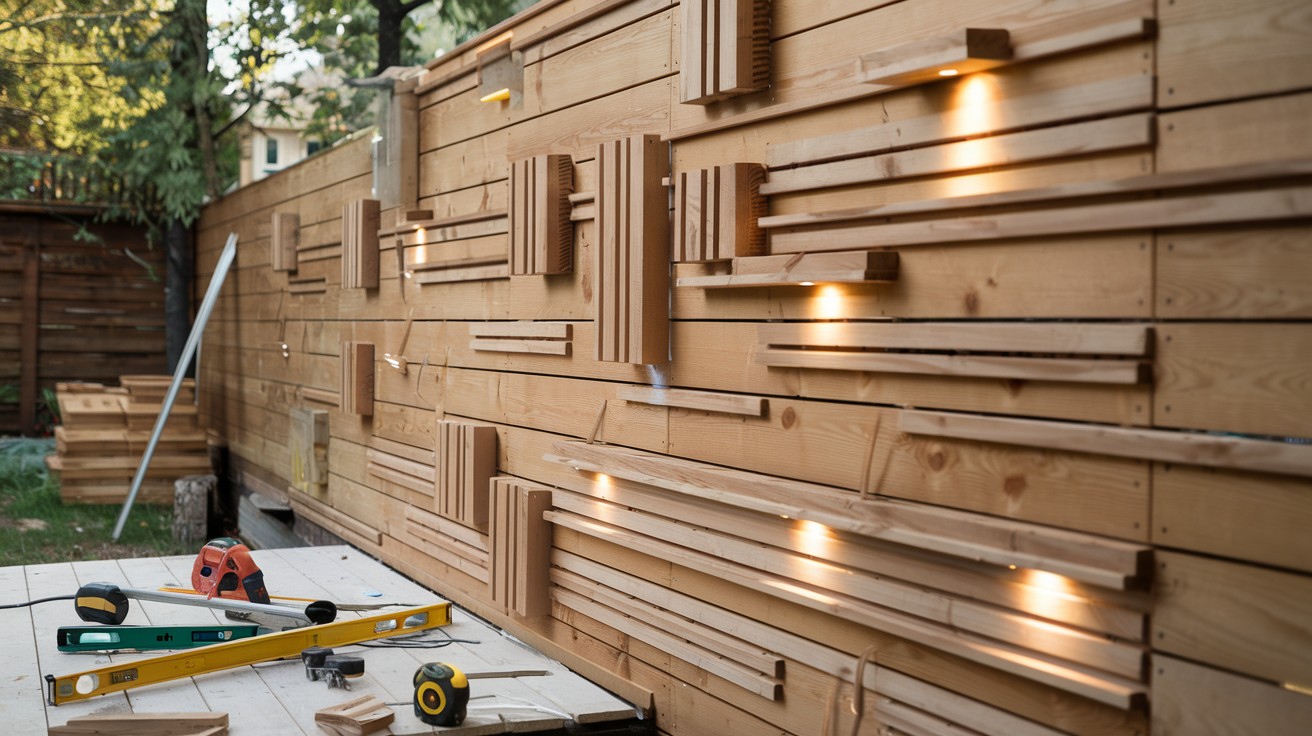
Enhance your wall with decorative features by planning a pattern of protruding planks or recessed sections.
Cut and attach additional pieces to create texture and visual depth. Consider adding integrated lighting to highlight these features and extend enjoyment into evening hours.
Step 8 – Stain, Seal, or Paint
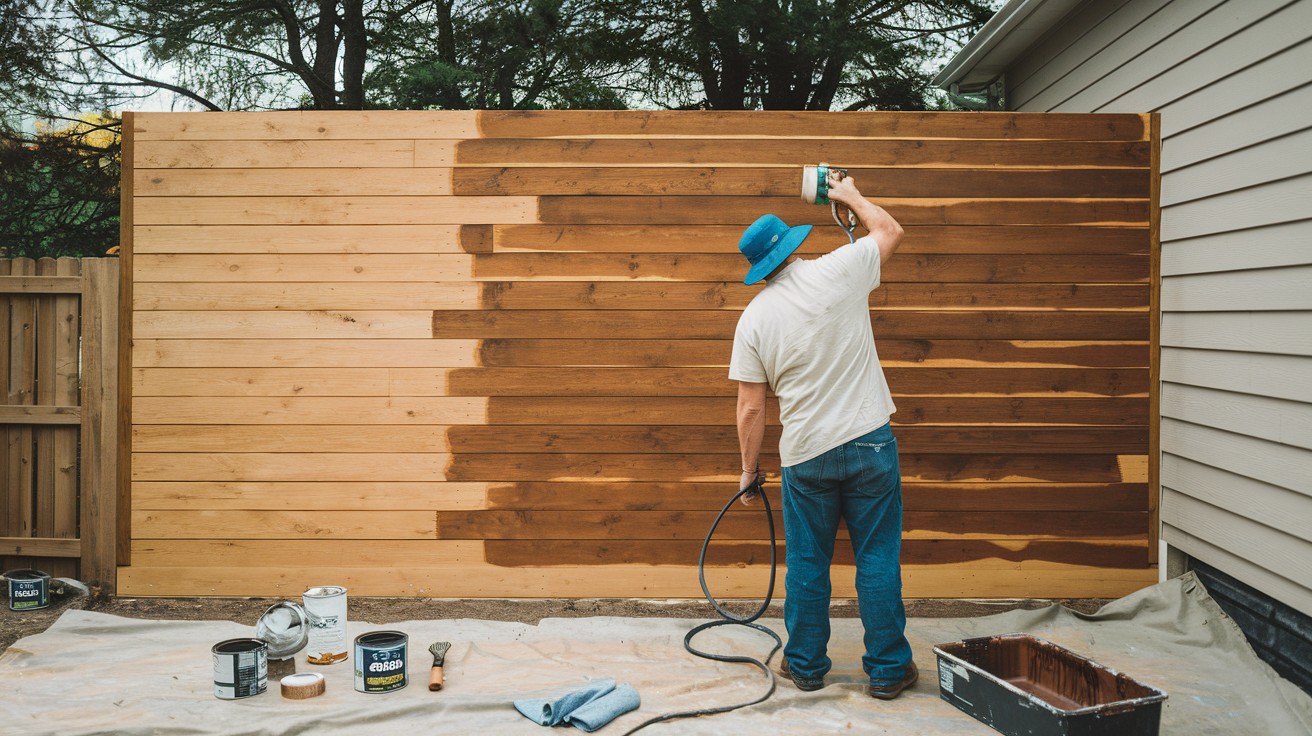
Allow your completed structure to dry thoroughly before applying any finish. Choose between transparent stain to showcase wood grain, solid color stain for moderate protection with color, or exterior paint for maximum weather protection.
Apply according to product instructions for optimal results and long-term protection.
Design Tips and Finishing Touches
Decorative Ideas
Your privacy wall provides an ideal background for personal touches. Attach hanging plants to add natural greenery and color variation.
Weather-resistant art pieces create visual interest throughout the seasons. String lights installed along the top or in patterns across the surface offer soft illumination for evening gatherings.
Matching Your Patio Furniture
For a unified outdoor space, coordinate your wall’s finish with existing patio furniture. Select complementary colors and materials that work with your current outdoor pieces.
This thoughtful coordination transforms separate elements into a complete outdoor living area with a professional appearance.
Conclusion
A privacy wall stands as a valuable addition to any outdoor space, providing practical benefits and visual impact.
By following this guide, you’ve learned how to construct a durable barrier that reduces noise, blocks unwanted views, and enhances your property’s appearance.
This project, while requiring some skill, results in a custom-built structure that meets your specific needs and complements your existing landscape.
With proper planning, quality materials, and careful execution, your privacy wall will serve you well for many years.
The satisfaction of creating this useful structure yourself brings an additional reward beyond its functional benefits.
Now you can fully appreciate your outdoor area with increased comfort, tranquility, and style – all thanks to your hard work and attention to detail.
Frequently Asked Questions
How long does it take to build a DIY privacy wall?
Building a privacy wall typically requires 2-3 weekends to complete. The concrete setting time (24-48 hours) and wood staining/sealing process account for most of the waiting periods in the project.
What type of wood is best for an outdoor privacy wall?
Cedar is ideal for the visible portions due to its natural resistance to insects and weather. Use pressure-treated lumber for ground-contact posts and framing to prevent rot and ensure structural longevity.
How far apart should I space the posts for my privacy wall?
For optimal stability, space posts approximately 4-6 feet apart. This spacing provides sufficient support for the wall while minimizing the number of holes you’ll need to dig and concrete you’ll use.
Do I need a permit to build a privacy wall in my yard?
Many localities require permits for structures over a certain height, typically 6 feet. Contact your local building department before starting your project to understand specific regulations and requirements in your area.
How do I maintain my wooden privacy wall over time?
Inspect your wall annually for signs of damage or wear. Reapply stain or sealant every 2-3 years, and promptly replace any damaged boards. Regular cleaning with a mild detergent helps prevent mold and extends the wall’s lifespan.