
Your beautiful plates are hiding in dark cabinets. What a waste of good dishes.
You need a DIY plate rack that actually works. One that displays your plates while keeping them organized and easy to reach. This article gives you 21 proven plate rack designs. From simple weekend builds to creative upcycled projects. I’ll show you step-by-step instructions, material lists, and styling tips.
Tested cheap materials and expensive ones. Make mistakes so you don’t have to.
You’ll find solutions for every kitchen style here. Farmhouse, modern, small spaces, rental-friendly options. Plus insider tips that make the difference between amateur and professional results.
Ready to turn your plates into kitchen art? Let’s build something amazing together.
Why Build a DIY Plate Rack?
Store-bought plate racks cost $50 to $200. That’s just for basic designs. Building your own saves money. More importantly, you get exactly what your kitchen needs.
Here’s what changes when you build a plate rack:
- Your plates become decorations. No more hunting through stacks of dishes. Everything has a perfect spot.
- Counter space opens up. Wall storage frees your surfaces for cooking and prep work.
- Guests notice immediately. A well-designed plate rack screams “this person has style.”
Plus, you’ll feel proud every time you look at it. There’s something special about using furniture you built with your own hands.
What You’ll Need to Get Started
Most plate rack projects use simple materials. Here’s your basic shopping list:
Wood Options:
- Pine boards (budget-friendly)
- Oak or maple (premium look)
- Plywood (smooth finish)
- Reclaimed wood (character)
Hardware:
- Wood screws (1¼ inch and 2½ inch)
- Wall anchors or studs
- Wood glue
- Sandpaper (120 and 220 grit)
Tools:
- Drill with bits
- Circular saw or miter saw
- Level
- Measuring tape
- Pencil
Don’t have all the tools? Most home improvement stores rent them by the day.
How to Build a Basic DIY Plate Rack: Step-by-Step
Let me walk you through building a simple wall-mounted plate rack. This design works in any kitchen style.
1. Choose a Wall or Cabinet Area
Location matters more than you think. Pick a spot near your dishwasher. You’ll thank me later when you’re putting clean dishes away.
Avoid areas above the stove. Heat and grease damage wood over time. Measure twice. Check the space with a tape measure. Account for cabinet doors that might swing into your rack.
2. Design the Layout
Sketch your rack on paper first. Include these measurements:
- Width: 24 to 36 inches works for most kitchens
- Height: 8 to 12 inches gives room for dinner plates
- Depth: 4 to 6 inches holds plates securely
Count your plates. Design slots for your actual dish collection, not some imaginary stack.
3. Cut and Assemble the Frame
Time to make sawdust.
Cut your pieces using these dimensions:
- Top rail: 36 inches long
- Bottom rail: 36 inches long
- Side pieces: 8 inches long
- Plate dividers: 6 inches long (cut 8-10 pieces)
Pro tip: Sand all pieces before assembly. It’s much easier than sanding the finished rack.
Drill pilot holes to prevent splitting. Assemble with wood glue and screws. Space your plate dividers 1½ inches apart. This fits most dinner plates perfectly.
4. Add Backing, Paint, and Mount
A solid back piece adds strength and looks professional. Cut plywood to fit the rear opening. Attach with small nails or screws. Paint or stain now. Two coats give the best protection and appearance.
Find wall studs with a stud finder. Mount with 2½ inch screws into studs for maximum strength. No studs where you need them? Use heavy-duty drywall anchors rated for 50+ pounds.
Upcycled & Budget-Friendly
Why buy new materials when you can repurpose items you already own?
These creative solutions cost almost nothing but look like expensive designer pieces.
1. Repurposed Pallet Plate Rack
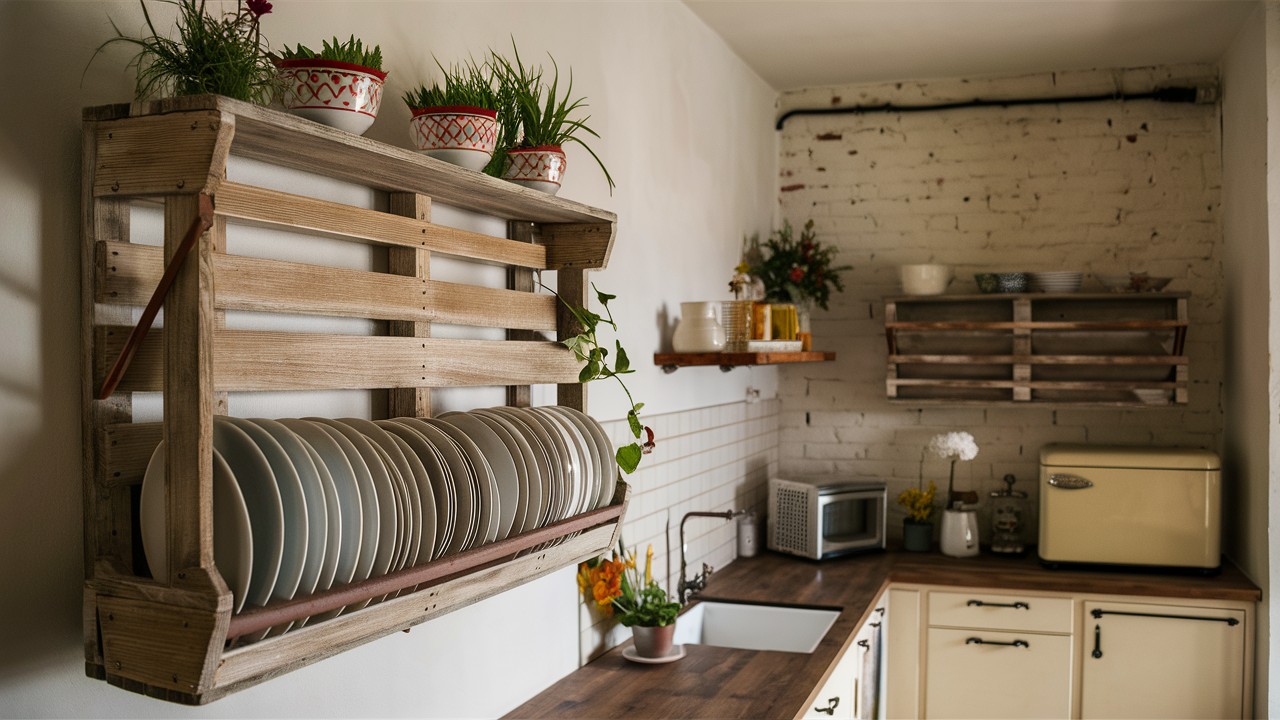
I love finding treasure in what others throw away. Pallets pile up behind stores, waiting for someone creative to rescue them.
Quick setup: Sand, cut to size, add mounting brackets. It takes one afternoon.
My goal was farmhouse charm without the farmhouse price tag.
Here’s how I did it:
Sand the pallet smooth. Remove any loose or damaged boards. Cut the pallet to your desired width. Most kitchen walls look best with 30-36 inch racks. Add a shelf on top for serving bowls or decorative items.
Mount securely. Pallets are heavy, so use three wall anchors minimum. Stain with weathered oak for that farmhouse vibe. Or paint white for a clean cottage look.
2. IKEA Spice Rack Plate Display Hack
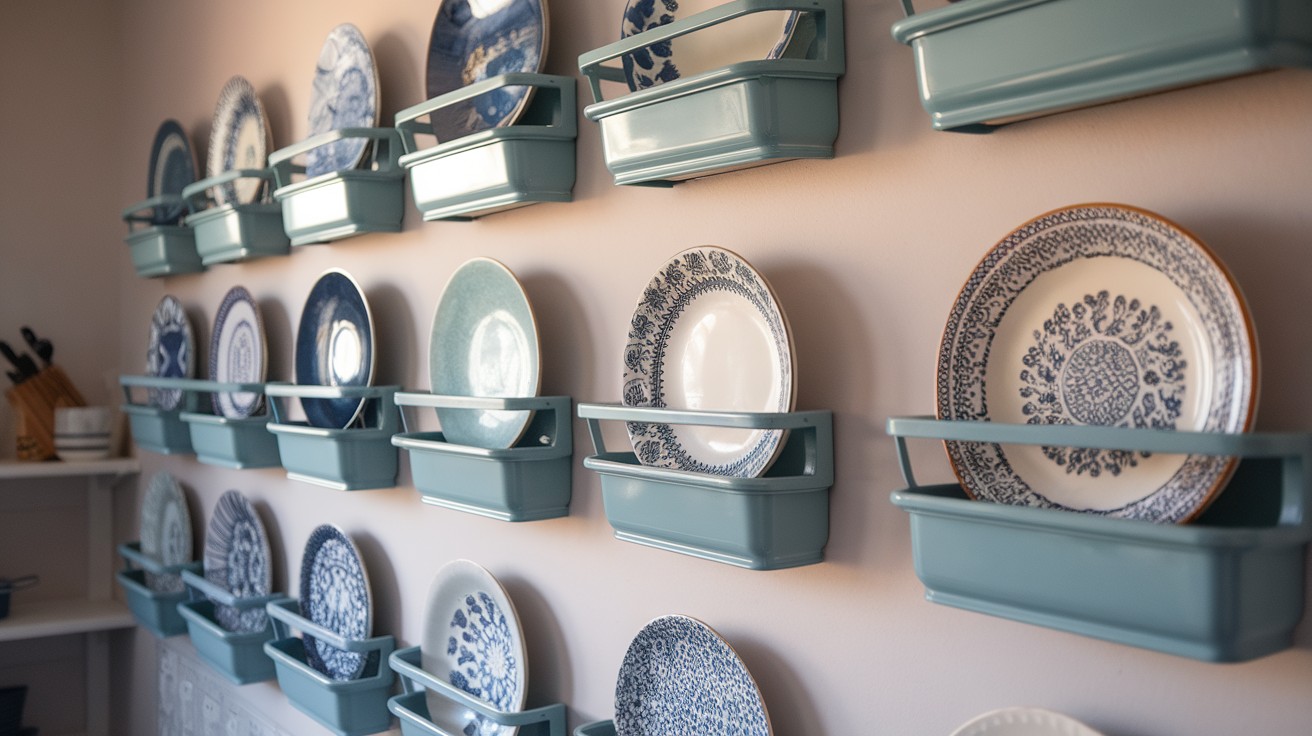
Sometimes the best solutions hide in plain sight. I walked past these spice racks dozens of times before the lightbulb moment hit.
Quick setup: Remove front rail, sand edges, mount in rows. Done in 30 minutes per rack.
Here’s how I did it:
I wanted an elegant plate display without custom carpentry skills. The IKEA BEKVÄM spice rack costs $6. With small modifications, it becomes an elegant plate display. Remove the front rail. Sand the edges smooth.
Mount multiple racks in a row for a gallery wall effect. Space them 10 inches apart vertically. This allows room for larger plates and serving pieces. Paint them to match your kitchen cabinets. Suddenly they look custom-built.
3. Old Ladder Turned Plate Rack
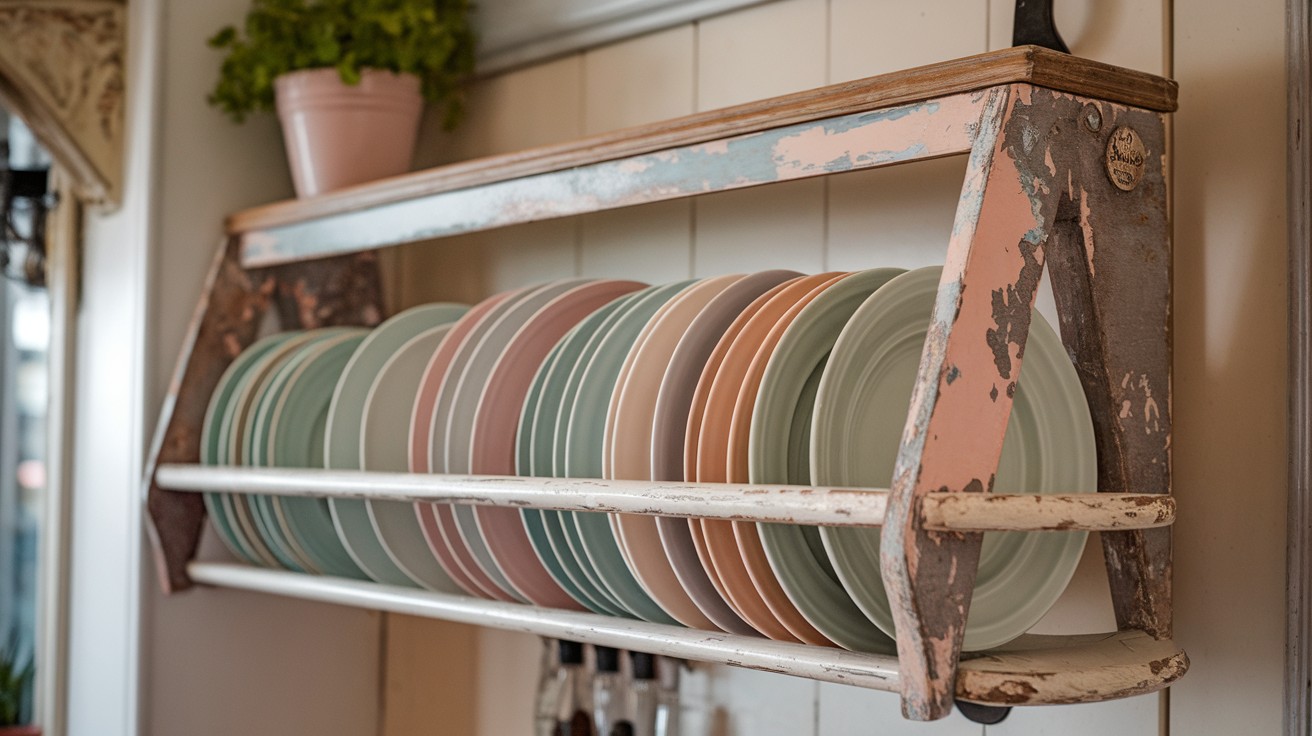
That ladder in my garage was gathering dust and guilt. Every time I saw it, I thought “I should use that for something.”
Quick setup: Sand, mount horizontally, secure loose rungs. Two hours max.
Here’s how I did it:
I wanted rustic storage that told a story about giving old things new life. That wooden ladder in your garage has potential. Sand it down and check for loose rungs. Replace any damaged sections. Mount horizontally on the wall. The rungs become natural plate dividers.
Bonus: The top creates a perfect shelf for cookbooks or plants. This works especially well in rustic or industrial kitchen designs.
4. Vintage Crate Wall Rack
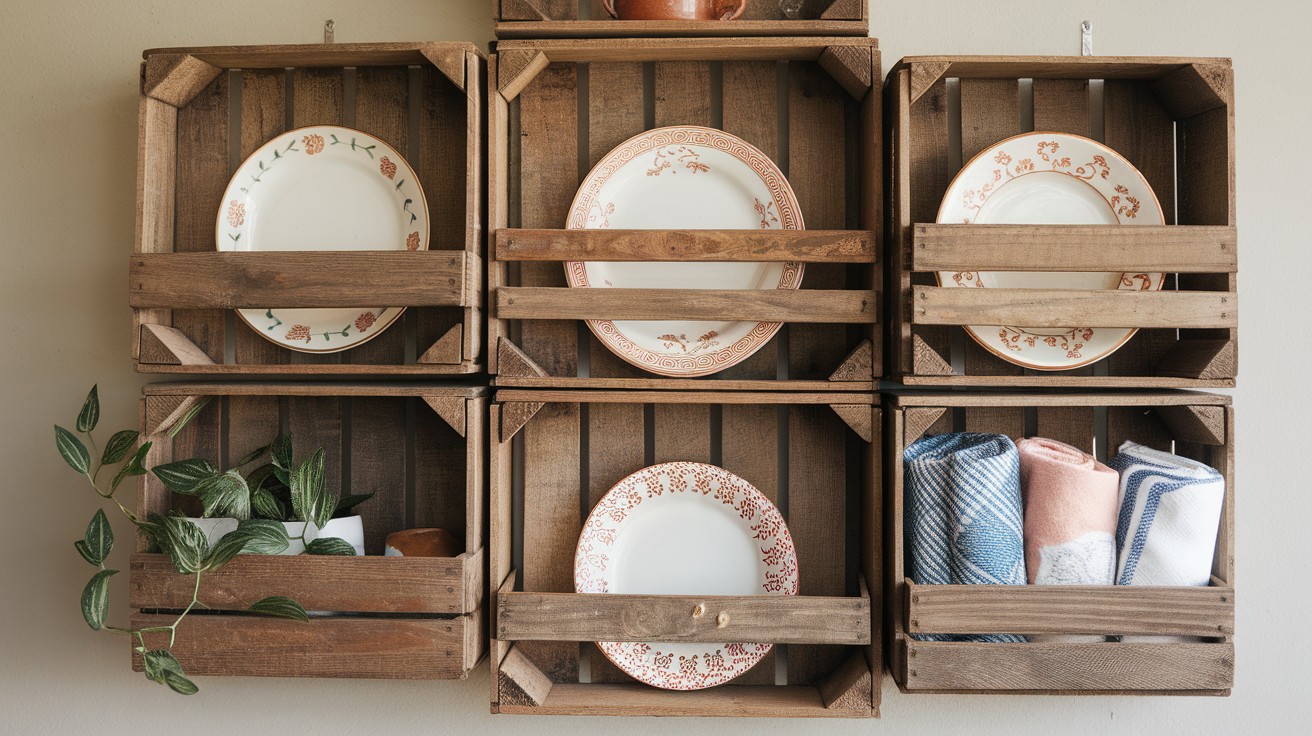
Flea markets speak to my soul. Those weathered crates have character that new wood can’t match.
Quick setup: Mount sideways, group together, add brackets. One morning project.
Here’s how I did it:
I wanted storage with personality that sparked conversations about where these crates traveled. Old wooden crates make charming plate storage. Look for fruit crates at antique stores or flea markets. Apple crates work perfectly.
Mount them on their side so the slats run vertically. This creates natural plate slots. Group 2-3 crates together for more storage and visual impact. Leave them natural for rustic charm. Or paint them for a more polished look.
5. Dish Drainer Plate Wall Mount
Small kitchens force creative thinking. When counter space is precious, walls become your best friend.
Quick setup: Remove tray, add wall brackets, mount securely. 45 minutes total.
Here’s how I did it:
I needed functional storage that didn’t eat up my already tiny counter. Turn a basic dish drainer into permanent wall storage. Choose a wooden or bamboo drainer for the best look. Plastic ones look cheap on the wall.
Remove the bottom tray. You only need the plate-holding portion. Mount it directly to the wall with heavy-duty brackets. This method works great in small kitchens where counter space is precious.
Wall-Mounted Solutions
Wall-mounted racks maximize storage without eating up counter space.
These designs range from simple to sophisticated. Pick the style that matches your kitchen personality.
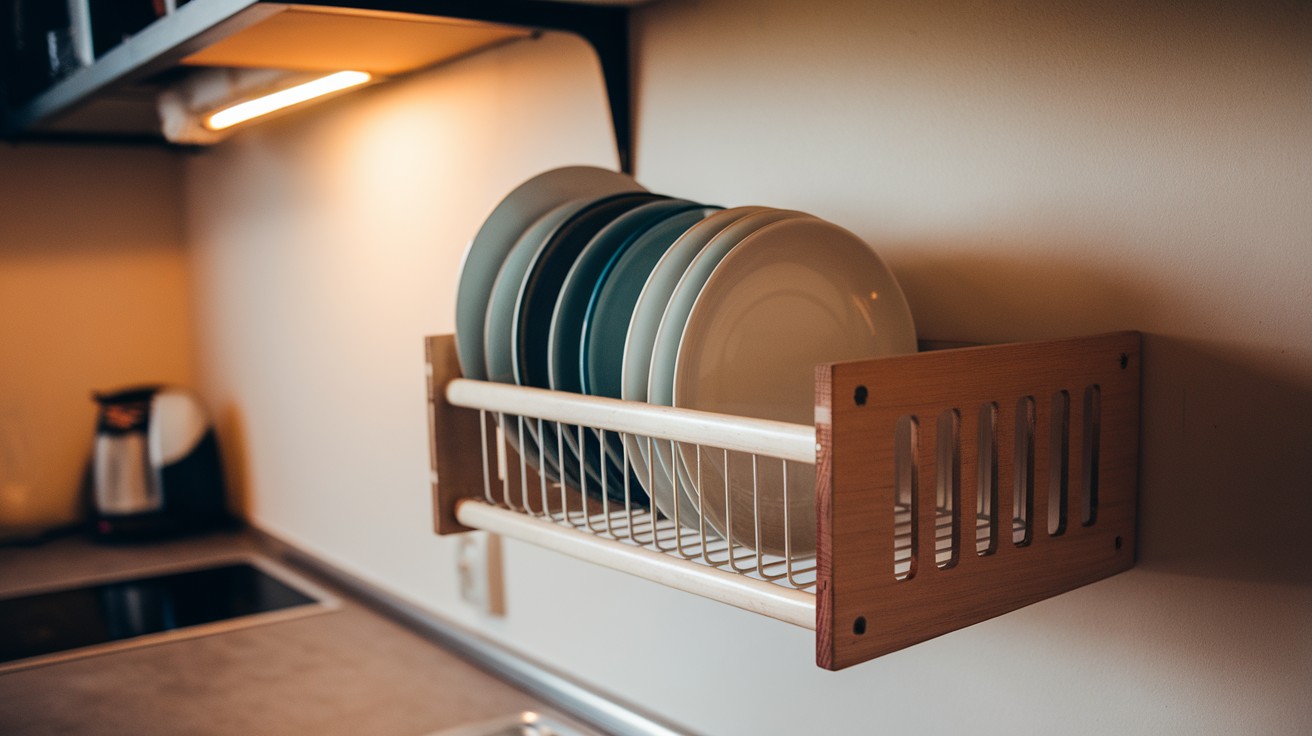
6. Slim Vertical Wall Plate Rack
Narrow spaces challenge even experienced builders. But sometimes constraints spark the best solutions.
Quick setup: Build a tall frame, add horizontal slots, paint to match the wall. Half-day project.
Here’s how I did it:
I wanted maximum storage in that awkward 6-inch gap between my cabinets. Perfect for narrow wall spaces between cabinets. Build a tall, narrow frame (6 inches wide, 30 inches tall). Add horizontal slots every 2 inches.
This design holds 8-10 plates in minimal wall space. Paint it the same color as your wall for a built-in appearance.
7. French Country Style Wall Rack
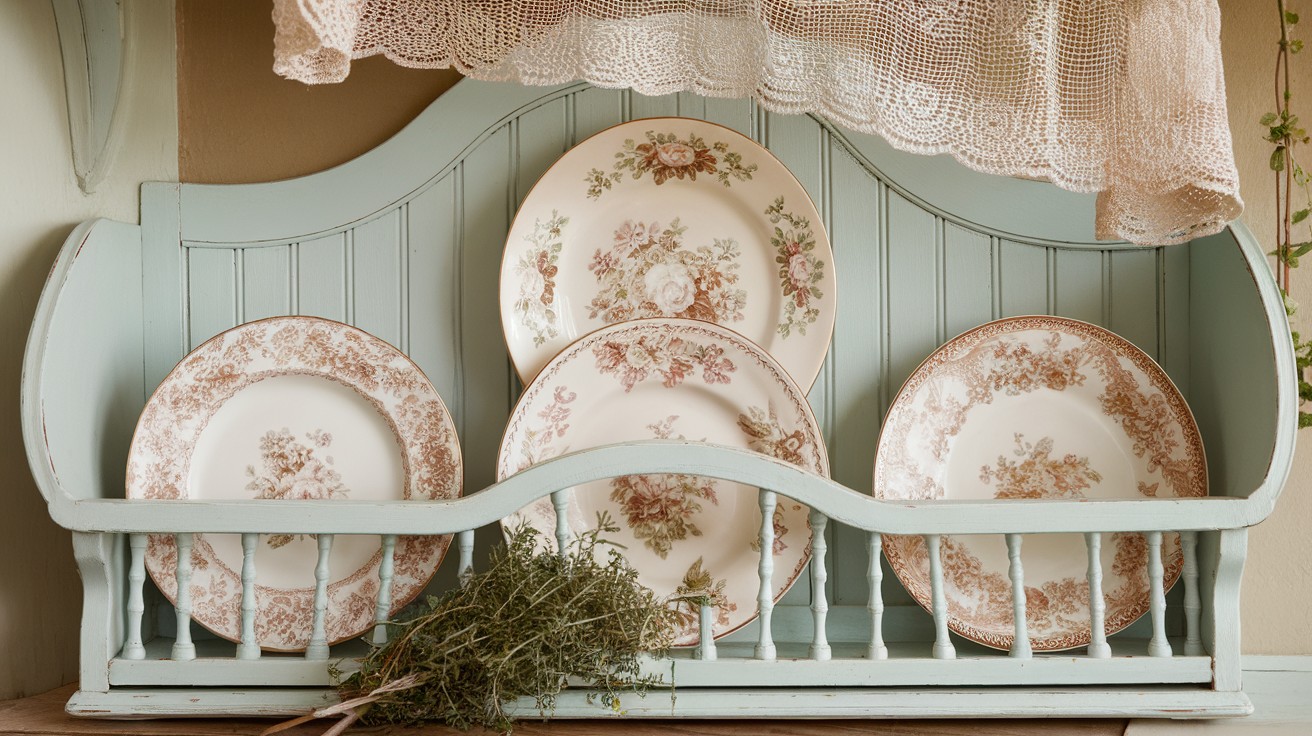
Romance belongs in the kitchen too. Curved lines and soft colors make cooking feel like poetry.
Quick setup: Cut curves with jigsaw, add beadboard backing, distress paint. Weekend project.
Here’s how I did it:
I dreamed of a French countryside kitchen that made every meal feel special. Add romantic charm with curved details and soft colors. Cut decorative curves on the side pieces using a jigsaw. Sand smooth.
Use beadboard backing for authentic texture. Paint in soft blue, sage green, or antique white. Distress lightly with sandpaper for an aged look. Add small hooks underneath for coffee mugs or kitchen towels.
8. Peg Rail Plate Rack with Shelf

Flexibility wins every time. When you can change your display with the seasons, storage becomes art.
Quick setup: Mount peg rail, add shelf above, hang plates with stands. Two hours.
Here’s how I did it:
I wanted the freedom to switch between everyday dishes and holiday china without rebuilding. Shaker-style peg rails offer flexibility and function. Mount a traditional peg rail 12 inches below a floating shelf.
Hang plates from the pegs using plate stands or holders. Change your display seasonally. Holiday plates in December, bright colors in summer. The shelf above holds matching bowls, pitchers, or decorative items.
9. Floating Frame Rack with Slats
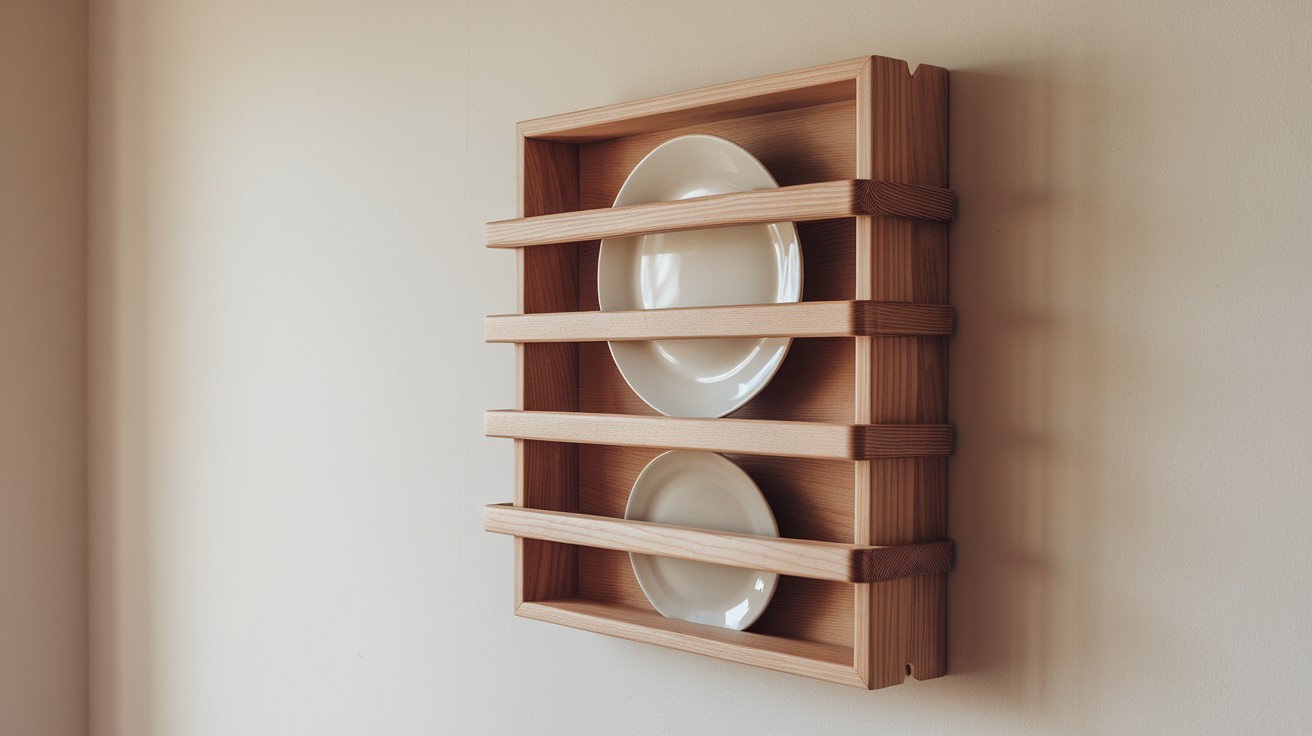
Magic happens when storage appears to float. Hidden brackets create the illusion of defying gravity.
Quick setup: Build frame, route grooves, install hidden brackets. One day build.
Here’s how I did it:
I wanted clean, modern storage that looked impossibly sleek and minimal. Create the illusion of floating storage with hidden brackets. Build a simple frame with vertical slats. Use a router to cut grooves for the plates.
Hide the mounting brackets behind the frame for a clean, modern look. This style works beautifully in contemporary and minimalist kitchens.
10. Framed Wall Rack with Chicken Wire Backing
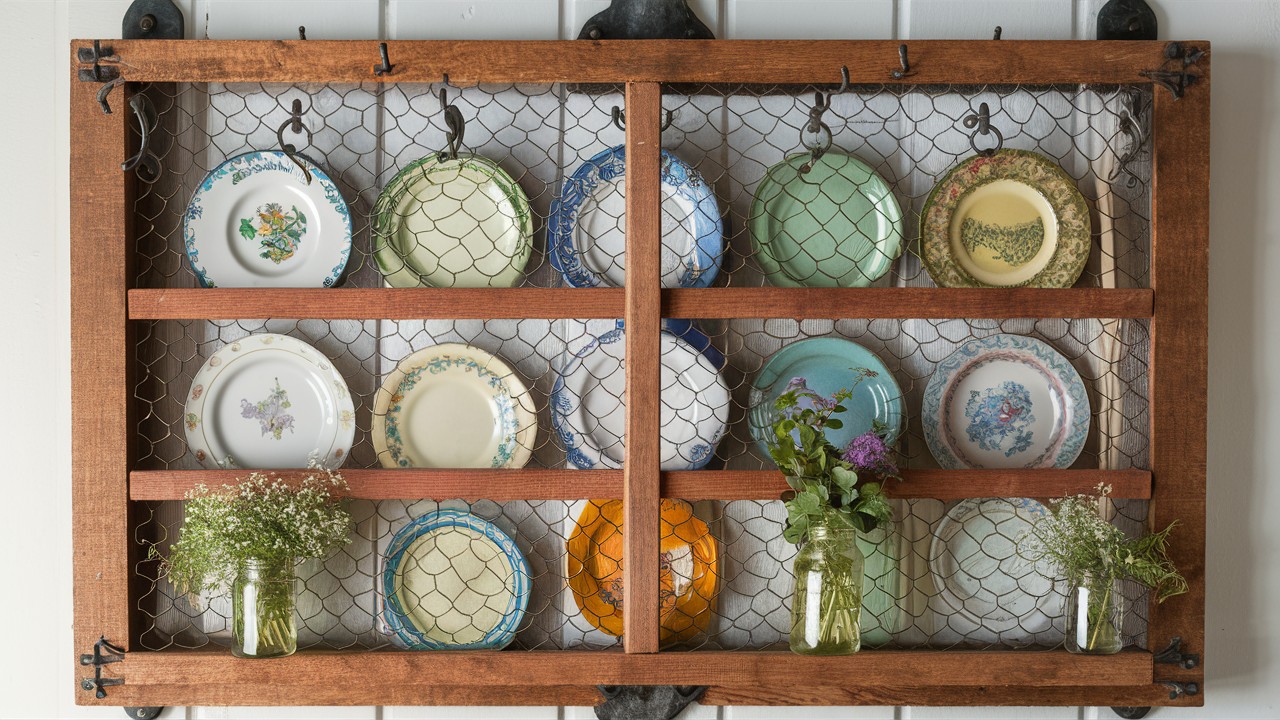
Industrial meets farmhouses in unexpected ways. Sometimes the best designs combine opposites.
Quick setup: Build frame, stretch wire, add ledges. Three hours total.
Here’s how I did it:
I wanted texture and visual interest while keeping plates secure and accessible. Industrial meets farmhouse in this unique design.
Build a rectangular frame from 2×2 lumber. Stretch chicken wire across the back. Attach small wooden ledges in front of the wire. Plates lean against the wire for support. The chicken wire adds texture and prevents plates from falling through.
Built-In & Cabinet Inserts
Transform existing cabinets into organized plate storage.
These solutions work inside cabinets, making them perfect for renters or anyone who wants hidden organization.
11. DIY Cabinet Plate Rack Insert
Hidden organization satisfies my perfectionist soul. When everything has a place, cooking becomes meditation.
Quick setup: Measure cabinet, build removable insert, slide in place. Morning project.
Here’s how I did it:
I needed organized storage that didn’t advertise itself to guests. Turn a regular cabinet shelf into organized plate storage. Measure your cabinet interior carefully. Build a rack to fit exactly.
Use thin plywood for the dividers to maximize plate capacity. Make it removable so you can clean the cabinet or change the configuration later.
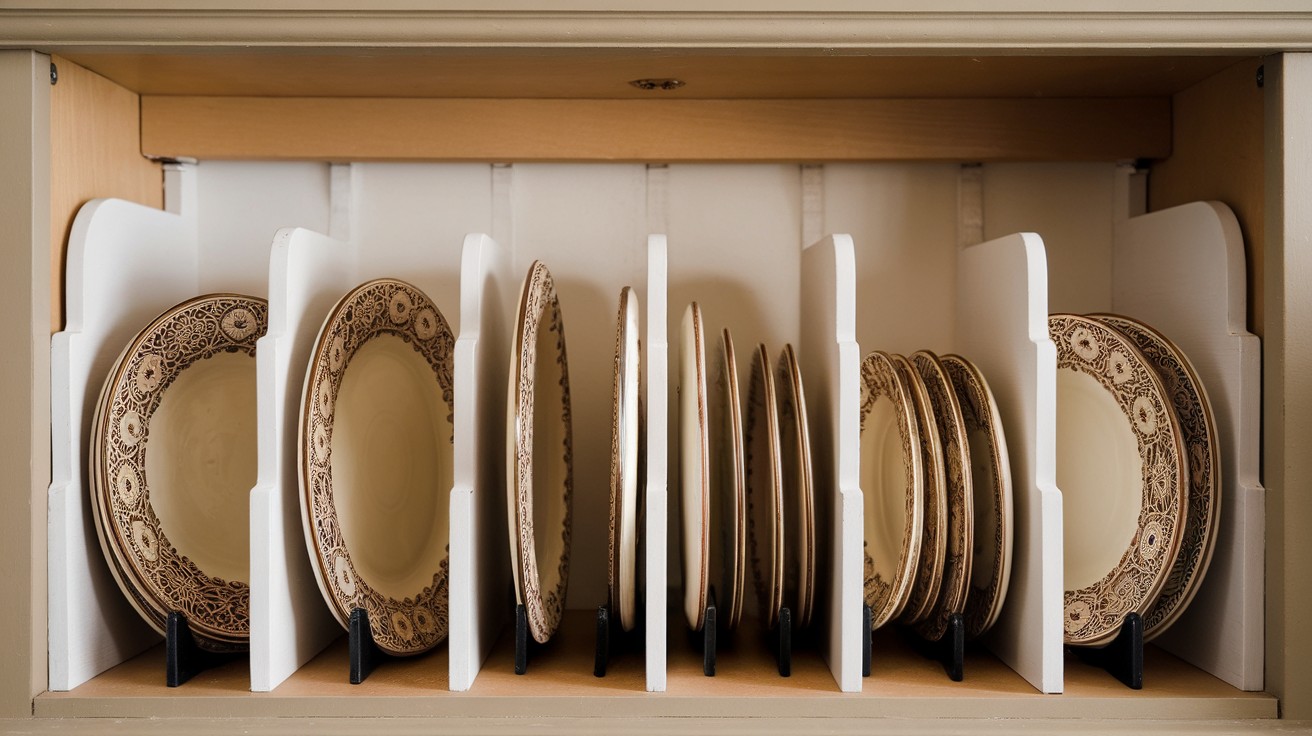
12. Shelf Divider Plate Organizer

Sometimes the simplest solutions work best. No screws, no permanent changes, just instant organization.
Quick setup: Cut plywood pieces, position between plates. 30 minutes done.
Here’s how I did it:
I wanted a quick organization that worked for renters and commitment-phobes alike. Simple dividers transform messy plate stacks into organized rows.
Cut pieces of plywood to fit your shelf height. Space them 1½ inches apart. No screws needed. The dividers stand freely and can be adjusted as needed. This quick fix costs under $10 and takes 30 minutes to complete.
13. Pull-Out Plate Drawer Rack

Reaching into deep cabinets tests everyone’s patience. Sliding storage brings everything within easy reach.
Quick setup: Install drawer slides, build rack insert, add handle. Half-day project.
Here’s how I did it:
I was tired of playing cabinet archaeology every time I needed a plate. Access plates easily with a sliding drawer system. Install drawer slides rated for the weight of your dishes.
Build the rack to fit your drawer dimensions. Add a handle for easy pulling. This works great in lower cabinets where reaching the back is difficult.
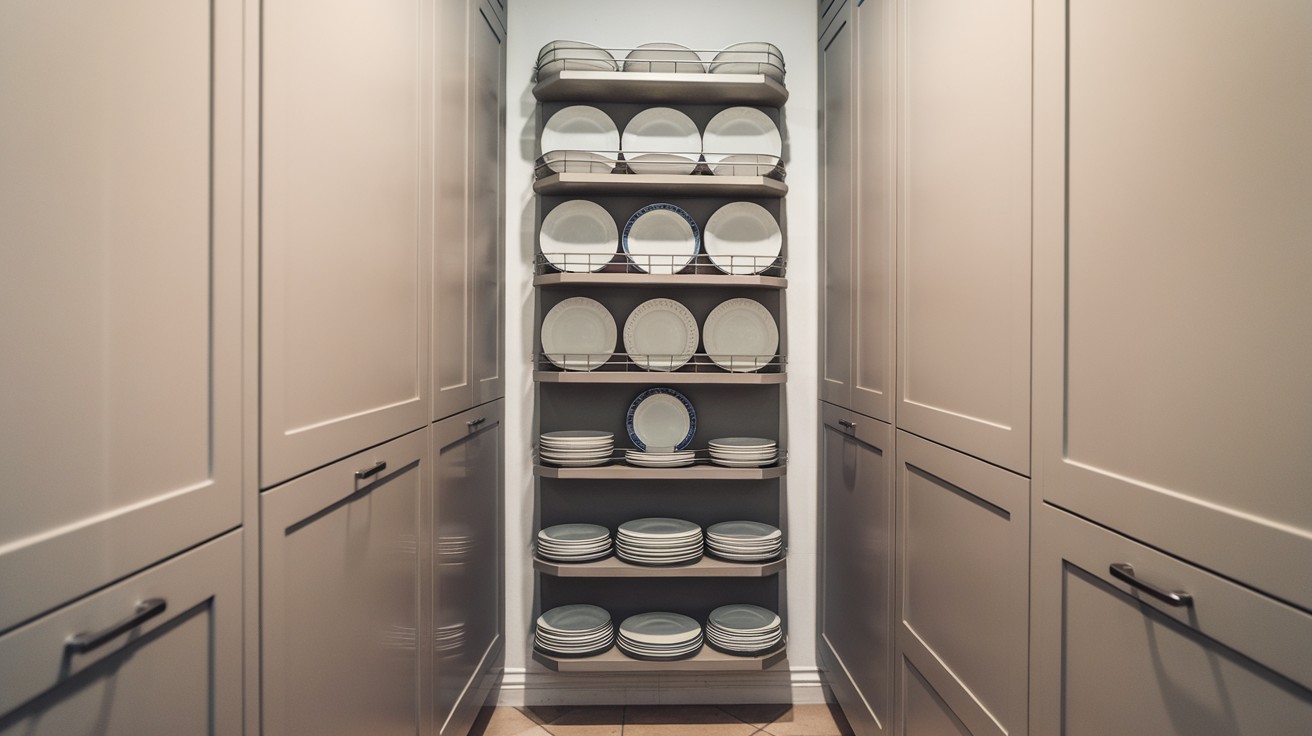
14. Corner Plate Rack for Small Kitchens
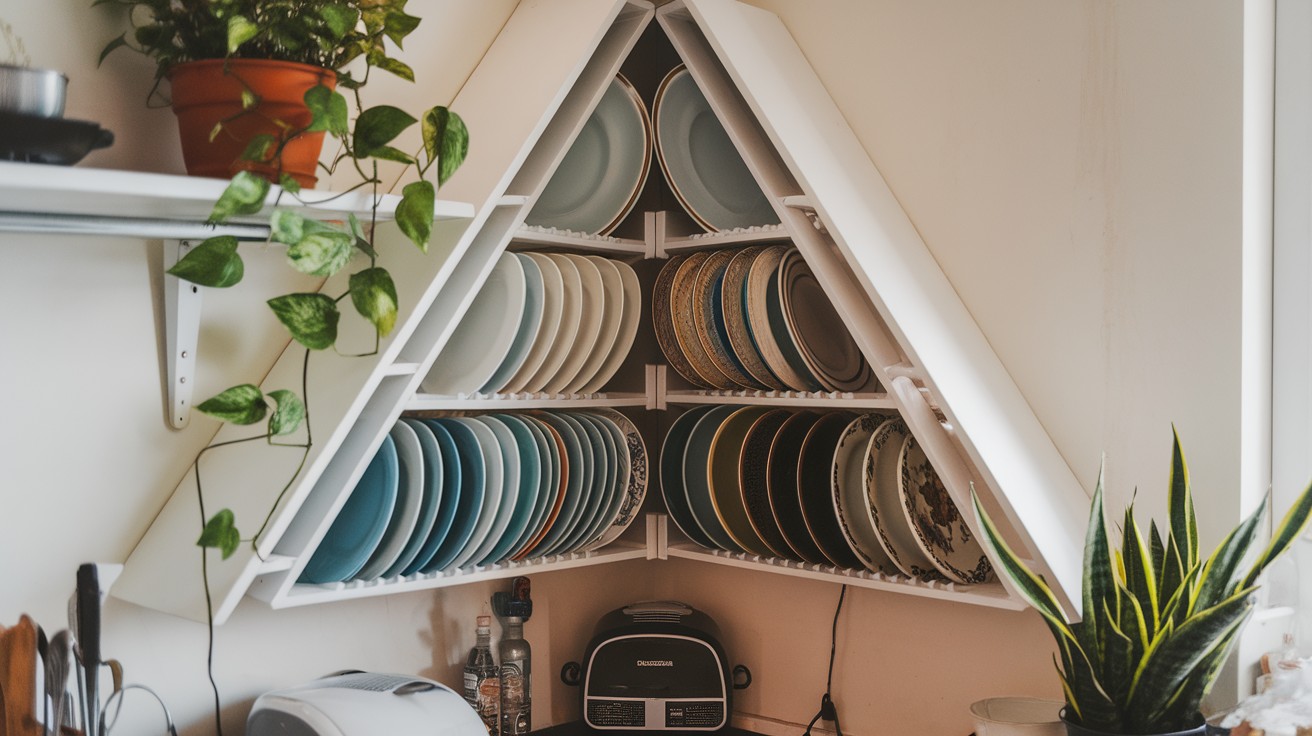
Corners get ignored in most kitchens. But those awkward angles hide surprising storage potential.
Quick setup: Build triangular rack, angle plate slots, secure in corner. A few hours of work.
Here’s how I did it:
My tiny kitchen needed every inch of space to earn its keep. Use awkward corner spaces efficiently.
Design a triangular rack that fits snugly in the corner. Angle the plate slots for easy access. Mount it inside a corner cabinet or on an open wall corner. Corner storage often goes unused, making this a smart space solution.
Decorative & Display-Focused
Sometimes plates deserve to be showcased, not hidden.
These display-focused racks turn your dishes into kitchen art while keeping them functional.
15. Cottagecore Plate Ledge Display
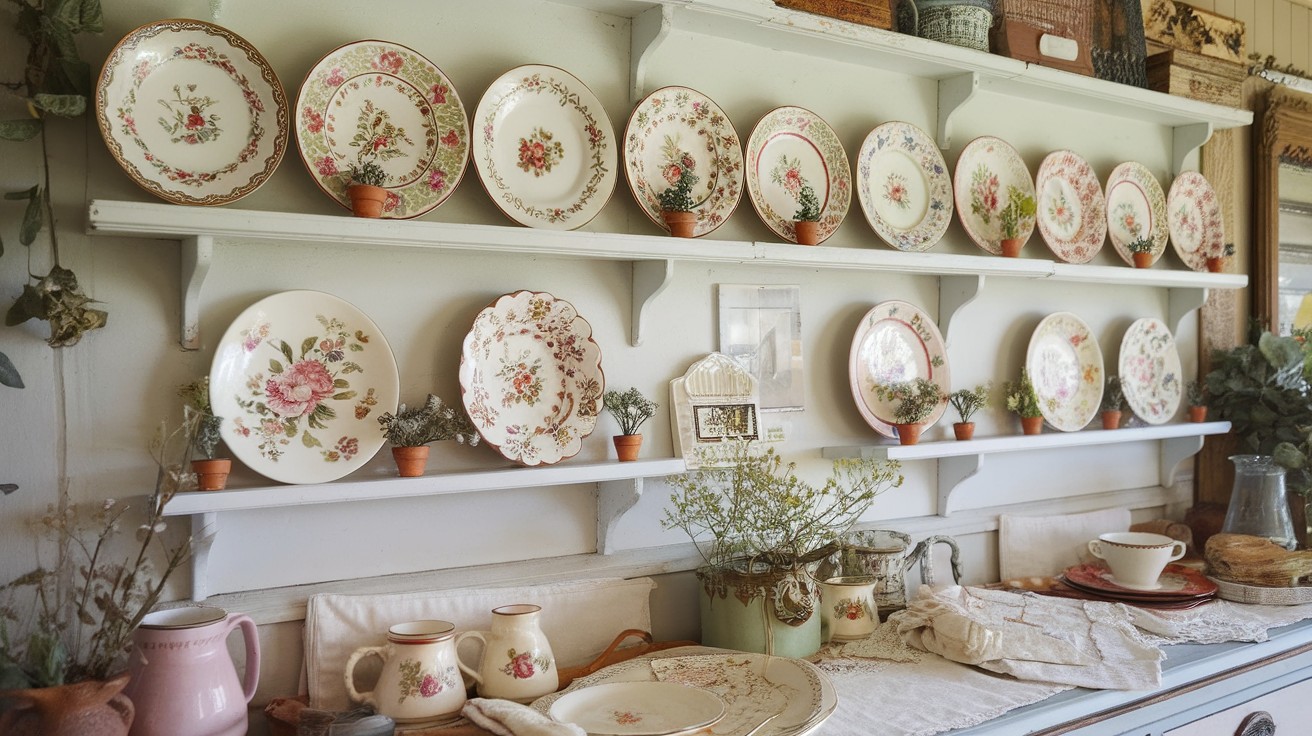
Pinterest dreams become reality with simple plate ledges. Sometimes the most charming solutions are the easiest.
Quick setup: Install narrow shelves with lips, arrange plates, add plants. One afternoon.
Here’s how I did it:
I wanted that collected-over-time cottage feel without waiting decades to achieve it. Create a charming cottage feel with simple plate ledges. Install narrow shelves with a small lip to hold plates upright.
Space ledges 8 inches apart vertically for visual balance. Mix plate sizes and patterns for an authentic, collected-over-time appearance. Add dried flowers or small plants between plates for extra cottage charm.
16. Rustic Farmhouse Plate Wall Gallery
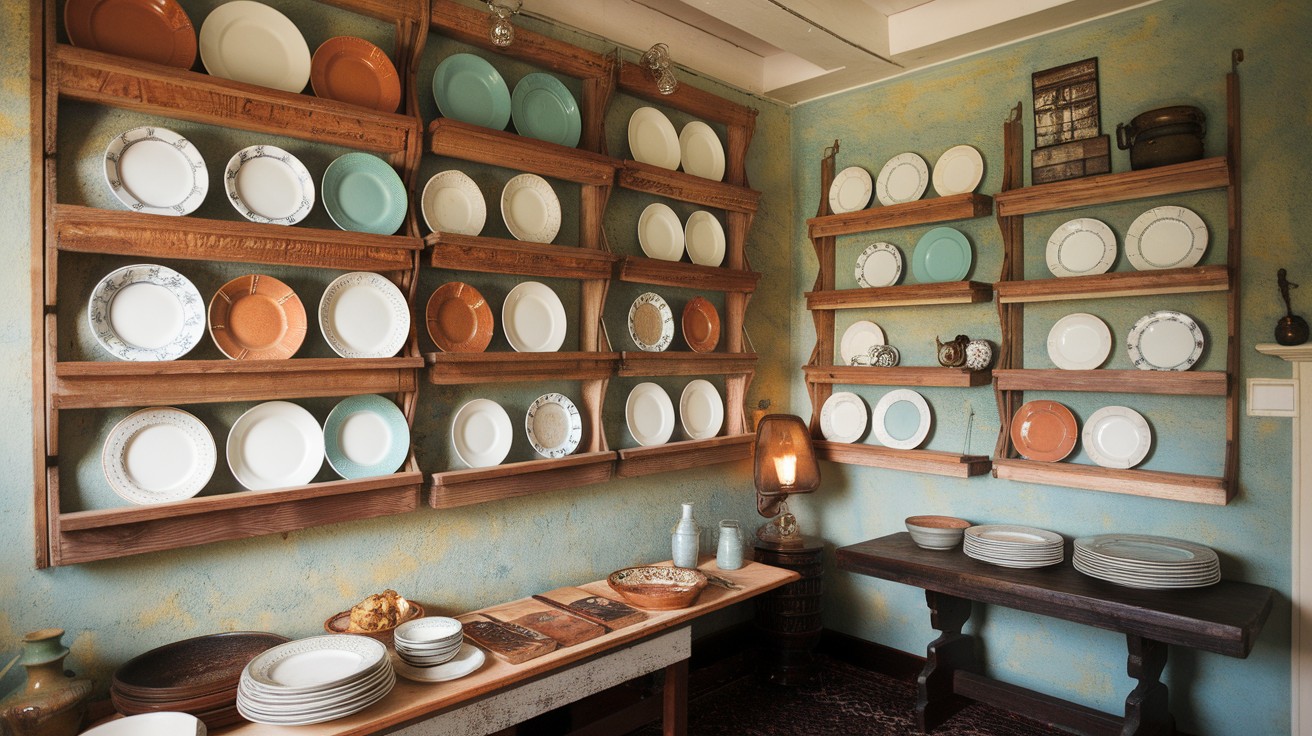
Gallery walls work for more than pictures. Multiple small racks create an impressive visual impact.
Quick setup: Build various sized racks, arrange gallery style, mix finishes. Weekend project.
Here’s how I did it:
I wanted a farmhouse character that looked collected over generations, not bought in one trip. Group multiple small racks for maximum impact. Build 4-6 small racks in different sizes. Arrange them gallery-style on one wall.
Use reclaimed wood for authentic farmhouse character. Paint some and leave others natural for visual interest without chaos.
17. Minimalist Scandinavian Plate Rack
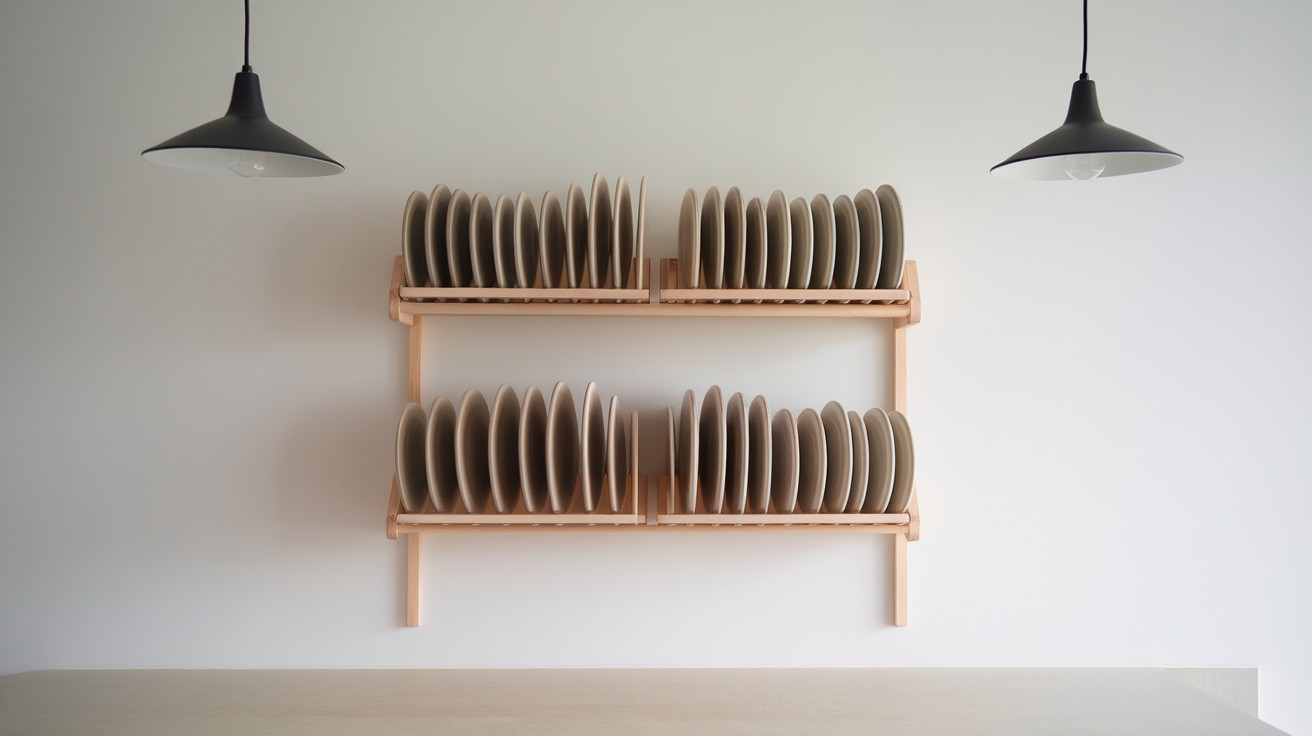
Less truly is more when done right. Clean lines and light wood create peaceful kitchen zen.
Quick setup: Use light wood, keep design simple, natural finish only. Quick build.
Here’s how I did it:
I craved calm in my kitchen, a place where simplicity brought serenity. Clean lines and light wood create serene Scandinavian style. Use light pine or birch wood. Keep the design simple with no decorative elements.
White or natural finish only. Bright colors don’t belong in this style. Mount at eye level for the most pleasing proportions.
18. Modern Floating Wood & Metal Rack
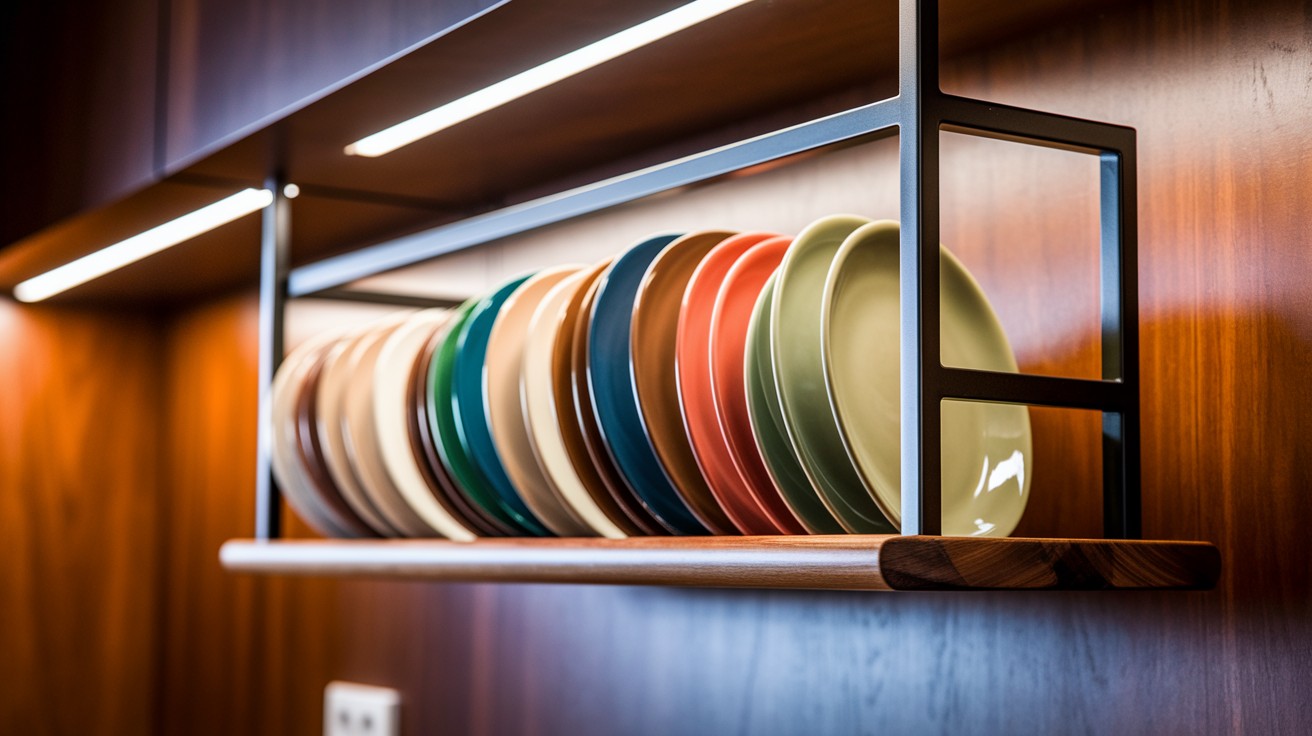
Mixing materials creates contemporary magic. Steel and wood together feel both industrial and warm.
Quick setup: Use steel brackets, light wood shelves, keep lines geometric. Afternoon build.
Here’s how I did it:
I wanted modern farmhouse vibes without looking like I copied every Pinterest board. Combine materials for contemporary appeal.
Use steel brackets with wooden shelves. The contrast looks striking and modern. Black steel with light wood creates the perfect modern farmhouse vibe. Keep lines clean and geometric. No curves or decorative details.
Creative & Special
Ready to think outside the box?
These creative solutions prove that plate storage doesn’t have to be boring.
19. Boho Macramé Hanging Plate Rack

Rope work relaxes my mind like meditation. Each knot connects me to centuries of crafting tradition.
Quick setup: Learn basic knots, create holders, hang at varying heights. Evening project.
Here’s how I did it:
I wanted storage that reflected my free-spirited, unconventional approach to life. Suspend plates in woven rope holders. Learn basic macramé knots to create rope plate holders. Hang them at varying heights.
This works best with lightweight plates or decorative pieces, not heavy dinnerware. Perfect for bohemian or eclectic kitchen styles.
20. Reclaimed Shutter Plate Holder
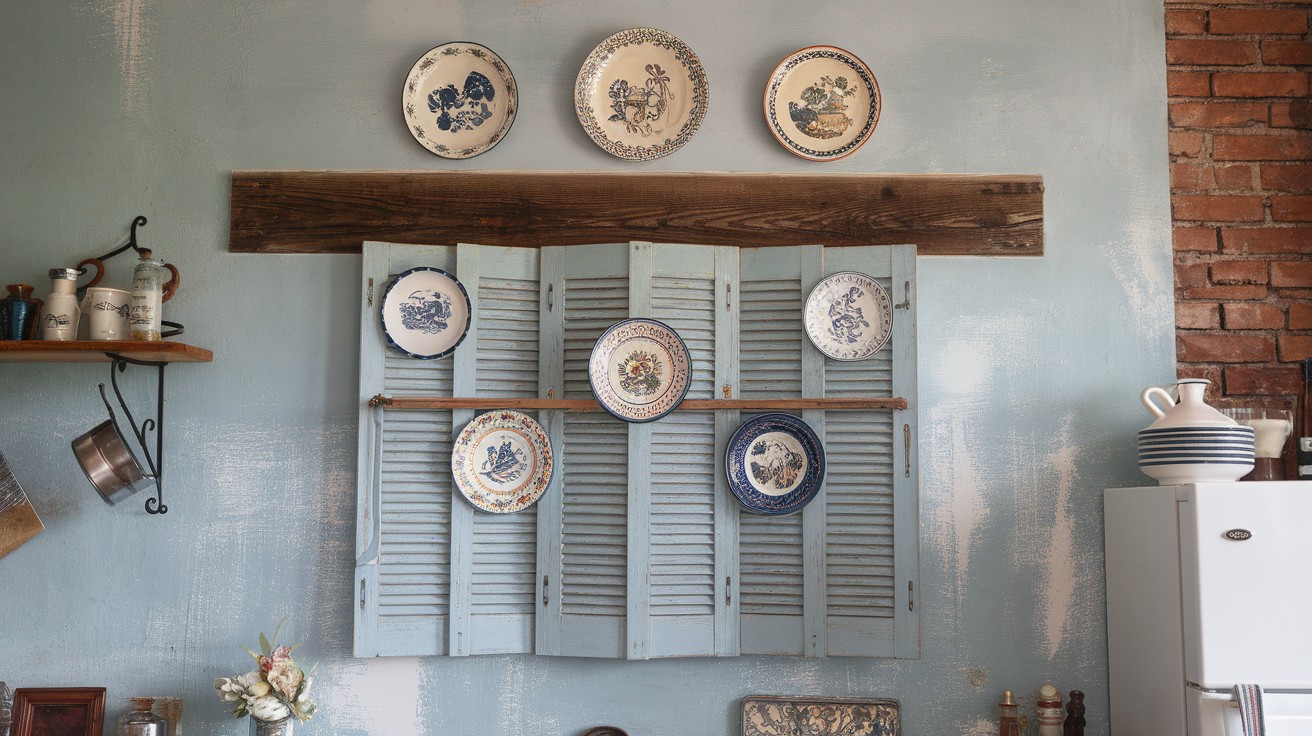
Vintage shutters whisper stories of windows they once protected. Now they guard my favorite dishes.
Quick setup: Sand shutters, paint if desired, mount horizontally. Two hours.
Here’s how I did it:
I wanted storage with history, pieces that sparked curiosity about their past lives. Old window shutters get new life as plate displays. Sand and paint vintage shutters. Mount horizontally on the wall.
The slats create natural plate slots. No modifications needed. This works especially well in cottage or shabby chic kitchens.
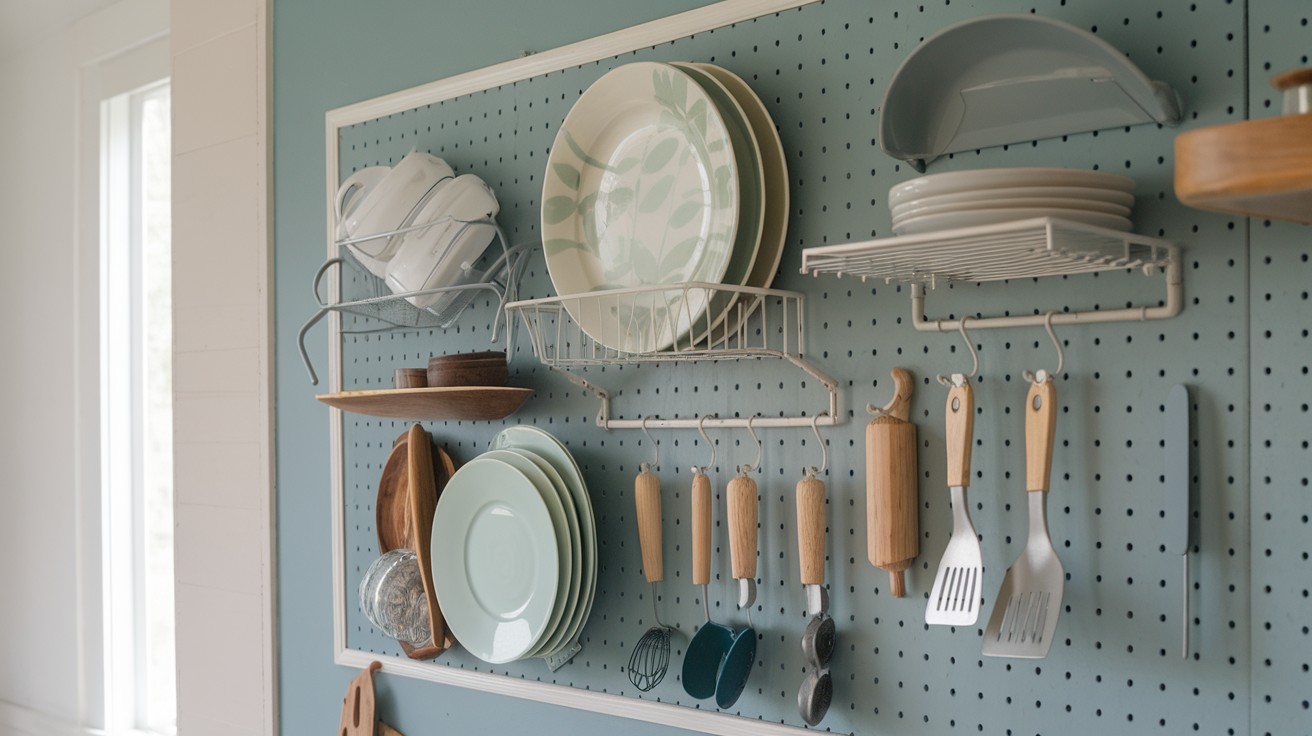
21. DIY Pegboard Plate Organizer Wall
Ultimate flexibility appeals to my indecisive nature. When you can rearrange everything, you never get bored.
Quick setup: Install pegboard, add various hooks and holders, paint to match. A few hours.
Here’s how I did it:
I wanted storage that adapted to my changing moods and seasonal decorating whims. Ultimate flexibility meets industrial style. Install a pegboard on the wall. Use various hooks and holders to display plates.
Rearrange anytime you want a new look or need different storage. Paint the pegboard to match your kitchen for a cohesive appearance.
Tips for Styling Your DIY Plate Rack
Building the rack is only half the job. Styling it properly makes the difference between storage and art. Mix plate sizes. Don’t line up identical plates. Vary sizes and shapes for visual interest.
Consider color flow. Group similar colors together, or alternate for rhythm. Add non-plate items sparingly. A small plant or decorative bowl breaks up the pattern nicely.
Don’t be overcrowded. Leave some slots empty. White space makes everything look more intentional.
Clean regularly. Dusty plates kill the whole aesthetic.
Final Thoughts
You now have 21 ways to transform your plate storage. From simple weekend builds to creative upcycled projects. Start with one design that matches your skill level. The basic wall-mounted rack works great for beginners. More experienced builders can try the pull-out drawer system.
Your plates will thank you. No more chipped edges from stacking. No more digging through cabinets. Here’s what happens next: Pick your favorite design. Gather your materials. Set aside a weekend. I’ve given you the roadmap. The measurements, the tips, the insider secrets.
Your kitchen transformation starts now. Those beautiful dishes deserve to be seen, not hidden away in dark cabinets.
Build something you’ll love for years.
Frequently Asked Questions
How much does it cost to build a DIY plate rack?
Basic designs cost $15-30 using pine wood and simple hardware. Premium materials like oak or maple run $40-60, still much cheaper than store-bought options.
What’s the easiest plate rack for complete beginners?
The repurposed pallet rack requires minimal cutting and basic tools. Sand it smooth, add mounting brackets, and you’re done in 2-3 hours.
How many plates can a standard wall rack hold?
Most 36-inch racks hold 12-15 dinner plates comfortably with proper spacing. Add serving platters and you’ll store 18-20 pieces total.
Can I build a plate rack in a rental apartment?
Yes, focus on cabinet inserts and removable designs that don’t require wall mounting. The shelf divider organizer works perfectly without any permanent changes.
Which wood finish works best in kitchens?
Polyurethane provides the best protection against grease and moisture. Apply two coats for durability, or use paste wax for a more natural look.