
When boring walls lack inspiration, picture frame moulding offers the perfect DIY solution. This simple technique instantly transforms any space with charm and sophistication. The visual depth created by these frames elevates your home’s aesthetic without adding clutter.
I still remember my first installation, walking into my living room afterward felt like entering an upscale designer space. The best part? This project welcomes beginners with open arms.
It’s surprisingly affordable, straightforward, and doesn’t require professional tools or woodworking experience. With basic materials and a weekend afternoon, you can create architectural interest that looks far more expensive than its actual cost.
Ready to take your walls from bland to breathtaking? Let’s transform that flat surface into a statement piece that reflects your style. Follow along as we break down this satisfying project into simple steps anyone can master.
Plan Your Frame Layout
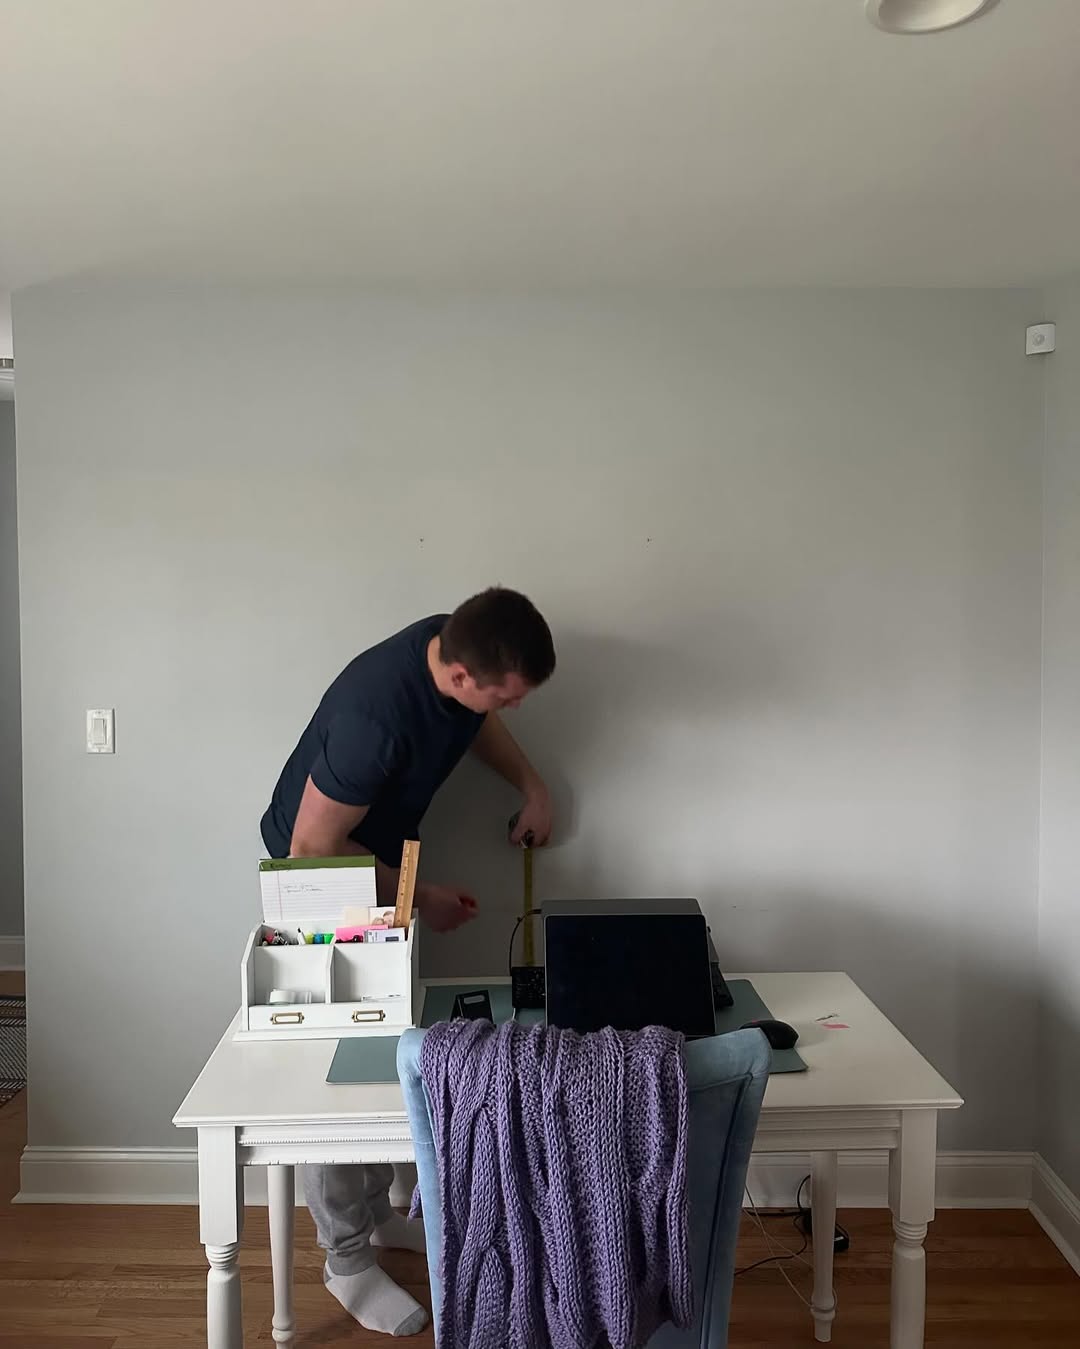
Start your DIY picture frame moulding by measuring your wall carefully with the help of a measuring tape. Decide how many you want to make and in what sizes based on the available wall space.
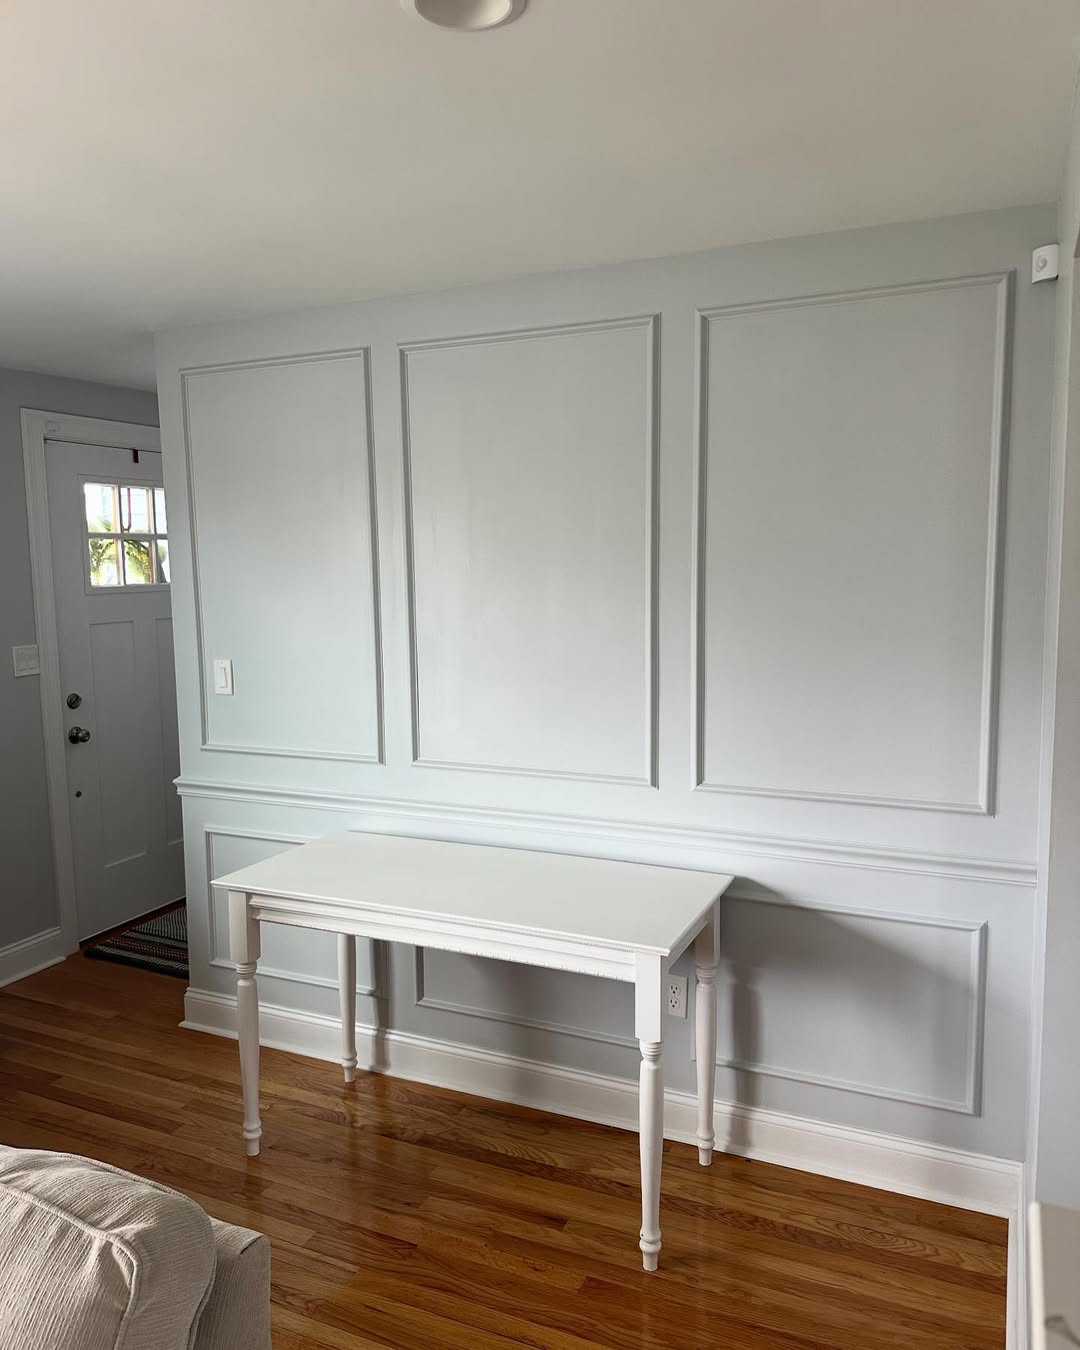
To begin with, I chose three evenly spaced frames on a long wall to create a sense of balance and proportion. Once you have decided on the number of frames and their sizes, use a pencil to lightly mark the placement of each frame on the wall.
For added accuracy, I sketched the layout on paper before committing to the wall. This gave me a clear idea of the proportions and made it easier to make adjustments before I started.
Once your design is mapped out, grab a level and draw straight lines on the wall. These lines will act as your guide when attaching the trim, making sure everything is aligned perfectly.
In my case, I marked the frames using painter’s tape for temporary outlines. This will help you to visualize what the final product would be and allow you to adjust before you move on to the cutting process.
Taking a little time in this stage prevents mistakes that could compromise the whole project, like uneven frames or wrong spacing.
Cutting and Preparing Moulding
The next step in your DIY picture frame moulding project is measuring the length of every piece using the markings on your walls. Be sure to get these dimensions correct, as this would save you more time in the future and also save a lot of materials.
Also, for every corner you make, the pieces will need to fit together snugly with the edges being cut at 45-degree angle, hence, recheck the measurements before cutting.
I used a miter saw for this step, making the cuts fast and fairly accurate. If you do not have a miter saw, a handsaw with a miter box works equally well but requires more effort and some precision.
Label all pieces with “top,” “bottom,” “left,” or “right.”. This small action helps ensure that the right pieces are placed in the proper positions, saving time and headaches from mismatched trim pieces.
After cutting the piece, lay them on the floor to test-fit them, then attach them to the wall. I found, through this step, some errors were avoided because these pieces were fitting properly in place.
If the edges of your pieces appear uneven, run sandpaper over them to even out the surfaces. This is what helps to ensure clean joints and a polished finish when completed.
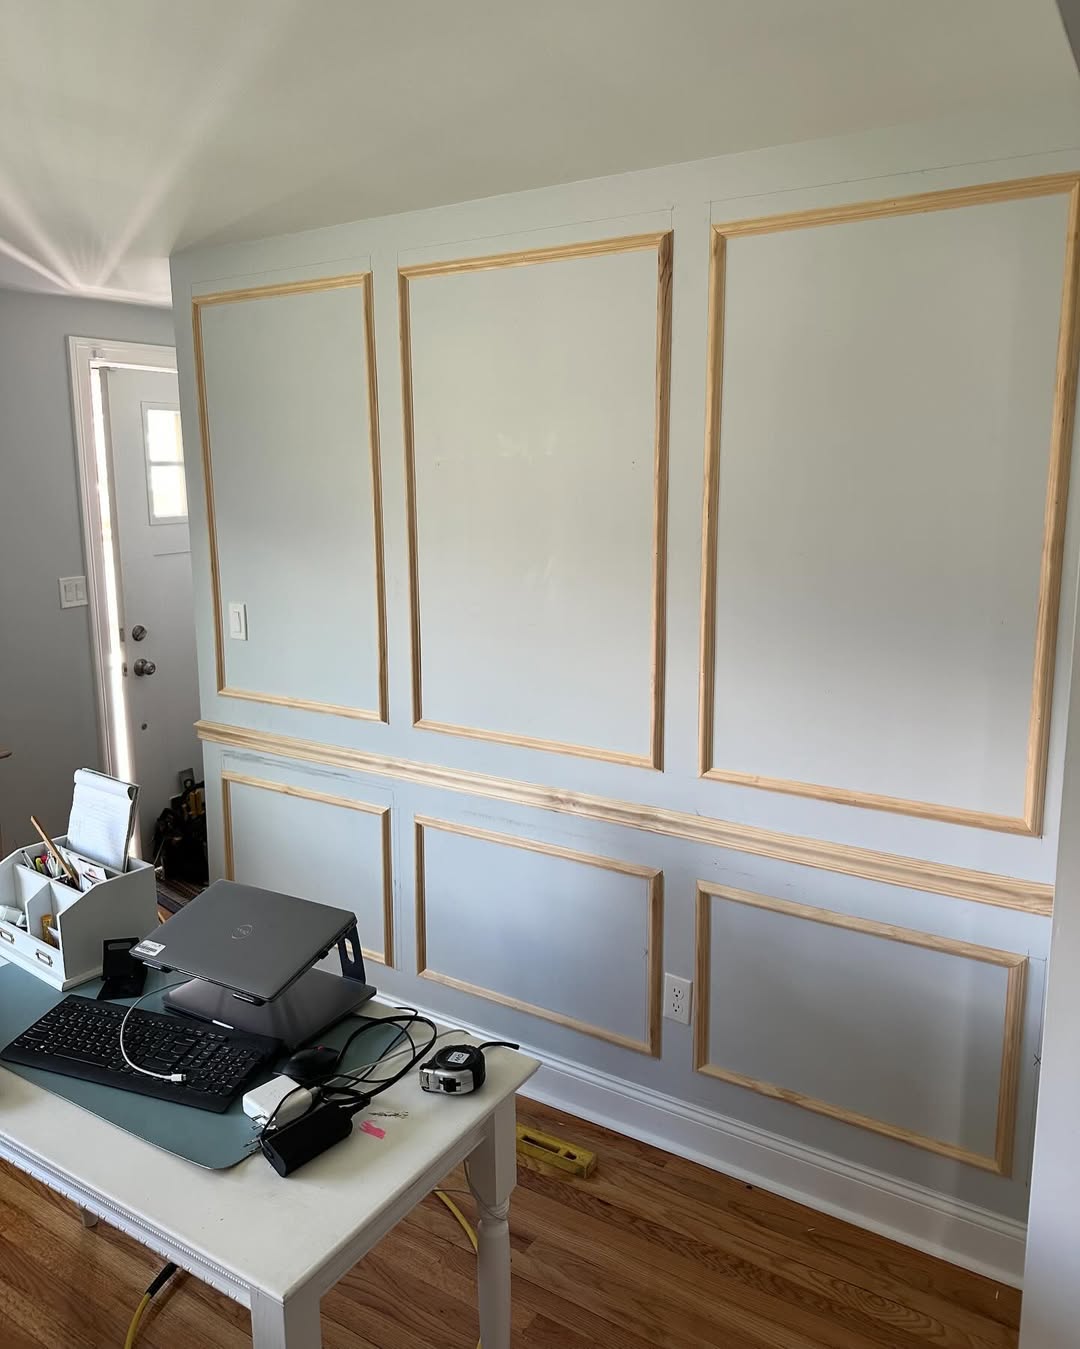
I planned out the DIY picture frame moulding in my living room, and as the picture shows, it has turned into a perfect setup.
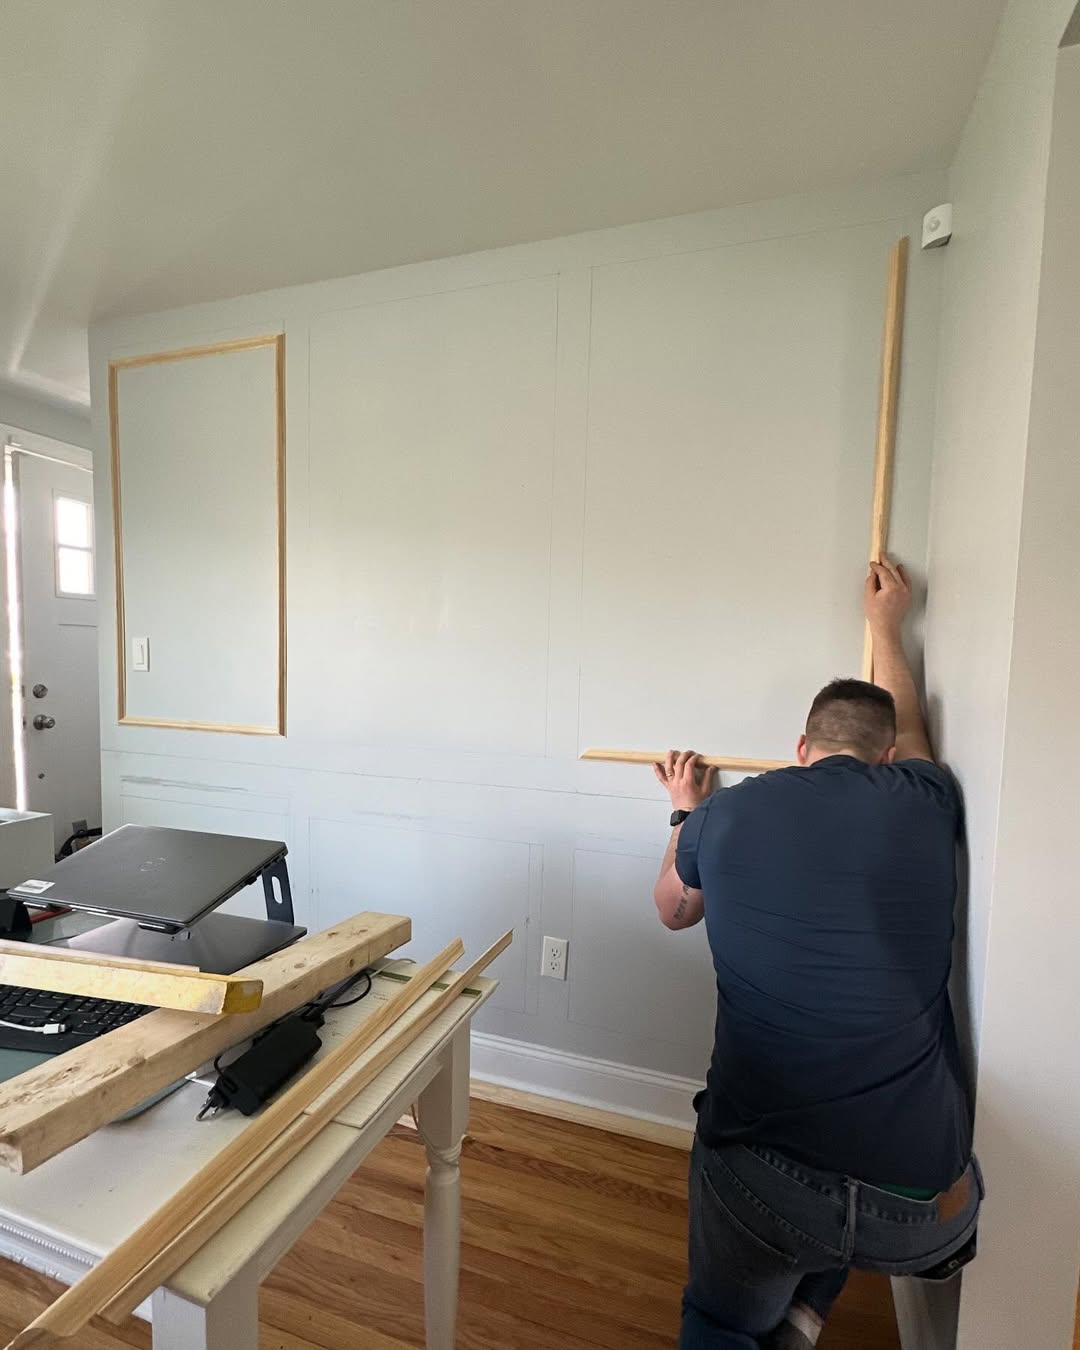
Installing the Moulding on the Wall
At this point in your project, you can see it all coming together. The first step here is applying wood glue or construction adhesive to the back of each piece.
Be cautious with glue quantities, as too much may lead to messy stockings or even affect the adhesion process, but a just-about-perfect amount of glue does allow for a robust stick that will not lead to the product becoming messy at all during the application.
For some, it works by only doing one frame, with the top frame completed, and then moving down into both sides and the bottom of that frame. Using wood glue will give a good base for the trim to stick to the wall.
When the glue is in place, place the trim along your pencil lines and press firmly to stick it to the wall. Here, a level is necessary to ensure that the pieces are aligned perfectly.
The next step is to secure the trim with finishing nails. I used a hammer for my first project, but a nail gun can speed this up if you have one.
Space the nails evenly along the trim so that they will hold in securely. Do not worry about visible nail heads; these will be filled later, so this is just the first step in securing the trim in place.
Filling Gaps and Sanding Moulding
Once all the trim is attached, you will notice small gaps between the pieces and around the nail heads. This is normal and needs to be filled for a seamless finish.
Fill in the gaps using wood filler, applying it with a putty knife for a smooth finish. This step should not be skipped, as the filler must dry completely so that it can set properly.
If the gaps are not filled, it will show through when you paint, and it will compromise the professional look of the finished project. Sanding is a very important step to make sure the entire surface is smooth.
For this process, you will need to use 120–220 grit sandpaper. Pay special attention to those filled areas so they seamlessly blend with the trim.
On my first DIY picture frame moulding project, I rushed this step and ended up with very uneven paint coverage later. Take your time in doing this step, it pays off in the final product.
Once you have sanded the trim, clean the surface with a damp cloth to remove dust, thus ensuring the surface is dust-free before you start painting.
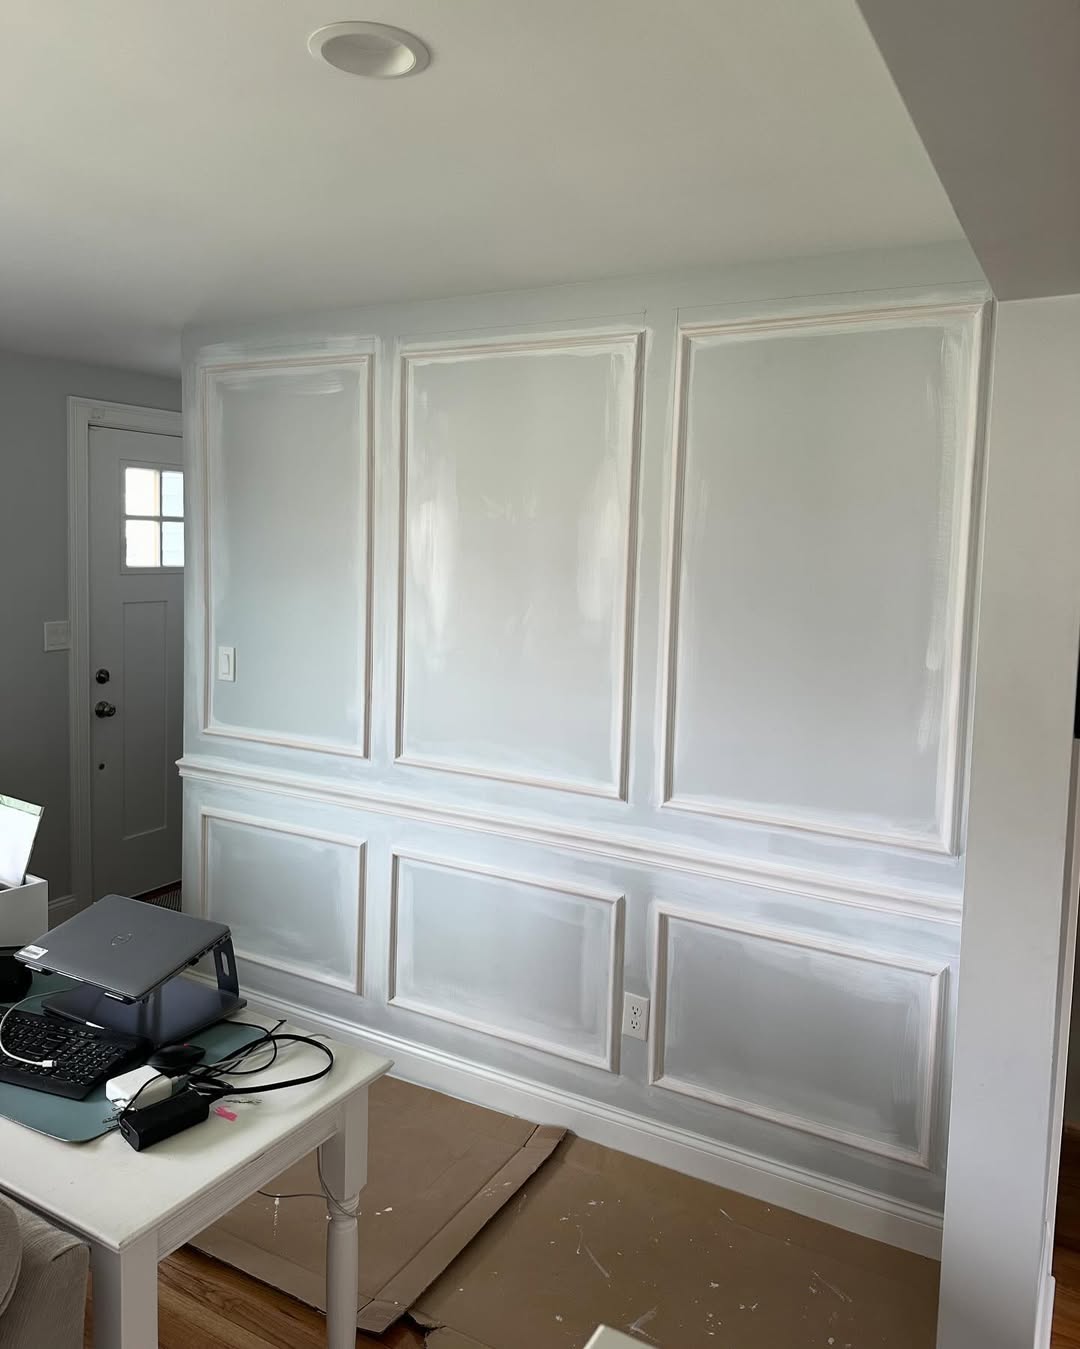
Painting and Finishing Moulding
The final step for your DIY picture frame moulding project is painting. What gives the trim its professional finish is painting.
To begin, apply a primer coat on the trim as well as the surrounding wall. Primer helps create a smooth surface for the paint to adhere to and ensures that the paint will better stick to the surface.
I used a small angled brush to apply primer to the edges of the trim and a foam roller for bigger areas. This method works perfectly, giving even coverage and preventing streaks.
Once the primer is dry, apply your chosen paint color in thin, even coats. I decided to use a good crisp white paint, which was amazing against my soft gray walls.
It is always important that you allow every coat a complete dry time before you allow the next one on not to smudge or perhaps uneven coverage. Do not rush through this step—multiple layers of paint will create a smoother and more durable finish that enhances the overall look.
Final Reveal of Our DIY Picture Frame Moulding
Step back and admire your work! This picture frame moulding instantly adds depth and character to your space. I styled mine with a combination of framed art and mirrors, which created a gallery-like effect.
This helped draw attention to the area and made the space feel more inviting and polished. You could also leave the frames empty for a minimalist look or add wallpaper inside the frames for a unique and dramatic touch.
When dressing your frames, take time to look at the surrounding decor as well so that everything complements each other. You will achieve a uniform look, for instance, by framing arts or photographs that have an affinity with the colors used in the room.
As an alternative, you would frame a large single piece of mirror to give out a more contemporary feel when framed. Adding plants or decorative items will further enhance the overall theme.
Conclusion
Picture frame moulding transforms plain walls with elegant style on a budget. This beginner-friendly DIY requires just basic tools and a free afternoon. Cut trim pieces at 45-degree angles, attach them with glue and nails, then fill gaps before painting for a polished look.
The project offers endless design flexibility. Create empty frames for a minimalist appeal or showcase art for personal expression. Most homeowners find this gateway project builds confidence for future home improvements while dramatically changing room dynamics without adding clutter.
FAQs
What if My Moulding Trim Does Not Align?
If your trim doesn’t align perfectly, use caulk or wood filler to fill in any gaps or uneven spaces. Caulk works well for smaller gaps between trim and wall, while wood filler is ideal for filling holes or larger gaps.
Sand the area once it’s dry for a smooth, seamless finish before painting. This ensures that even small imperfections won’t show after the final coat of paint.
Can I Put Moulding Over Textured Walls?
Yes. But textured walls require some more steps. You might sand lightly the area that has to be fitted with trim to ensure proper bonding.
If the texture of the wall is large enough, you could consider sticking to construction adhesive for additional strength. To have proper fitting and a good seam, you could outline your trim using painter’s tape on the walls with texture.
Can I Use Any Type of Wood for the Trim?
You can use different types of wood, but softwood is recommended, such as pine or MDF. These woods are easier to cut, sand, and paint. MDF gives a smooth finish, which is ideal for painting, so you can be sure that the finish will be polished.
How Do I Get a Smooth, Professional Finish When Painting?
Primer before painting. Use a small brush on edges and a foam roller to roll larger areas. It eliminates any possibility of the painterly effect of the brushes. Thin coats, so apply slowly, allowing drying, followed by sanding of coats for smoothness between applications.