")
Need a napkin holder that actually works? I’ll show you how to make one.
Store-bought holders cost $15-50. That’s too much for something so simple. I’ve built 23 different napkin holders. Some were disasters. Others became family favorites. I’ll share what works and what doesn’t.
This guide covers everything:
- Simple projects for beginners
- Themed holders for holidays
- Upcycled designs using old materials
- Modern styles for chic homes
- Multi-purpose holders that save space
You’ll get step-by-step instructions with exact measurements. Plus materials lists and time estimates.
Your problem solved: By the end of this article, you’ll know exactly how to build a napkin holder that fits your style and budget.
What Is a Napkin Holder & What Makes a Good DIY One?
A napkin holder keeps your napkins neat and easy to grab. Simple, right?
But here’s the thing, not all napkin holders work the same way. Store-bought holders can cost $15-50. That’s crazy expensive for something so basic.
What Makes a DIY Napkin Holder Actually Good?
- Stability – It won’t tip over when you pull a napkin
- Size – Fits standard napkin sizes (cocktail, lunch, dinner)
- Weight – Heavy enough to stay put, light enough to move
- Style – Matches your table or kitchen decor
The best part? You can customize it exactly how you want.
Tools & Materials You’ll Need
Basic Tools:
- Drill with bits
- Saw (hand saw or power saw)
- Sandpaper (120 and 220 grit)
- Measuring tape
- Pencil
- Safety glasses
Common Materials:
- Wood scraps
- Wood glue
- Screws
- Paint or stain
- Brushes
Don’t have all these tools? No problem. Many projects need just a few items.
Simple DIY Napkin Holder Tutorials (Great for Beginners)
1. Rustic Wood Block Napkin Holder
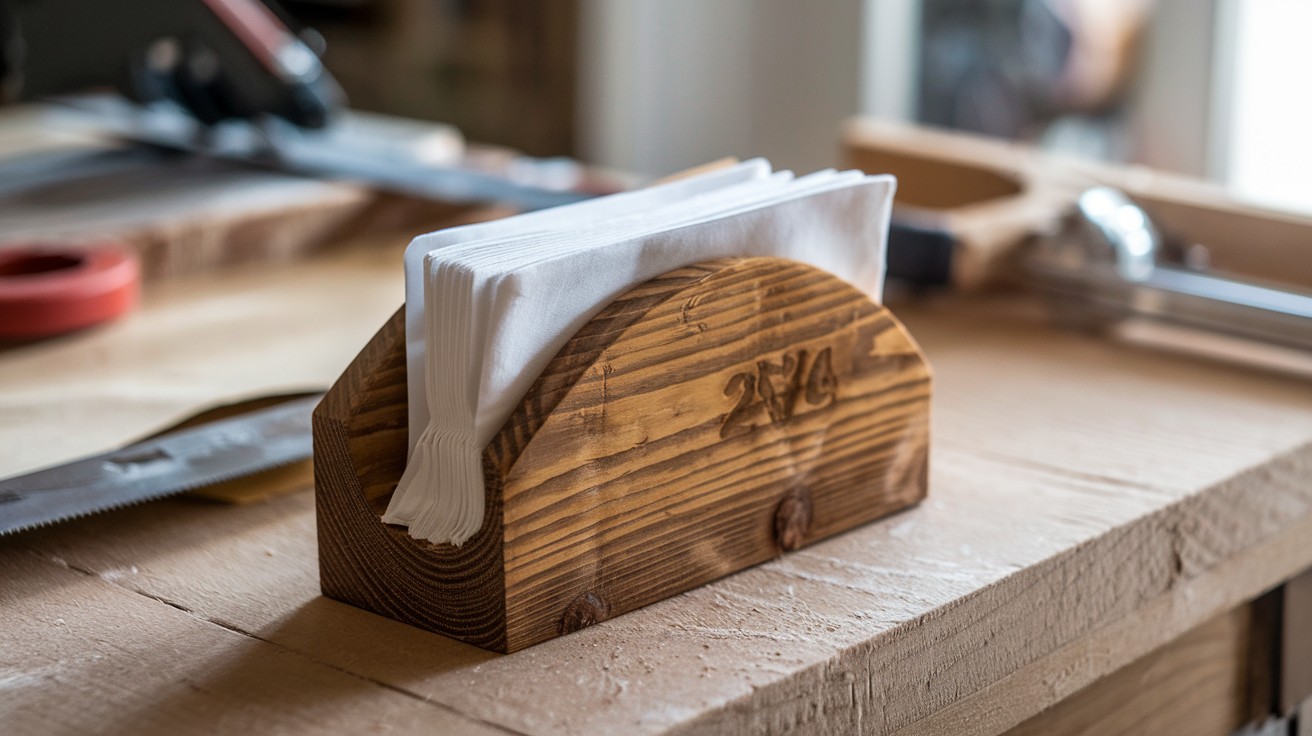
Time: 30 minutes
Cost: Under $5
Skill: Beginner
This design uses a single piece of wood. Cut a slot in the middle. Sand it smooth. Done.
Materials needed:
- 2×4 wood block (6 inches long)
- Saw
- Sandpaper
- Wood stain (optional)
Step-by-step:
- Cut your wood to 6 inches long
- Mark the center of the block
- Cut a slot ¾ inch wide, 2 inches deep
- Sand all surfaces smooth
- Apply stain if you want color
Pro tip: Make the slot slightly wider than your napkins. This prevents tearing.
2. Cardboard + Fabric Covered Holder
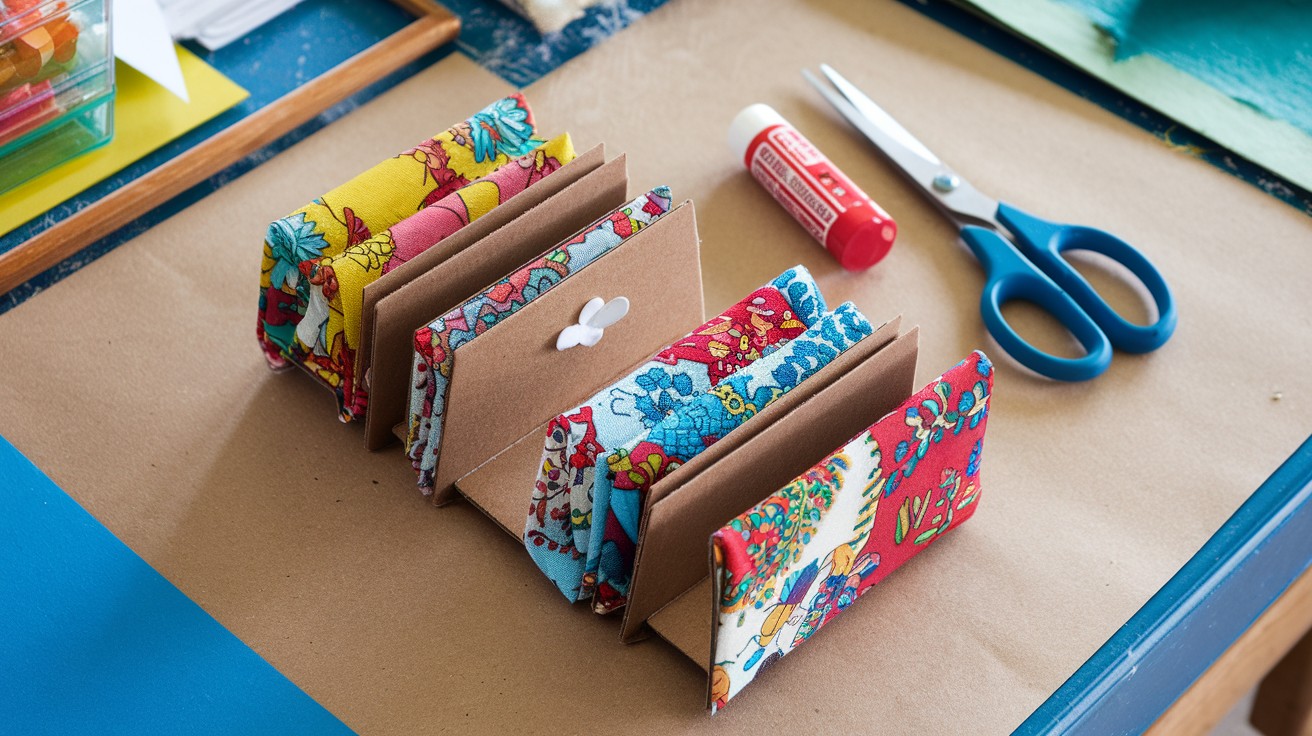
Perfect for parties or kids’ events. Cheap to make. Easy to customize.
Materials:
- Cardboard box
- Fabric
- Glue stick
- Scissors
- Ruler
Quick steps:
- Cut cardboard into L-shape
- Cover with fabric
- Glue edges down
- Let dry completely
Why this works: Kids can help make these. Great for birthday parties.
3. Acrylic Sheet & Super Glue Napkin Stand

The modern look without the modern price tag. Clear acrylic looks expensive. But it costs about $3 at the hardware store.
What you need:
- 2 pieces acrylic (4×6 inches each)
- Super glue
- Protective film remover
Assembly:
- Remove protective film
- Clean both pieces
- Apply thin line of glue to one edge
- Press together at 90-degree angle
- Hold for 2 minutes
Warning: Work in a ventilated area. Super glue fumes are strong.
4. Wooden Dowel Upright Holder
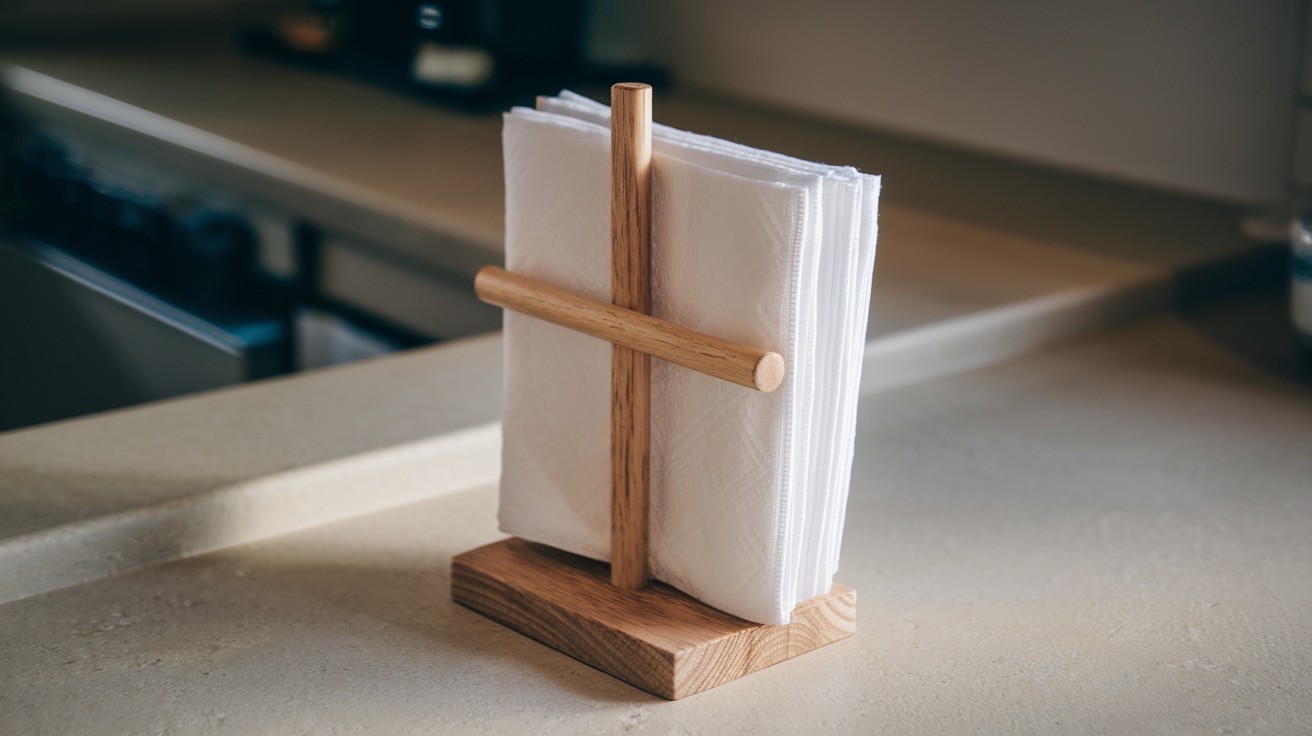
This takes up almost no table space. Perfect for small kitchens.
Materials:
- Wooden dowel (½ inch diameter, 8 inches long)
- Small wood base (3×3 inches)
- Drill bit (½ inch)
Process:
- Drill hole in center of base
- Insert dowel
- Add wood glue for security
- Sand and finish
Creative Themed Napkin Holder Ideas
5. Coastal Rope & Driftwood Holder

Bring the beach home with this nautical design. Find driftwood at the beach. Or buy rope from the hardware store.
Materials:
- Piece of driftwood (8-10 inches)
- Thick rope (3 feet)
- Hot glue gun
- Drill
Steps:
- Drill holes at each end of driftwood
- Thread rope through holes
- Create loops for napkin storage
- Secure with hot glue
6. Boho Macramé Napkin Ring Stand
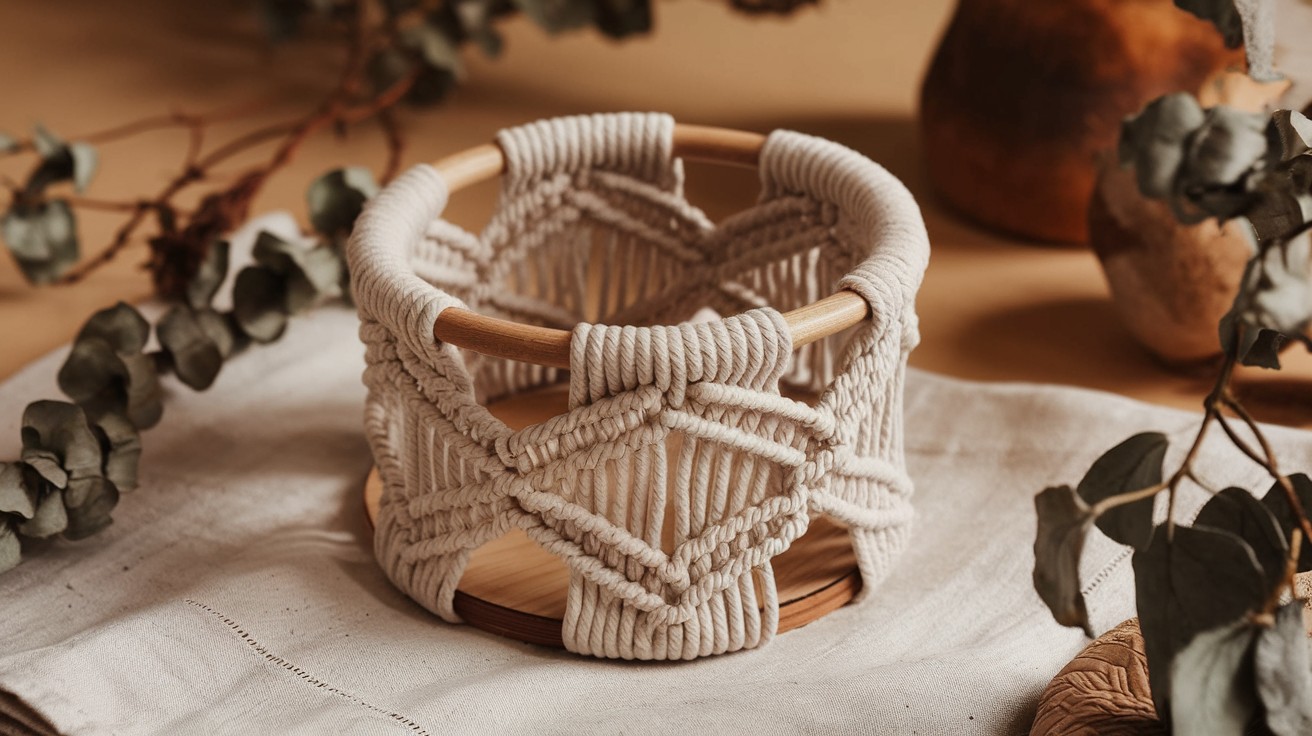
Macramé is trending. This project rides that wave. You don’t need to be an expert. Basic knots work fine.
What to buy:
- Macramé cord
- Wooden ring (4-inch diameter)
- Scissors
Basic steps:
- Cut macramé cord into 8 equal pieces
- Attach cords to wooden ring with lark’s head knots
- Create square knot pattern for 6 inches
- Form napkin pocket at bottom
7. Farmhouse Chicken Wire Holder

Rustic meets functional. This holder screams country kitchen. Chicken wire is cheap. About $8 for a whole roll.
Assembly notes:
- Wear gloves (wire edges are sharp)
- Create basket shape
- Add wooden base for stability
- Paint or leave natural
8. Holiday-Themed Holders (Christmas, Thanksgiving, etc.)
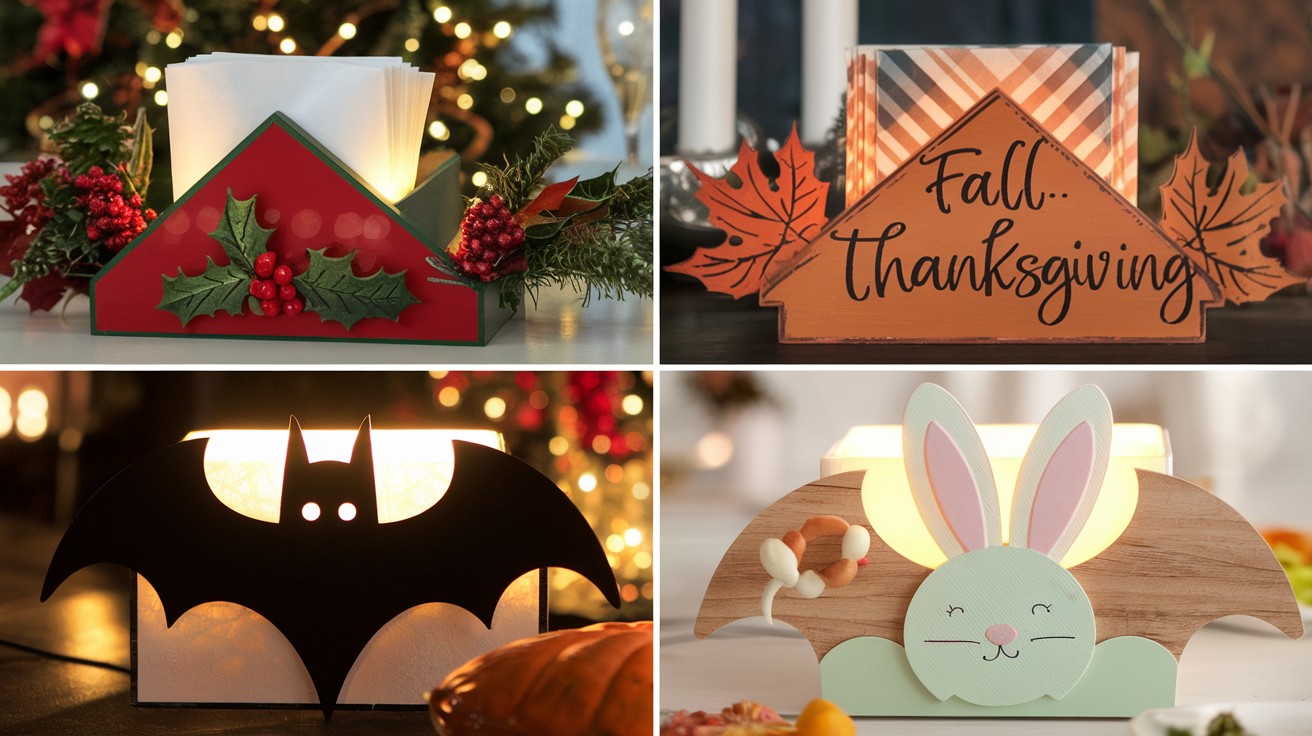
Switch designs with the seasons.
Holiday themes to try:
- Christmas: Red and green paint, mini ornaments
- Thanksgiving: Orange stain, small pumpkins as base
- Halloween: Black paint, orange accents
- Easter: Pastel colors, small bunny decorations
Smart idea: Make the base neutral. Change decorations only.
Upcycled & Eco-Friendly DIY Napkin Holders
9. Mason Jar + Wood Base Holder
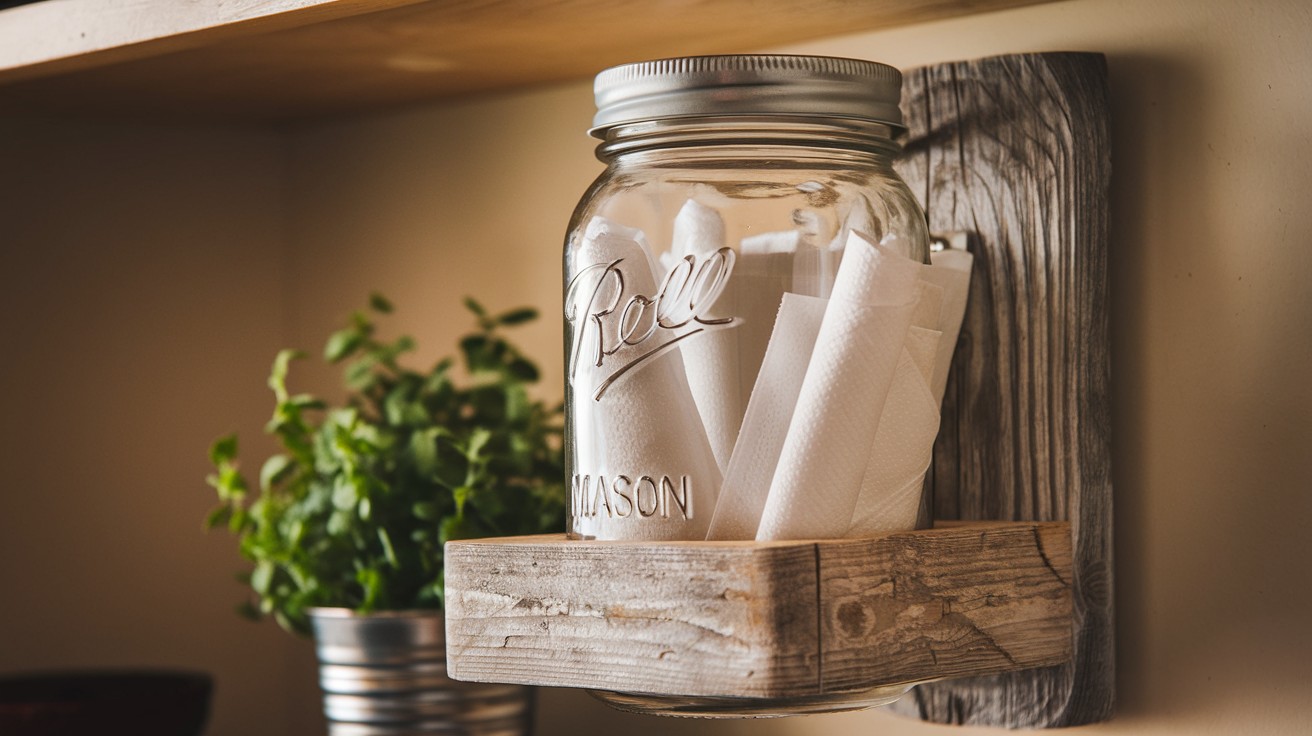
Everyone has mason jars sitting around. Put them to work. The jar holds napkins upright. The wood base adds style.
What works best:
- Wide-mouth jars
- Cedar or pine base
- Light stain to show grain
Assembly tip: Secure jar to base with strong adhesive. You don’t want it sliding around.
10. Tin Can + Pallet Wood Combo
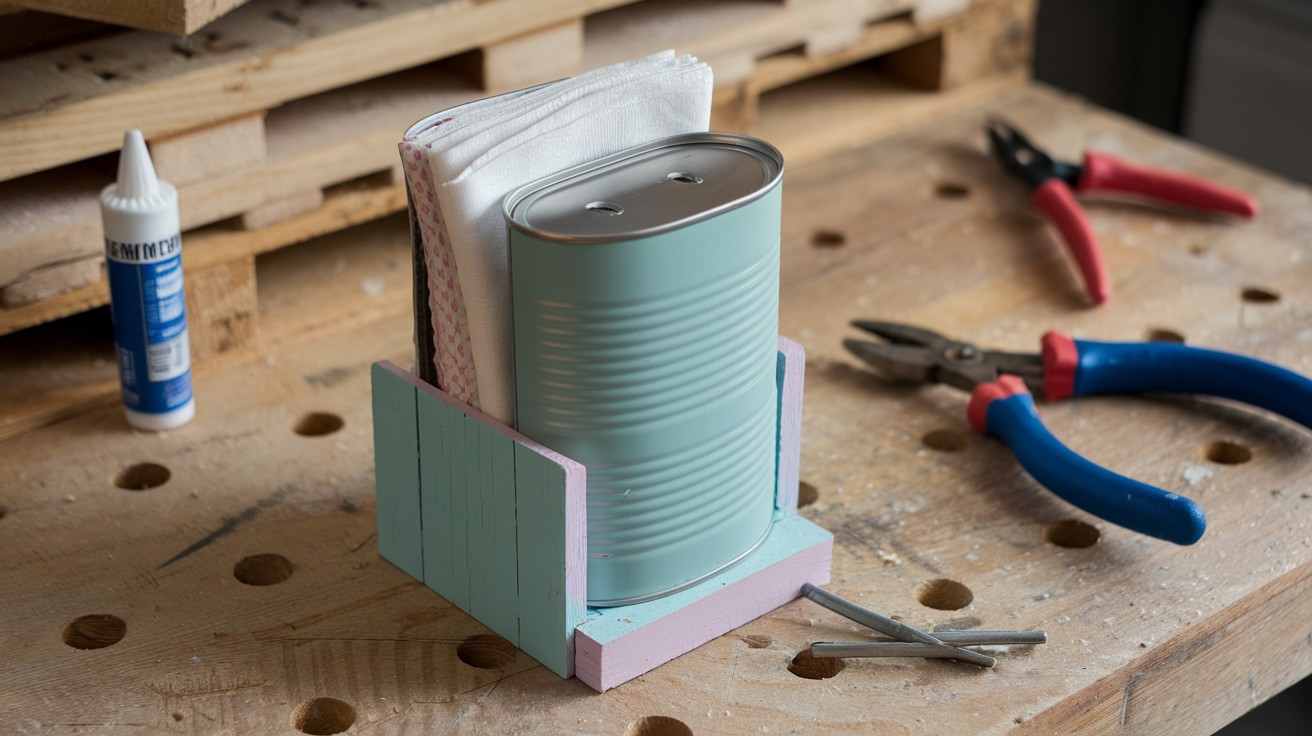
Two trash items become table decor.
Assembly steps:
- Cut tin can to desired height
- Sand all rough edges smooth
- Cut pallet wood for base (6×4 inches)
- Attach can to wood base with strong adhesive
Safety first: File down any sharp edges on the can.
11. Repurposed Vinyl Record Holder
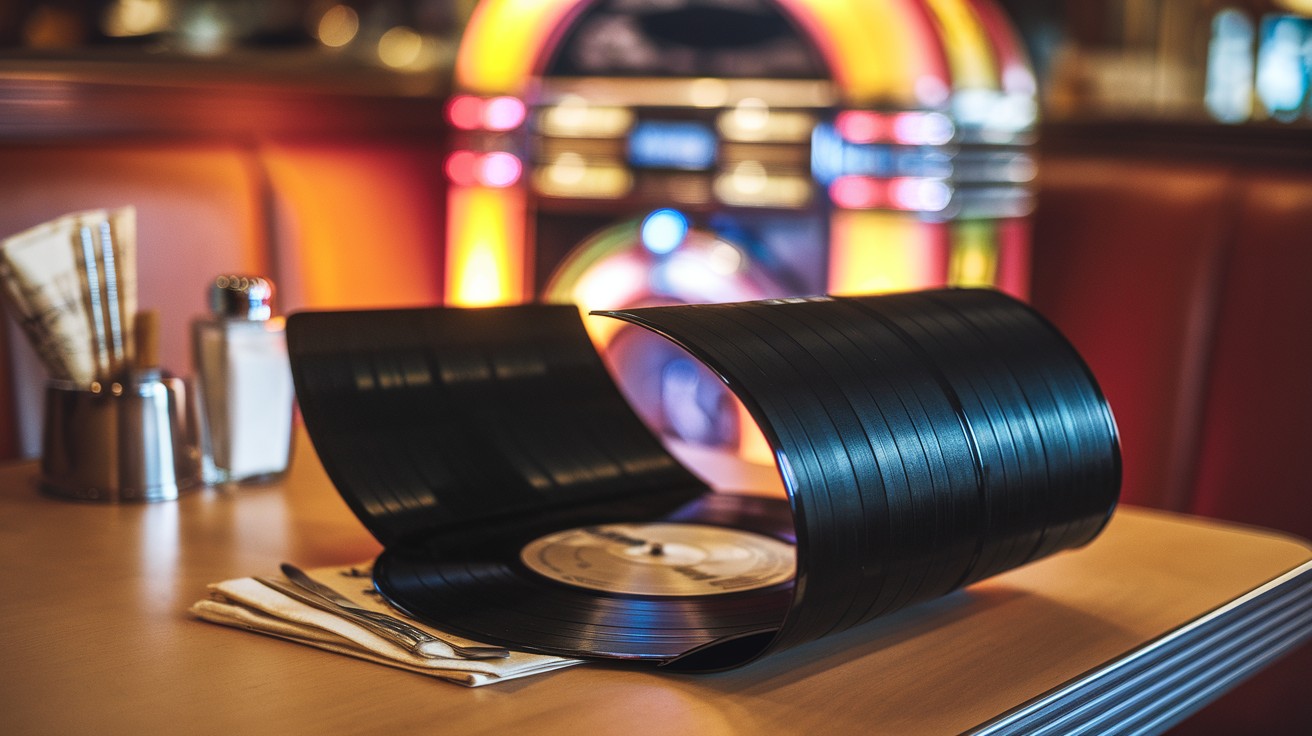
Got old records you can’t play? Turn them into napkin holders.
Process:
- Heat record in oven (200°F)
- Bend into L-shape
- Hold shape until cool
- Sand any rough spots
Bonus: People always ask about these at dinner parties.
12. Cork Board + Metal Clip Style Holder
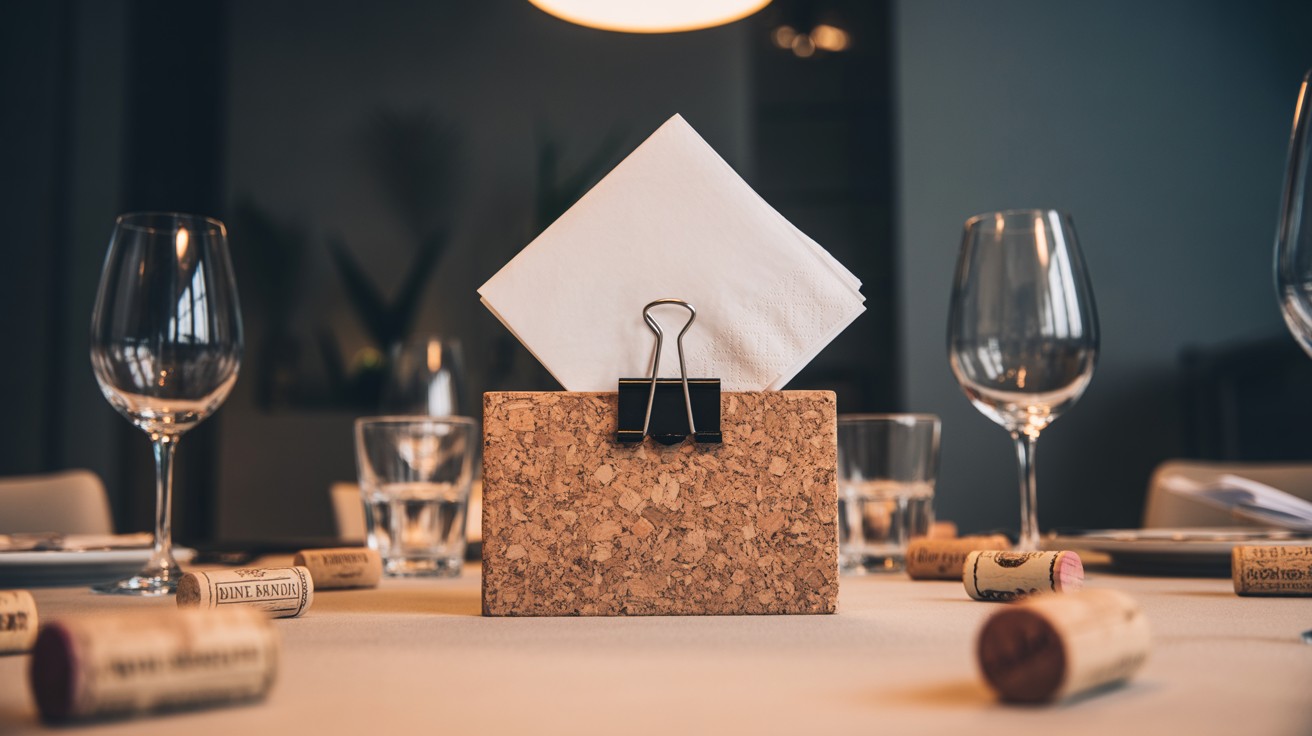
Wine lover? Save those corks.
Building steps:
- Glue wine corks together in rectangular pattern
- Create base that’s 4×6 inches
- Attach metal clips along one long edge
- Space clips 2 inches apart for easy access
Why this rocks: Napkins stay neat even in windy outdoor dining.
Stylish Designs for Modern & Chic Homes
13. Geometric Wooden Holder with Paint Dip
Clean lines meet bold color. This screams contemporary design. Use painter’s tape for crisp lines. Dip bottom third in bright paint.
Color combinations that work:
- Natural wood + bright yellow
- White base + navy blue
- Light oak + coral pink
14. Resin + Gold Flake Napkin Tray
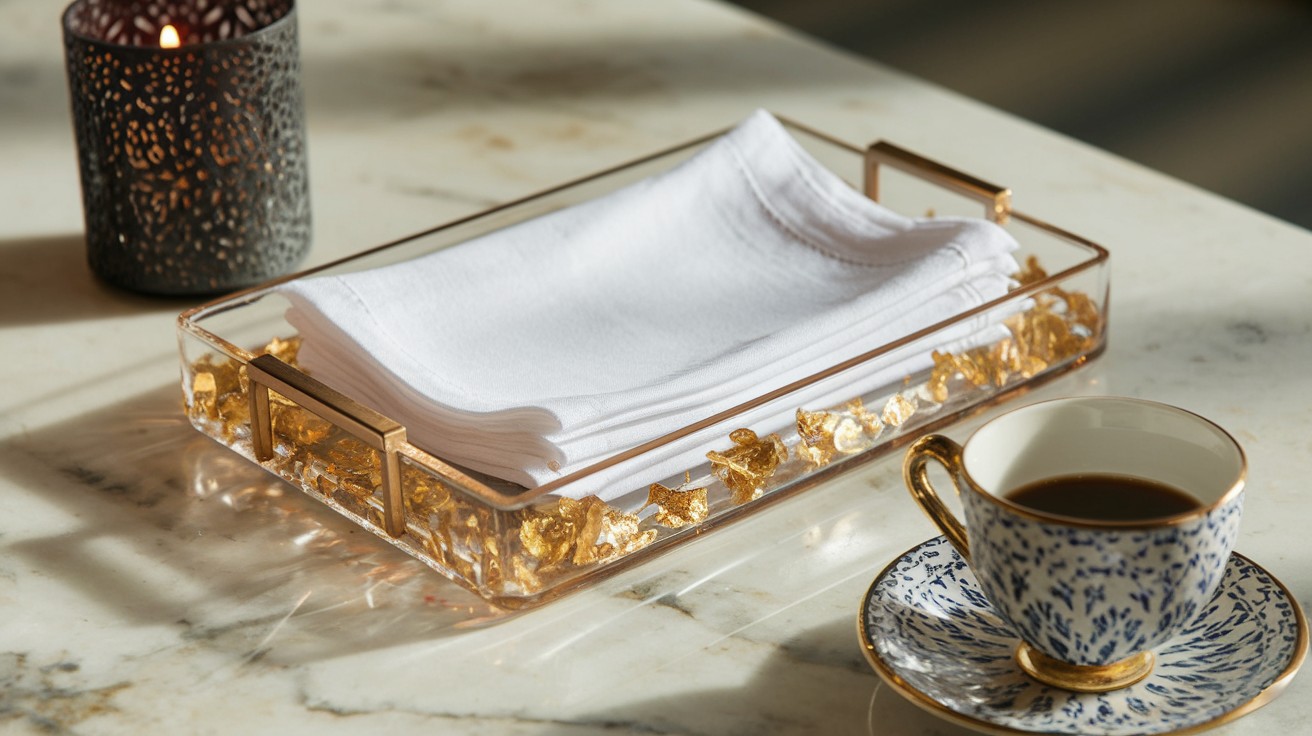
Looks like it costs $100. Actually it costs about $15.
Resin process:
- Mix epoxy resin according to package directions
- Add gold flakes while resin is still liquid
- Pour into napkin tray mold
- Let cure for 24 hours before removing
Important: Work in a dust-free area. Bubbles ruin the look.
15. Ceramic Slab Holder with Stamped Design
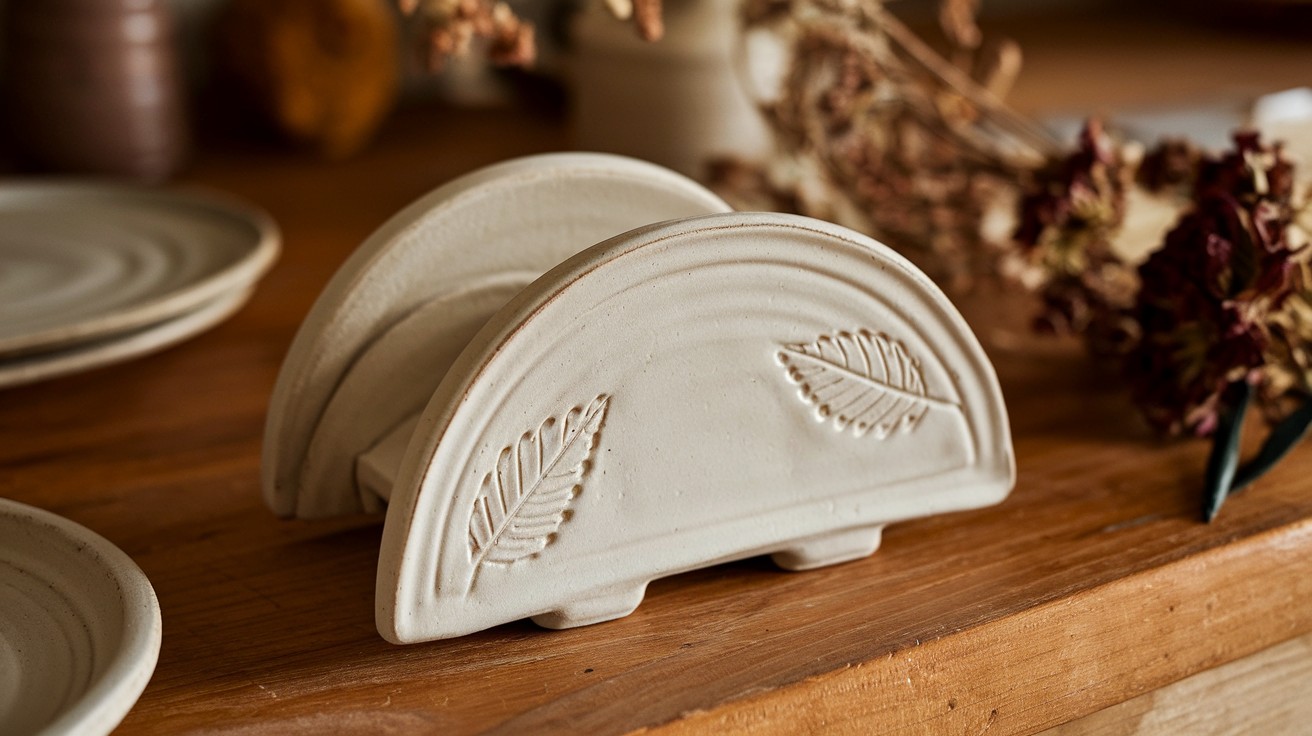
Clay + stamps = custom patterns.
Clay working steps:
- Roll clay into flat slab (¼ inch thick)
- Press stamps into clay for texture
- Cut napkin holder shape with knife
- Fire in kiln at cone 04 temperature
Don’t have a kiln? Many art centers let you use theirs for a small fee.
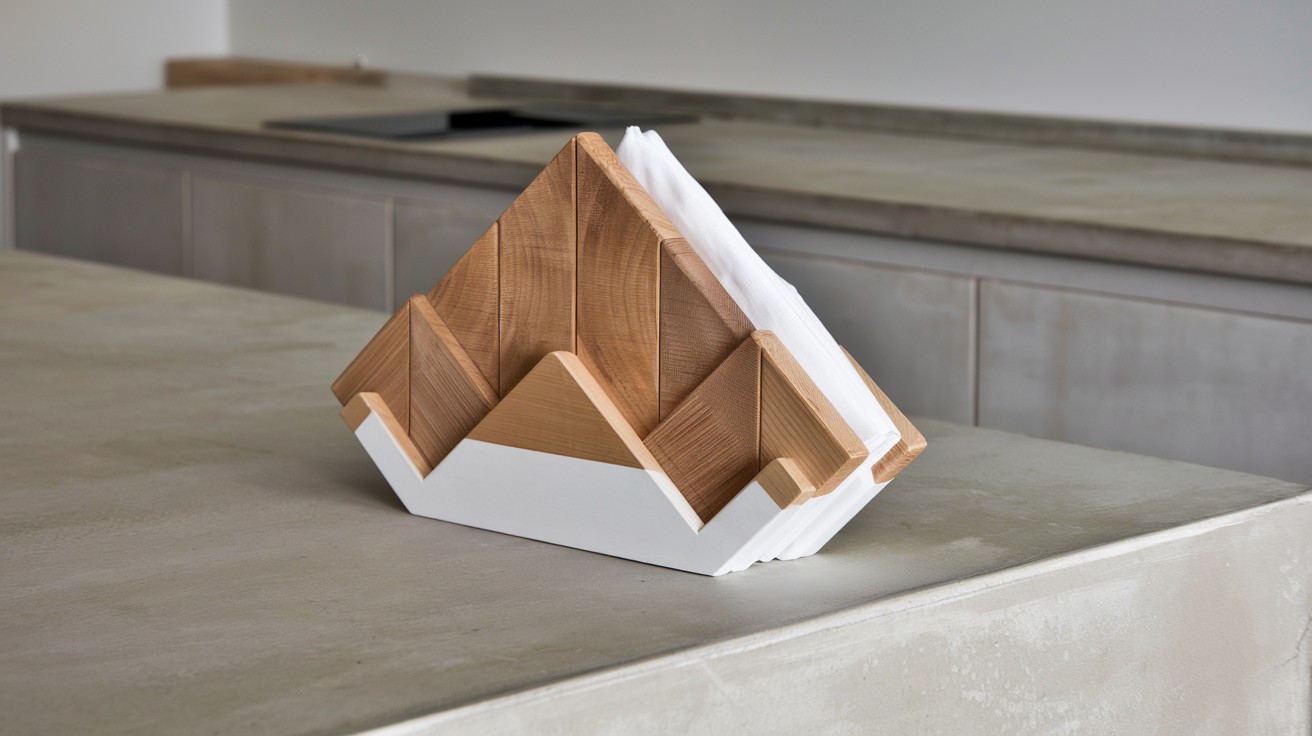
16. Scandinavian-Inspired Bent Plywood Stand
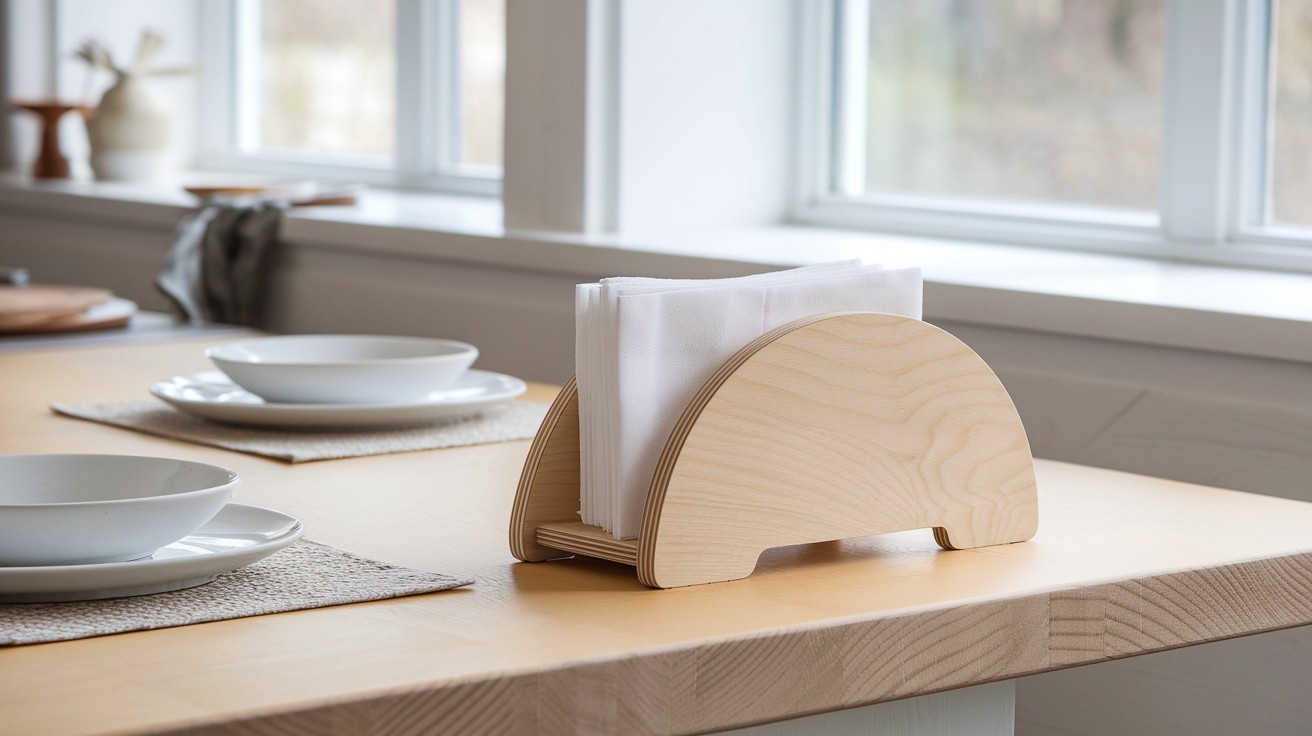
Minimalist design with maximum impact. Thin plywood bends easily when steamed. Creates flowing curves.
The technique:
- Steam plywood over boiling water
- Bend slowly into shape
- Clamp until dry
- Sand and oil finish
DIY Napkin Holders for Special Occasions
17. Wedding Table Napkin Display Stand
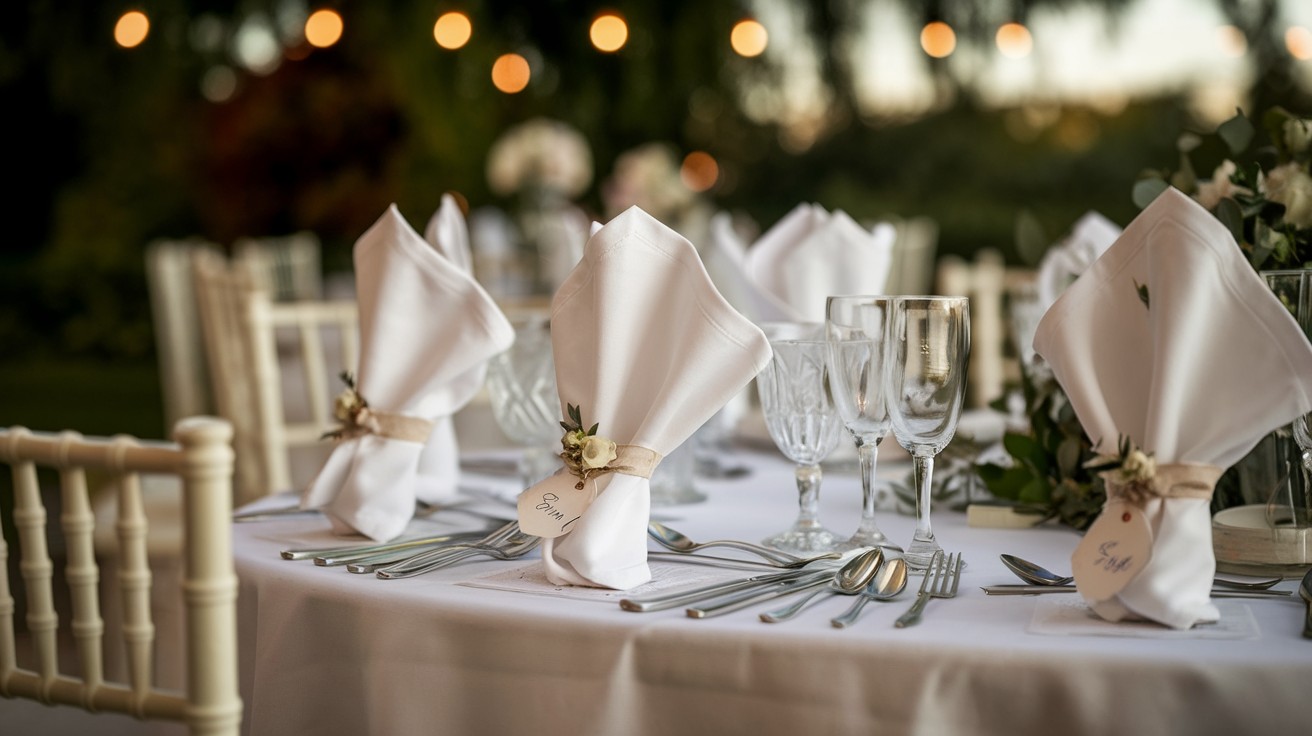
Your wedding, your style.
Wedding production tips:
- Choose simple design for mass production
- Buy materials in bulk for cost savings
- Set up assembly line with friends
- Make 2-3 extra holders as backups
Time-saving tip: Prep all materials first. Assembly-line style production works best.
18. Picnic Basket Integrated Holder
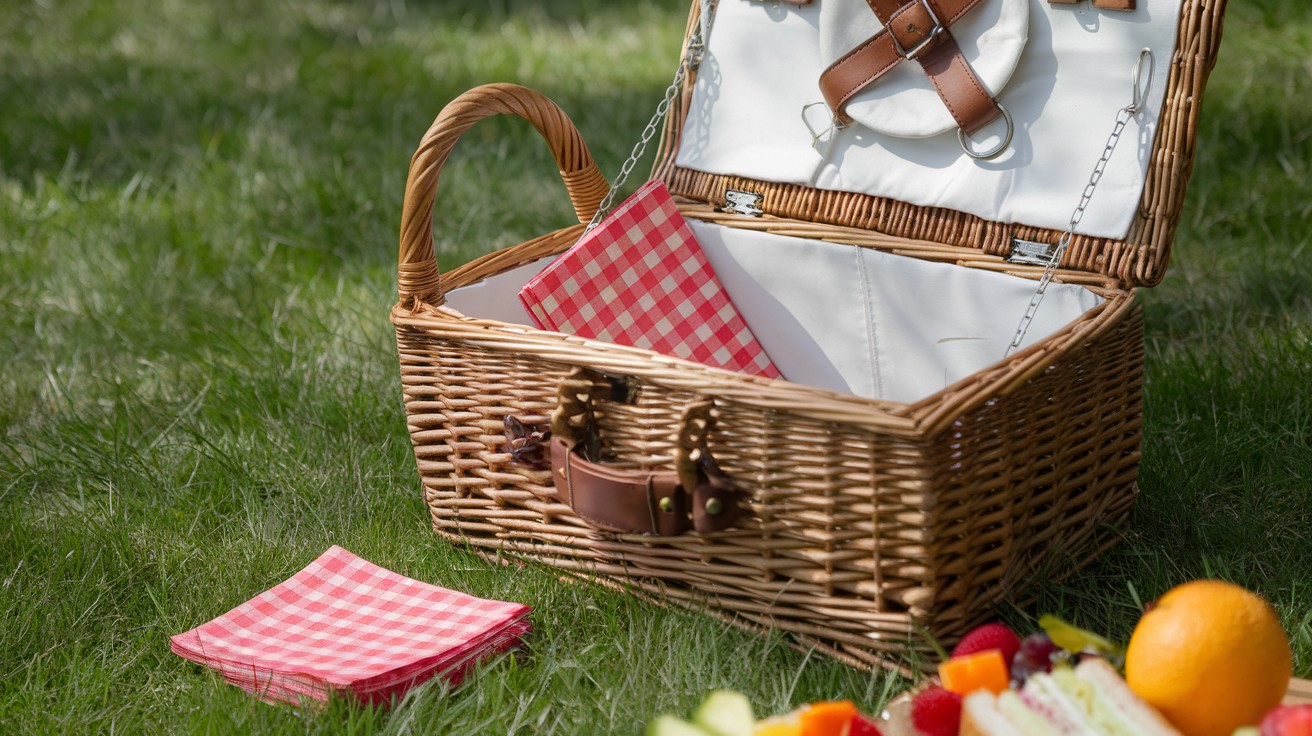
Built-in organization for outdoor dining.
Installation steps:
- Measure basket lid interior space
- Cut holder to fit snugly inside
- Attach with small hinges or Velcro
- Test that lid closes properly with holder attached
19. Birthday Party Custom Cardstock Holder
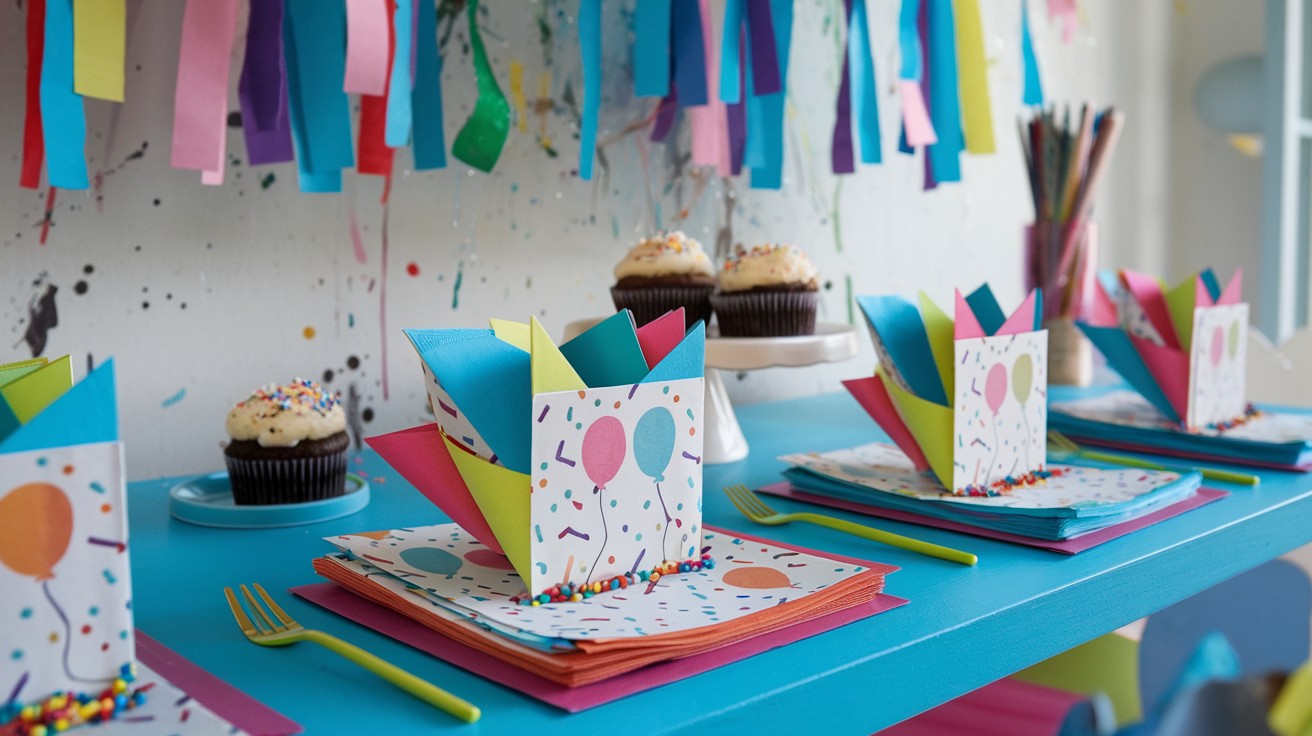
Personalize with the birthday child’s name.
Customization process:
- Design template on computer first
- Print on heavy cardstock (110lb weight)
- Cut out with craft knife for clean edges
- Fold along score lines for crisp corners
Design elements:
- Child’s favorite colors
- Age numbers
- Fun shapes (stars, animals)
20. Baby Shower Theme with Letter Blocks
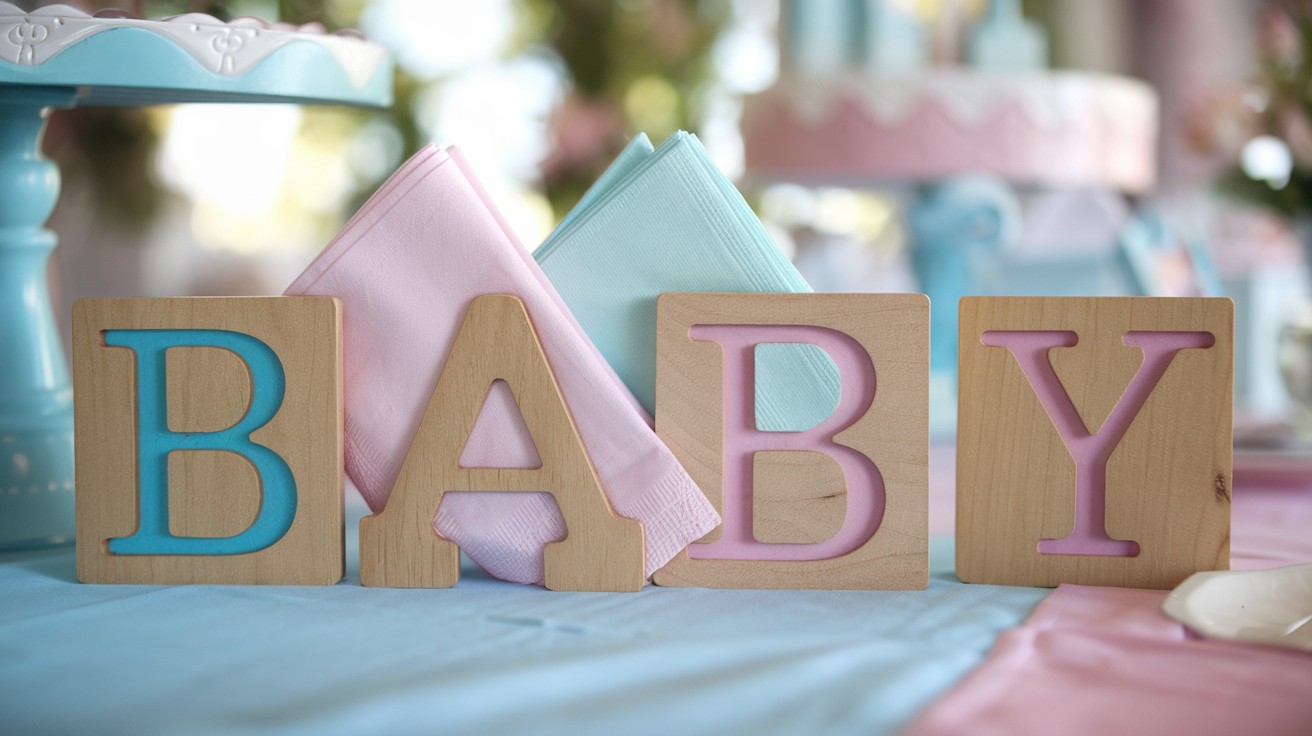
Spell out the baby’s name with wooden letter blocks.
Assembly process:
- Sand wooden letters until smooth
- Arrange letters to spell baby’s name
- Glue letters to wooden base in order
- Create napkin slot between every 2-3 letters
Pro tip: Sand letters smooth. Babies will want to touch everything.
Functional + Multi-Purpose DIY Holders
21. Napkin Holder + Salt/Pepper Organizer Combo
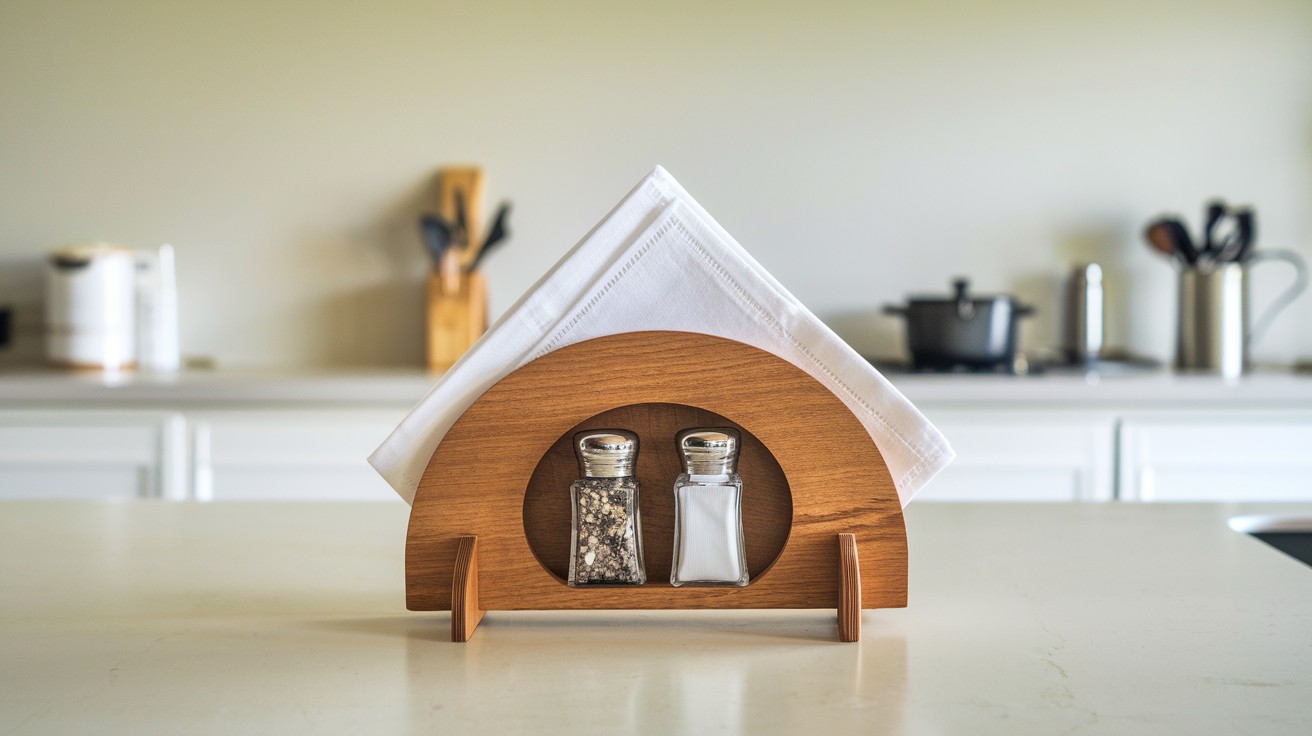
Why make two things when one works better?
Construction steps:
- Build main napkin compartment first
- Add smaller sections for salt and pepper
- Include space for condiment packets
- Sand all compartments smooth before finishing
Perfect for:
- Camping trips
- Picnic tables
- Small kitchen tables
22. Utensil + Napkin Caddy in One
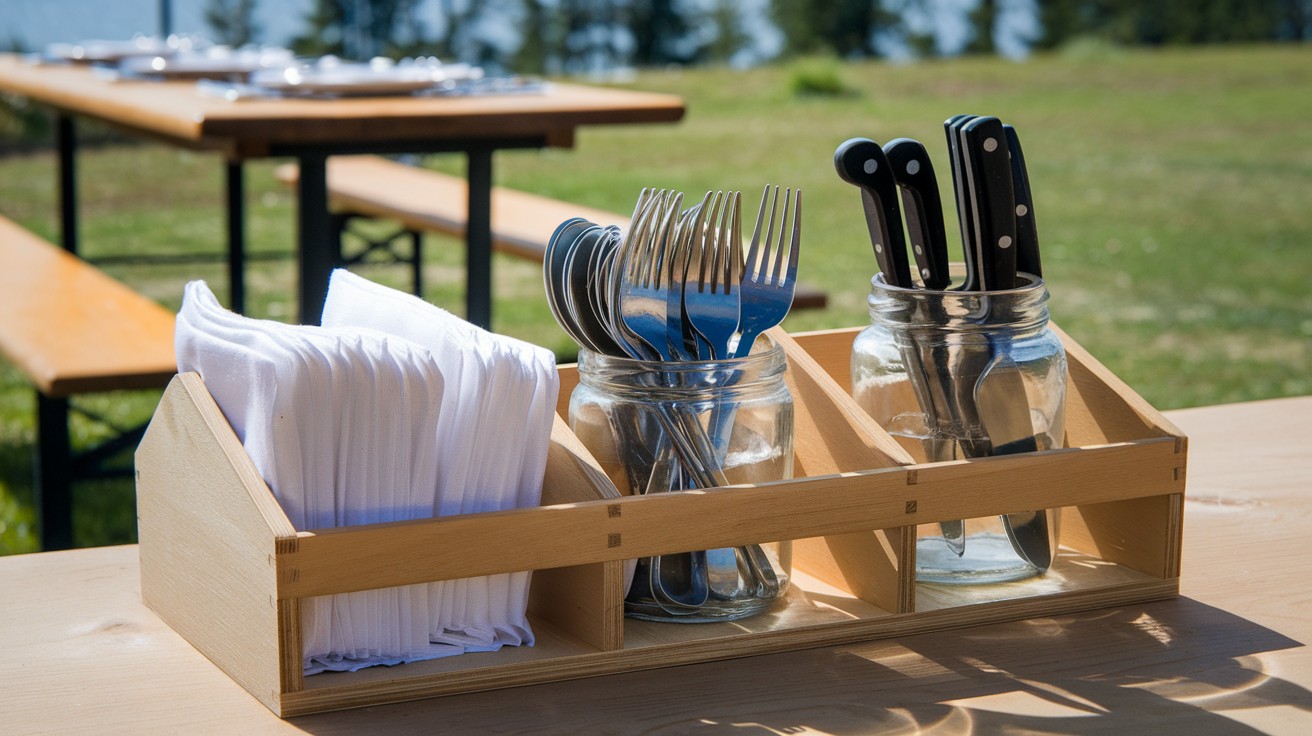
Restaurant-style organization for your home table.
Building approach:
- Create separate compartments for each utensil type
- Make napkin section tallest for easy access
- Add dividers that slide out for cleaning
- Use food-safe finish on all surfaces
Build tip: Make sections removable for easy cleaning.
23. Vertical Hanging Napkin Dispenser for Small Kitchens
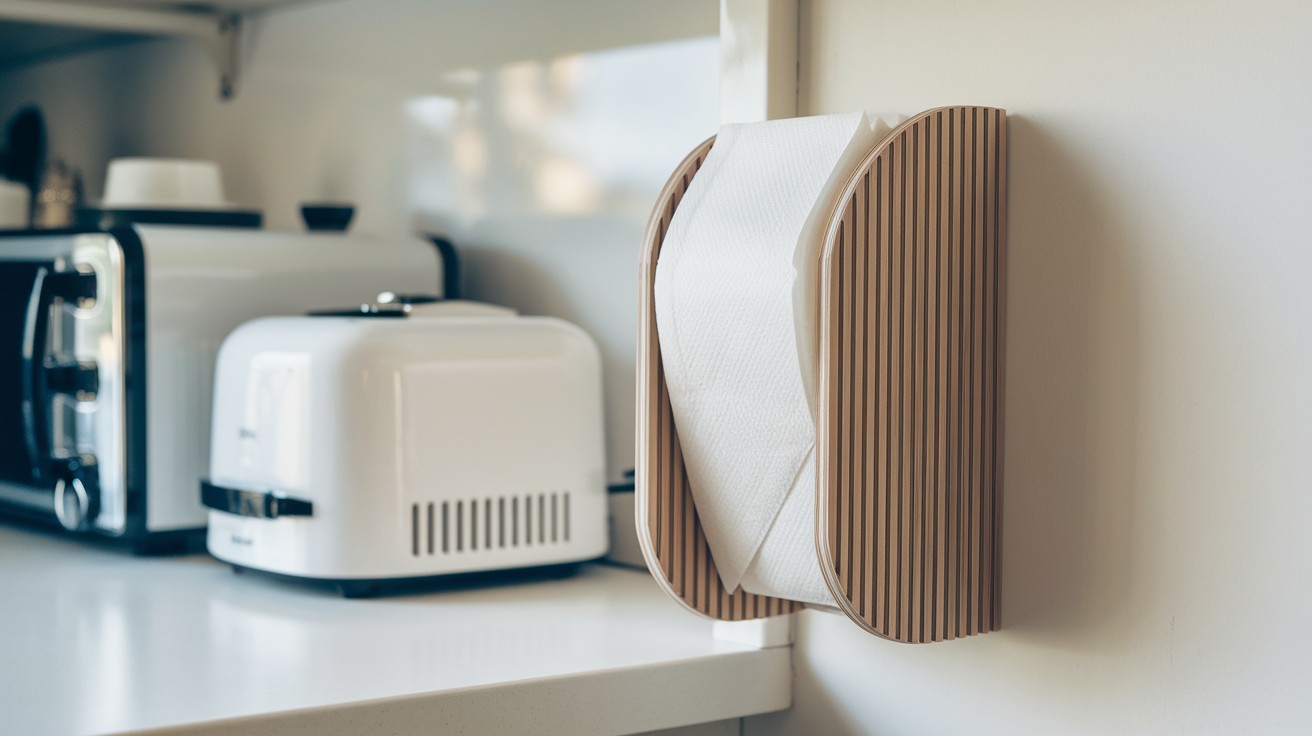
No counter space? No problem.
Installation process:
- Find wall studs for secure mounting
- Mark bracket locations with pencil
- Drill pilot holes to prevent wall damage
- Mount dispenser with included screws
Hardware needed:
- Wall brackets
- Screws appropriate for your wall type
- Level for straight installation
Tips for Personalizing Your DIY Napkin Holder
Color matters. Match your existing decor or create contrast.
Finish options:
- Natural wood: Shows grain, needs occasional oiling
- Paint: Many color choices, easy to change
- Stain: Enhances wood grain, more durable than paint
Add your touch:
- Stencil designs
- Hand-painted accents
- Decorative hardware
- Seasonal elements
Size considerations:
- Cocktail napkins: 5×5 inches
- Luncheon napkins: 6.5×6.5 inches
- Dinner napkins: 8×8 inches or larger
Make it yours. The best DIY projects reflect your personality.
Conclusion
You now have 23 proven napkin holder designs. Each one tested in real kitchens. Start with your skill level. New to DIY? Try the wood block holder. It takes 30 minutes and costs under $5.
Want something fancy? The resin and gold flake design looks like expensive store decor.
My top recommendation: The mason jar and wood base combo. Most people already have these materials. It’s functional and stylish.
Here’s the truth: the best napkin holder is one you’ll actually build. Pick a design that matches your tools and time.
Don’t overthink it. Choose materials you can find this weekend. Start building today. Your messy napkin problem ends now. Your organized table starts here.
Frequently Asked Questions
What’s the best wood type for beginners making napkin holders?
Pine and cedar work perfectly for first-time builders. Both woods are soft, easy to cut, and stain beautifully without special tools.
How do I make my DIY napkin holder stable enough for everyday use?
Add weight to the base or make it wider than it is tall. Most wobbly holders fail because they’re too narrow or too light for their height.
Can I weatherproof my napkin holder for outdoor dining?
Yes, use marine-grade polyurethane or exterior deck stain for protection. Cedar and teak naturally resist moisture better than other wood types.
What’s the ideal slot width to prevent napkins from tearing?
Cut your slot between ¾ inch and 1 inch wide for most napkin sizes. Too narrow rips napkins when you pull them, too wide lets them fall over.
How long do homemade napkin holders typically last with regular use?
Well-built wooden holders last 5-10 years with proper care. Cardboard versions work great for 6-12 months or special events only.