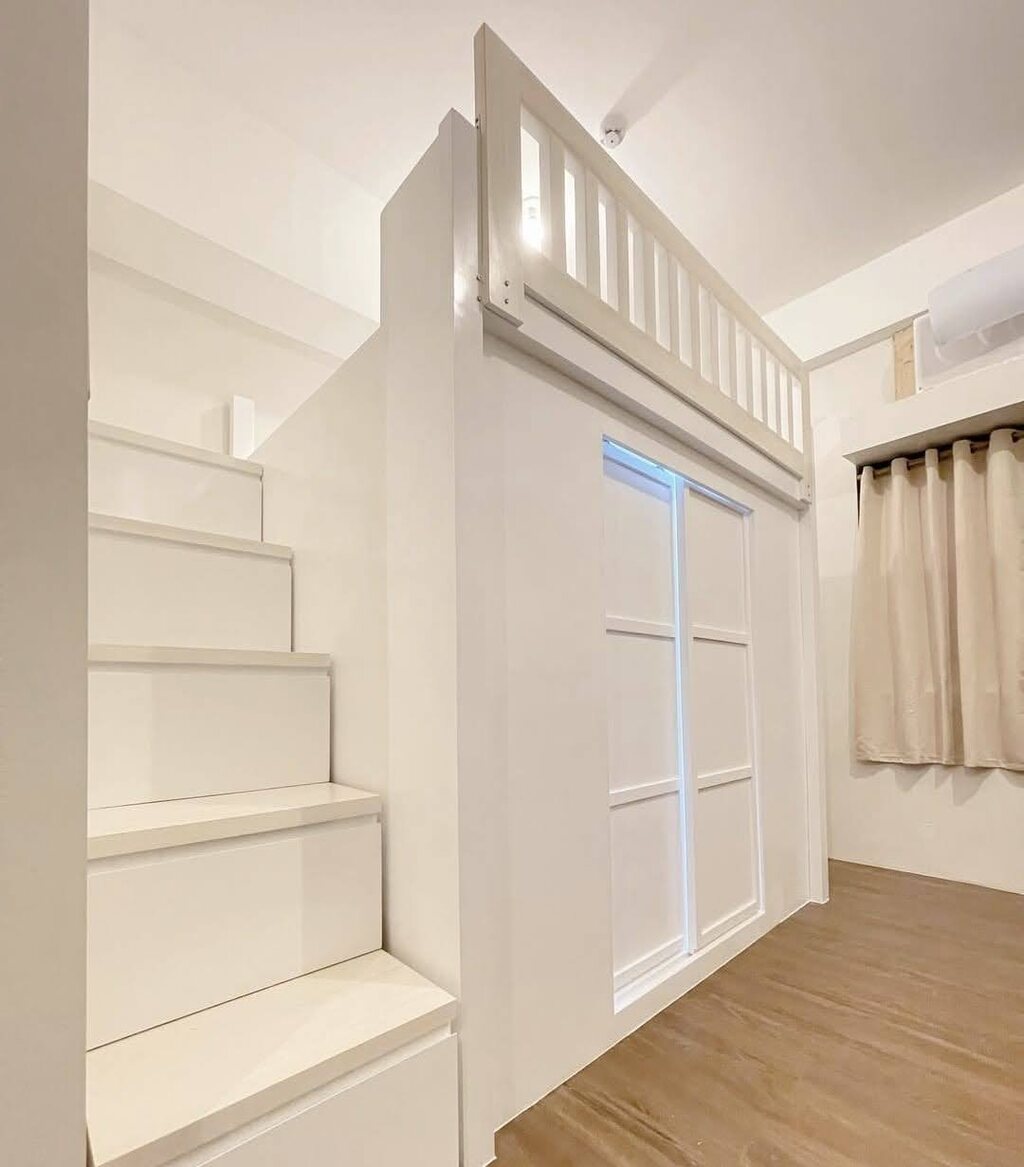
I knew I had to find ways to make the most of my small bedroom space when I moved. For me, a loft bed seemed like the perfect solution, opening up room for storage and a cozy workspace.
I opted for stairs instead of a ladder because that would provide more stability, extra storage, and an ensured safer climb. This DIY project ended up being both affordable and custom-designed to fit my space perfectly.
The best part? It gave my room a totally unique vibe that I couldn’t have bought in a store. Plus, who doesn’t love the idea of hiding clutter in stair drawers?
It felt like a fun, practical challenge to take on, and I’m excited to share the process with you. If you’re looking to create your own loft bed, here’s a step-by-step guide based on my experience!
Materials and Tools
Materials:
- Plywood sheets: used for the bed frame and stair construction. Plywood is sturdy and cost-effective, ideal for building a loft bed.
- 2×4 wooden planks: These are the foundation of the frame and stairs, providing structural integrity and support.
- Screws and brackets: To hold pieces together firmly. I would recommend using heavy-duty screws for extra stability.
- Wood glue: It helps to join the pieces and adds strength.
- Sandpaper: To smoothen out any rough edges, preventing splinters.
- Paint or wood stain: a protective coat for the wood and the color that complements your room.
- Guardrails: For safety, in case you have a loft bed on a higher platform.
- Storage Bins: Available only for this stairwell. Can make wonderful usage of interior spaces inside stairs for hiding and secret storage
Tools
- Measuring Tape: Always keep checking since I take every measure multiple times to avoid mistakes at each point.
- Circular saw or jigsaw: Used for cutting wood to appropriate lengths and sizes. However, jigsaws would work too well when there’s straight cuts available instead of using the circular saws.
- Drill and drill bits to pre-drill holes where you are putting in screws so that the wood doesn’t split.
- Screwdriver to tighten the screws.
- Clamps come handy when holding pieces together as you connect them.
- Leveling straightens the bed frame and stairs.
- Paintbrush or roller for final finishing on wood. Safety goggles and gloves make sure to protect your eyes and your hands.
Planning and design
Even before I was going to put a piece of wood to hand, I dedicated quite some time into planning and designing the loft bed.
This process started by taking measurements: from the floor upwards—not just the dimensions that were directly in front of me, but the height too—which accounted for the need under it, including a possible space for my desk and for a bit of storage. End.
Then, I drew out a picture of the frame and stairs. The frame had to be sturdy enough to support the mattress weight and also withstand anyone who might jump or sit on the bed.
The stairs are an important feature, and each step will have double capabilities as storage, so I had to be sure to understand just the right dimensions and space created for drawers or cubbies.
This included material costs, such as plywood, and 2x4s were inexpensive but sturdy, which was ideal for this project. I also planned the number of steps and the step height to be easily accessible to the bed.
Loft Bed Frame Construction
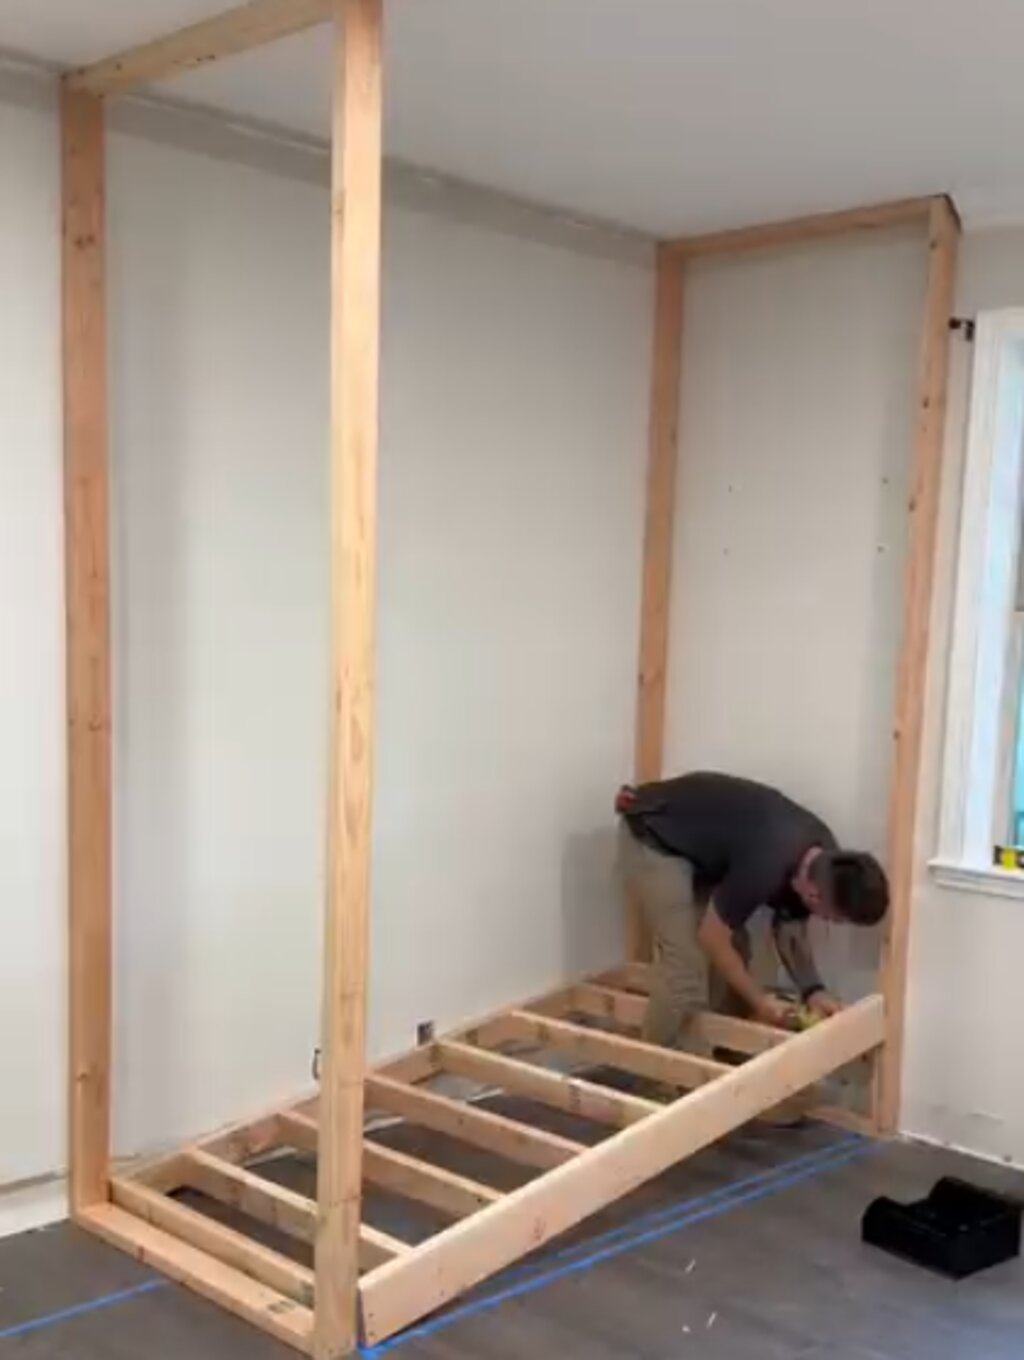
Once I had my design and materials ready, it was time to start building the frame. First, I began by cutting the plywood and 2x4s to the right size for the bed’s sides, headboard, footboard, and support beams.
I used a circular saw for straight, clean cuts. Then, I began to assemble the frame. I glued the pieces together with wood glue for added strength and secured them with screws.
I ensured that the side panels were flush with the top of the support beams so that everything would be level. I added horizontal support beams to stabilize the structure and keep it from wobbling.
One of the significant steps in the process was the securing of the bed to the wall. Now, it’s not always essential, but what I found in my case is that attaching the bed to the wall with brackets added a tremendous amount of stability, especially considering my loft was a little taller.
You should double-check the frame to make sure it’s level and square during this step to avoid having crooked parts.
Building the Stairs
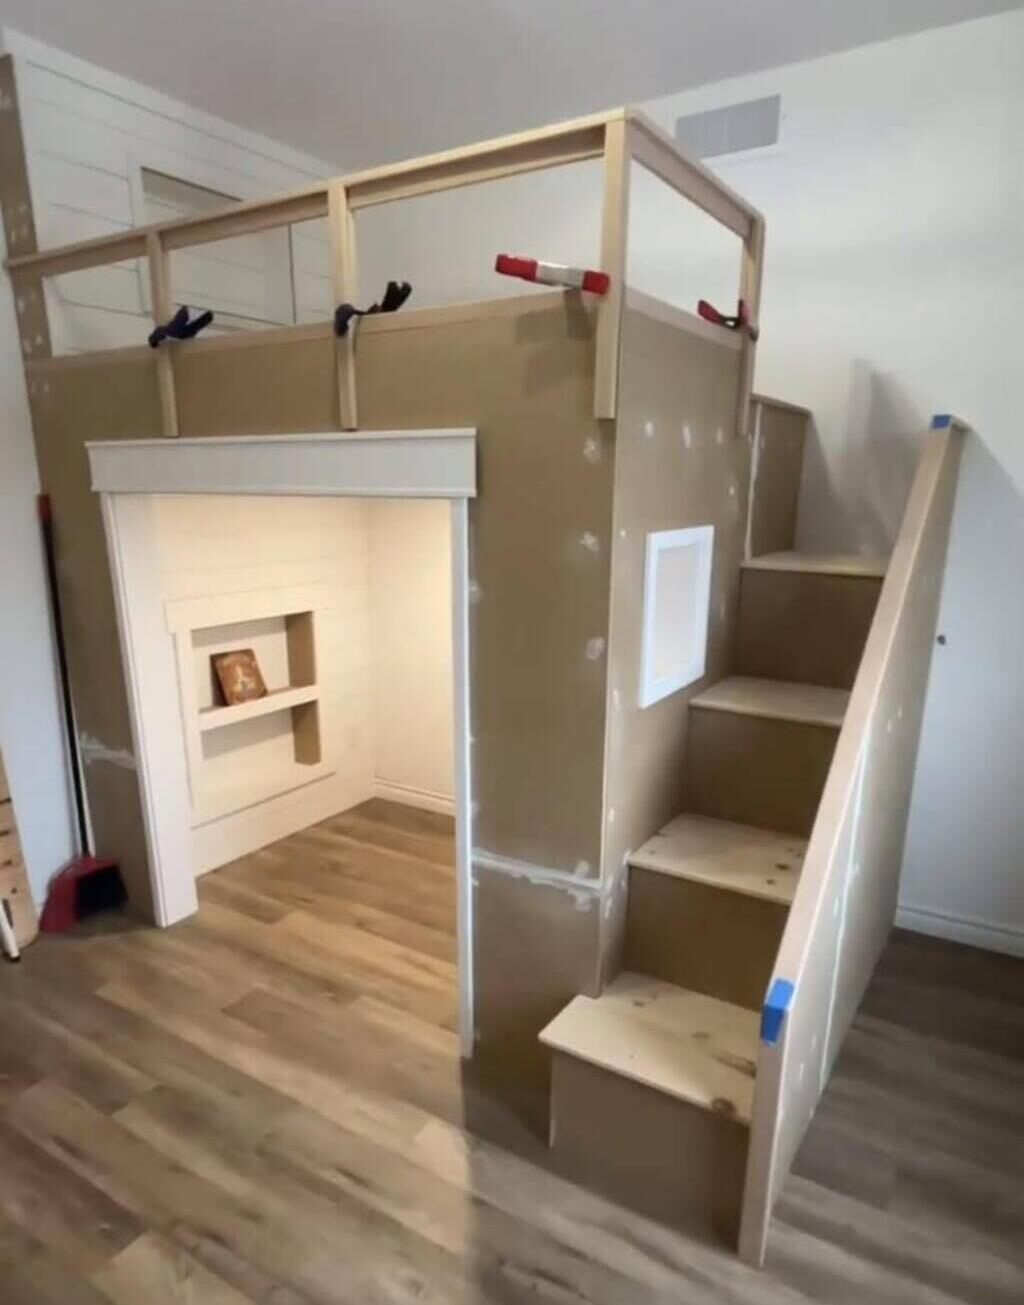
Building the stairs was the next step. I decided on storage stairs rather than a ladder since I needed a safer and more practical alternative.
Every step becomes a drawer or shelf, incorporating functional storage directly into the design. For the construction of the stairs, I started by cutting the 2x4s for the stair frame and the plywood for the treads and risers.
For the stair frame, I made a box-like for every step with an assurance of wide enough steps to store something in them. The risers (the vertical parts) were cut a little short of the treads for comfort in a step.
The assembled pieces of every step are fixed tightly onto the frame by screws.
One tip: When installing the stairs, I made sure to align them correctly with the bed. I used clamps to hold everything in place and double-checked the angle so that the stairs would be comfortable and safe to use.
Adding Safety and Finishing Touches
I added the guardrails along the edges of the loft bed since safety came first. I used 2x4s to make a solid railing so that the structure completely framed the bed all around.
For further safety purposes, all the edges were sanded smooth so there would be no sharp corners or splinters. Once the bed was structurally sound, I gave it a fresh coat of paint in a soft gray color.
This made the wood look polished while also blending nicely with my room’s decor. If you prefer a more natural look, wood stain would be a good choice, as it highlights the wood’s grain.
When the paint dried, I added the mattress and some soft bedding. For some personality, I also strung fairy lights along the guardrails.
The light made it warm and inviting, and I added a couple of under-the-stairs storage bins, which stored books as well as small stuff.
Final Test Setup
With everything set in place, I then ensured to test the bed for stability. I sat down on it to give it weight on the frame, and I tested the stairs by climbing them a few times.
I tightened loose screws, reinforced joints when necessary, and made sure that everything was rock-solid.
Once I was satisfied with the bed safety and stability, I just added a few finishing touches, for example, putting a beanbag chair underneath and some bookshelves along the wall. Such additional pieces helped maximize space.
Conclusion
Building my DIY loft bed with stairs was an incredibly fulfilling project.
Not only will I save money against buying a store loft bed, but I have also designed it exactly as I wanted it to be made—ideal storage space in the stairs, which really changed things for me, and I really love it with some other elements placed there.
If you’re thinking about tackling this project, my advice is to take your time with measurements, be sure to prioritize safety, and have fun personalizing your creation. It’s a challenging but incredibly rewarding DIY project.
FAQs
How long does it take to build a DIY loft bed with stairs?
The timeline will depend on your experience and available time. It took me a weekend, but that was with proper planning and preparation. If you have enough time for each step, things will go much more smoothly.
Do I need advanced woodworking skills for this project?
Not at all! Provided you are comfortable with basic tools like a saw, drill, and screwdriver, and provided you follow measurements, there is nothing to worry about. If you are not sure, there are so many online tutorials that will walk you through each step.
How do I choose the type of wood for my loft bed?
Plywood and 2x4s do the trick in most loft bed projects. To make it that much stronger, you can even use hardwood: oak or maple. That costs a little extra.
Can storage be added into the stairs as well?
Sure! I drew mine up to have drawers every step, but you could definitely add open shelving or cubbies, based on your desire. The ability to store many things is, without a doubt, one of the best qualities of this build.


