
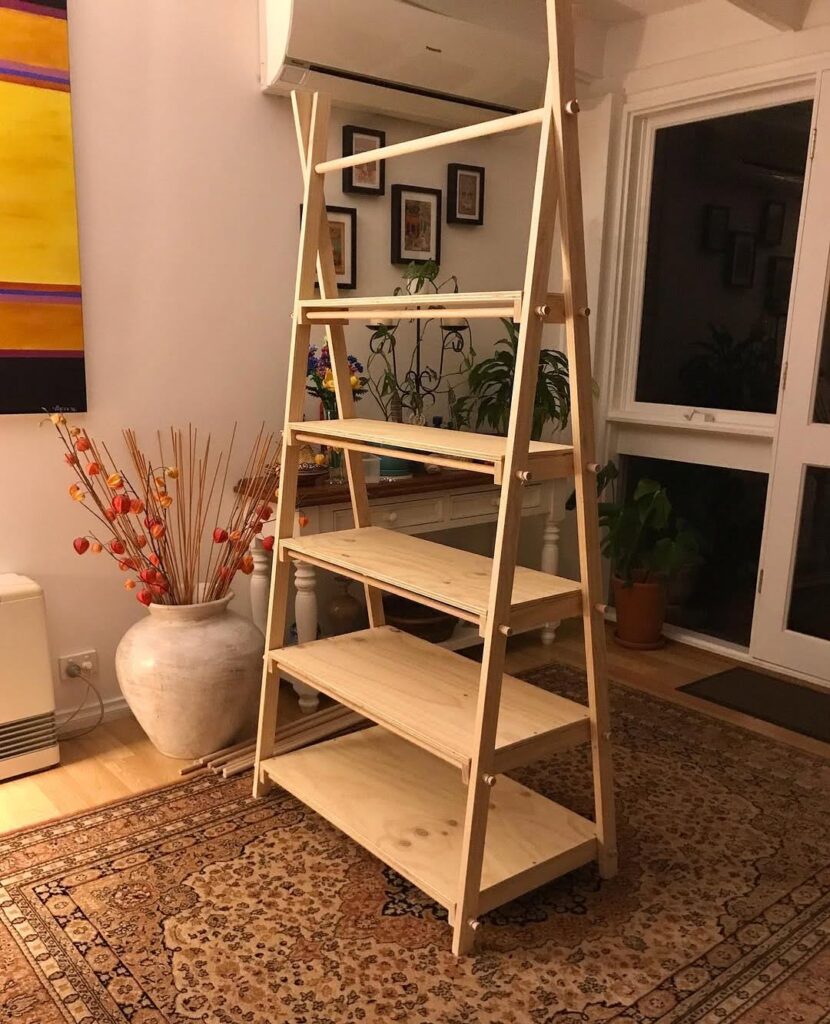
In this blog, I will take you through the exciting process of creating your very own DIY ladder shelf—a stylish and functional piece that blends rustic charm with modern practicality.
Standing tall at 178cm, with a sleek top rail measuring 160cm high, this ladder shelf is designed for both aesthetic appeal and smart storage. With a 30cm gap between the top rail and the highest shelf, it provides ample space for displaying books, plants, or decorative accents.
Whether you’re a seasoned DIYer or a beginner looking for a rewarding weekend project, this guide will equip you with all the details to build a stunning ladder shelf that enhances any space. Let’s dive in!
Step-by-Step Guide to Making a DIY Ladder Shelf
A DIY ladder shelf is a stylish and space-saving storage solution that blends rustic charm with modern functionality. It’s perfect for displaying books, plants, or decorative pieces while adding a unique touch to your home. Follow this 10-step guide to create your ladder shelf!
Materials Needed:
- Two wooden side rails (178cm tall)
- One wooden top rail (160cm wide)
- Four to five wooden planks (for shelves, varying widths)
- Wood screws and wood glue
- Drill and screwdriver
- Saw (for cutting wood to size)
- Measuring tape and level
- Sandpaper (for smoothing rough edges)
- Paint or wood stain (optional)
Step 1: Plan Your Design and Gather Materials
Before starting construction, plan the number of shelves and their spacing for a balanced, functional design.
Since the top rail is at 160cm and a 30cm gap before the first shelf, place the first shelf 30cm below the top rail to maintain an open look and structural integrity.
Space the remaining shelves 35-40cm apart, adjusting for storage needs. Keep the bottom shelf 35-40cm above the floor to create a well-proportioned silhouette and prevent clutter. Thoughtful spacing ensures stability and gives your DIY ladder shelf a sleek, polished finish.
Step 2: Cut the Wood Pieces
Cut two side rails (178cm) for vertical support and one top rail (160cm) to connect them at the top. These form the sturdy frame of your ladder shelf.
Next, cut four to five wooden planks for the shelves. The number of shelves depends on your spacing preference and storage needs.
For a stylish tapered effect, make the bottom shelf the widest (around 50cm) and gradually decrease the width as you go up. The top shelf should be the smallest (25-30cm) for a balanced and visually appealing design.
Step 3: Sand All Pieces
Before assembling your DIY ladder shelf, take time to smooth all wooden pieces with sandpaper. This step is essential for both safety and aesthetics, ensuring there are no rough edges or splinters that could cause injury.
Start with a coarse-grit sandpaper to remove rough spots, then finish with a fine-grit sandpaper for a smooth, polished look. Pay special attention to cut edges and corners, as these areas tend to be the roughest.
A well-sanded surface not only enhances durability but also gives your ladder shelf a professional, high-quality finish.
Step 4: Assemble the Frame
Lay the two side rails parallel on the floor, ensuring they are evenly spaced and aligned. This will serve as the foundation for your DIY ladder shelf’s frame.
Position the top rail (160cm) between the side rails and secure it using wood screws and strong wood glue. This connection is crucial for stability, so take your time to get it right.
Before fully tightening the screws, double-check alignment and levelness to prevent a lopsided frame. A properly aligned structure will make the rest of the assembly much smoother.
Step 5: Mark Shelf Positions
Measure and mark the shelf positions on both side rails, ensuring consistency for a balanced look. Accurate markings will help with smooth assembly and prevent misalignment.
Use a level to check that each shelf will sit evenly before attaching them. This step is crucial for stability and ensures your DIY ladder shelf has a professional, polished finish.
Step 6: Attach the Shelves
Begin by installing the top shelf first, then work your way down. This method keeps the frame stable and ensures proper alignment as you add each shelf.
Attach each shelf to the side rails using wood screws and wood glue for a secure hold. Pre-drill holes to prevent splitting and reinforce durability.
Before fully tightening the screws, double-check that each shelf is level. A well-leveled shelf not only enhances stability but also gives your DIY ladder shelf a clean, polished look.
Step 7: Reinforce the Structure
For added stability, install wood brackets or L-brackets underneath each shelf. These reinforcements help distribute weight evenly and prevent sagging over time.
This step is especially important if you plan to store heavier items like books, plants, or decorative pieces. Secure the brackets tightly to ensure maximum support.
Well-placed supports not only enhance durability but also keep your DIY ladder shelf sturdy and long-lasting, making it a reliable storage solution for any space.
Step 8: Check Stability
Once assembled, stand the ladder shelf upright and check for any wobbling. Gently press on different areas to ensure it feels sturdy and well-balanced.
If there’s any instability, tighten all screws and inspect the joints. Sometimes, a small adjustment can make a big difference in stability.
This extra support helps prevent shifting and ensures your DIY ladder shelf remains strong and secure, even when holding heavier items.
Step 9: Stain or Paint
Personalize your DIY ladder shelf by applying wood stain for a rustic feel or paint to complement your decor. Choose a finish that enhances your space while protecting the wood.
Apply the stain or paint evenly, using a brush or cloth for smooth coverage. Allow sufficient drying time between coats for the best results.
Let the shelf dry completely before use to prevent smudging or damage. A well-finished ladder shelf adds both style and functionality to your home.
Step 10: Style and Enjoy!
Once completely dry, position your ladder shelf against a wall for added stability. If needed, secure it with wall anchors or brackets for extra safety.
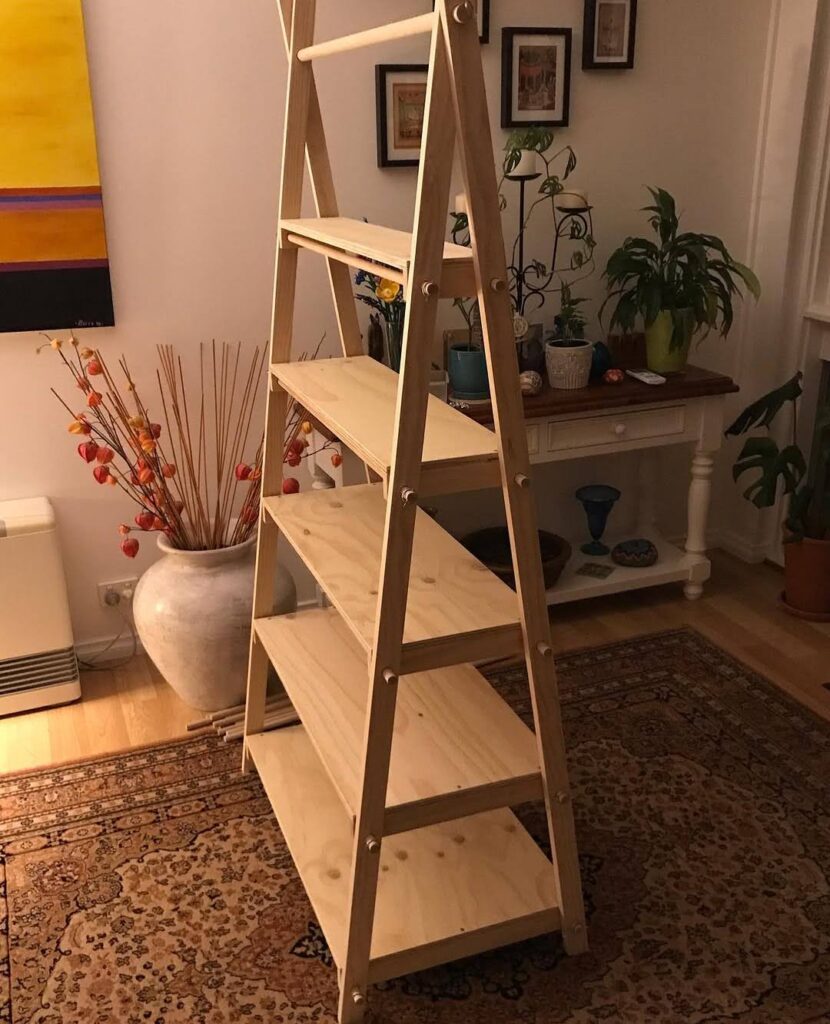
Decorate by arranging books, plants, storage baskets, or decorative accents to match your style. Mixing textures and heights creates a visually appealing display.
With the right decor, your DIY ladder shelf becomes both a functional storage solution and a stylish statement piece in your home.
Complementary Tips
It’s very stable with the metal brace, the whole thing just pulls apart very easily without any tools required.
FAQs
How can I make sure my ladder shelf is stable?
To ensure your DIY ladder shelf is stable, use solid hardwood and secure shelves with long screws and wood glue. Add cross-bracing or L-brackets for extra support. Check that shelves are level and evenly spaced.
A wider base improves balance, and securing it to the wall with brackets prevents tipping. Place the shelf on a flat surface, adding rubber pads if needed. Regularly tighten screws and joints to maintain stability.
What can I use ladder shelves for?
Ladder shelves are versatile and stylish for any space! Use them to display books, plants, and decorative pieces in the living room. In the bedroom, they’re great for storing folded clothes, baskets, or bedside essentials.
Add them to the bathroom for towels, toiletries, and candles. In the kitchen, they can hold cookbooks, spices, or dishware. They also work well as an office organizer for files and stationery. Even in entryways, they serve as a shoe rack or key station.
How can I make my ladder shelf more attractive?
Make your ladder shelf more attractive by staining or painting it to match your decor—rustic, modern, or vintage. Decorate with books, plants, candles, and baskets for a curated look. Add LED puck lights or fairy lights for ambiance.
Arrange items at varying heights and mix materials like glass, wood, and ceramics for texture. Incorporate hanging plants or succulents for a fresh feel. Personalize with photos, framed quotes, or souvenirs. Keep it balanced and clutter-free, leaving some space for an airy, stylish design.