
Make your bedroom cozy with a headboard that talks about your unique style and comfort. You can add some elegance or personality to it; whatever the case, a DIY headboard is the perfect project to make your space more interesting.
And the best part? It’s customizable, budget-friendly, and reflects your creativity. From minimalist wooden designs to plush cushioning for those lazy mornings, there’s something here for everyone.
Let’s explore the best 10 DIY headboard ideas that are as comfy as they are stylish.
Our DIY Corner Inner Curve Headboard
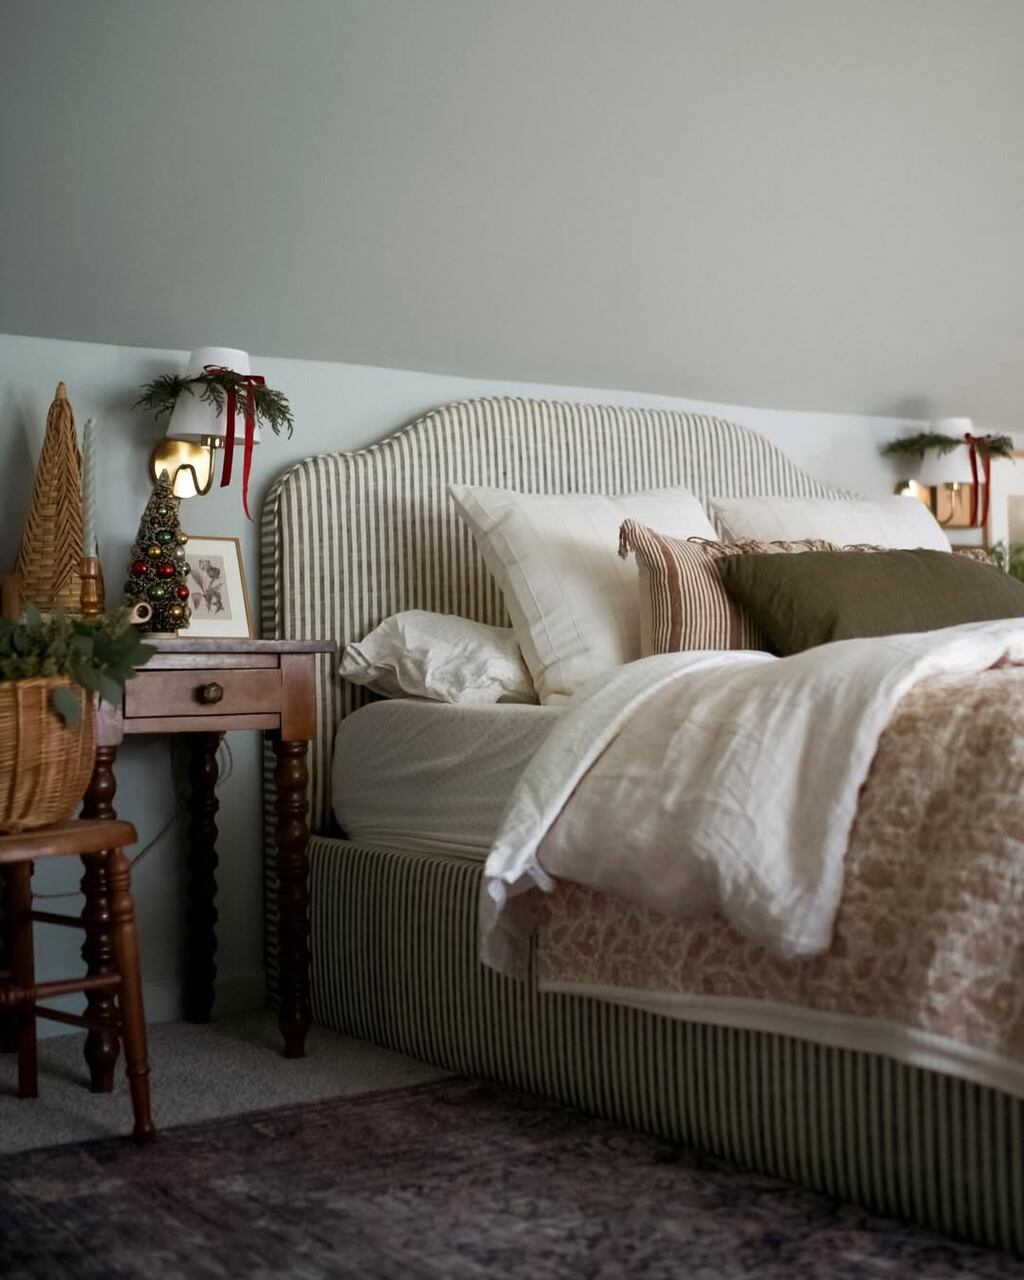
A corner inner-curve headboard adds a modern, cozy touch to your bedroom, perfect for softening edges and creating a serene sleeping space.
Materials
- Plywood (large enough for your desired design)
- Foam padding
- Fabric (velvet, linen, or your choice)
- Decorative piping (optional)
- Staple gun and staples
- Spray adhesive
- Wall-mounting hardware or bed frame brackets
Tools
- Pencil and measuring tape
- Jigsaw
- Sandpaper
- Scissors
When I chose to make a corner inner curve headboard, it was surprisingly simple and extremely rewarding.
I started by sketching the design on a large plywood sheet so that the curves felt balanced and smooth. Cutting the shape with a jigsaw was a little nerve-wracking, but taking it slow made it easier to follow the outline precisely.
After it was done, I sanded the edges so there were no splinters, and the curves seemed so seamless. I applied foam padding to give it that soft, cushioned feel.
I used spray adhesive carefully to attach the foam to the plywood and cut them to fit the curves just right. For the fabric, I chose a deep gray velvet that matches my room’s decor.
Wrapping it around the board and securing it with a staple gun was the most satisfying part of this process it instantly transformed the look. I even added piping down the edges for a polished finish.
Finally, mounting the headboard to the wall gave it stability and, therefore, a clean, secure fit. Now, when I walk into my room, it feels like I am entering my special retreat.
The curved lines add soft elegance that I utterly love!
10 comfy DIY headboard Ideas
1. DIY Petal-Shaped Upholstered Headboard
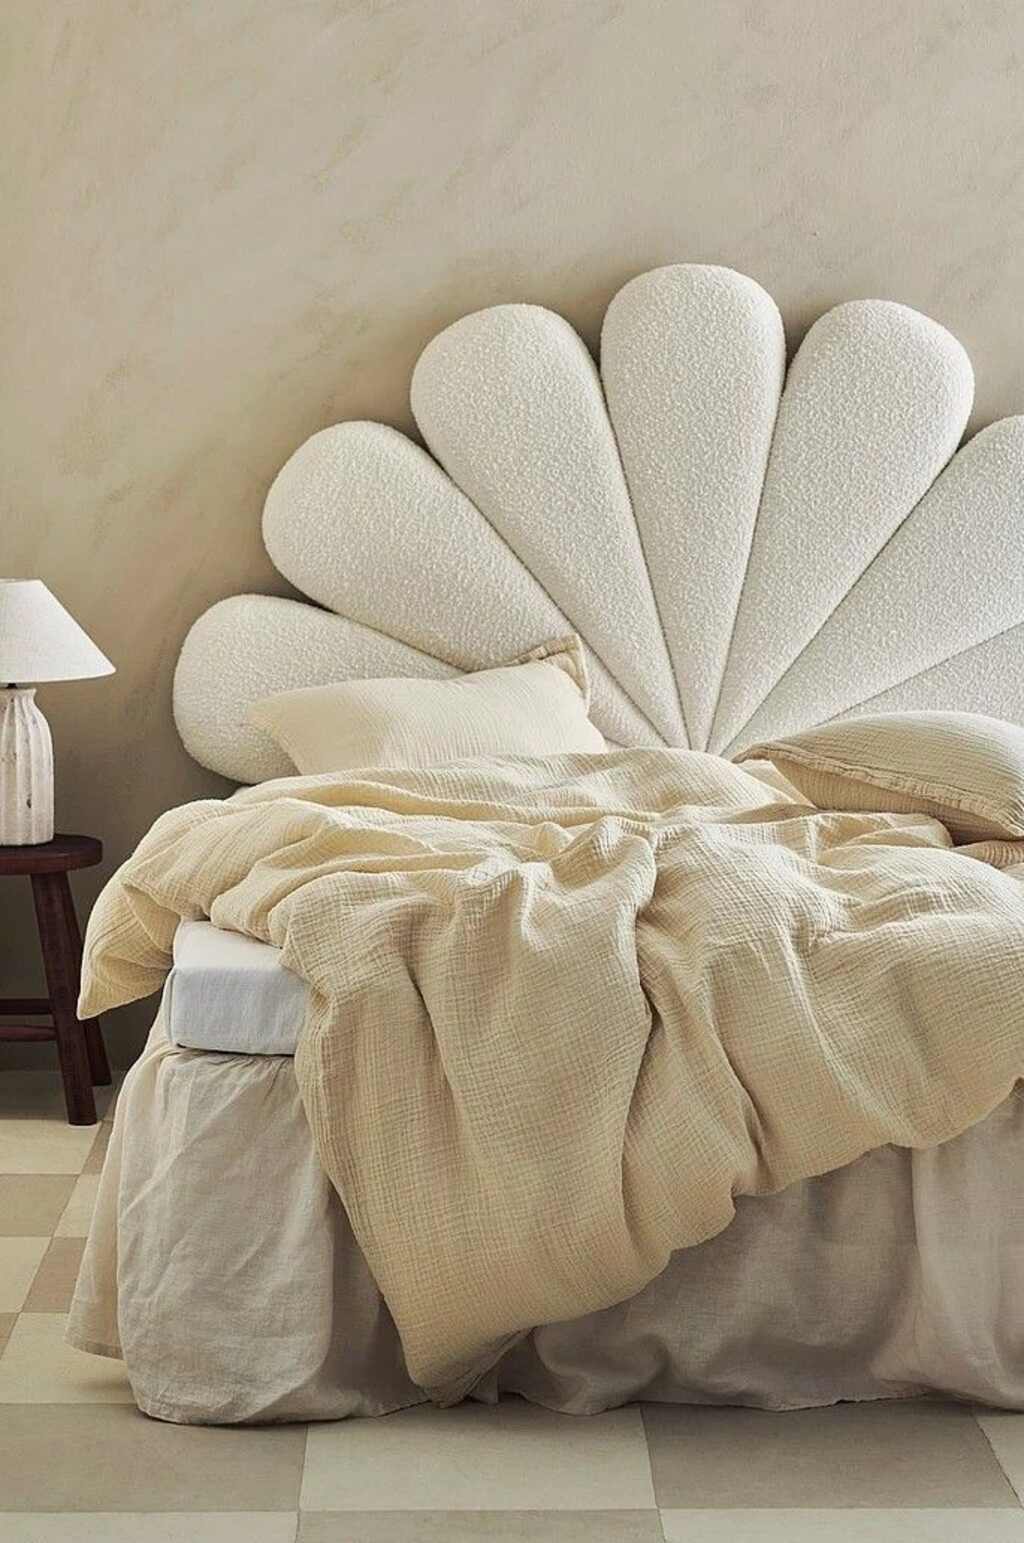
Materials
- Plywood or MDF board (for the base)
- Foam padding
- Bouclé fabric or any textured upholstery material
- Staple gun and staples
- Jigsaw (for shaping)
- Adhesive spray
- Wall-mounting hardware
How to Make It
To make this petal-shaped headboard, begin by drawing the petal design on a large plywood board. Use a jigsaw to cut out the individual petal shapes.
Attach foam padding to each petal for a plush look, securing it with adhesive spray. Roll up the petals in bouclé fabric or the chosen material, ensuring the fabric is smooth and tightly stapled to the back.
The arrangement and attaching of the petals can either be on a backing board or directly to the wall as the basis of a symmetrical fan-like pattern.
How to Decorate It
Pair this unique headboard with neutral bedding to maintain a serene minimalist vibe. Use soft textured linens in warm tones like beige or cream, which will enhance its cozy and inviting aesthetic. Add bedside lamps in soft tones for a harmonious look. This design is good for creating a statement piece without ruining the chic and calming atmosphere in the bedroom.
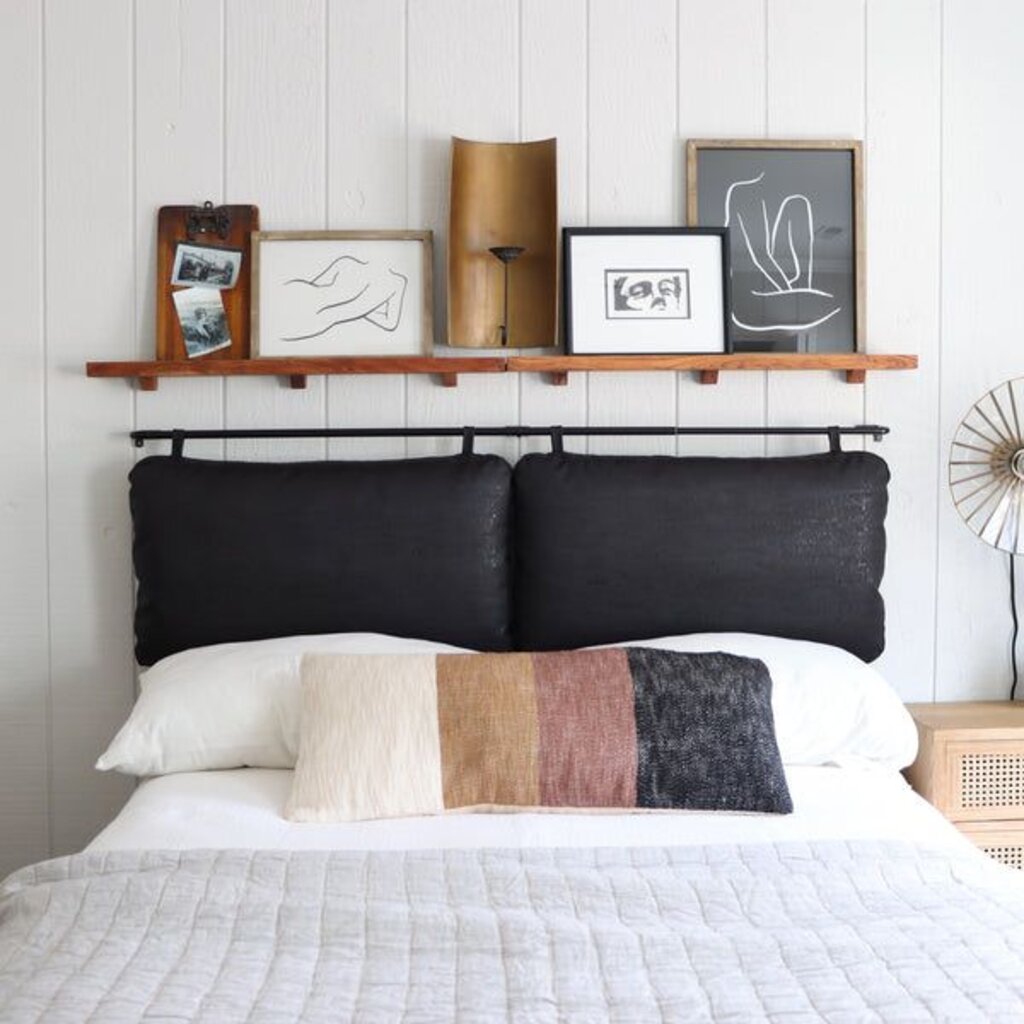
2. DIY Cloud-like Pillow Headboard
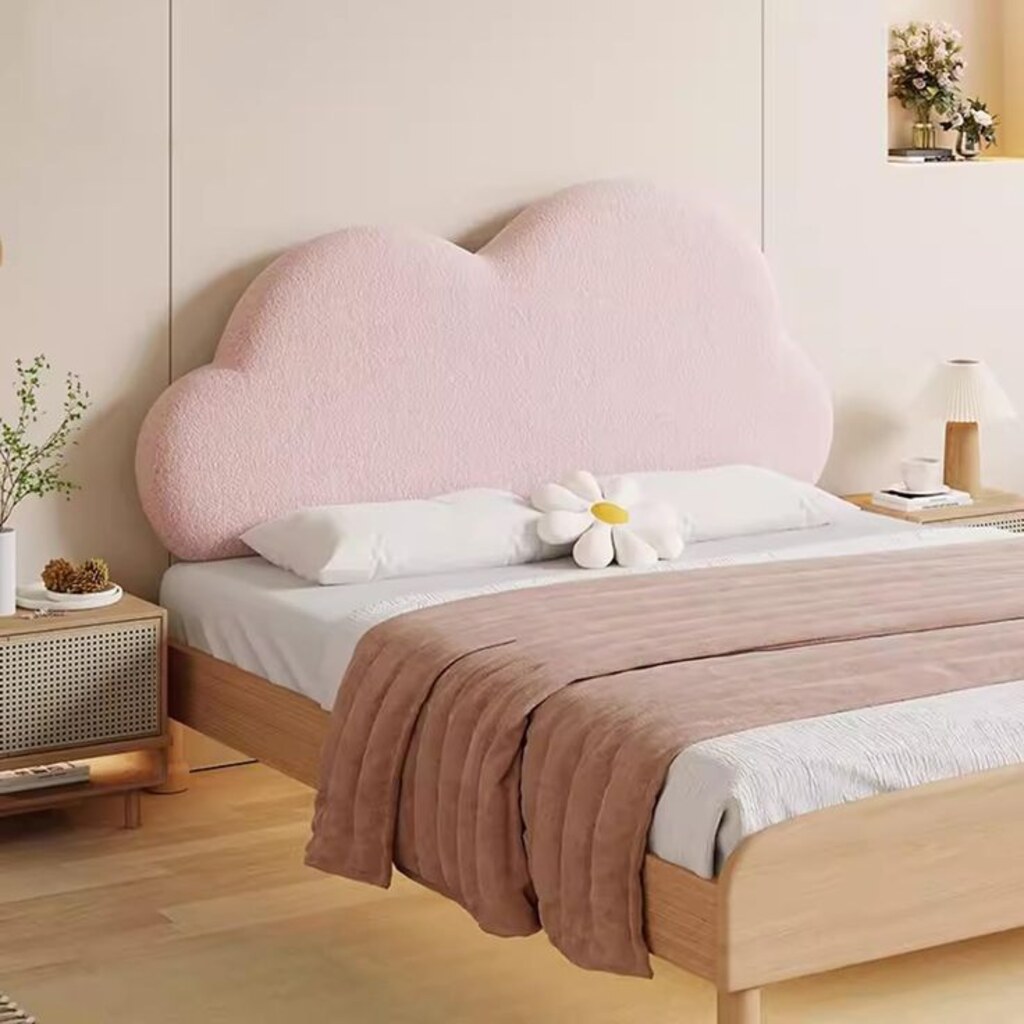
Materials
- Large, puffy pillows (down or memory foam)
- Soft fabric pillow covers (cotton or velvet)
- Curtain rod or horizontal wooden dowel
- Wall hooks or brackets
How to Do It
Attach a strong rod or a wooden dowel behind the bed. Thread the pillows through by making loops in their covers or using ties to attach them.
Set them horizontally or stack them in multiple rows for added comfort. The effect is an aesthetically pleasing and cushy headboard that looks as well as it feels.
How to Decorate It
Dreamy Tones: Use pillow covers in calming hues of pale pink and white. A coordinating throw blanket or a few accent pillows can make the space look very cozy.
3. Rolled Cushion Headboard
Materials
- Rolled bolsters or cushions
- Upholstery fabric (optional)
- Curtain rod or wooden rail
- Wall brackets or hooks
How to Make It
Cover the bolsters with fabric if needed to match your room’s theme. Mount a curtain rod or wooden rail horizontally on the wall, ensuring it’s securely fastened.
Arrange the bolsters in a row and attach them to the rod with straps, loops, or ties. The rolled design offers excellent support and a unique plush look.
How to Decorate It
Add extra softness through fabrics in velvet or corduroy. Decorate with the help of a blanket draped across cushions or a string of lights to add warmth and romance.
4. Vintage Window Frame Cushion Headboard
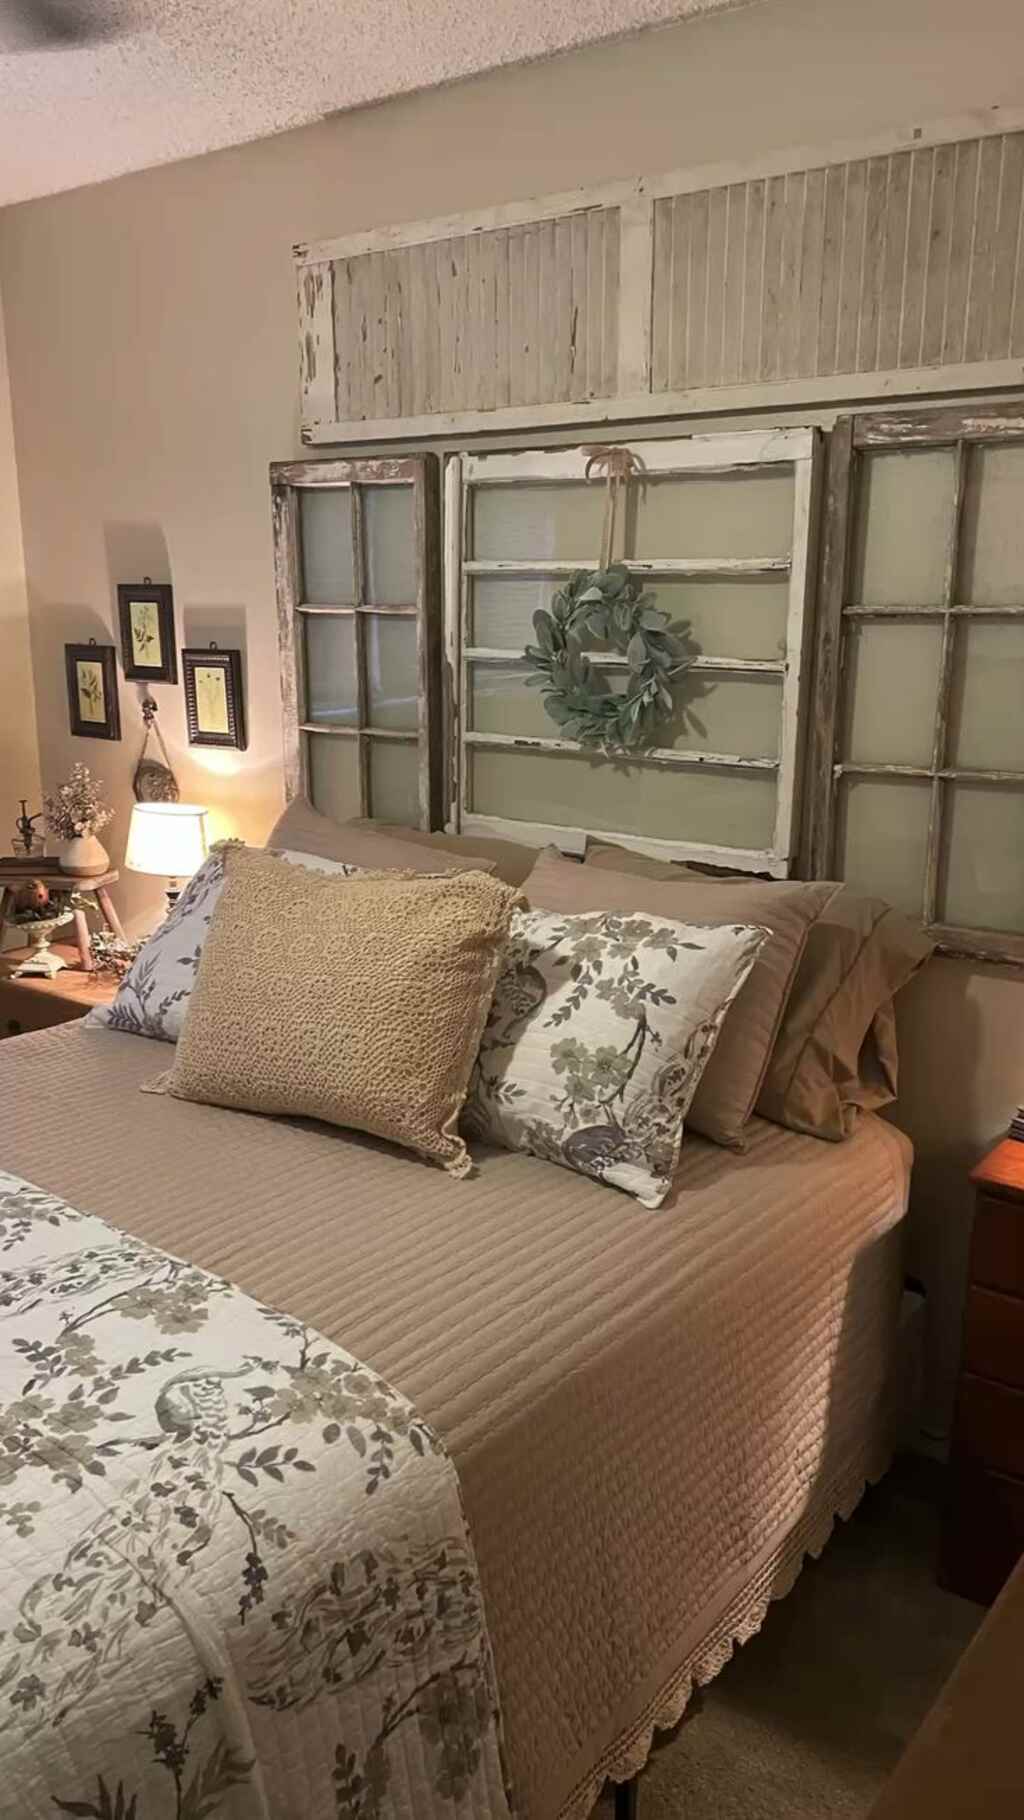
Materials
- Old wooden window frame
- Foam padding
- Fabric (textured or patterned)
- Spray adhesive
- Staple gun and staples
- Sandpaper and paint (optional)
How to Make It
Refurbish an old window frame by sanding and painting it if needed. Cut foam padding to fit each section of the frame, then wrap the foam in fabric and staple it securely.
Attach the padded sections to the back of the frame with adhesive or screws. Mount the frame to the wall for support.
How to Decorate It
Use rustic fabric to complement a farmhouse or shabby chic aesthetic. Drape fairy lights or greenery around the frame.
5. Luxurious Velvet Panels for Headboard
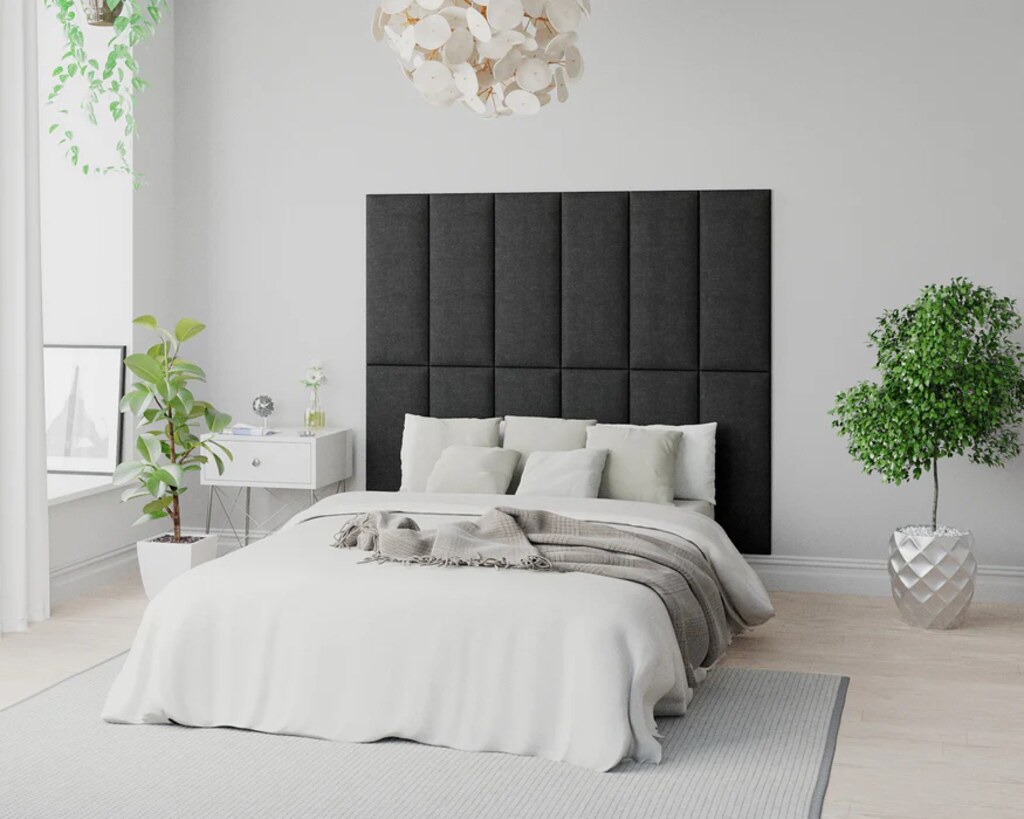
Material
- Plywood or MDF board
- Foam padding (1-2 inches thick)
- Velvet fabric
- Staple gun and staples
- Spray adhesive
- Mounting brackets
- Measuring tape
- Fabric scissors
How to DIY
You will begin by cutting up the plywood or MDF board into vertical sections according to the size of your bed and the desired panel look.
Measure and cut the foam padding to fit each section. Secure it using spray adhesive.
Lay the velvet fabric on top of the foam, ensuring that it is smooth and tight, then staple the fabric to the back of the panel using a staple gun.
Repeat this for all the panels. Attach the mounted panels on the wall, evenly spaced, to a sleek, sophisticated look.
Decorate the Idea
Warm string lights or minimalist wall art hanging above it add a plush feel to the headboard. Velvet-rich tone bedding in emerald green, navy blue or beige can complement it further.
Add throw pillows with contrasting textures, like satin or faux fur, for a touch of welcoming coziness. The soft area rug at the foot of the bed helps bring everything together in an elegant, cozy atmosphere.
6. DIY Button-Tufted Elegant Headboard
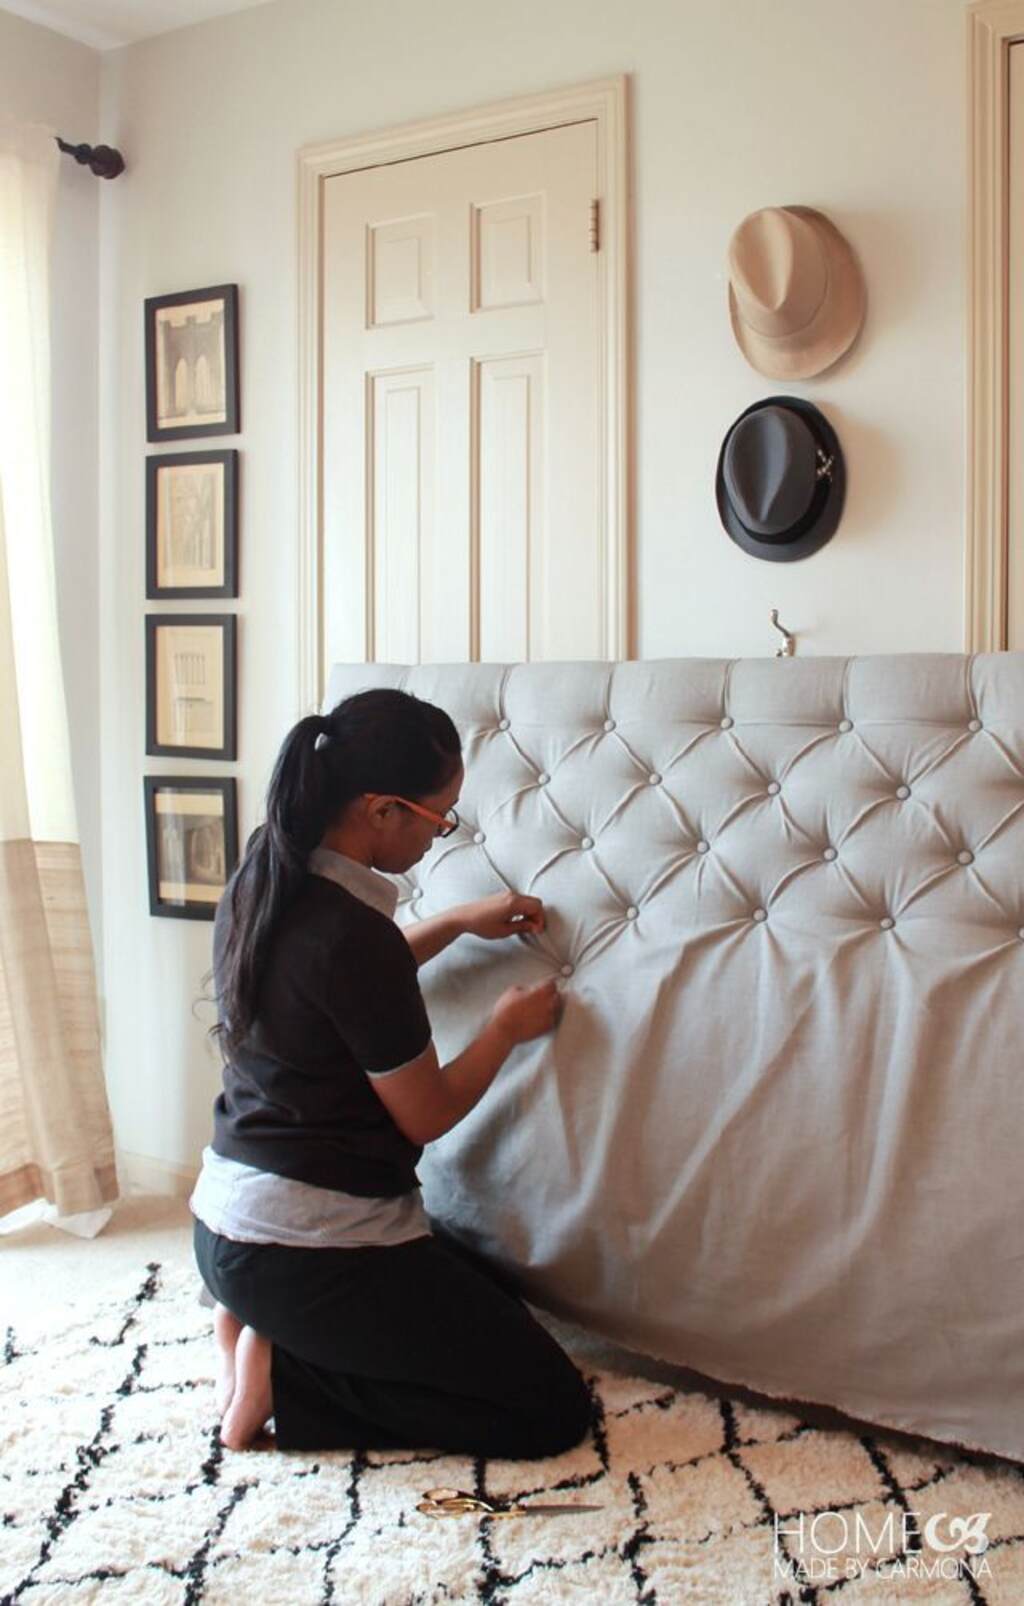
Materials
- Plywood
- Foam padding 2-3 inches thick
- Upholstery fabric enough to cover the board with extra for stapling
- Upholstery buttons
- Needle and upholstery thread
- Staple gun and staples
- Spray adhesive
- Drill
How to DIY
Cut a piece of plywood to match the width of your bed. Cover the board with thick foam padding, securing it with spray adhesive.
Place the upholstery fabric over the foam, allowing enough fabric to wrap around the edges. Drill small holes in a tufting pattern such as a diamond or grid layout through the board.
Pass a needle with strong upholstery thread, attach fabric-covered buttons, and pull the thread tightly through the foam and fabric to create tufts.
Secure the thread at the back of the board. After tufting, staple excess fabric to the back of the board. Mount the headboard securely behind your bed.
How to Decorate the Idea
Pair it with neutral bedding to create an elegant base for a sophisticated bedroom. Add pops of color through accent pillows or a plush throw blanket.
Incorporate metallic decor elements in gold or silver, including perhaps the bedside lamps or mirror to bring home that luxurious feel.
Dramatic and perfect touches can be added with chandeliers or pendant lighting. Soft curtains complete this boho macramé bedroom.
8. Quilt-Covered Headboard DIY
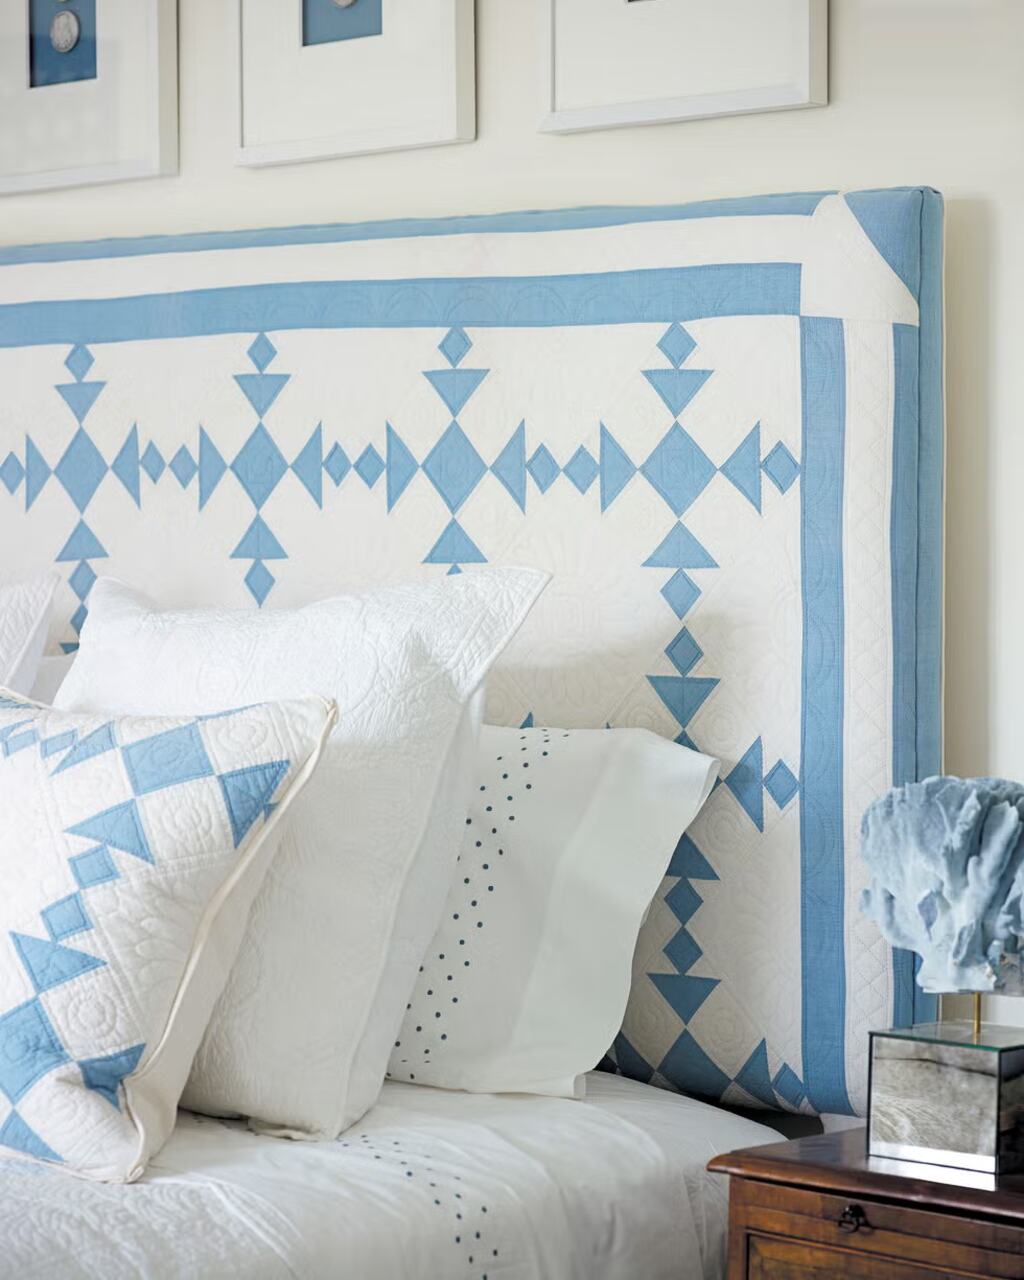
Materials
- Plywood or MDF board
- Batting (foam or polyester)
- Quilting fabric
- Staple gun and staples
- Scissors
- Measuring tape
- Button covers (optional)
How to Make It
Cut the plywood or MDF into the size of your bed. Stretch a layer of batting over the board using a staple gun so that it is flat.
Put the quilt fabric on top of the batting. There should be excess on both sides to fold and attach the sides to the back using staples.
Use fabric-covered buttons for the tufted look: Sew fabric-covered buttons and attach them with a grid pattern. Staple the fabric in a very tight way, then if needed for structure, add a wooden frame to the edges.
Decoration of the Concept
Match the headboard with simple bedding that goes well with the quilt fabric. Add some throw pillows in the same color and texture to make it look cozy.
You can also add a coordinating quilted bedspread to give a warmer look and a sense of comfort.
9. Oversized Pillow Headboard
Materials
- Large pillows (2-3, depending on bed size)
- Chosen fabric of pillow covers
- Curtain rod or wooden dowel
- Wall hooks or mounting brackets
- Rope or fabric ties
How to DIY
Mount a curtain rod or strong dowel slightly above the height of your bed, ensuring it is securely mounted with wall hooks or brackets.
Place large pillows in covers that match the decor of your room and attach them to the rod using fabric ties or loops. The pillows hang free, making a soft, cozy headboard that is easy to adjust or replace.
How to Decorate the Idea
This headboard is paired with bedding in soft, natural fabrics such as cotton or linen. Add a combination of patterned and solid-colored pillows to the oversized pillow headboard.
A chunky knit throw or faux fur blanket adds texture and warmth. Surround it with wall art, fairy lights, or a floating shelf for a cute, laid-back look.
10. Beautiful Mural Headboard
Materials
- Mural paint or wall decals
- Painter’s tape
- Paintbrushes (sized for the mural)
- Drop cloth or plastic sheeting
- Wood (plywood or MDF board) to frame; this is optional
How to DIY
Measure up the space where you want this mural to go behind the bed. Using painter’s tape, mark off with crisp edges where you place your mural.
You can alternatively mount a plywood or MDF board and make a frame on the wall. Decide which theme of the mural should be floral, abstract, or nature-inspired, and draw out very lightly in pencil.
Fill your design in with mural paint using your paintbrushes. Or you can alternatively use peel-and-stick wall decals if you want a much easier painting. Allow the mural to dry.
How to Style the Concept
Match this creative headboard with minimalist, monochromatic bedding to draw the viewer’s attention to the painting. Include a few subtle, velvety throw pillows in accentuating colors.
Bring in some small potted plants or install a dramatic chandelier over the bed to shift focus to the mural. Steer clear of overcrowding the space, since the mural itself is sure to be the room’s focus.
11. Custom Wood Detail Headboard
Materials
- Custom-cut wooden panels
- Wood glue or nails
- Wood stain or paint
- Sandpaper
- Drill and screws
How to DIY
Begin by customizing wooden panels that can be arranged in a pattern or style suitable for your room. Whether linear arrangement, chevron pattern, or more abstract, cut the wood to the desired size.
Sand the edges and apply the wood stain or paint of your choice. Secure the panels to the wall or plywood base behind the bed with wood glue or nails.
This can be achieved through intricate carving or geometric patterns for a highly unique and personalized finish.
How to Decorate the Idea
This custom headboard looks great with neutral bedding in whites, grays, or blacks. This allows the wood design to be showcased.
Accent with a few bold pieces, such as metallic side tables or modern lamps, to complement the custom wood details. The decoration should be sleek and modern to complement the custom craftsmanship of the headboard.
Conclusion
Incorporating a DIY headboard into your bedroom not only elevates the space but also offers a unique way to express your style.
Whether you’re drawn to the elegance of a mural, the whimsical nature of a tulle canopy, or the functionality of built-in shelves, each of these headboard ideas can transform your room into a cozy, personalized sanctuary.
The beauty of these DIY projects is you can customize them to your taste and space; hence, you can create a headboard that’s not only beautiful but also practical.
So leap and start crafting a headboard that reflects your style and makes a space uniquely yours!
FAQs
How much do DIY headboard ideas typically cost compared to store-bought ones?
DIY headboard ideas generally cost $50-150 depending on materials, while store-bought options range from $200-800+. Making your velvet panel or tufted DIY headboard saves significant money. Choose budget-friendly fabrics or repurpose existing materials for extra savings. The price difference lets you splurge on higher-quality materials while still saving cash.
Which DIY headboard ideas are best for beginners?
The oversized pillow DIY headboard ideas are perfect for beginners! Simply mount a curtain rod and hang large pillows with fabric ties. No complex cutting or upholstery is needed. The cloud-like pillow DIY headboard design is equally newbie-friendly. Both options offer impressive results without requiring advanced skills. You’ll finish in an afternoon with professional-looking results.
How do I choose the right fabric for my DIY headboard ideas?
For DIY headboard ideas, consider durability, texture, and your bedroom style. Velvet adds luxury but collects dust. Linen offers casual elegance but wrinkles easily. Test fabrics by rubbing against them will they show wear quickly? Bouclé and microfiber resist stains. Match your fabric’s vibe to your room’s personality. Feel samples before deciding.
Can I create DIY headboard ideas without power tools?
Absolutely! The cloud-like pillow DIY headboard ideas, rolled cushion design, and oversized pillow options require no power tools. Even the quilt-covered DIY headboard needs minimal tools if you buy pre-cut wood from hardware stores. These no-saw projects deliver stunning results using simple mounting hardware, fabric, and creativity. Power tools are optional.
How do I maintain and clean my fabric DIY headboard ideas?
Vacuum fabric DIY headboard creations monthly using an upholstery attachment. Spot clean stains immediately with mild soap and water. Avoid saturating the fabric. Removable covers (like on pillow DIY headboard ideas) can be laundered according to fabric instructions. Spray with a fabric protector before installing for easier maintenance. Prevention beats deep cleaning.
Which DIY headboard ideas work best in small bedrooms?
The mural DIY headboard ideas create visual interest without taking up physical space. Alternatively, the petal-shaped upholstered DIY headboard keeps a slim profile while adding texture. Both DIY headboard options maximize visual impact while minimizing footprint. Consider wall-mounted designs rather than freestanding options to preserve precious floor space in compact rooms.