
In this blog, I’ll share how I made DIY floating shelf brackets, which are an extraordinary showpiece in my home.
Are you tired of staring at bland, store-bought floating shelves? Are you planning to add a touch of personality to your walls? You’re not alone! Let’s ditch the ordinary and embark on a DIY adventure to craft unique, show-stopping brackets for your shelves.
Ready to transform your home with custom-made brackets that reflect your style? Let’s get started!
Types Of Bracket Systems For Floating Shelf
Here are some common types of bracket systems used for floating shelves:
1. Floating Box Shelves
Floating box shelves are sleek, minimalist storage solutions that appear to “float” on a wall without visible brackets or supports.
They are typically hollow rectangular boxes that can be used to store or display items, offering a modern, clean-lined look.
These shelves are mounted to the wall using hidden mounting systems, such as wall cleats or concealed brackets, which give them their floating appearance.
Floating box shelves come in various materials, like wood, MDF, or metal, and are available in different sizes and finishes to match various home styles.
2. Premade Brackets for Floating Shelves
Premade brackets for floating shelves are pre-designed hardware that supports shelves while keeping the brackets concealed or minimally visible.
These brackets are often made of metal and are designed to attach to the wall and fit snugly inside or behind the shelf. Common types of premade brackets include:
- Concealed Rod Brackets: Metal rods that anchor into the wall and slide into holes drilled in the back of the shelf.
- L-Brackets: Simple brackets that attach under the shelf for support; these are visible unless painted or hidden by the shelf’s design.
- Floating Shelf Kits: Complete sets that include the shelf and the concealed mounting brackets.
3. Hovr Bracket System
The Hovr Bracket System is a specialized mounting system designed to securely and seamlessly install floating shelves while maintaining a clean, modern look.
It’s known for its strength and innovative design, making it popular for heavy-duty floating shelves.
When installed, the two brackets lock together, creating a tight and secure fit that can hold significant weight. The system ensures shelves stay level and can hold heavy items without sagging.
Why Make Your Own Floating Shelf Brackets?
Floating shelf brackets sold online are often pricey, with some kits costing $30-$50 per bracket. For a multi-shelf project, that cost adds up quickly. My DIY version cost me less than $10 per bracket, and they’re just as strong and good-looking. Plus, there’s something satisfying about creating something with your own hands.
Step-by-Step Guide for DIY Floating Shelf Brackets
Let’s roll up our sleeves and create Sturdy floating shelf brackets with a DIY project that’s as fun as it is functional.
1. Supply List for DIY Floating Shelves:
Before you start building your DIY floating shelves, let’s gather all the materials you’ll need. Having the right tools and supplies on hand will make the process smoother and more enjoyable, so here’s what I used.
- 1×4 inch pine boards (or oak, maple, or reclaimed wood)
- Metal rod brackets (optional, for extra support)
- Wood glue
- Assorted screws (variety of sizes)
- Sandpaper (80, 120, and 220 grits)
- Wood stain or paint (e.g., warm walnut stain)
2. Planning: Measure Twice, Cut Once
Before you unleash your inner carpenter, take some time to plan. Measure the desired length of your shelves and determine the length of your brackets.
I found that 6-inch brackets provided ample support for my shelves, but you can adjust this based on your desired look and the weight of the items you’ll be displaying.
Now, let’s talk spacing. I spaced my brackets 24 inches apart on the wall, but this is entirely up to you. Consider the weight of your shelves and the number of shelves you’re installing. Heavier shelves generally require closer spacing for optimal support.
I use a pencil and measuring tape to mark the cutting lines on my wood, ensuring they are precise. A little extra precision here will save you time and frustration later on.
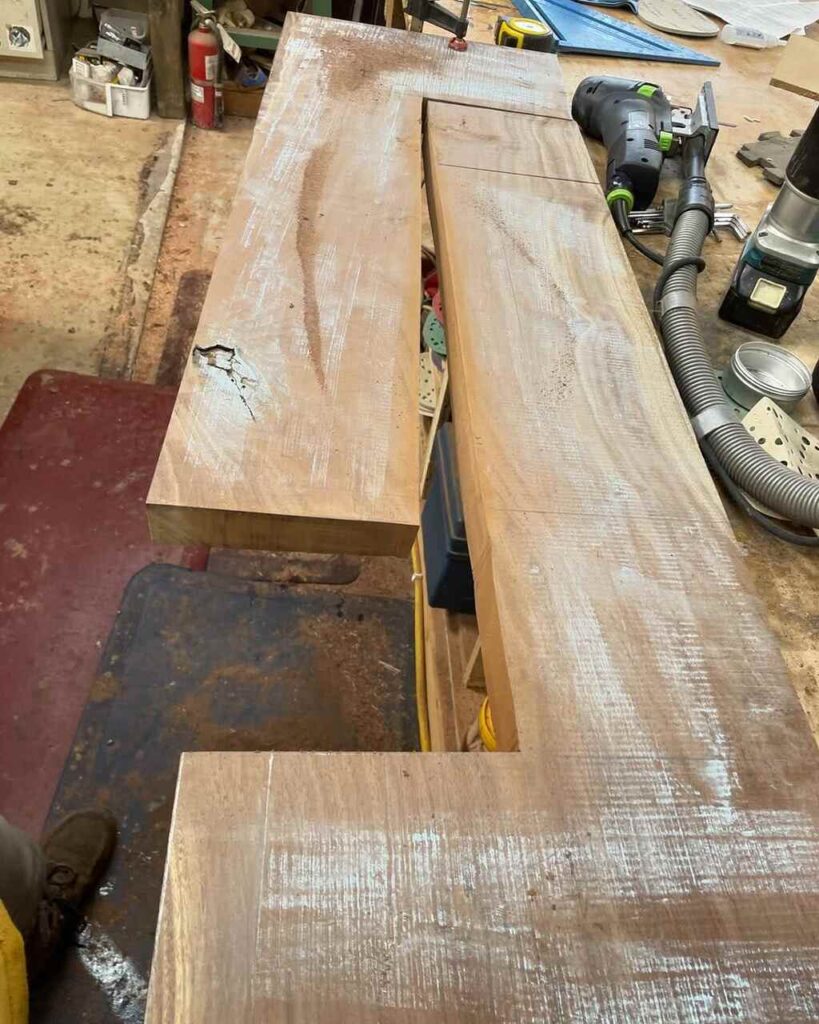
3. Cutting and Shaping
This is where the real fun begins! Carefully cut the wood according to your markings. I found a jigsaw to be the most maneuverable for my project, allowing for easy curves and intricate shapes.
Sand all cut edges with 80-grit sandpaper to smooth them out. Don’t be afraid to get creative! I added a slight curve to the bottom of my brackets, which gave them a unique and elegant look.
You can experiment with different shapes and angles to find a style that reflects your taste.
You can also consider adding decorative elements like notches, grooves, or even carving simple designs.
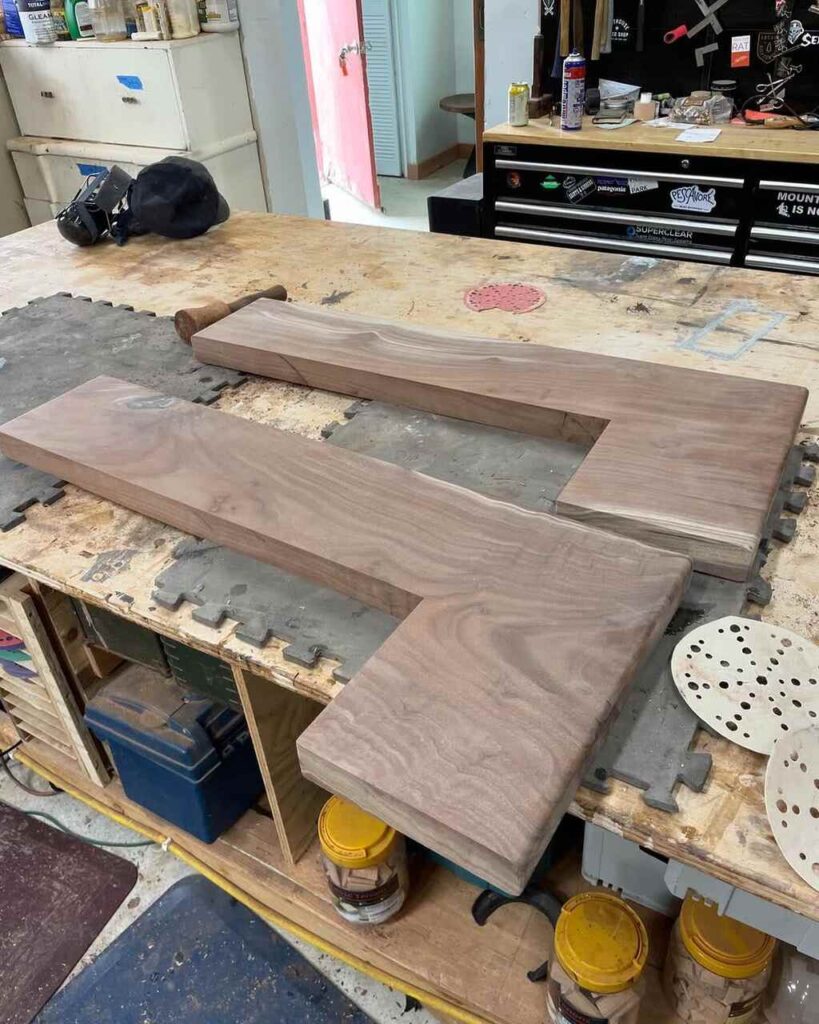
4. Finishing Touches: Sanding, Staining, and Protecting
Next, sand all surfaces of the brackets with 120-grit sandpaper, followed by 220-grit for an incredibly smooth finish.
I chose to stain my brackets a warm walnut color to complement my existing decor, but you can paint them any color you like, or even leave them natural for a more rustic look.
Let the stain or paint dry completely according to the manufacturer’s instructions. For added protection and a beautiful shine, I applied two coats of clear polyurethane.
5. Installation of Brackets
Now comes the installation. I used a stud finder to locate wall studs and mark the mounting points for the brackets on the wall. Ensure they are perfectly level using your level – this step is crucial for a professional look.
Drill pilot holes into the wall at the marked locations to prevent the wood from splitting.
For the brackets I used, the rod diameter was ½ inch, so I drilled corresponding ½-inch holes in the underside of the shelves, about 1 ½ inches deep for a snug fit.
The bracket rods protruded about 2 ½ inches from the wall, giving enough clearance for a secure hold.
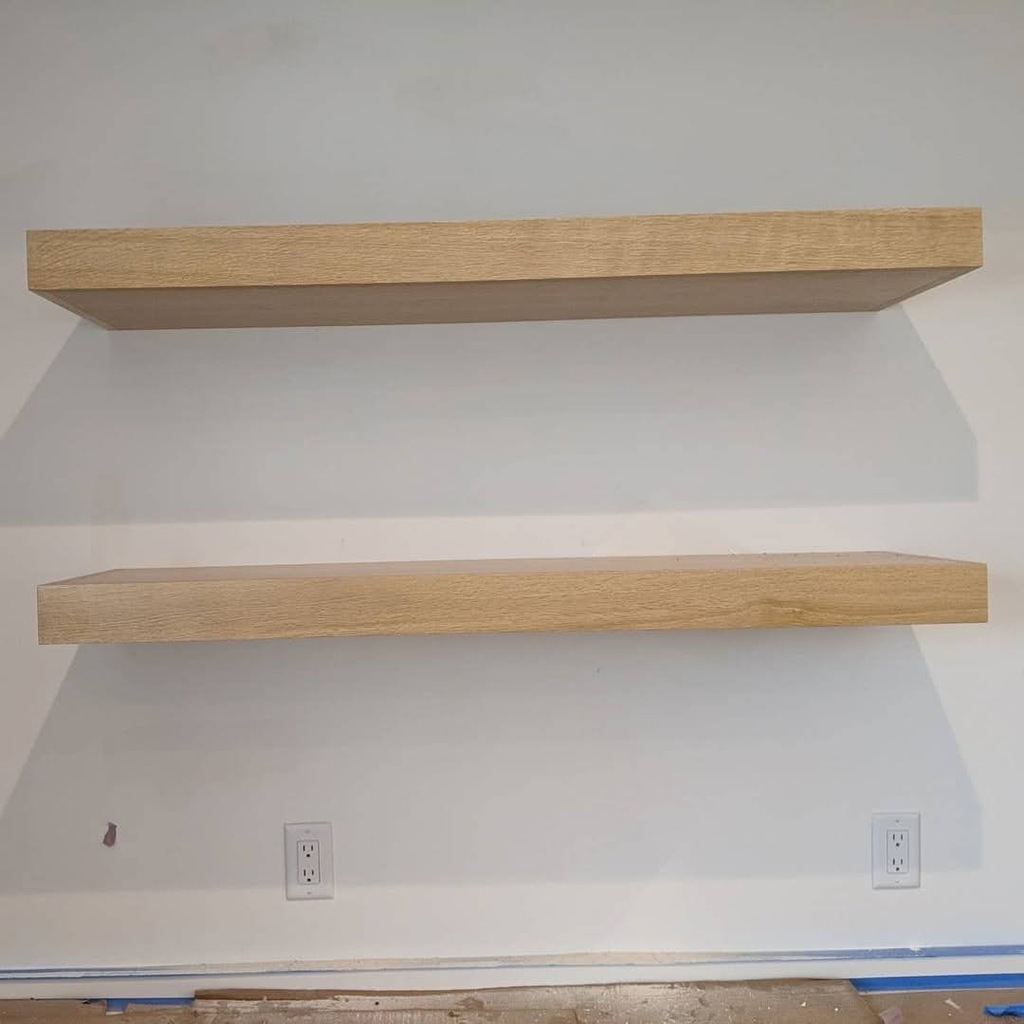
6. Installing the Shelves
Once the brackets are installed, it’s time to mount the shelves.
I measured and marked where the holes of the shelves would align with the bracket rods, ensuring they were evenly spaced. Using a ½-inch drill bit, I drilled about 1 ½ inches deep into the underside of the shelves for a snug fit.
To make sure the holes were drilled straight, I used a drill guide to keep the angle consistent, preventing any crooked holes that could make the shelf sit unevenly.
After sliding the rods through, I applied wood glue for extra support, then placed the shelf in the brackets and secured it with screws.
For a shelf projecting 10 inches from the wall, the total bracket length would be about 11.5 inches (10 inches for the projection + 1.5 inches for the drilled hole depth).
Finally, I checked that everything was level before tightening the screws, and my floating shelves were good to go.
Tips For Successful Project
- Consider the Wood: Pine is a budget-friendly option, but you can get creative with other woods like oak, maple, or even reclaimed wood for a more rustic look.
- Weight Matters: Take into account the weight of the items you’ll be placing on the shelves when choosing wood thickness and bracket spacing. Heavier items will require stronger support.
- Safety First: Always wear safety glasses and hearing protection when using power tools.
- Don’t Be Afraid to Experiment: This is your chance to unleash your creativity! Play with different shapes, sizes, and finishes to create truly unique and personalized brackets.
- Embrace Imperfections: Remember, handmade items often have a unique charm. Don’t strive for absolute perfection; embrace the slight imperfections that make your project truly one-of-a-kind.
- Take Your Time: This is a DIY project, so enjoy the process! Don’t rush through any steps. Take your time, and savor the satisfaction of creating something beautiful with your own two hands.
Conclusion
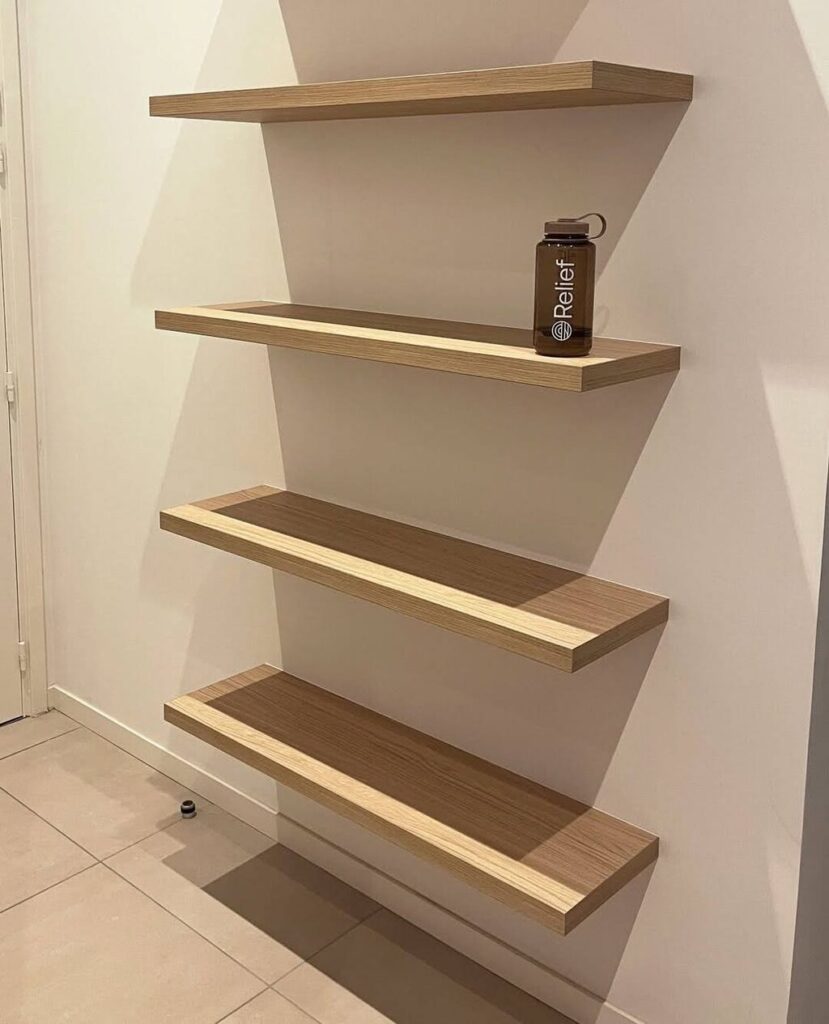
And there you have it! With a little patience, creativity, and the right tools, you can transform ordinary shelves into extraordinary showpieces. By following these steps and embracing your inner DIYer, you’ll not only save money but also gain the immense satisfaction of creating something truly unique and personalized for your home.
Remember, the beauty of this project lies in your ability to customize it to your unique style and preferences. So, grab your tools, unleash your creativity, and enjoy the rewarding feeling of crafting something beautiful with your own two hands. Happy DIYing!
FAQs
Can I use reclaimed wood for my brackets?
Absolutely! Reclaimed wood adds character and sustainability to your project. Look for old pallets, discarded furniture, or even fallen branches to give your brackets a unique story.
Can I use different types of wood for the shelves and the brackets?
You can mix and match woods for a unique contrast. For example, use darker wood for the brackets and lighter wood for the shelves.
What’s the most important thing to remember when starting this project?
This is a DIY project, so enjoy the process. Don’t get discouraged if things don’t go perfectly the first time. Embrace the learning experience and enjoy the satisfaction of creating something beautiful with your own two hands.
Can I use these brackets to display plants? What should I consider?
Absolutely! Floating shelves are a fantastic way to display plants. However, you’ll want to consider a few things. First, ensure the brackets and wood can support the weight of the plants and their pots. Heavier plants may require stronger support, such as thicker wood or additional metal brackets. Second, consider the moisture levels. Plants release moisture into the air, which can affect the wood. Choose a wood that is resistant to moisture damage, such as cedar or redwood, or apply a waterproof sealant to protect your brackets.
What are some unique display ideas for my floating shelves?
Get creative! Go beyond simply placing books and decorative objects. Create a mini gallery wall by displaying framed photos or artwork. If you’re a bookworm, curate a collection of your favorite novels or create a “reading nook” with a small lamp and a cozy blanket. Use the shelves to display a collection of vintage bottles, seashells, or other unique finds. If you’re a plant lover, create a lush display of various plants and greenery. The possibilities are truly limitless.