
A daybed is a versatile piece of furniture that functions as both a comfortable seating area during the day and a cozy sleeping space when needed.
This dual-purpose furniture offers numerous benefits for any home, including maximizing space in smaller rooms, providing extra sleeping accommodations for guests, and creating a relaxing spot for reading or afternoon naps.
Building your own DIY daybed presents an excellent opportunity to save money compared to purchasing expensive store-bought options.
Additionally, creating your own allows complete control over design, size, and materials to perfectly match your home’s style and specific needs.
This rewarding project combines practical woodworking skills with creative expression, resulting in a custom piece you’ll be proud to display and use for years to come.
Materials and Tools Needed
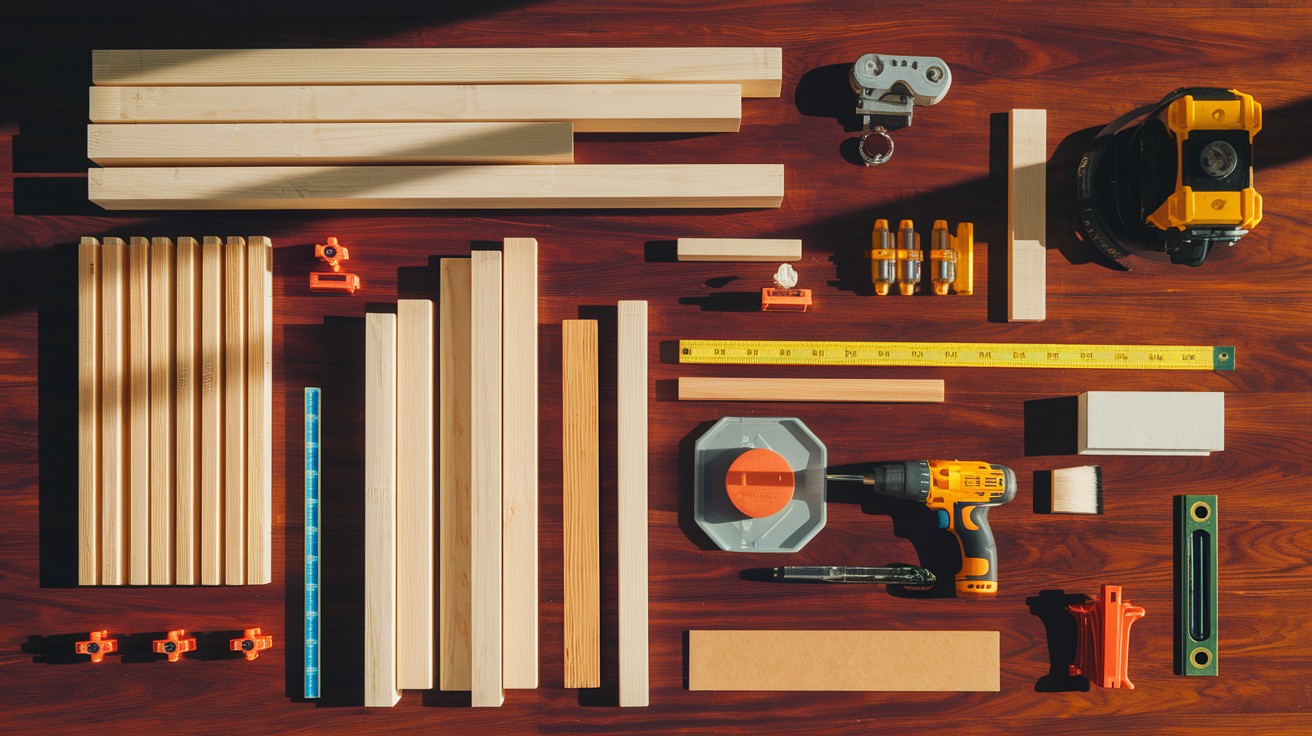
Materials
Building a sturdy daybed requires quality lumber such as 2x4s for the frame structure and 1×6 boards for slats.
You’ll need wood screws in various sizes (2.5-inch and 3-inch), corner brackets for additional support, and wood glue for stronger joints.
Optional finishing materials include wood stain or paint to match your decor.
Complete the project with a twin-size mattress and decorative cushions for comfort and style.
Tools
- Circular saw or miter saw for cutting lumber to size
- Power drill with bits for creating pilot holes and driving screws
- Measuring tape for accurate dimensions
- Medium-grit sandpaper for preparing wood surfaces
- Quality paintbrush for applying finishes
- Level to ensure proper assembly
- Clamps to hold pieces securely during construction
Step-by-Step Guide to Creating a Daybed
This comprehensive guide walks you through building your own functional daybed from start to finish. Follow these clear instructions to create a comfortable piece of furniture that serves as both seating and sleeping space.
Step 1: Plan and Measure Your Daybed

Start by measuring the room where you want to place your daybed. Make sure there’s enough space for people to walk around it comfortably.
Think about the size you need – how long, wide, and tall it should be. Write down these measurements so you won’t forget them later.
Next, decide on your design. You can keep it simple with a basic rectangular shape or add some decorative touches like curved edges.
Draw a quick sketch on paper with all your measurements marked clearly. This drawing will be your guide throughout the building process.
Step 2: Cut the Wood Pieces
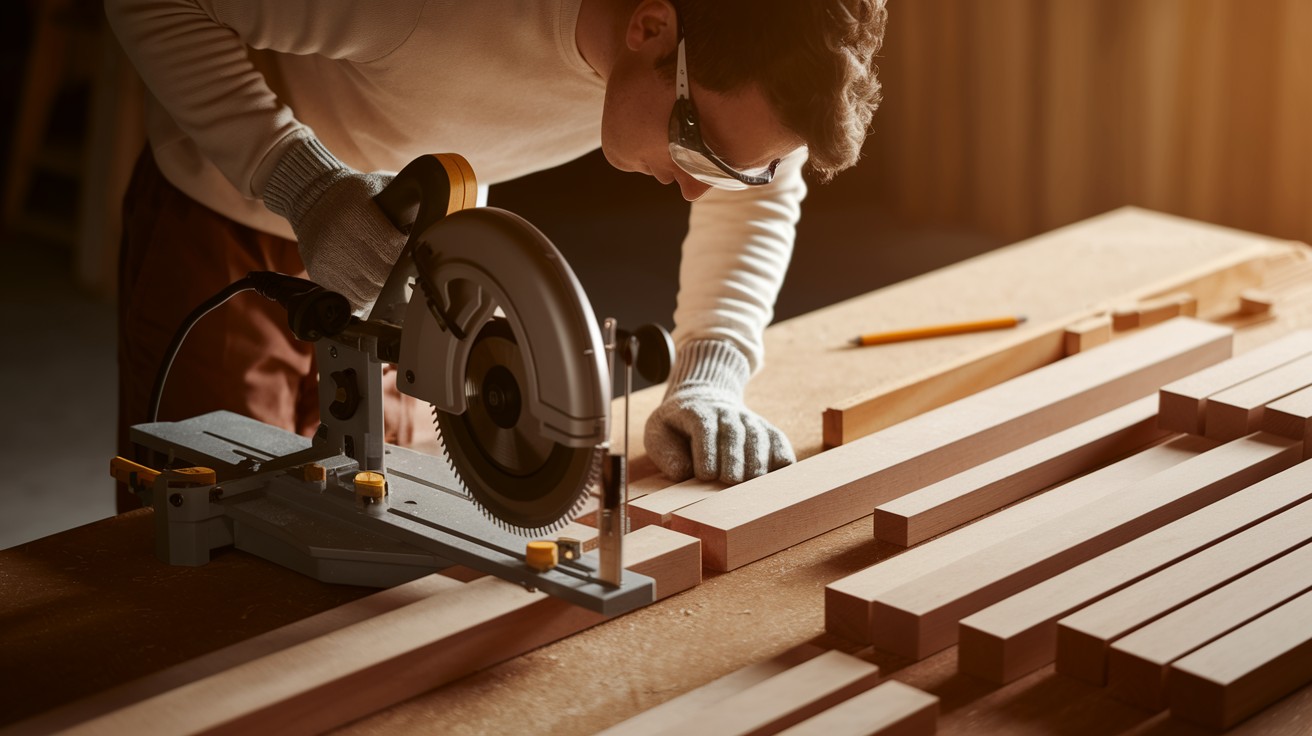
Using your measurements, cut all the wood pieces you’ll need. Start with the main frame parts – the long side pieces, headboard, and footboard.
Double-check your numbers before making any cuts to avoid mistakes. Then cut the support slats that will hold your mattress.
These should all be the same length and fit nicely across the inside width of your frame.
Step 3: Assemble the Frame
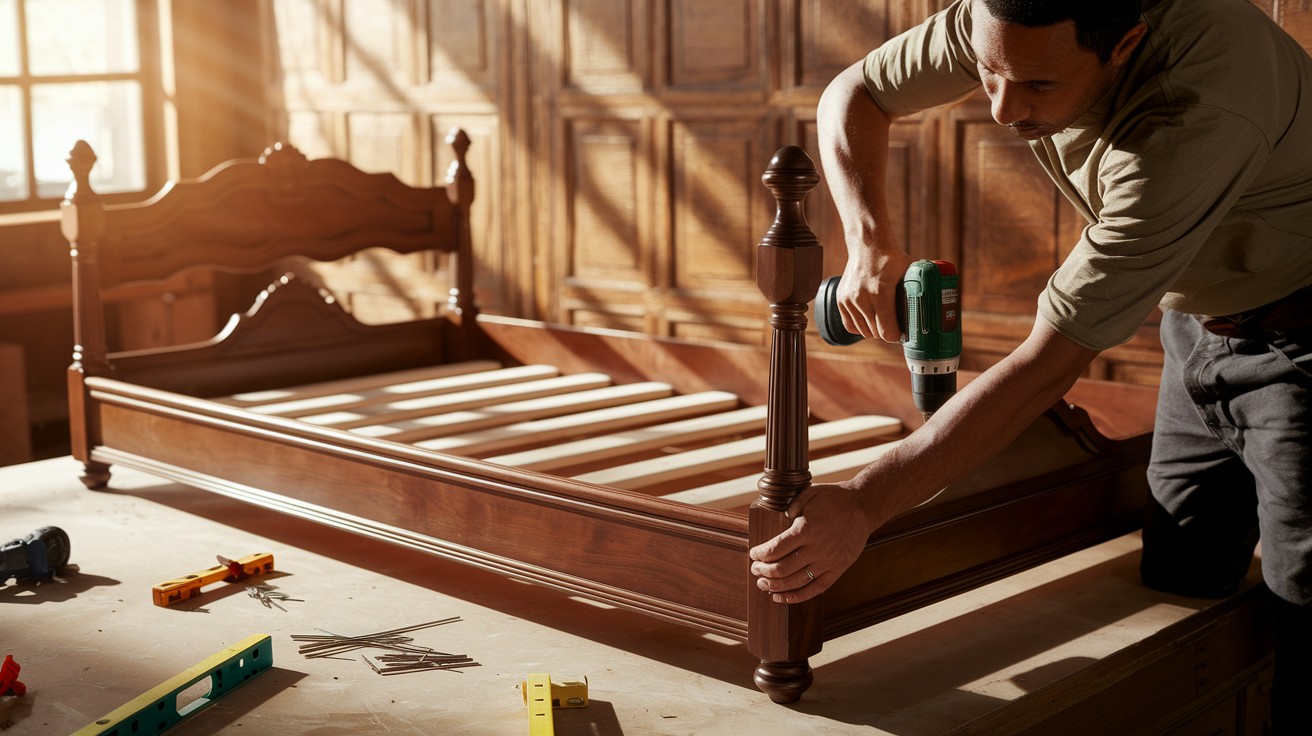
Begin putting your daybed together by connecting the side rails to the headboard and footboard using screws or metal brackets.
Make sure all corners are square and connections are tight. Once the outer frame is solid, install the support slats inside the frame.
Space them evenly across the length to provide good support for your mattress.
Step 4: Sand the Wood
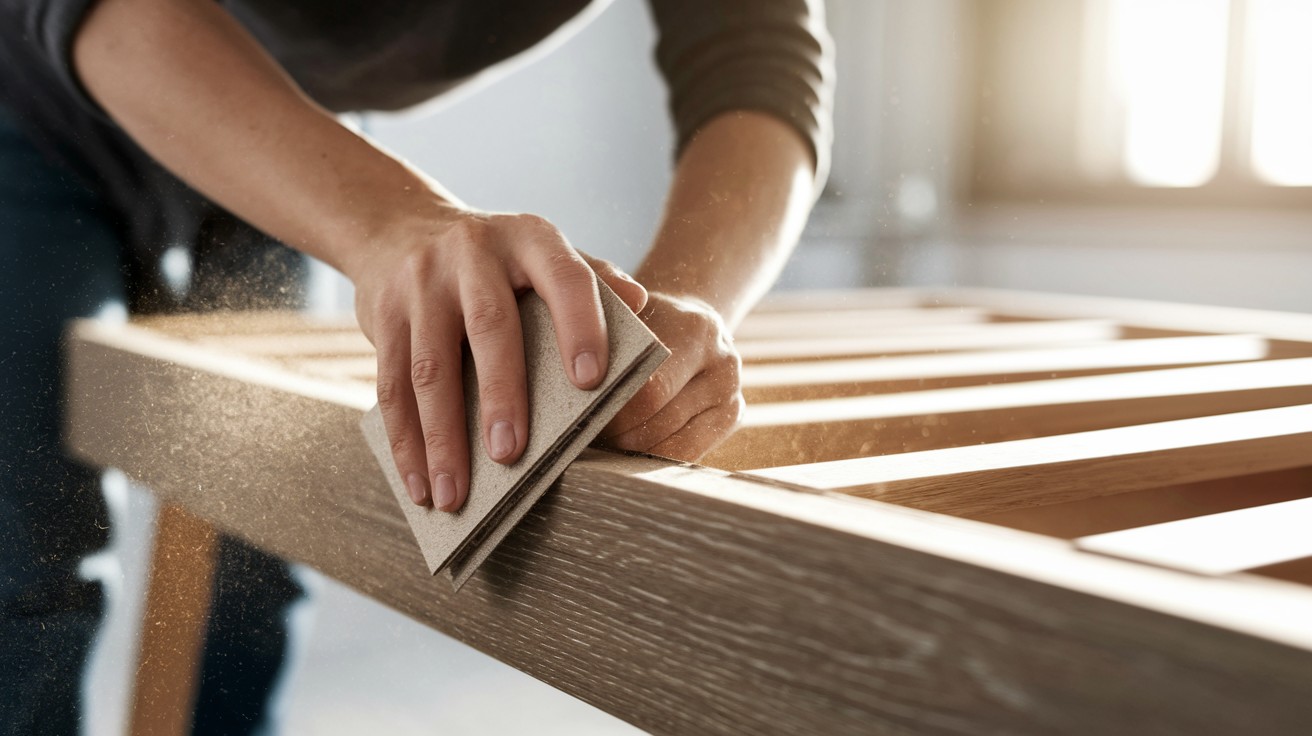
Sand down all surfaces and edges of your daybed frame using medium-grit sandpaper.
This step removes any rough spots and splinters, making it safe to touch and giving you a smooth surface for painting or staining.
Pay extra attention to areas people will touch often.
Step 5: Finish the Frame
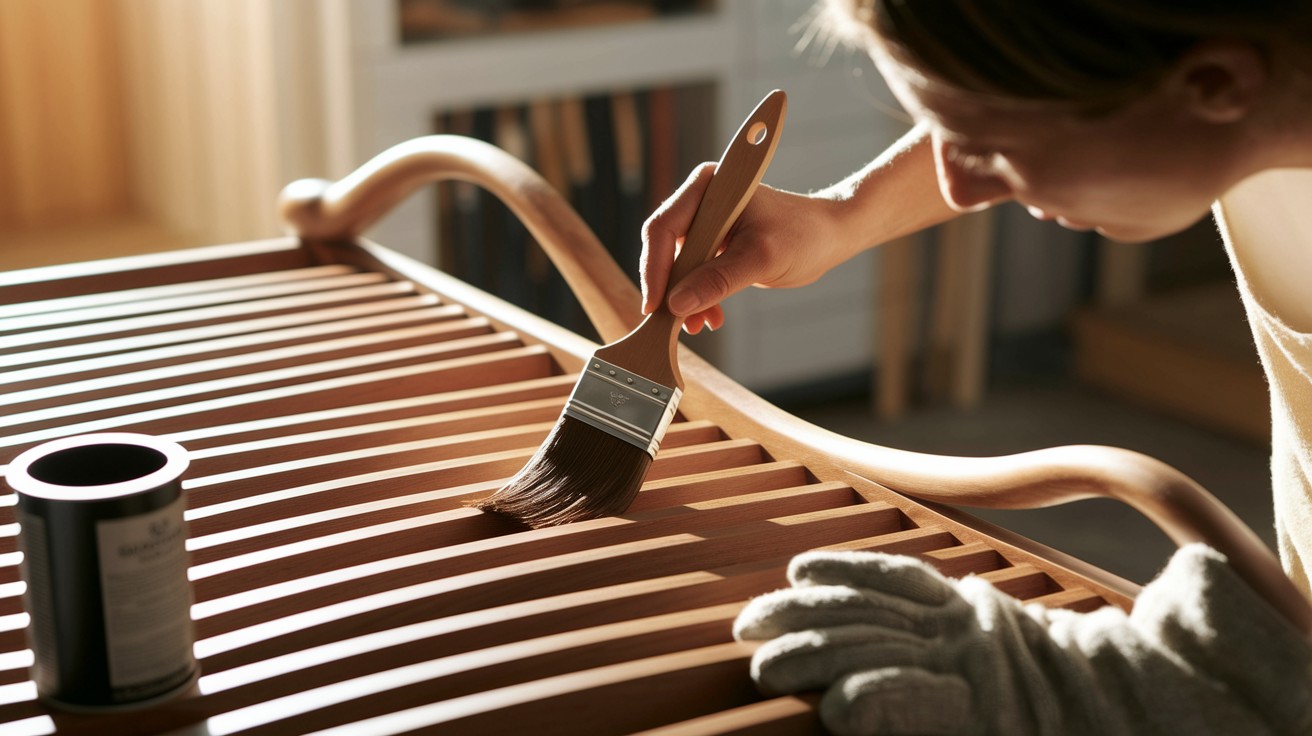
Apply paint or wood stain to protect the wood and make it look nice.
Use smooth, even strokes and let each coat dry completely before adding more.
This finishing step also helps your daybed match the rest of your room’s style.
Step 6: Add Mattress and Cushions
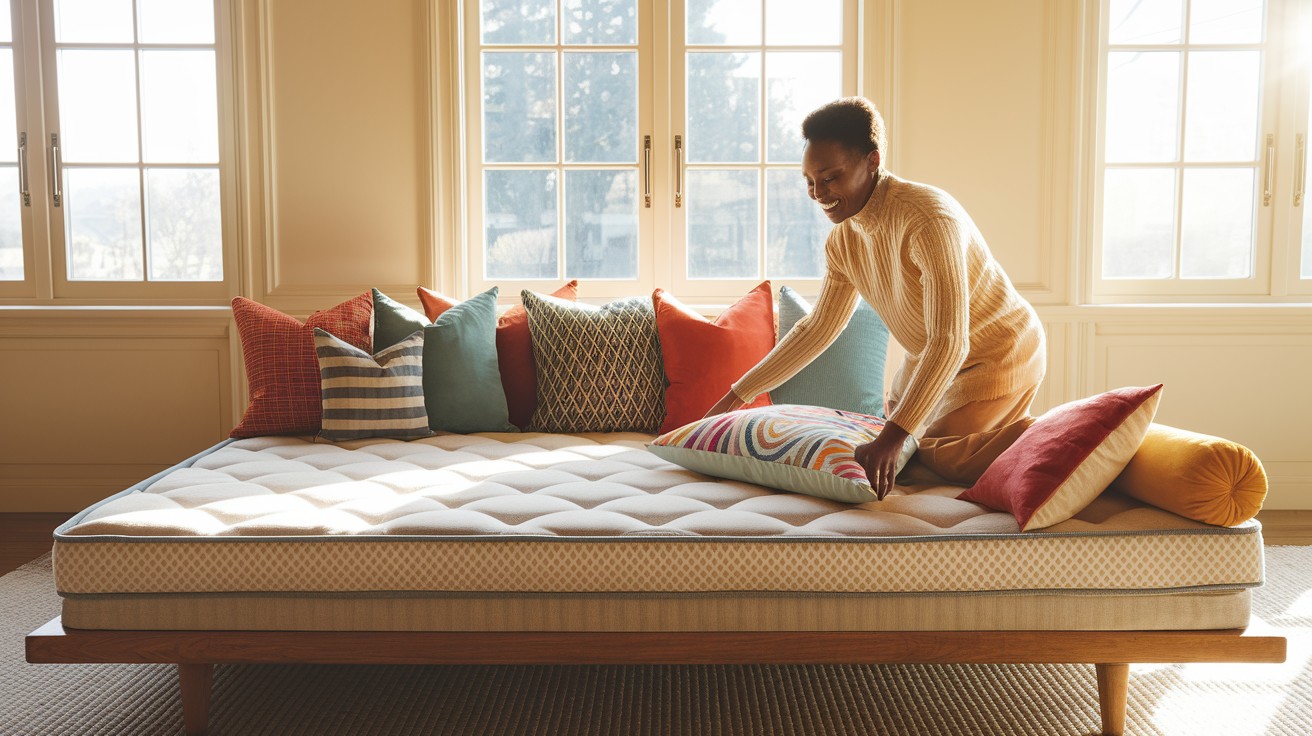
Choose a mattress that fits your frame size perfectly.
Consider how thick and firm you want it based on how you’ll use the daybed – for sitting, sleeping, or both.
Add some cushions and pillows for extra comfort and to make it look more inviting.
Step 7: Final Setup
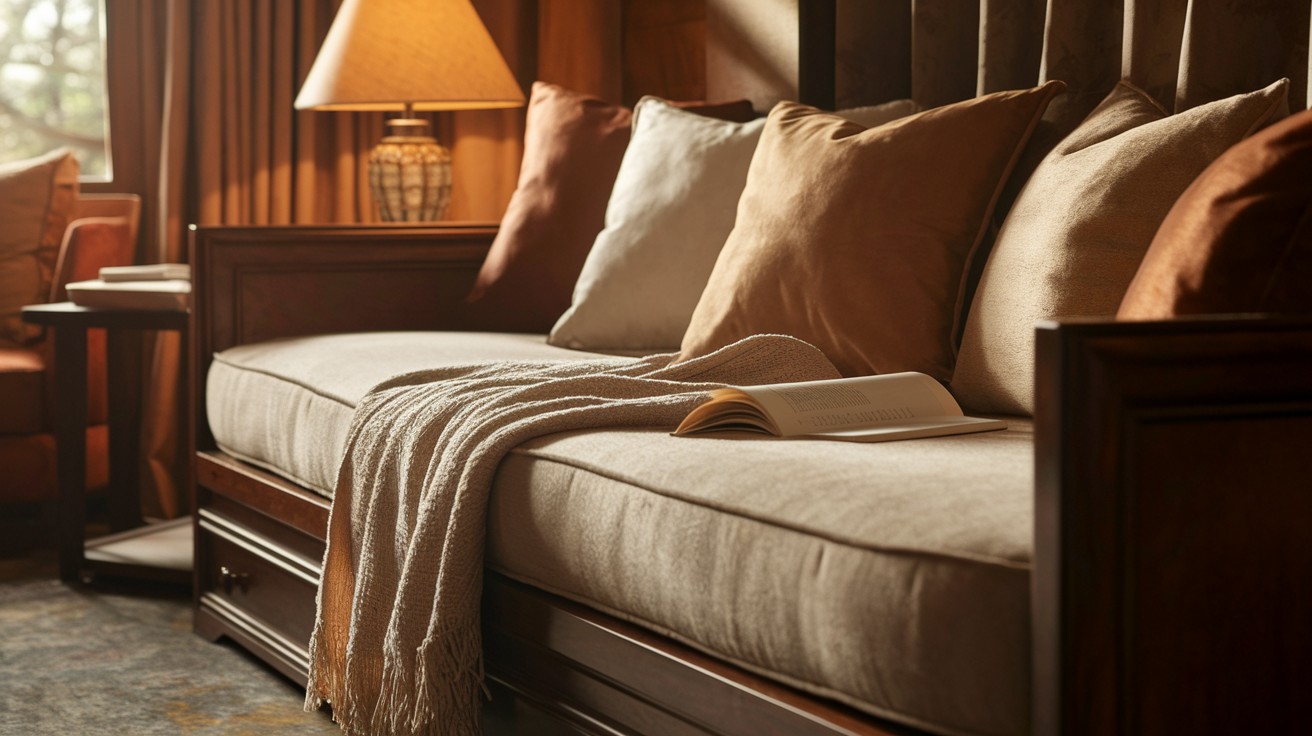
Place your finished daybed in its permanent spot in your room.
Add some final touches like throw blankets, extra pillows, or a small side table nearby.
These finishing touches make your daybed both functional and stylish, creating a cozy space you’ll love using.
Maintenance Tips for Your DIY Daybed
Keeping your handmade daybed in great condition requires regular care and attention.
Clean the wood surface weekly with a soft, dry cloth to remove dust and debris.
For deeper cleaning, use a slightly damp cloth with mild soap, but avoid soaking the wood.
Always wipe dry immediately to prevent water damage.
Check screws and brackets every few months to ensure they remain tight, as regular use can cause them to loosen over time.
When your daybed’s finish starts looking worn or scratched, touch-up work can restore its appearance.
For painted surfaces, lightly sand the damaged area with fine-grit sandpaper, then apply a thin coat of matching paint with a small brush.
Allow it to dry completely before use. For stained wood, clean the area first, then apply matching stain with a soft cloth, working in the direction of the wood grain.
Wipe away excess stain and let it cure properly. Regular maintenance will keep your DIY daybed looking fresh and extend its lifespan for years of comfortable use.
Conclusion
Building your own daybed offers numerous advantages that make this project worthwhile.
You’ll save money compared to store-bought options while creating a piece that perfectly fits your space and style preferences.
The satisfaction of completing a handmade furniture project adds personal value that can’t be purchased elsewhere.
This woodworking project is achievable for beginners and experienced builders alike.
With basic tools and materials, you can create a functional piece that serves your home for years.
Don’t hesitate to start this rewarding project – the results will exceed your expectations.
We’d love to see your finished daybed! Share photos of your completed project and tell us about your building experience.
Your success story might inspire others to tackle their own DIY furniture projects and create beautiful, functional pieces for their homes.
Frequently Asked Questions
What type of wood is best for building a DIY daybed?
Pine and plywood are excellent choices for beginners due to their affordability and ease of working with basic tools. Hardwoods like oak or maple offer greater durability but require more advanced woodworking skills and cost more.
How long does it take to build a daybed from scratch?
Most DIY daybed projects can be completed in one weekend, requiring about 8-12 hours of work time. This includes cutting, assembly, sanding, and finishing, though drying time for paint or stain may extend the timeline.
What size mattress should I use for my homemade daybed?
A standard twin mattress (38 x 75 inches) works perfectly for most daybed designs and provides comfortable seating and sleeping space. You can also use a daybed-specific mattress which is slightly thicker and designed for dual-purpose use.
Do I need advanced woodworking skills to build this project?
This project requires only basic woodworking knowledge and common tools like a saw, drill, and measuring tape. Following the step-by-step instructions carefully will help beginners achieve professional-looking results without prior experience.
How much money can I save by making my own daybed?
DIY daybeds typically cost $100-200 in materials, while similar store-bought versions range from $400-800 or more. You can save 50-75% of the retail cost while creating a custom piece that fits your specific needs.