
I still remember gazing at my dull, lifeless concrete floor. Was it possible to turn it stylish without breaking the bank? Tiles were too expensive, rugs weren’t practical, and I wanted something unique.
That’s when I made up my mind to paint it myself. Little did I know, this DIY project would completely change the space and boost my confidence in home makeovers. The transformation was beyond my expectations, and the best part?
It was incredibly budget-friendly and allowed me to customize the floor exactly how I wanted. If you’re looking for the best DIY painted concrete floor ideas, let me share my journey, step-by-step guidance, and other creative ways to transform your concrete floor beautifully and affordably.
Our DIY Painted Concrete Floor Process
Step 1: Prepping the Concrete Surface

Proper preparation is crucial for achieving a flawless finish that will last. I began by fully cleaning the floor, making it dust, dirt, and grease-free. I used warm water and a very mild detergent ,which cleaned out most of the surface.
Degreaser would be applied when dealing with resistant stains and oils. Then I checked for any cracks or uneven spots on the floor ,applying a concrete patching compound to fill in cracks and allowing this to dry for 24 hours.
Sanding was the next thing. I sanded the entire floor lightly using a concrete sander. If you don’t have a sander, you can use coarse-grit sandpaper. I vacuumed all the dust out so that it was smooth to hold the paint.
Step 2: Selecting the Appropriate Paint and Materials
Not all paints are designed for concrete floors, so I knew I needed to be selective about my materials. For the most durable and long-lasting results, I opted for an epoxy-based floor paint, which is perfect for high-traffic areas.
Acrylic latex paint also works for indoor spaces with light foot traffic, while concrete stain provides a more natural finish. I gathered a few essential supplies:
- High-quality roller to ensure an even coat
- Painter’s tape for edges and wall demarcation ,and a variety of patterns
- Concrete primer to enhance paint adhesion
- Brush for edges and corners.
Step 3: Applying the Primer.
This is a step I almost skipped, but I’m so glad I didn’t! Applying primer creates a strong bond between the concrete and the paint, preventing peeling over time.
Using a roller, I applied a thin and even coat of primer, making sure to cover every spot of the floor. After letting it dry for 24 hours, the concrete was primed and ready for painting.
Step 4: Painting the Floor
I quickly learned the importance of working in smaller sections when I began rolling on the first coat of paint .Paint dries unevenly in some spots, so I made sure to use long, steady strokes and avoid overloading the roller.
After the first coat had dried, I applied a second coat, letting another 24 hours pass before It ouched it again. For a playful and ornamental detail, I tried a stencil pattern with varying paint colors to produce an eclectic look of contrast.
Step 5: Sealing the Paint
To protect my efforts and keep them beautiful, I applied two layers of clear polyurethane sealers. With this ,my floor gained the glossy finish needed and was generally easier to maintain.
I would use a water-based sealer for the inside floor since that is less rough and dries faster. While sealing enhances a floor’s looks ,it further protects it against moisture, scrapes, or fading, all of which affect high-traffic floors.
Other Stunning DIY Painted Concrete Floor Ideas
1. Faux Tile Stenciling
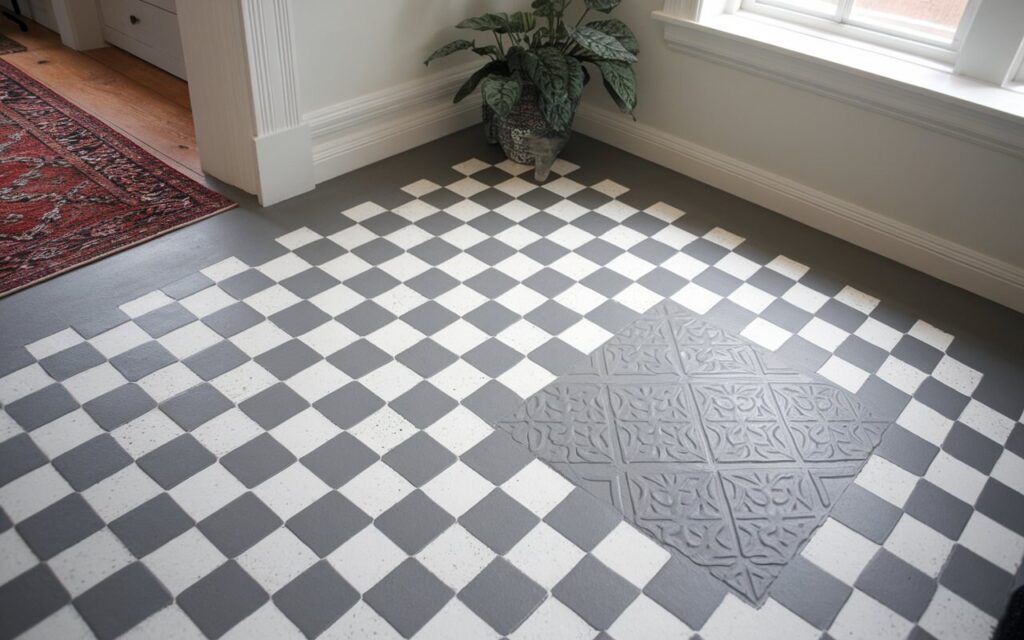
Transforming your concrete floor into a faux tile design is a fun and easy way to add character without breaking the bank. The key to this look is using a stencil. Here’s how to do it:
Materials Needed: thick mylar stencils, paint, dense foam sponge, painters tape, and a matte topcoat.
Steps:
First ,start with cleaning and priming your concrete floor. Prepare the section of the area for your stencil design where you want your stencil painted.
Use a piece of tape to mask the edges once your primer has dried .A thick, mylar-made stencil is recommended because the paint will not bleed under the edges of the stencil.
Apply for sharp, clean lines using a dense foam sponge rather than rolling on the paint. Once the paint is completely dry, seal the whole floor with a matte topcoat for that finished, durable look.
Pattern Suggestions:
- Classic checkerboard for a timeless design
- Moroccan-inspired patterns for that boho chic feel
- Geometric shapes like diamonds or triangles for a modern touch
- This concept is fantastic for the appearance of customized, tile-like materials at not at all expensive costs like tiles.
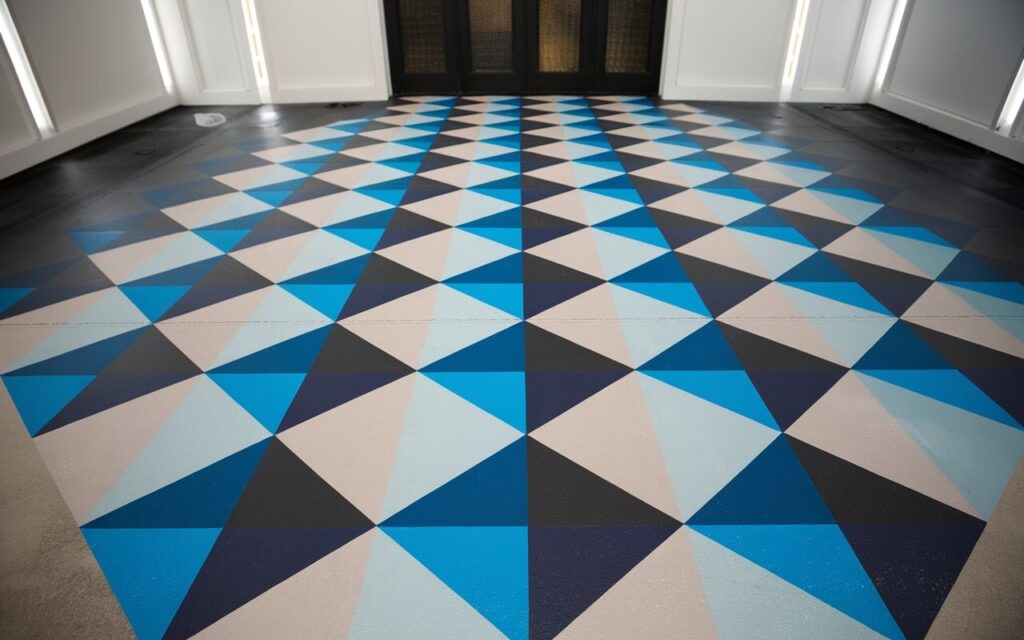
2. Geometric Patterns
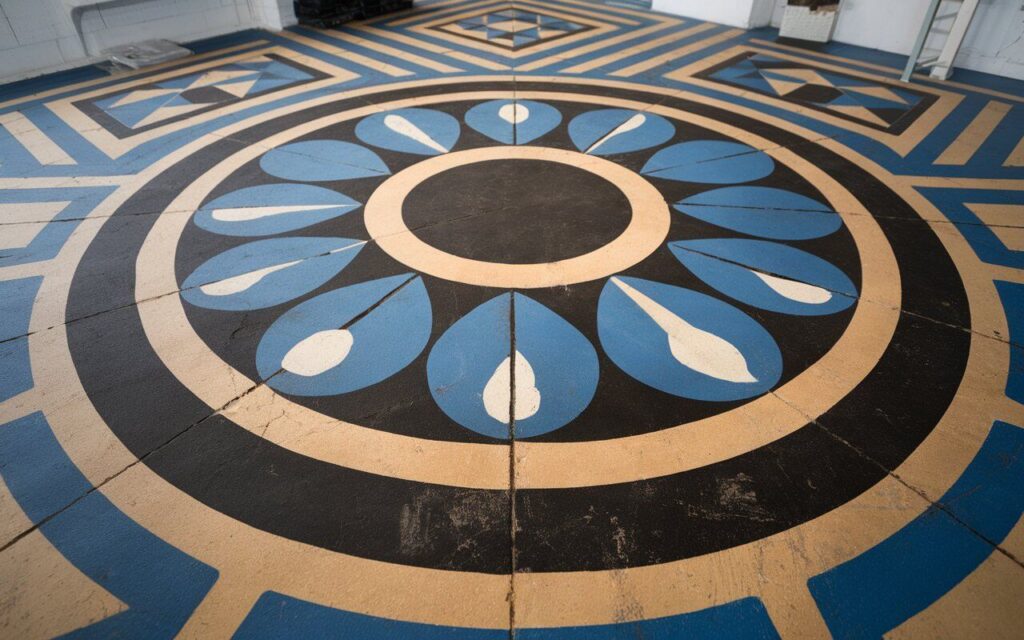
Those who are fond of vibrant and modern patterns will simply love it. Precision and attention to contrasting colors are the essence of these patterns.
Materials Needed: Painter’s tape, paint in contrasting colors (such as black, white, or navy), a roller, and a brush for edges.
Steps:
After the concrete is ready, use painter’s tape to create the geometric design you would like. You can do triangles, chevrons, or even rectangles that interlock.
The tape creates clean, sharp lines once painted. Once you have taped the areas off, you roll on your chosen paint colors with long, even strokes.
After one layer has dried, gently remove the tape to uncover sharp, angular shapes. Add more complexity by using different colors and shapes.
Design Inspiration
- Bold black and white for a clean ,graphic look
- Navy and gold for a rich, sophisticated look
- Soft pastels with triangles for a soft, modern feel
- This aestheticadds a cool, architectural element to any space.
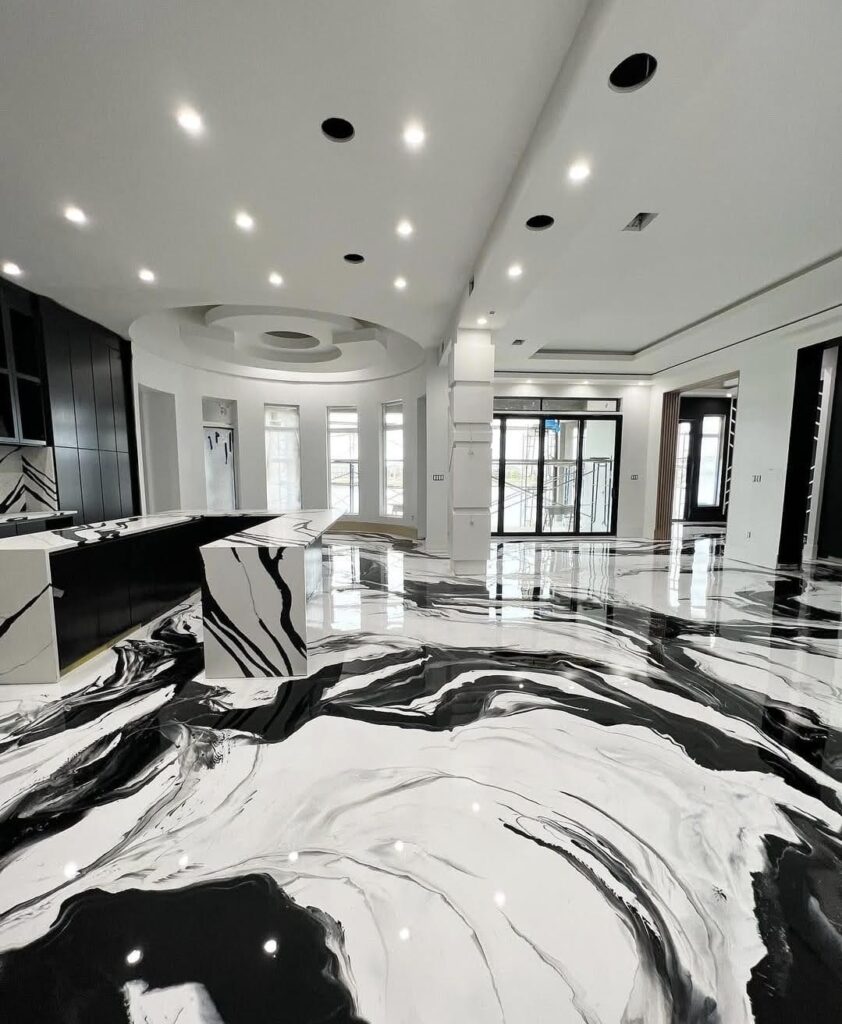
3. Marbled Concrete Effect
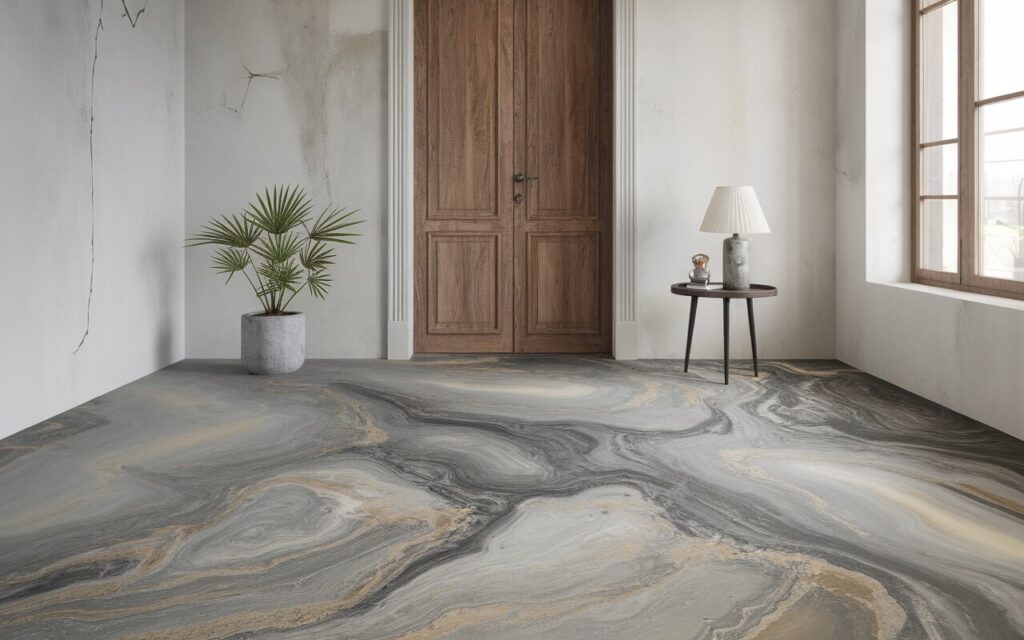
Achieving a marble effect on your concrete floor may sound complex, but it’s quite straightforward and gives your floor an expensive, luxurious feel.
Materials Needed: Paint (two colors), sponge or crumpled plastic bag, feather, and high-gloss epoxy sealer.
Steps:
Start by painting your floor with a solid base color typically a soft white or gray. Once this base coat has dried, use a sponge or crumpled plastic bag to apply the second color in swirls and streaks to mimic the veins in marble.
For a more realistic effect, blend different shades of gray or even soft black with your base color. Once you’ve achieved the desired look, apply a high-gloss epoxy sealer to enhance the marble finish and give it that shiny, polished appearance.
Marble Color Combinations:
- Classic white and gray for a timeless look
- Black-and-white for a dramatic, upscale design
- Gray, white, and soft gold for a unique, high-end marble effect
- This design is perfect for those wanting a sophisticated, marble-like finish on a budget.
4. Abstract Artistic Design
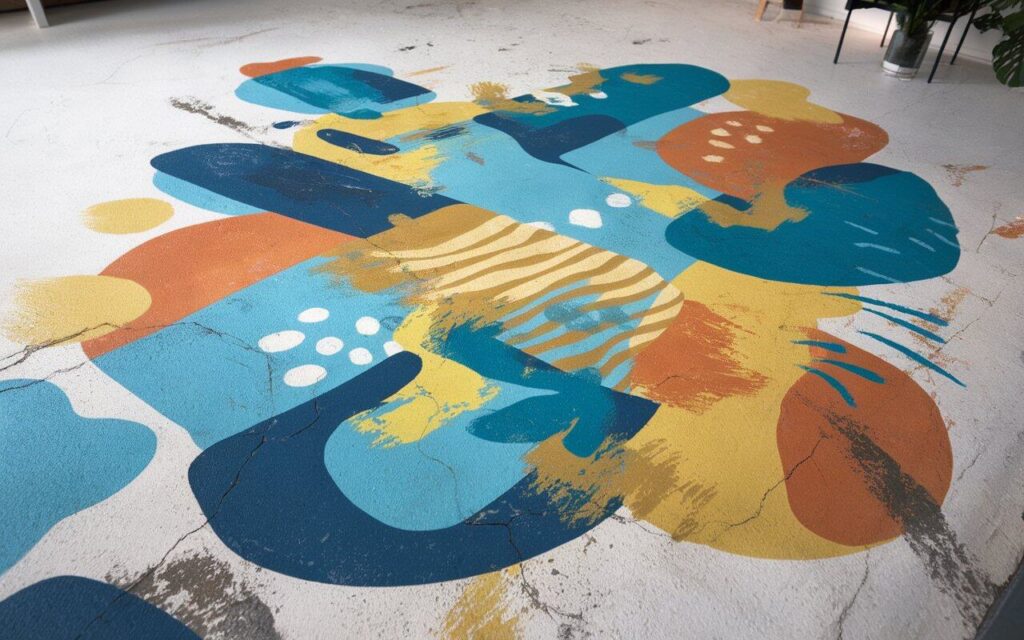
If you want a truly unique floor, an abstract design gives you the freedom to create something one-of-a-kind. This design works great for creative, modern, or industrial spaces.
Materials Needed: Paint colors (multiple), a squeegee, sponge, or brush, painter’s tape (optional).
Steps:
Apply paint once your concrete is prepped and primed .This can be tone-on-tone muted tones for a soft appearance or a palette of vibrant colors to add more energetic and lively looks to your creation. Use a squeegee or sponge to apply and spread out the paint across the floor. You can layer colors, blend them, and even let them drip and run for a more fluid, abstract look. No rules apply here just go with the flow! If you want to keep certain areas clean, tape off sections for defined edges.
Design Ideas:
- Earthy tones like terracotta, ochre, and brown for a warm, organic feel
- Bright pops of color like yellow, pink, and blue for a fun, playful look
- Bold brush strokes in varying thicknesses for a hand-painted aesthetic
- This style is ideal for anyone who wants to showcase their artistic side and make their floor a work of art.
5. 3D Illusion Designs
For a truly eye-catching and unique floor, 3D illusion designs take things to the next level. These designs use shading and perspective to make your floor appear as though it has floating elements, such as steps or ripples of water.
Materials Needed: Multiple shades of paint (including darker colors for shadows), painter’s tape, and a clear sealer.
Steps:
3D illusion floors rely heavily on perspective and shading. Start by outlining the illusion you want to create this could be floating steps, a ripple effect, or an optical illusion.
Use painter’s tape to mark off the different sections. Once your sections are defined, use darker shades to create shadows on one side of each section to give the appearance of depth.
Blend the paint carefully to create the illusion of three-dimensional space. The more accurate you are with your shading, the more dramatic the effect will be.
Once done, seal the floor with a clear polyurethane sealer to protect your design.
3D Design Ideas:
- Floating steps that seem to hover over the floor
- Water ripples that give the illusion of a water feature
- Optical illusions like staircases that seem to go on forever
- These designs are ideal for game rooms, home theaters, or even garages and can add a futuristic, interactive vibe to your space.
FAQs
How long does a painted concrete floor last?
Painted concrete floors are expected to last from 5 to 10 years, given proper preparation and sealing .A floor with very high foot traffic may need resurfacing in a few years. Regular cleaning with mild detergent and avoiding any harsh chemicals should also help to extend its service life.
Can I paint over an already painted concrete floor?
Yes! Before painting, all loose and flaking paint is removed, and the surface is sanded to be coated with concrete primer, which helps to ensure the paint sticks and doesn’t peel prematurely.
What is the best type of paint to apply to concrete floors?
For maximum durability, epoxy-based floor paint is the best choice. For less heavy-duty spaces, you can use acrylic latex paint or concrete stains, depending on the look you prefer (matte vs. glossy).
Final Thoughts: Time to Transform Your Floor!
Painting a concrete floor is a budget-friendly, creative way to upgrade your space without the need for expensive materials or labor.
With the right steps and quality materials, you can achieve a stunning, durable finish that’s customized to fit your style.
The beauty of this DIY project lies in its versatility: whether you want a modern, minimalist look or something more artistic and bold, painted concrete floors provide endless possibilities.
So, grab your supplies and start transforming your space today you won’t regret it!