
Our living room always felt like it was missing a touch of character. We wanted something that could elevate the space, making it look elegant yet personal.
That’s when the idea of a coffered ceiling struck us. Not only does it add depth and sophistication, but it also gives us a chance to work together as a family on a fun and rewarding project.
The best part? A DIY coffered ceiling can be made in your style without breaking the bank. We imagined clean, geometric lines with a smooth finish that complemented our home.
The thought of creating something beautiful with our own hands was enough to get us excited and nervous. With a little planning, patience, and teamwork, we were ready to bring our vision to life.
Materials and Tools Needed for DIY Coffered Ceiling
Before constructing your DIY Coffered Ceiling, arranging the tools is important so below are the essentials you need.
Materials
- MDF or plywood planks: for beams and framing. We used MDF for a smooth finish, but real wood can add more texture and depth.
- Crown molding: For the decorative edge on top of the beams
- Perimeter trim: to frame the whole ceiling so it looks polished
- Wood filler: to fill up gaps or imperfections in between pieces.
- Paint and primer: We used a neutral, light color to lighten up the space.
- Caulk: This was to close any gaps and create clean lines along the beams.
Tools
- Tape measure: Ensure everything is level and measured perfectly.
- Saw: To cut up the wood and MDF into size. I used a miter saw to ensure the cuts for all angles.
- Drill: This was used to hold the pieces together.
- Nail gun: This is to save time and leave an area much cleaner than pounding in nails.
- Level: To make sure everything was straight and even.
- Paintbrushes and rollers: For a smooth, even coat of paint.
- Having all the materials ready allowed us to jump right into the project without scrambling for supplies. It made the process a lot smoother and kept us on track.
Planning and Prepping Ceiling Layout
The most important aspect of a successful coffered ceiling is taking accurate measurements and planning out the layout. We measured the entire ceiling first, getting all the measurements, so we could work off of that.
For our room, the ceiling measured 12 feet by 16 feet, giving us plenty of space to put a grid layout in place with larger panels. This step was important in determining how many panels we wanted and spacing between beams.
We started by marking the center of the room from both lengthwise and widthwise to set a mark for a starting point. Thus, the beams would remain symmetrical and aligned on the entire space.
A chalk line was then laid out from the center point straight across the ceiling, running along the length of 16 feet and another 12 feet along the width of the room, maintaining everything neat and aligned.
The size of the panels was then decided. We opted for a grid layout with 4-foot by 4-foot squares, which made the ceiling look balanced and proportional.
However, you could always adjust the panel size based on the dimensions of your room. For example, in smaller rooms, you could opt for 3-foot by 3-foot panels to maintain a clean, open feel.
After we planned everything out, we double-checked all our measurements to ensure that the beams and panels would fit perfectly with no awkward gaps or overlaps.
Frame Installation of Perimeter Trim
With the layout in place, we then proceeded to the installation of the perimeter trim. This was a crucial installation, as it framed the ceiling and provided the entire design with structure.
The trim pieces were cut to fit at the edges of the room, thus enclosing everything within the grid we had created. We used a level to ensure that the trim pieces were straight.
We nailed them securely to the edges of the ceiling with nails, ensuring that the studs were firmly attached so that they would not sag. This created a clean boundary for the coffered ceiling and provided solid support for the beams.
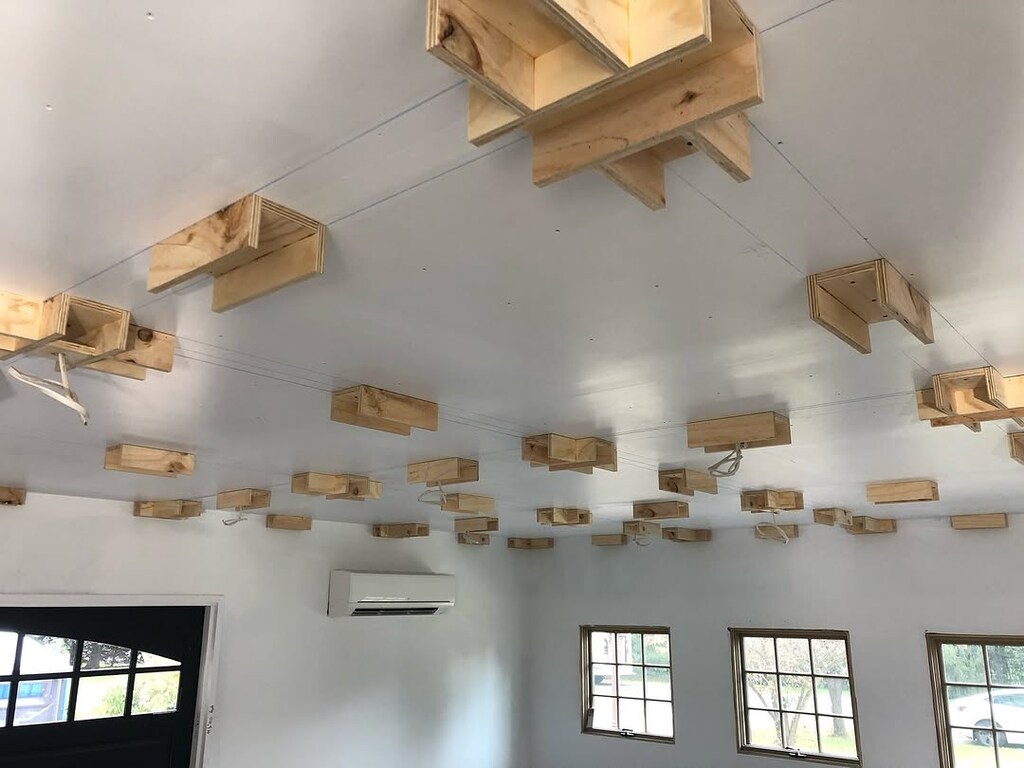
After the installation of the trim, we began putting in the framing of the grid. Beams were cut according to the gap available between the perimeter trim based on our previously calculated dimensions.
The beams were mounted on the ceiling using a drill and screws to fasten them onto the ceiling to avoid sagging and provide equal distance from each other.
Putting the Crown Molding and Beams
Crown molding added that final finishing touch to the space. We measured and cut the pieces carefully to fit around the perimeter of the ceiling because it gives a more finished look and elegant appearance.
Once we dry-fit the pieces, we nailed them in place, ensuring that they were aligned with the beams for a seamless look. We then proceeded to the beams.
We cut them to the size and fastened them across the ceiling. Using a combination of screws and wood glue, we ensured the beams were not moving around.
To make it even easier, we spaced them evenly apart using our previously measured grid.
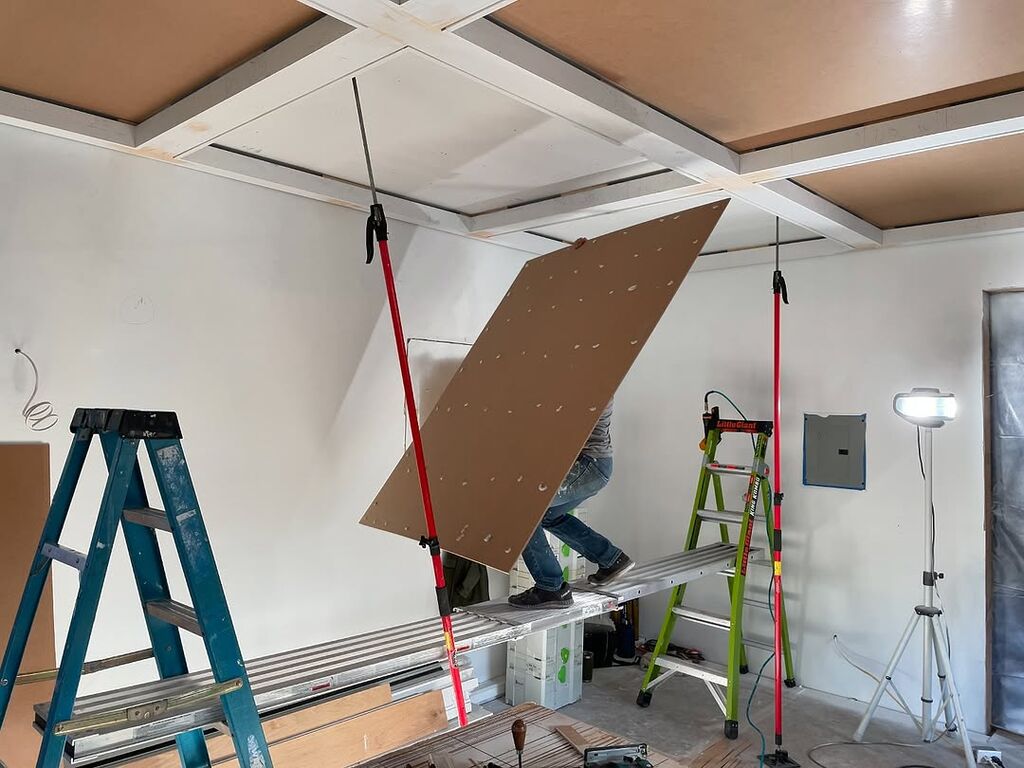
Framing the Panels

Once done was to frame the individual panels, using the remaining trims to create borders that border the individual panels. That entailed cutting them off so they fit between each of the beams.
As a result, after fitting those borders with a nail gun, the grid framework and the panels started appearing as if they were actual elements. We double-checked that the frame is level, flush against the ceiling, by using a level and making adjustments where necessary.
All this took some patience, but once all panels were framed, it seemed as though the ceiling was prepared for its final finishing touches.
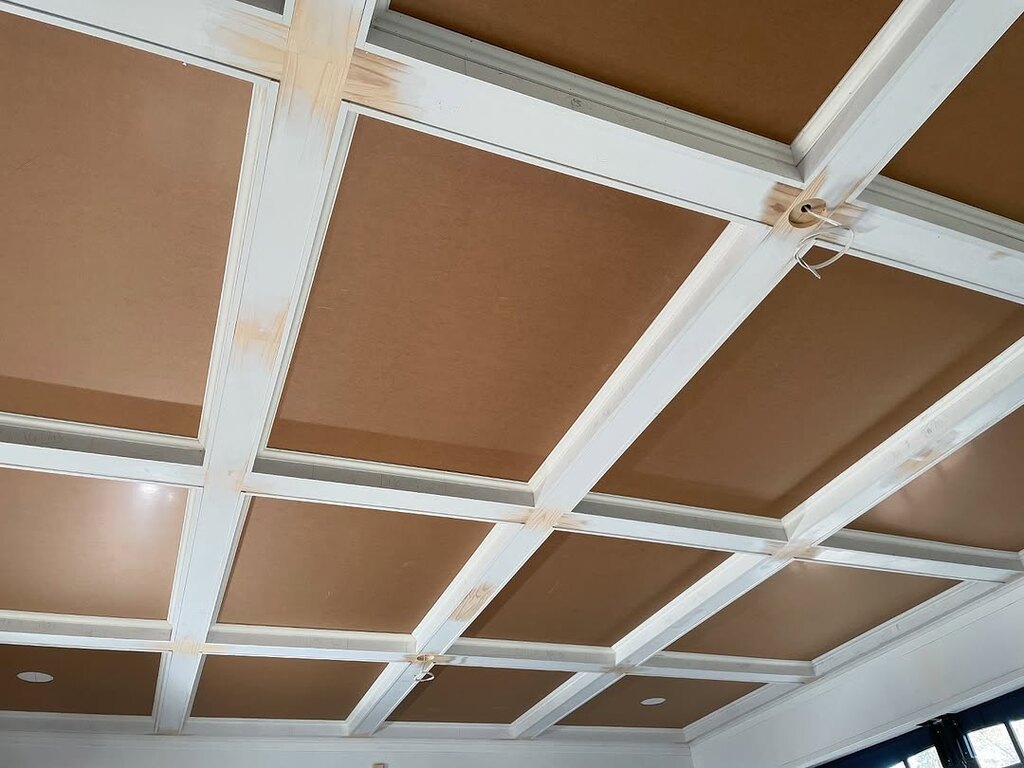
Coloring the Coffered Ceiling Wisely
Painting the ceiling was the most rewarding next step. We filled all the gaps of the framing with caulk and wood filler, which we allowed to dry, then sanded it down smooth.
Then we put a coat of primer over the whole ceiling to give good coverage and a good base for the paint. Once the primer was dry, we painted the beams, the trim, and the panels very carefully.
We selected a neutral, light color so that the room would seem more open and bright. The painting strategy was very important, especially starting with edges and beams and then filling in the panels.
It used a paint roller to achieve an even finish while using a small brush for the corners and details. It was incredible to see how much of a transformation the paint gave to the whole room.
Finishing Touches of Our Coffered Ceiling
To add more character to the ceiling, we decided to stain the beams. This gave the room a warm, inviting vibe that complemented the lighter wall color.
We carefully applied a wood stain to the beams, ensuring they were absorbed evenly. We also added a few cosmetic touches, such as installing little LED lights along the edge of the trim to achieve a soft, ambient glow when the lights are on after dark.
The end product was a show-stopper, custom-designed coffered ceiling that made the room feel elevated and timeless all at once.
Challenges We Faced While DIY Coffered Ceiling
Although the project went mostly smoothly, we had a few hiccups along the way. Probably one of the biggest challenges was making sure that all of the pieces were level and aligned, particularly when we were installing the beams and trim.
Some pieces did not fit perfectly as we had planned them, so we had to make quick adjustments by cutting pieces down or repositioning them until they fit perfectly.
Another thing was painting the ceiling to be even. The problem was that we had beams all around the edges, so we had to be careful not to get paint on the walls and the trim.
A steady hand and the right brushes helped a lot here.
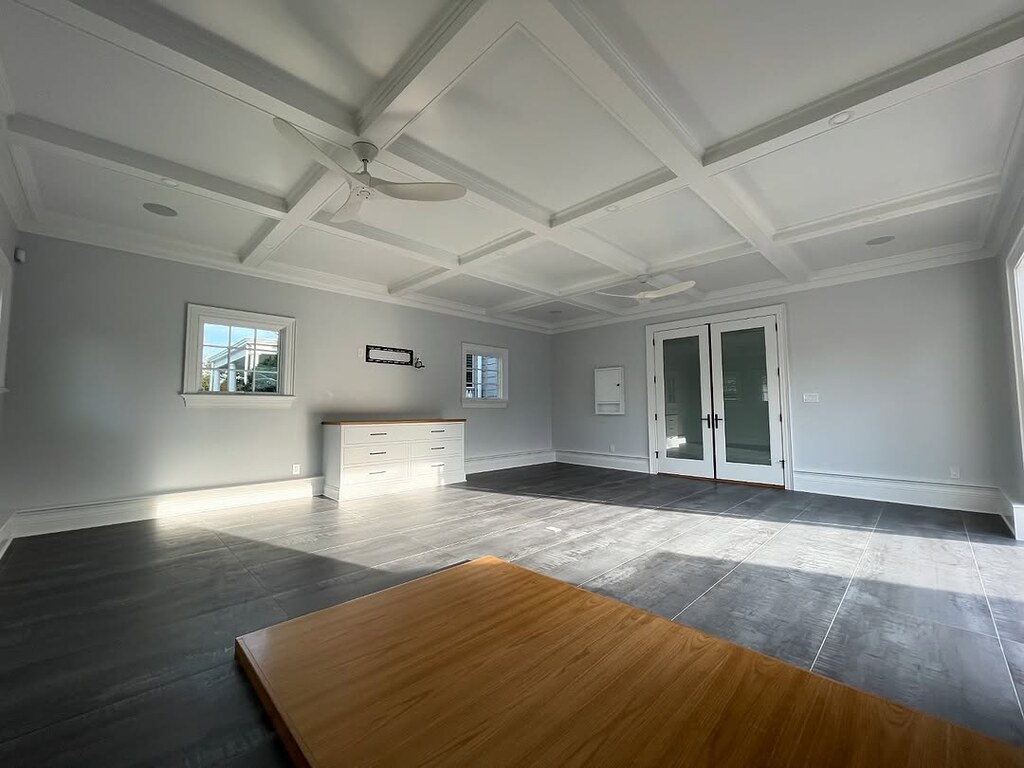
The Final Reveal of Our DIY Coffered Ceiling
Finally, the moment we had all been waiting for: was the big reveal. Stepping back and looking at the finished ceiling, we couldn’t believe how much it changed the look and feel of the room.
The coffered ceiling made the space feel more expansive and sophisticated, and the light paint and warm wood tones created a perfect balance.
The best part was the knowledge that we created this lovely, customized feature together with our family. It made our room change, and it made us remember those moments we spent working as a team to make our home something we are more proud of.
FAQs
What is a coffered ceiling?
A coffered ceiling features a grid of recessed panels framed by beams, adding architectural interest to flat surfaces. This elegant element transforms ordinary rooms into sophisticated spaces with dimension and character. It offers homeowners a cost-effective way to elevate their interior design without major renovation.
What materials do I need for a DIY coffered ceiling?
Gather MDF or plywood planks, crown molding, perimeter trim, wood filler, paint, primer, and caulk. Essential tools include a tape measure, miter saw, drill, nail gun, and level. Quality materials ensure professional results and longevity, while proper tools make installation much smoother.
How do I plan the layout for my DIY coffered ceiling?
Measure your ceiling dimensions and mark the center point. Create a grid using chalk lines and determine panel size based on room proportions—larger spaces suit 4×4 foot panels, smaller rooms work with 3×3 foot squares. Double-check all measurements to prevent awkward gaps or asymmetrical patterns.
How difficult is it to install a DIY coffered ceiling?
This project requires moderate carpentry skills, with challenges in maintaining level beams and making precise cuts. With proper planning and basic tools, most homeowners can complete the job over a weekend or two. Patience during measurement and installation phases yields the best results.
How much does a DIY coffered ceiling cost?
Expect to spend $500-$1,500 depending on room size, materials, and design complexity. This represents significant savings compared to professional installation ($3,000-$5,000+). MDF offers budget-friendly options, while real wood adds authentic texture at higher cost. Quality finishes matter most for visual impact.
What are common mistakes to avoid with DIY coffered ceilings?
Take time with measurements inaccurate dimensions create visible flaws. Level each beam carefully, as crooked lines stand out dramatically. Purchase extra materials for inevitable mistakes. Allow proper drying time between paint coats. Secure beams firmly to prevent future sagging or separation from the ceiling.
Can I install a DIY coffered ceiling in rooms with low ceilings?
Yes! Use shallow beams (2-3 inches deep) for low ceilings. Choose white or light colors to create an illusion of height. Implement a simpler grid pattern with fewer, larger panels. This approach adds architectural interest without making your space feel cramped or overwhelming.
How do I finish my DIY coffered ceiling for the best look?
Seal gaps with caulk and wood filler before sanding smooth. Apply primer for even coverage. Try contrasting colors between beams and panels for drama, or matching shades for subtle sophistication. Consider LED lighting along perimeters for ambiance. Stained wood creates warmth while painted finishes offer clean, contemporary looks.
How long does it take to complete a DIY coffered ceiling?
Expect 2-4 weekends from start to finish. Planning takes 3-4 hours, frame installation 1-2 days, and adding molding another 1-2 days. Finishing work (filling, sanding, priming, painting) needs 2-3 days including drying time. Work at a steady pace rather than rushing through crucial steps.
How does a DIY coffered ceiling impact a room’s acoustics and value?
This architectural feature improves acoustics by reducing echo as panels and beams break up sound waves. It also increases home value, with potential ROI of 60-80% on installation costs. Real estate buyers typically view coffered ceilings as premium upgrades worth paying more for.