While the basement is the most undeserved space in any house, sometimes it can become one of the most stylish and functional rooms if done right.
Still, one significant opportunity stands out: making an enormous impact without burning a hole in your pocket—the ceiling. Imagine taking that dingy, underutilized space and turning it into a welcoming, eclectic space—all your own.
When my family and I decided to renovate our basement, we realized that having a good ceiling can make all of the difference in the ambiance.
Once a dark room filled to the brim with clutter, we transformed it into a cozy, rustic hideaway with nothing more than the installation of a wooden plank ceiling that added both character and warmth.
I’m here to share that project with you, as well as other great DIY basement ceiling ideas to give your space that extra lift, regardless of style or budget.
From wood’s warmth to painted ceilings and modern cleanliness, these ideas will help you maximize your basement, so you’re left with a space you’ll be proud of.
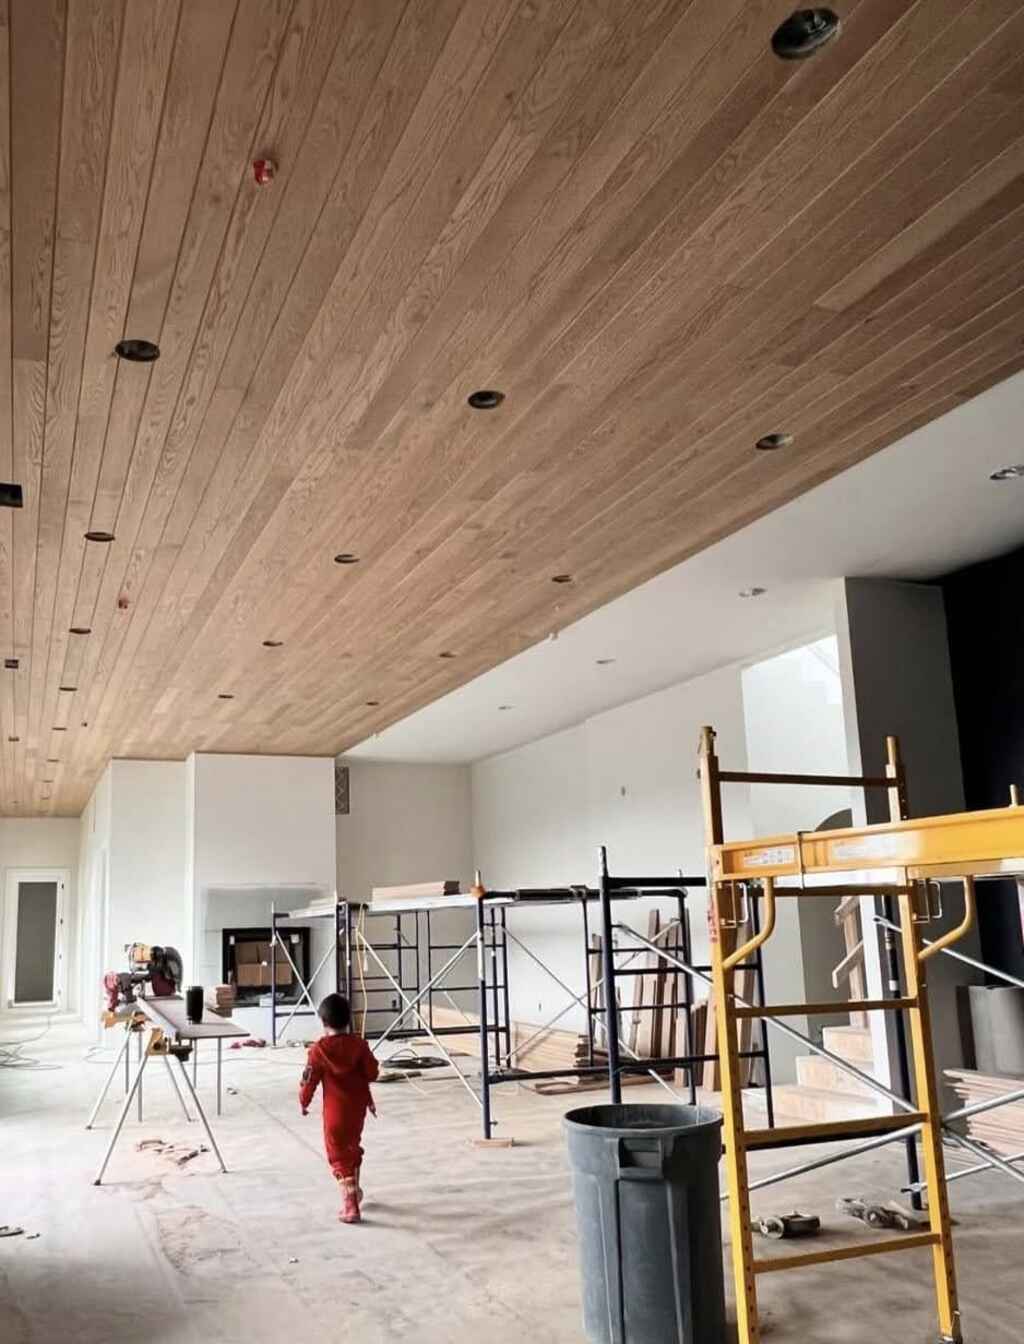
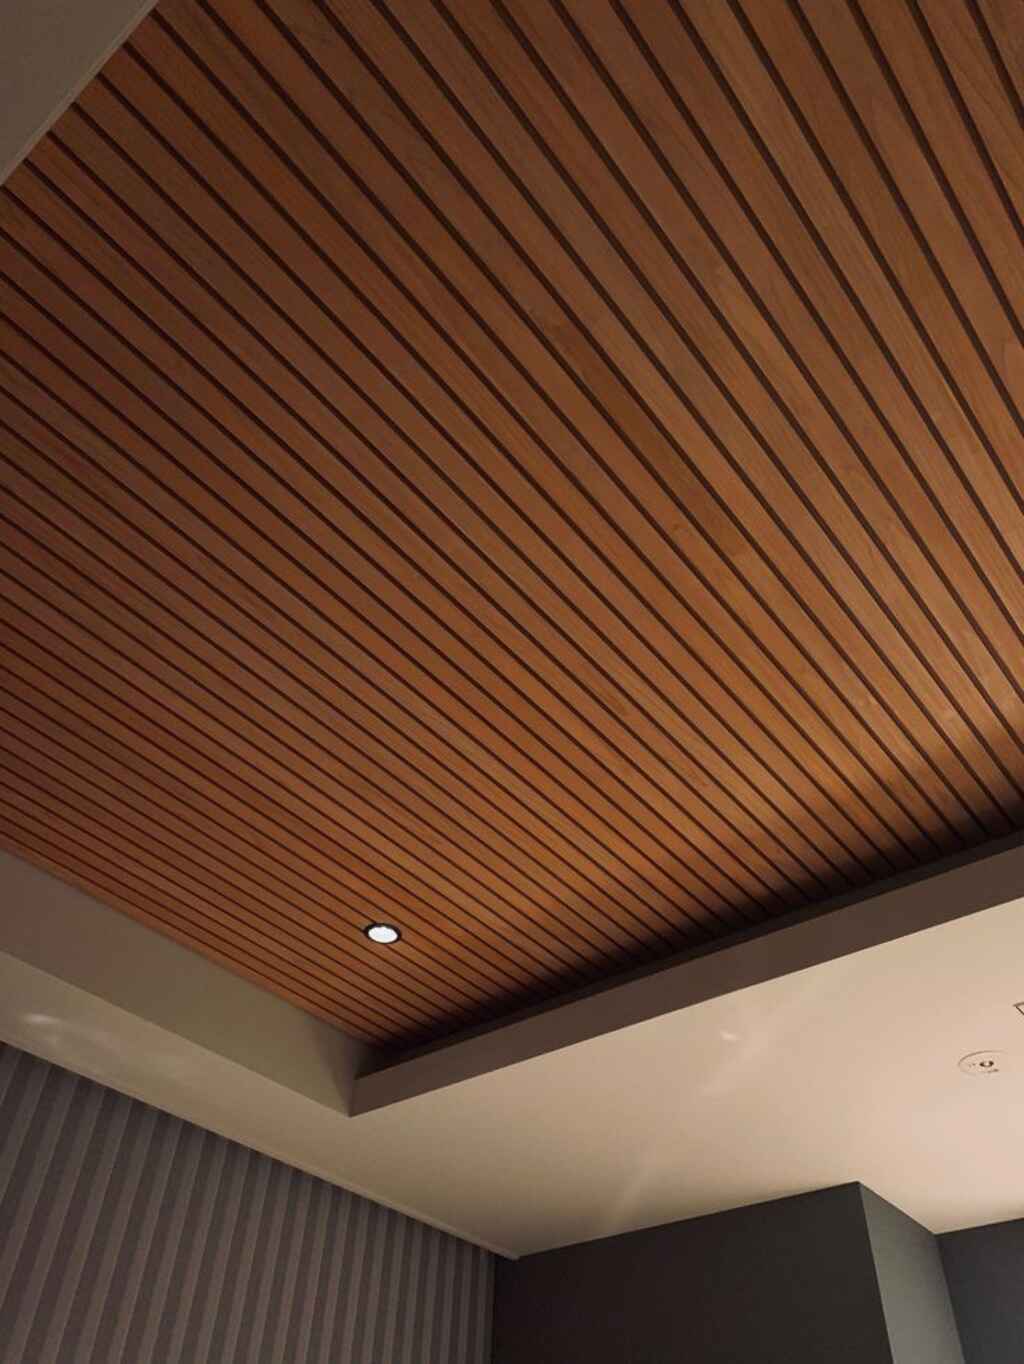
1. My Wooden Plank Ceiling Project: A Personal Touch of Rustic Charm
 I knew that when it was time to renovate our basement, it should feel inviting and connected to the rest of our house. We wanted our basement to be like our living room, not some little corner left behind.
I decided on a wooden plank ceiling to really add texture and warmth to the space. This was not for aesthetics alone—it was about producing an environment that I wanted to appear cozy, grounded, and unique.
Here’s the step-by-step process for transforming our basement ceiling using reclaimed wood:
Materials
- Reclaimed planks of varied tones, combining light and dark
- Measuring tape
- Saw-to cut the required length of wood
- Drill-to provide stability
- Wood screws or nails- to hammer in the planks onto the ceiling
- Wood finish stain-I personally used a warm honey finish to endow it with that rustic tone
- Sandpaper (for smoothing rough surfaces)
- Wood filler (for filling small gaps to give a smoother finish)
Instructions to Make:
Measured the ceiling, planned the pattern, and made sure the planks were going to fit in such a way that would create a uniform, symmetrical look. A staggered pattern was chosen to add a more dynamic, interesting visual appeal to the ceiling.
- Prepare the Wood: The reclaimed wood needed some preparation. I sanded each piece to remove splinters, then stained them with a warm honey finish to enhance the natural grain.
- Cut the Planks: Using a saw, I cut the planks to the lengths desired, making sure that each piece was cut to precision. I labeled each piece for easy installation.
- I installed the planks of the ceiling from the corner, using screws. Each plank I attached directly to the joists of the ceiling was also done with attention so that all the planks were level and aligned. The staggered design really made it have a very rustic feel.
- Finishing touches : With all the planks in position, I filled gaps with wood filler and touched up stain where necessary. Final touches were a quick dusting or residue removal.
Tips:
- Use a stud finder to locate ceiling joists and ensure your planks are securely attached
- Pre-drill holes in the wood to avoid splitting when screwing them into place.
- Mix woods or textures for a richer, more layered look, yet at the same time, natural and unique.
This wooden plank ceiling really transformed our basement from an unused space to the living room where we hang out and entertain, hence achieving a sense of fulfillment and warmth throughout the room.
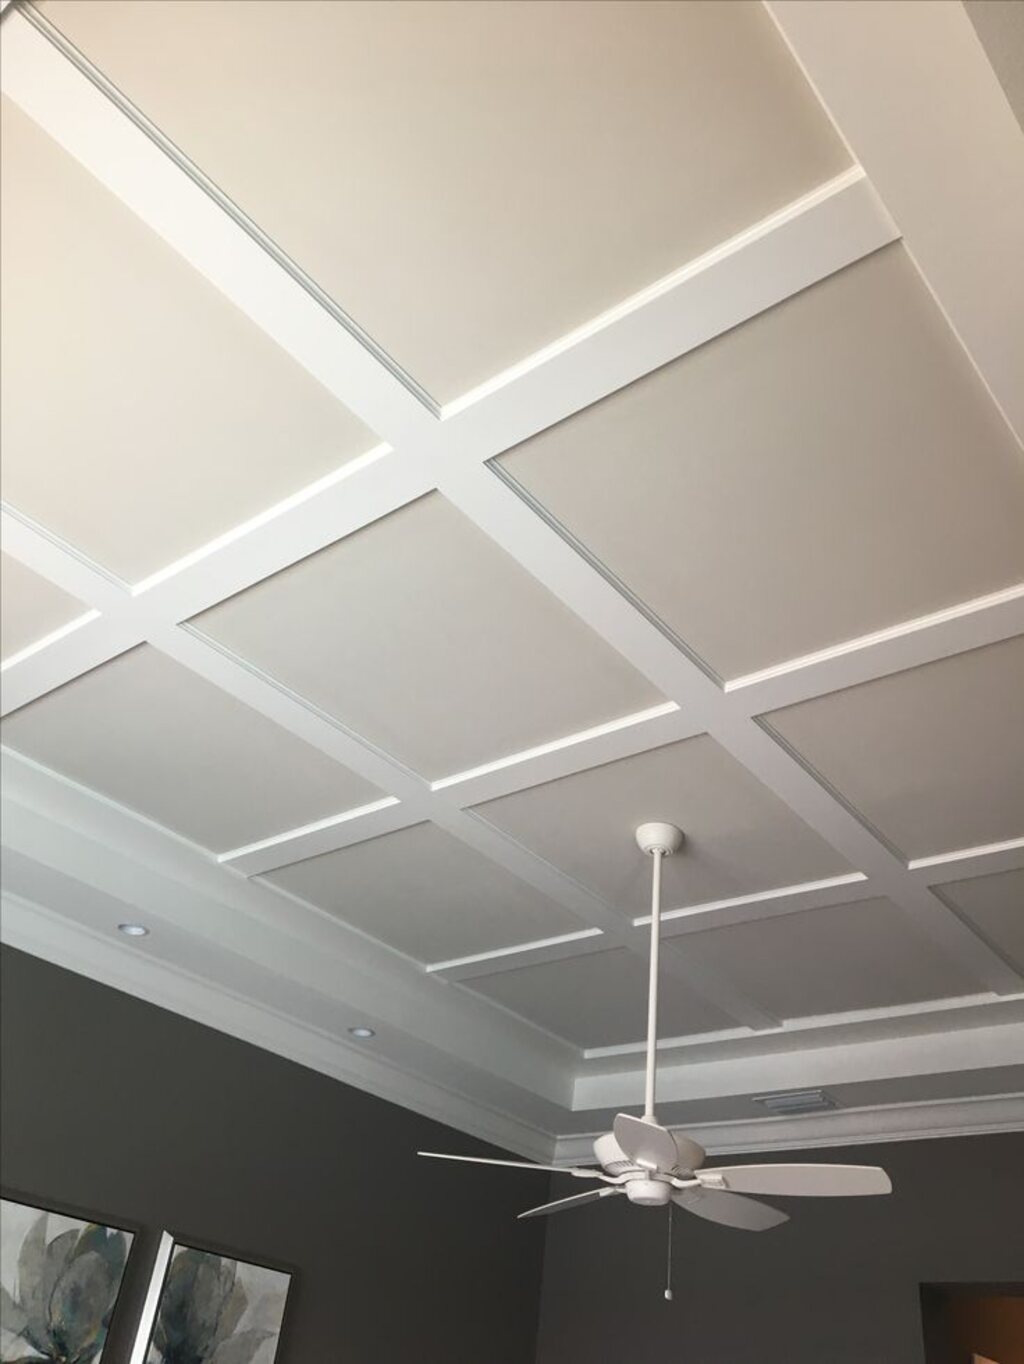
2. Painted Ceiling
Clean, modern, bold. Painting your basement ceiling is a cost-effective way to refresh the room, and it’s ideal for hiding imperfections like exposed pipes or beams.
Materials Needed:
- Paint (choose a color that complements your room’s theme—dark shades like black or deep gray hide imperfections, while whites and light colors make the space feel bigger)
- Paint sprayer or roller
- Painter’s tape (to protect walls and trim)
- Drop cloths (to protect the floor and furniture)
Steps:
1. Prep the Room:
Lay drop cloths or plastic sheets on the floor to cover any drips. Painter’s tape around edges of walls and other trim and fixtures that you don’t want painted
2. Clean the Ceiling:
Clean off the ceiling, removing any dust, cobwebs, or debris. The paint will not adhere if this isn’t done.
Spot clean any grease spots or stains on the ceiling with a gentle cleaner before painting.
3. Prime the Ceiling:
Use primer first if your ceiling is very dark or has stains. Apply it thinly with a paintbrush or sprayer, and let it dry before adding color.
4. Apply the Paint:
If using a sprayer, keep it a steady distance from the ceiling, and apply the paint evenly across it. Work from one side to the other. For a roller, apply long, even strokes to cover large areas.
Begin in one corner and work in sections so that your coverage will be even.
Let the first coat dry before applying a second coat. Darker ceiling colors may require multiple coats.
5. Inspect and Touch Up:
Inspect the paint when it has dried to see if there are any missed spots or areas that require touchup.
Carefully remove the painter’s tape and clean up any paint drips from the walls or trim.
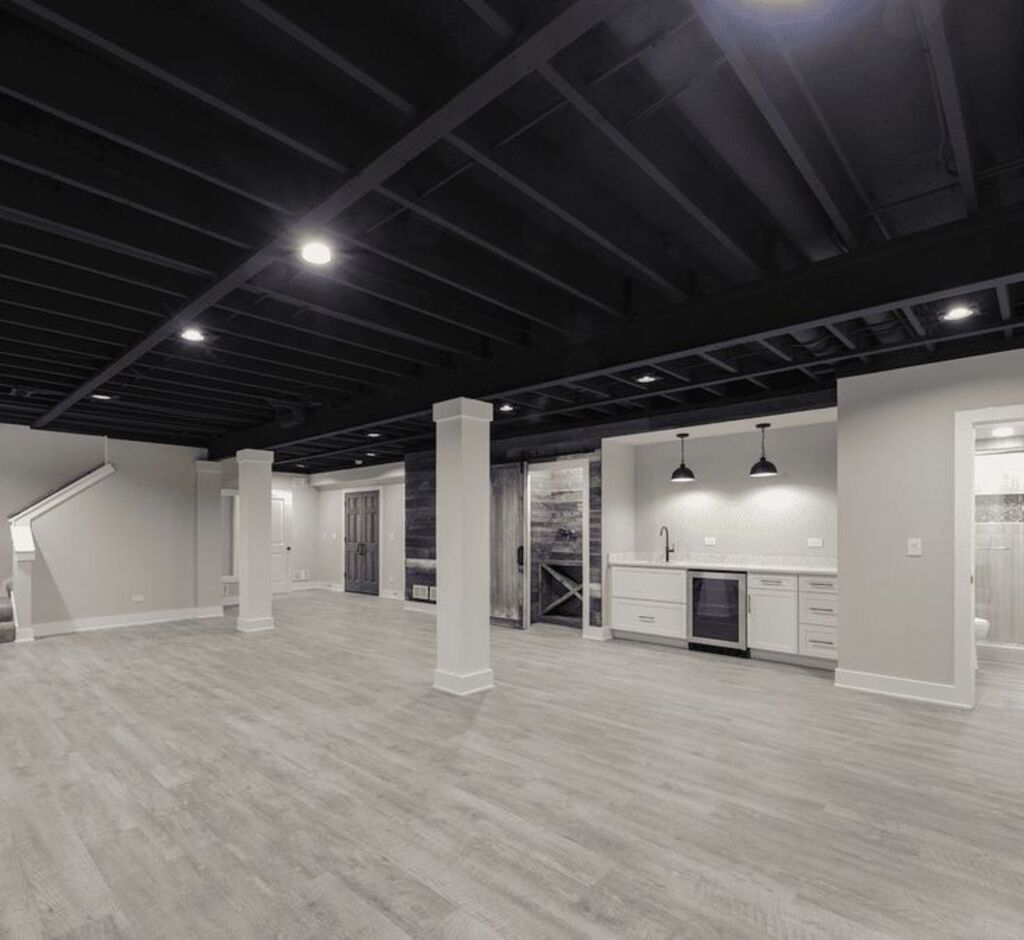
3. Drop Ceiling: Aesthetic and Practical
A drop ceiling can conceal ductwork and wiring for a smooth, clean appearance. And it is also easy to modify to add extra flavor.
Materials
- Drop ceiling grid kit
- Ceiling tiles (which come in a variety of textures and finishes)
- Saw (to cut the tiles to size if necessary)
- Suspension wires
- Drill (to attach the grid)
- Tape measure
1. Install the Suspension System:
First measure the dimensions of the room and mark the area that the ceiling is going to hang. Install suspension wires along the joists of the ceiling, ensuring the wires are installed equidistant according to the installation instructions on the grid kit.
Attach the suspension wires to the joists of the ceiling using a drill.
2. Assembling the Grid:
Once the suspension wires are in place, assemble the grid frame according to the instructions. Make sure that the grid is level and secured before moving on to the next step.
3. Cut the Ceiling Tiles:
measure the size of each tile to fit into the grid sections You may have to cut tiles to fit in around the edges of the room. A saw or utility knife can be used for any trims on the tiles.
4. Insert the Tiles into the Grid:
Put the tiles into the grid system, starting from one corner of the room to the other side.
Ensure that every tile is fitted tightly and lies flat.
5. Finishing Touches:
Add some lighting fixtures or customized tiles for a better design touch. Check all tiles to ensure they are well fixed and lying flat
4. Beadboard Ceiling: Classic, Elegant, and Timeless
Beadboard ceilings offer a classic, timeless look that can elevate any basement. It’s a simple yet effective way to add texture and visual interest.
Materials Needed:
- Beadboard panels
- Adhesive or nails (to secure the panels)
- Measuring tape
- Saw (to cut the panels to size)
- Paint (to finish the panels)
Steps:
1. Measure the Ceiling:
Start by measuring the length and width of the ceiling to determine how many panels you’ll need. Mark the placement of each panel using a pencil to ensure they are evenly spaced.
2. Cut the Panels:
If necessary, use a saw to cut the beadboard panels to fit the dimensions of the ceiling. Beadboard panels come in various sizes, so it’s important to plan for any cuts needed at the edges of the room.
3. Apply Adhesive:
Apply a thin layer of adhesive to the back of each board panel. Instead, you can opt to use nails in order to attach the panels, which means they will be properly fixed to the ceiling.
4. Application of the Panels:
Begin from one corner of the room, working in your direction. Attach each panel consecutively, one after the other. You will now use your level to ensure that your panels are properly lined and straight.
5. Completion of the Finish
Apply a coat of paint after ensuring that all the panels have been properly installed. You can choose a light color for a bright, airy feel or a darker shade for a more dramatic look. Optionally, add crown molding to the edges for an elegant, polished finish.
6. Additional Tips for All Ceiling Designs:
Always work with a helper if possible, especially for lifting and installing heavy materials like wood planks or drop ceiling grid systems. Be slow when you are taking your measurements.
Everything should be well fitted this time, so there will not be much hustle when you eventually need it.
Use protective gear while making any cuts to the ceiling; goggles and a dust mask.
Conclusion
Upgrading your basement ceiling may not be such a daunting and costly task after all. No matter how simple the job, whether installing beadboard panels, a rustic wood ceiling, or merely painting, you can add so much character and functionality to a space.
Try my wooden plank ceiling project as an inspiration or one of many other creative ways to suit your style. A little effort and creativity can go a long way in turning your basement into a functional, stylish area that you’ll enjoy for years to come.
Ready to get started? Let’s dive into these DIY ceiling transformations!
FAQs
What is the cheapest DIY ceiling idea for a basement?
Painting an exposed ceiling is the most affordable option. You’ll only need paint, a roller or sprayer, and some painter’s tape. This creates a sleek, industrial look that adds character to the space.
What’s the best ceiling option for a low basement ceiling?
Beadboard panels, fabric-draped patterns, and painted ceilings are all excellent options for a low basement ceiling. All these options help create an illusion of height as they attract the eye upwards rather than adding volume to the ceiling.
How can I soundproof my basement ceiling?
Acoustic tiles or soundproofing insulation should be installed in order to reduce noise. It would also help to add thick rugs or carpets in the space above your basement, which could help absorb the sound.
How do I brighten a dark basement with ceiling design?
How do I make a dark basement a brighter place with ceiling design? Choose light-colored paints, reflective ceiling tiles, or beadboard panels. Adding recessed lighting or track lighting will also assist the general illuminating function of the space as well as give it an opened-up look and be very welcoming.


