
Creating an organized baby closet is more than just a Pinterest-worthy project, it’s a practical necessity for busy parents. When you’re juggling midnight feedings and diaper changes, knowing exactly where to find that backup onesie becomes invaluable.
DIY organization systems offer two major advantages over store-bought solutions. First, they save money during an already expensive time in your life. Second, they allow you to create a space perfectly tailored to your specific needs and available area.
With a thoughtfully organized closet, you’ll spend less time hunting for essentials and more time enjoying precious moments with your little one. The peace of mind that comes from an efficient system is worth every minute spent planning and setting it up.
Let’s transform that chaotic baby closet into a functional, stress-reducing space—one simple step at a time.
DIY Baby Closet Efficiently
In this I will share the following steps, on how to organize a DIY Baby closet efficiently,
Step 1: Plan Your Closet Layout
Planning your baby’s closet layout is like creating a blueprint for stress-free parenting. Begin by taking precise measurements of the available space, width, height, and depth. These numbers will guide all your future organization decisions.
Next, mentally divide the closet into functional zones based on your daily routine with your baby:
- Everyday clothes zone: Place most-used items at eye level
- Diapering station: Group changing essentials together
- Seasonal storage: Position less-used items in higher or lower spaces
- Accessories area: Dedicate a spot for small items like socks and hats
The architecture of your closet significantly impacts your organization approach. A walk-in closet offers floor space for hampers and dressers, while a reach-in closet requires maximizing every vertical inch with door organizers and stackable solutions.
Think about your baby’s daily routine and organize accordingly. Which items do you reach for most frequently? Position these in prime “real estate” areas that don’t require bending or stretching.
Step 2: Declutter and Sort Baby Clothes
Babies grow at an astonishing pace, making regular closet decluttering essential for maintaining order.
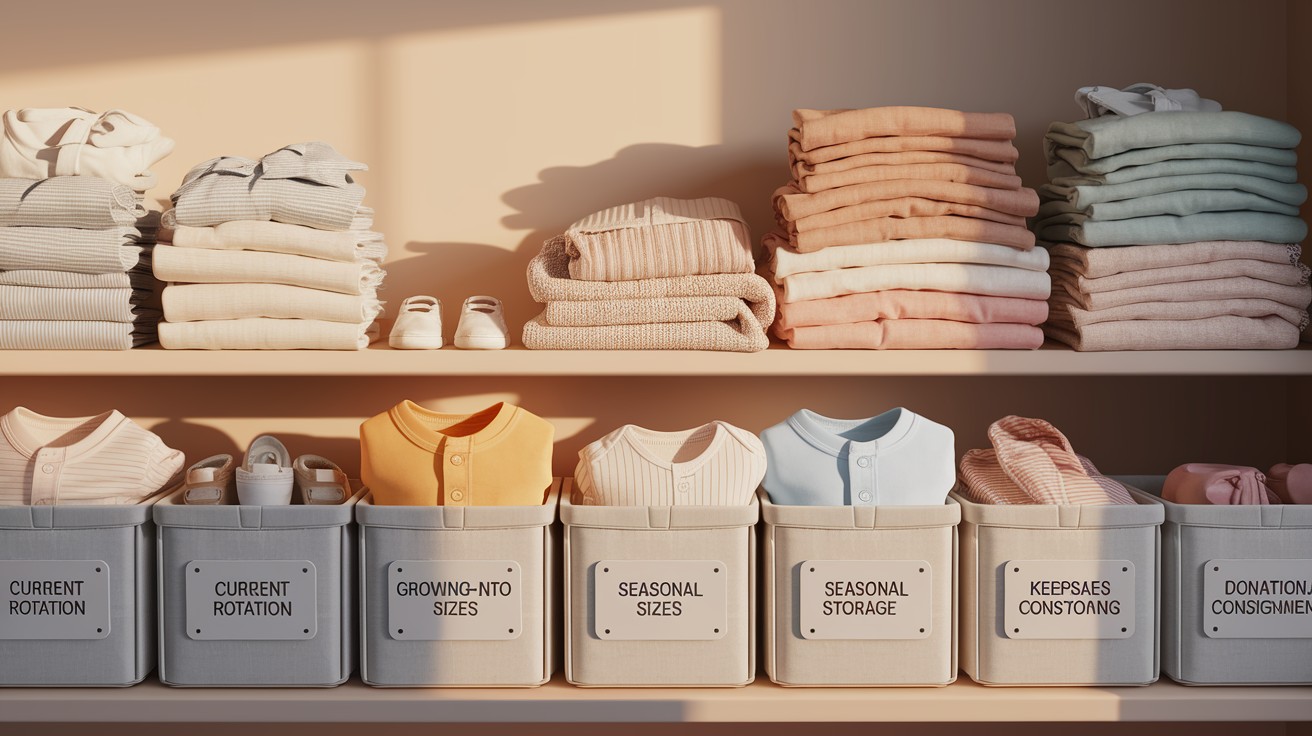
Start by emptying the entire closet and sorting everything into clear categories:
- Current rotation: Items that fit right now and match the current season
- Growing-into sizes: The next 1-2 size ranges your baby will need soon
- Seasonal storage: Off-season clothes that will eventually fit
- Keepsake items: Special outfits with sentimental value
- Donation/consignment pile: Outgrown or excess items
Create a “clothing progression system” where you can easily move items from storage to active use as your baby grows. Consider using color-coded bins or labels indicating sizes to simplify this process.
Be ruthless with duplicates. While having multiple onesies makes sense, twenty similar outfits creates unnecessary clutter. The reality is that babies outgrow clothes quickly, often before wearing everything in their wardrobe.
Store outgrown clothes in vacuum-sealed bags to save space, clearly labeled with size and season for future siblings or for donation.
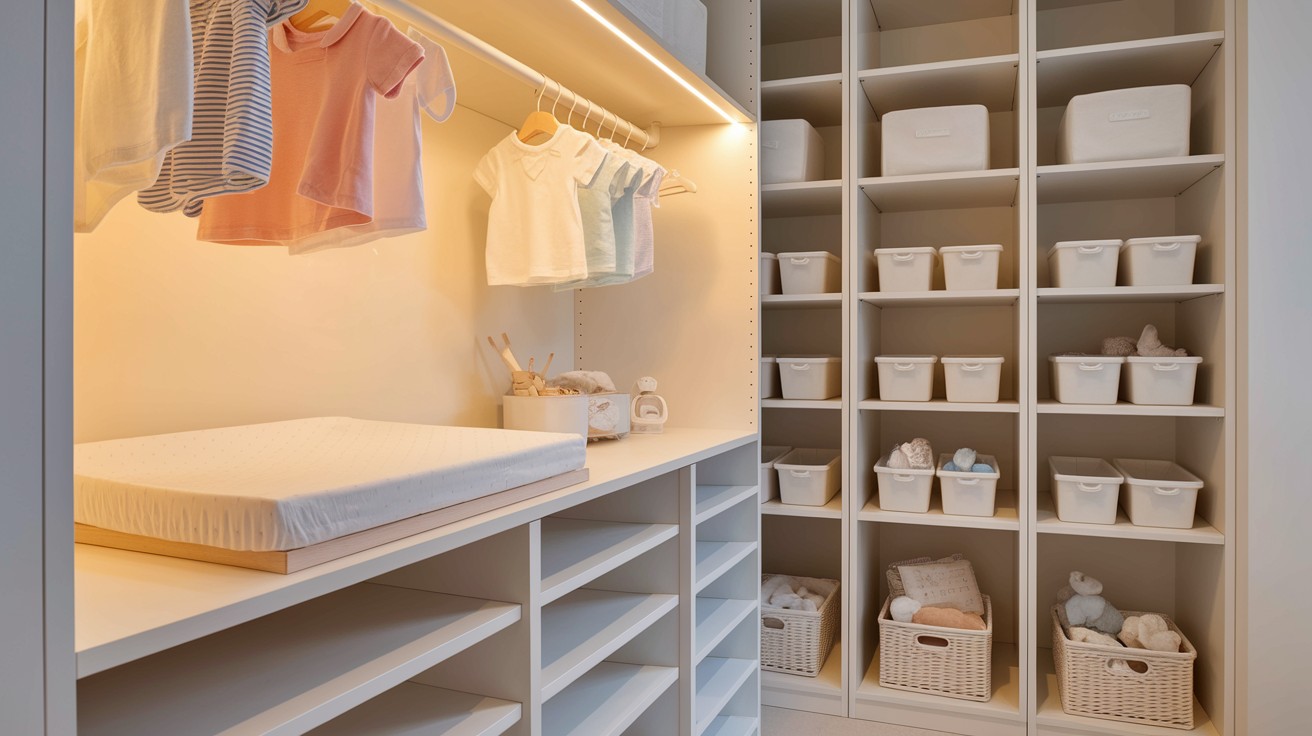
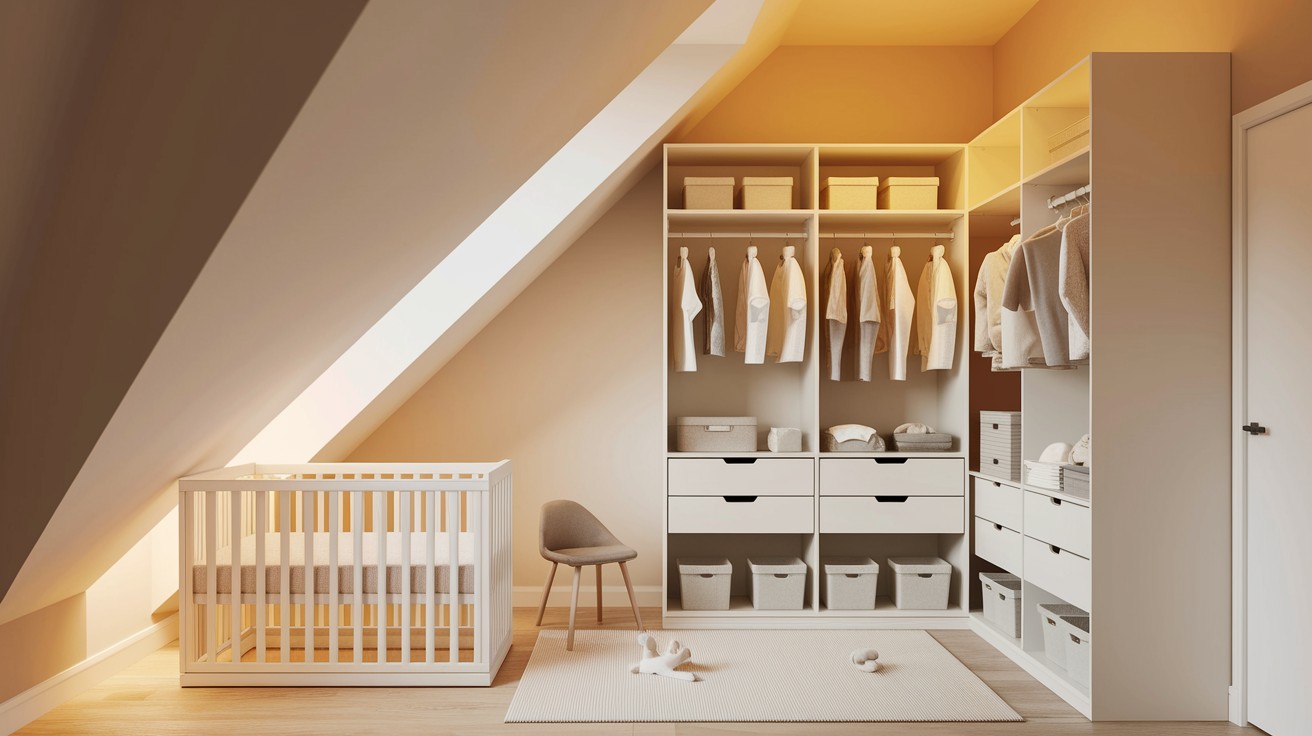
Step 3: Select the Right Storage Solutions
The foundation of an organized baby closet lies in choosing appropriate storage solutions that maximize function while minimizing visual chaos.
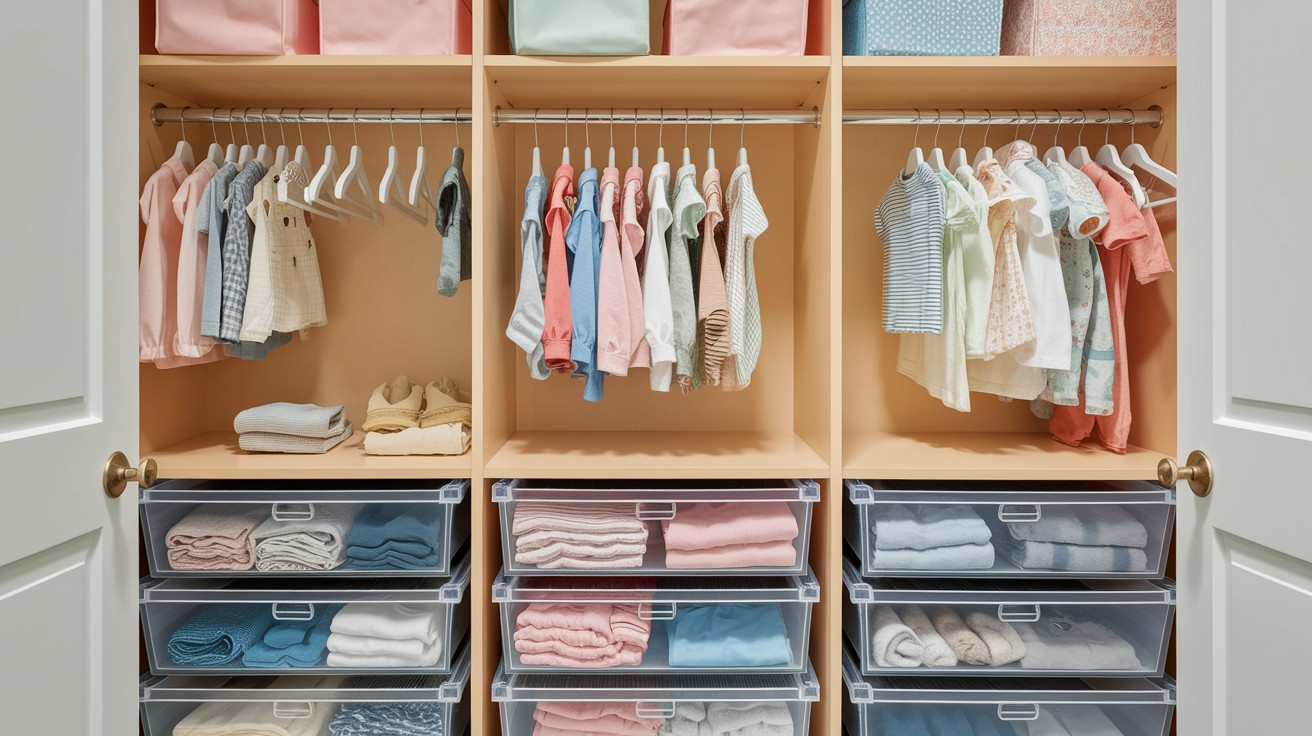
For hanging clothes, consider:
- Double-hang rods to multiply vertical hanging space
- Baby-sized hangers that prevent stretching tiny necklines
- Hanger dividers marked with sizes or age ranges
For folded items, invest in:
- Clear, stackable drawers for visibility
- Drawer dividers for separating tiny socks from mittens
- Fabric bins in different sizes for various categories
Labeling is perhaps the most underrated organizational tool. Use picture labels for non-readers helping with laundry, or color-coded systems that make it obvious where items belong. Consider temporary labels for size-specific storage that can be updated as your baby grows.
Choose storage solutions that can adapt as your needs change. Modular systems allow you to reconfigure components rather than starting from scratch when your baby’s wardrobe evolves.
Prioritize accessibility, storage solutions should make your life easier, not create additional obstacles when you’re holding a squirming baby.
Step 4: Optimize Vertical and Horizontal Space
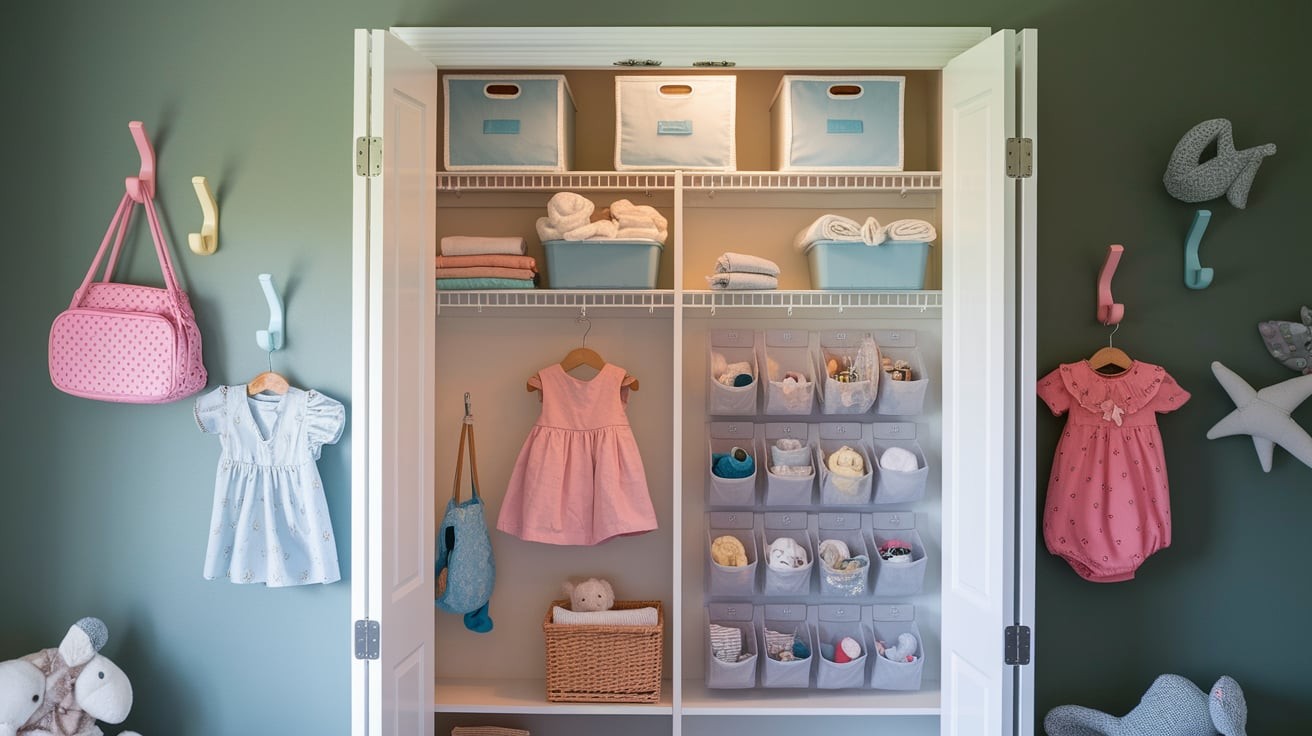
Vertical space optimization transforms even the smallest closet into a storage powerhouse. Examine your closet walls, door, and ceiling for untapped potential:
- Install adhesive hooks at various heights for:
- Diaper bags
- Special occasion outfits
- Tomorrow’s outfit (preset the night before)
- Utilize door space with:
- Over-the-door shoe organizers repurposed for baby supplies
- Hanging organizers with clear pockets for small accessories
- Custom-built narrow shelving on the inside of the door
Don’t overlook unconventional spaces. The area above the closet door can hold seasonal storage bins. The few inches between the closet side wall and dresser might accommodate a narrow rolling cart for diapering supplies.
For horizontal spaces, think beyond the traditional:
- Under-crib storage drawers for seasonal items
- Stackable bins with front openings for grab-and-go access
- Corner shelving units that transform unusable angles into functional storage
Remember that the most accessible spaces should contain daily essentials. Reserve higher shelves and deeper storage for items used less frequently or future sizes.
Step 5: Keep It Flexible for Growth
A baby’s needs change rapidly, making flexibility the cornerstone of sustainable closet organization. Design your system with growth in mind:
Invest in adjustable components:
- Expandable drawer dividers
- Shelving systems with movable heights
- Tension rods that can be repositioned as needs change
Incorporate room for developmental milestones. As your baby begins crawling and walking, you’ll need space for shoes and different clothing types. Leave some strategic empty space rather than filling every inch immediately.
Consider the long view when purchasing organization tools:
- Choose neutral storage bins that can transition to toy storage later
- Select shelving that works for books as well as baby supplies
- Install closet systems that can adjust from baby clothes to toddler outfits
Implement a regular review system, perhaps with each growth spurt or seasonal change, to assess what’s working and what needs adjustment. The most successful organization systems evolve alongside your child.
Remember that flexibility doesn’t mean lack of structure. Create a system with clear guidelines but built-in adaptability for inevitable changes.
Conclusion
An organized baby closet is more than a luxury, it’s a sanity-saving necessity for parents navigating the beautiful chaos of raising a child. The time invested in thoughtful organization pays dividends during those bleary-eyed midnight changes and hurried morning routines.
Your DIY organization system reflects your unique parenting journey. There’s no one-size-fits-all solution, but rather a personalized approach that addresses your specific space constraints and daily needs.
As your baby grows, your organization system will evolve, but the fundamental principles remain: accessibility, flexibility, and simplicity. The goal isn’t perfection but functionality that supports your parenting experience.
Remember that the best organization system is one you can maintain, even during the most challenging parenting moments. Start small, implement changes gradually, and celebrate the calm that comes from knowing exactly where that backup pacifier is hiding.
Frequently Asked Questions
When should I start organizing my baby’s closet?
Start during your second or third trimester, about 2-3 months before your due date. This gives you energy to complete the project before the baby arrives. If your baby is already here, begin with a simple system focusing on current necessities, and implement improvements during nap times.
How do I handle clothes of different sizes that I’ve received as gifts?
Create a size-progression system using labeled bins or drawers. Sort gifts by size, wash them first, and store in clearly labeled containers (0-3 months, 3-6 months, etc.). Keep the next size up accessible and store future sizes in higher areas. This prevents discovering outgrown clothes still with tags on.
What are the most essential storage items I should invest in first?
Prioritize these five basics:
- Size dividers for hanging clothes
- Clear storage bins with lids for future sizes
- Small drawer dividers for socks and accessories
- A closet-compatible hamper
- Multi-tier hanging organizers for vertical space
Build upon this foundation as your needs evolve.
How do I maintain organization with the constant influx of new baby clothes?
Follow a “one-in, one-out” rule once you have sufficient clothing. Set maximum numbers for each category like 8 onesies, 5 pants and stick to them. Schedule weekly 5-minute maintenance sessions and keep a donation bag in the closet for immediately storing outgrown items.
How can I involve other family members in maintaining the organization system?
Create an intuitive system with clear visual cues like color coding, picture labels, or simple text labels. Give caregivers a quick “tour” of essentials. For regular helpers, consider a one-page reference guide with photos. Make maintaining the system easier than creating new piles by ensuring storage is easily accessible.