
A well-organized pantry serves as the heart of an efficient kitchen, making meal preparation smoother and grocery shopping more purposeful.
When you can easily see and access your ingredients, cooking becomes less stressful and more enjoyable.
You’ll spend less time searching for items and reduce the frustration of buying duplicates of products you already own.
Deep pantry organization offers significant benefits that extend beyond simple storage.
You’ll minimize food waste by keeping track of expiration dates, save money by avoiding duplicate purchases, and maximize your storage capacity by using every inch effectively.
A systematic approach also helps you maintain inventory control and plan meals more efficiently.
The organization process involves three main phases: emptying and cleaning your pantry space, categorizing items by type and frequency of use, and implementing storage solutions that maintain order long-term.
This methodical approach ensures lasting results that make daily kitchen tasks more manageable and pleasant.
I understand you’d like me to create blog content for a deep pantry organization guide using the outlined steps, formatting it in paragraph form while avoiding all the banned words from your previous list.
Deep Pantry Organization: Step-by-Step Process
A comprehensive guide to organizing deep pantry spaces efficiently using strategic storage solutions and maintenance systems.
Step 1 – Assess and Clear Out Your Pantry

Start your pantry transformation by completely emptying all shelves and storage areas.
This comprehensive approach allows you to see exactly what you have and gives you a clean slate to work with.
Remove every item, from the smallest spice jar to the largest cereal boxes, and place them on a nearby counter or table where you can easily examine everything.
Once empty, thoroughly clean all shelves, walls, and corners using a mild detergent solution to remove dust, crumbs, and sticky residue.
Inspect the shelving structure for any damage, loose brackets, or areas that might need repair before reorganizing.
This initial assessment phase is crucial because it reveals the true capacity of your space and identifies any structural issues that could affect your new organization system.
Step 2 – Categorize and Sort Your Pantry Items
With all items removed, begin the sorting process by creating distinct groups based on food types and cooking purposes.
Gather similar items together such as baking supplies, canned goods, pasta and grains, snacks, condiments, and beverages.
This categorization makes it easier to determine storage needs and helps prevent duplicate purchases in the future.
As you sort, carefully check expiration dates on all products and set aside anything that has passed its prime.
Make three separate piles for items you plan to keep, donate to local food banks if still good, or dispose of safely.
This step often reveals forgotten items and helps you understand your actual consumption patterns, which will inform your future shopping and storage decisions.
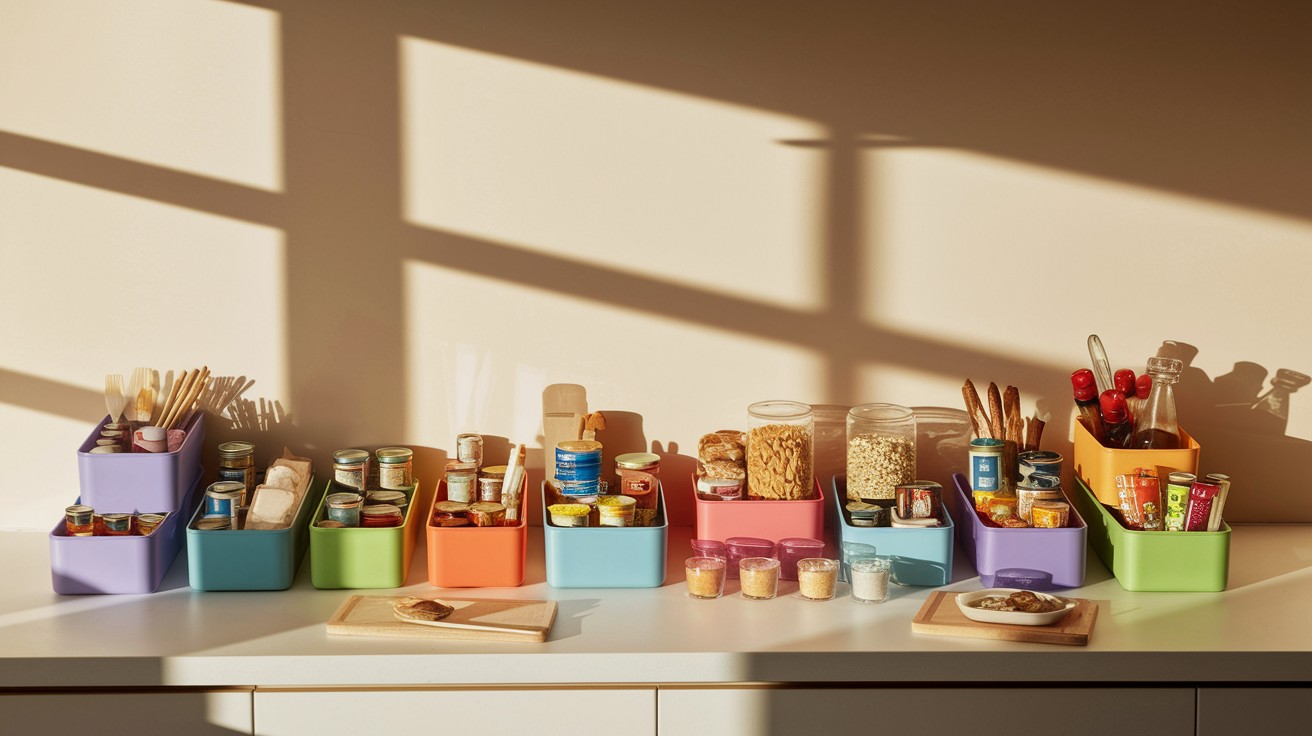
Step 3 – Choose the Right Storage Solutions

Select appropriate containers and organizers based on your pantry dimensions and the types of items you store most frequently.
Shelf-depth bins work well for standard pantry shelves and allow easy access to items, while cabinet-depth bins maximize space in deeper storage areas.
Choose plastic bins with comfortable handles for heavier items like canned goods, as they make retrieval much easier.
Incorporate lazy susans in corners or on deep shelves to bring hard-to-reach items within easy grasp.
Install spice racks on doors or walls to free up shelf space for larger items.
Add clear labels to all containers and designated areas to ensure everyone in your household can maintain the system and quickly find what they need.
Step 4 – Maximize Your Pantry Space
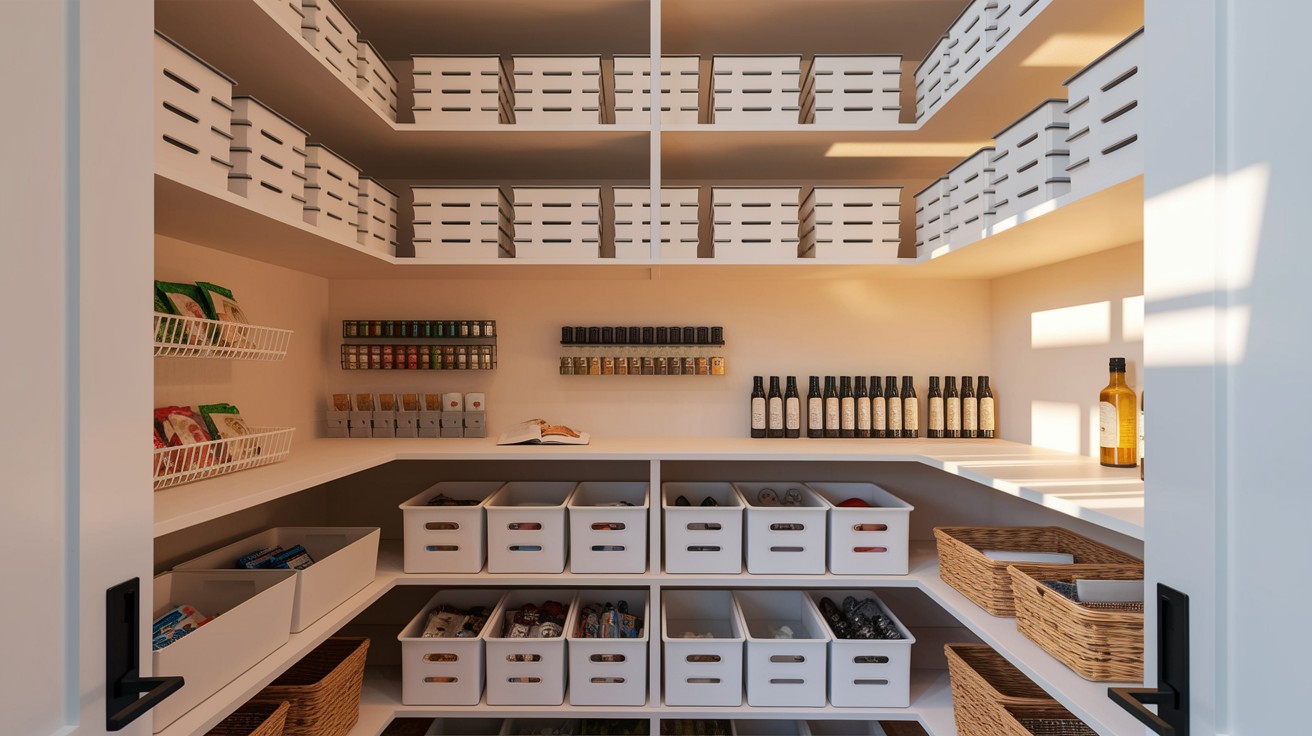
Make the most of your available storage by thinking vertically and utilizing every inch of space efficiently.
Stack bins and containers in stable configurations, ensuring heavier items remain on the bottom for safety and accessibility.
Install over-the-door racks to hold lightweight items like seasoning packets, small snacks, or cleaning supplies.
Consider wall-mounted solutions such as magnetic spice holders or narrow shelving units that can hold oils, vinegars, or frequently used condiments.
Use shelf risers to create additional levels within existing shelves, effectively doubling your storage capacity without requiring major modifications to your pantry structure.
Step 5 – Arrange Items Strategically
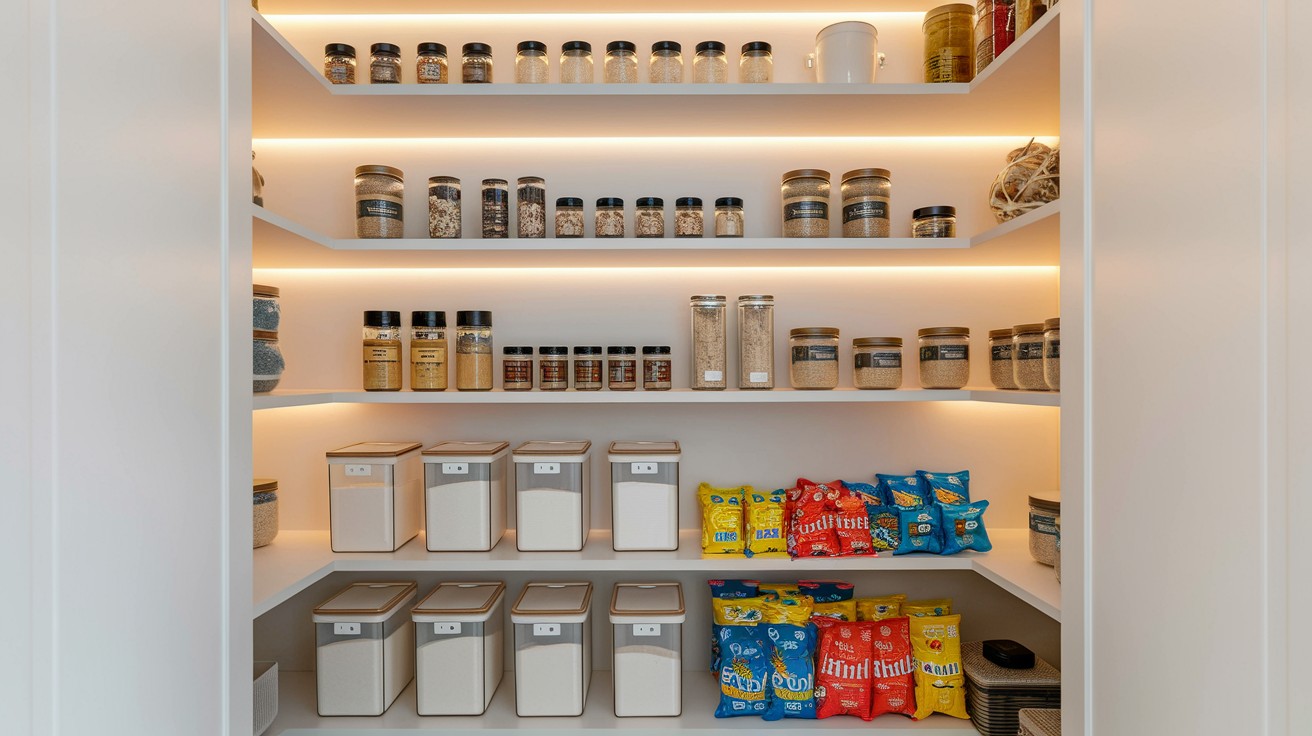
Position items based on frequency of use and practical considerations for daily cooking routines.
Place everyday essentials at eye level where they’re immediately visible and easily accessible without reaching or bending.
Store heavier items like large containers of flour, rice, or canned goods on lower shelves to prevent strain and reduce the risk of dropping items.
Keep snacks and grab-and-go items in easily accessible locations, particularly if you have children who need to reach them independently.
Reserve higher shelves for special occasion items, seasonal products, or backup supplies that you don’t need regularly.
This strategic placement reduces daily frustration and makes meal preparation more efficient.
Step 6 – Maintain Your Organized Pantry

Establish a maintenance routine to preserve your newly organized system and prevent it from reverting to chaos.
Schedule monthly or quarterly cleanouts to remove expired items, reorganize categories that may have become mixed, and adjust your system as your needs change.
When restocking, take time to place items in their designated areas rather than just cramming them onto any available shelf.
Refill containers completely before opening new packages to maintain proper rotation and prevent waste.
Stay flexible and modify your organization system as your family’s eating habits, cooking frequency, or pantry contents change over time.
Regular maintenance prevents small issues from becoming major reorganization projects.
Tips for Long-Term Pantry Organization Success
Maintaining an organized pantry requires developing simple daily habits that make organization feel natural, such as immediately returning items to their designated spots after use and implementing a “one in, one out” policy for rotating older products first.
Monitor your inventory regularly to prevent overstocking by keeping a running grocery list and checking contents before shopping to avoid duplicate purchases while setting reasonable limits for bulk items based on actual consumption patterns.
Update labels and containers as needed when they become worn or when your family’s eating habits change, replacing damaged storage solutions and upgrading to better options as your budget allows.
Involve all family members in maintaining order by assigning age-appropriate organizational tasks, teaching children where items belong with visual cues like picture labels, and holding brief family meetings to discuss challenges and brainstorm solutions together while establishing clear expectations and recognizing efforts to keep the system functioning smoothly.
Conclusion
Deep pantry organization transforms your kitchen experience by creating efficient storage systems that save time, reduce food waste, and eliminate the frustration of searching through cluttered shelves.
When everything has a designated place and you can easily see what you own, meal planning becomes simpler and grocery shopping more focused.
The benefits extend beyond just appearance – you’ll save money by avoiding duplicate purchases, maximize your storage capacity, and maintain better control over expiration dates.
Starting your pantry organization project today will immediately improve your daily cooking routine and create lasting positive changes in your kitchen workflow.
Even spending just one afternoon implementing these strategies will yield results you’ll appreciate every time you prepare meals or search for ingredients.
For optimal results, consider investing in quality storage containers, lazy susans, and labeling systems specifically designed for pantry organization.
These recommended products will help you maintain your newly organized space and ensure your system remains functional for years to come.
Frequently Asked Questions
How often should I reorganize my deep pantry?
Complete reorganization should happen every 3-4 months to maintain efficiency and remove expired items. However, quick weekly maintenance sessions help prevent clutter from building up and keep your system functioning smoothly.
What’s the best way to store bulk items in a deep pantry?
Use clear, airtight containers with secure lids to keep bulk items fresh and visible. Label containers with contents and purchase dates, and place frequently used bulk items on easily accessible shelves.
Should I keep original packaging or transfer everything to containers?
Transfer dry goods like cereals, pasta, and snacks to clear containers for better visibility and freshness. Keep canned goods and items with important nutritional information in their original packaging for reference.
How do I prevent items from getting lost in the back of deep shelves?
Install pull-out drawers or use bins with handles to bring back items forward easily. Lazy susans work well for corners, and regular rotation of stock ensures older items get used first.
What’s the most efficient way to categorize pantry items?
Group items by meal type and cooking frequency rather than just food type. Create zones for breakfast items, baking supplies, snacks, and dinner ingredients to streamline meal preparation and shopping lists.