
Yes, you can absolutely paint pressure treated wood, but proper preparation makes all the difference between a lasting finish and peeling paint within months.
Many homeowners choose to paint pressure treated lumber for several reasons: to match existing home colors, protect the wood from weathering, or simply improve its appearance beyond the typical greenish tint.
Pressure treated wood presents unique challenges due to its chemical treatment and moisture content, but with the right approach, you can achieve professional-looking results that stand the test of time.
This comprehensive guide will walk you through every step of the process, from initial preparation and drying time to selecting the best primers and paints, ensuring your project succeeds from start to finish.
What Is Pressure Treated Wood?
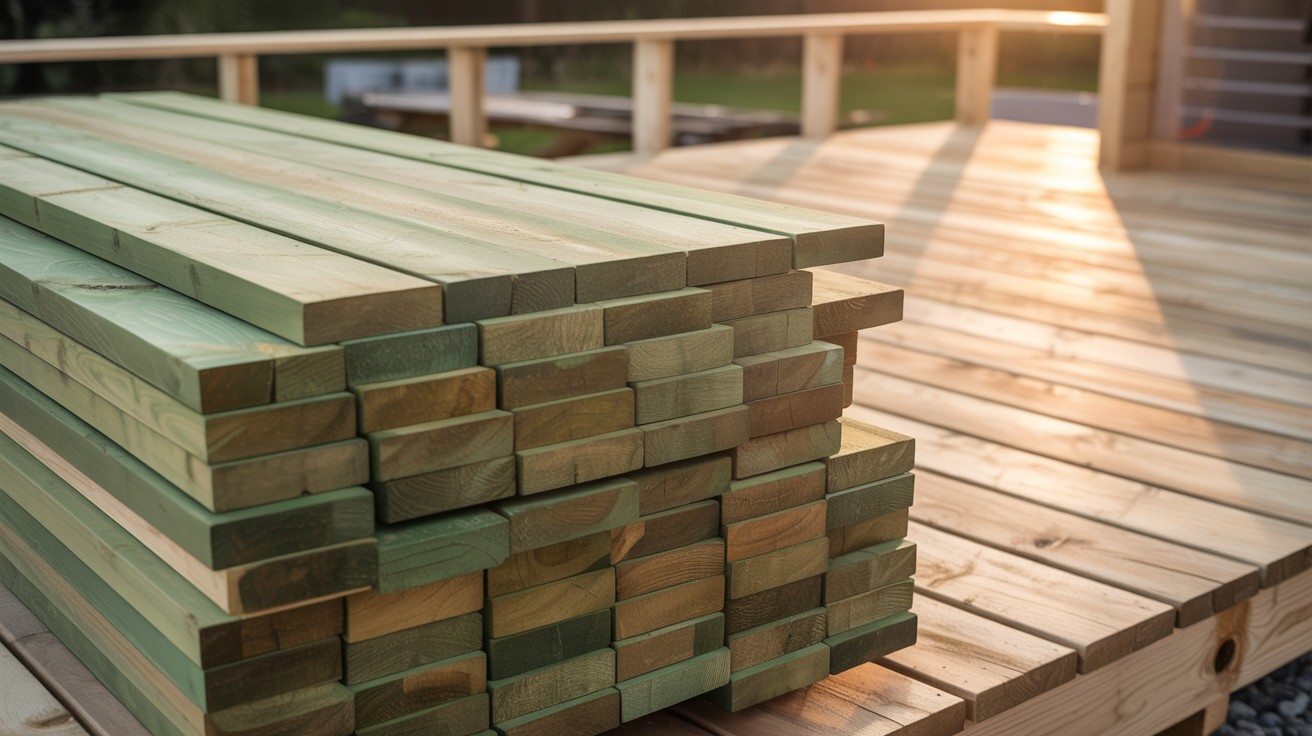
Pressure treated wood is regular lumber that has undergone a special treatment process to make it more durable for outdoor use. The most common type uses southern yellow pine as the base material.
How It’s Made
The treatment process involves placing lumber in a large chamber where chemical preservatives are forced deep into the wood fibers under high pressure.
These chemicals, typically copper-based compounds, penetrate throughout the wood to provide long-lasting protection against rot, decay, termites, and other wood-destroying insects.
The pressure treatment also helps the wood resist moisture damage, making it ideal for outdoor applications where regular lumber would quickly deteriorate.
Common Uses
You’ll find pressure treated wood in numerous outdoor construction projects.
Popular applications include building decks, constructing fences, creating outdoor furniture pieces, building storage sheds, installing deck railings, and constructing retaining walls.
Its resistance to weather and pests makes it the go-to choice for any project exposed to the elements.
Why Paint Pressure Treated Wood?
While pressure treated lumber comes with built-in protection, adding paint provides several compelling advantages for homeowners looking to improve both function and appearance.
Benefits of Painting
Painting pressure treated wood creates an additional barrier against harsh weather conditions, extending the wood’s lifespan even further.
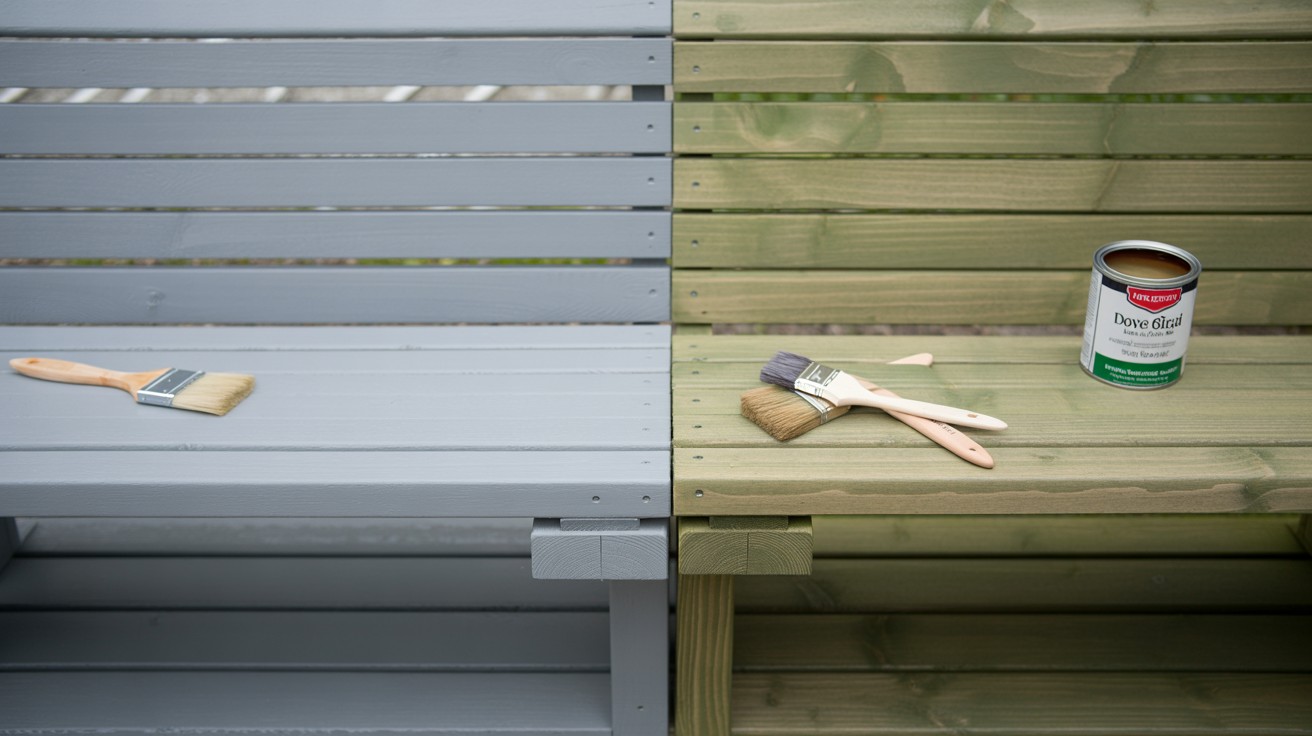
The treatment process often leaves lumber with an unappealing greenish or brownish tint that many homeowners find unsightly.
Paint completely covers these natural discolorations, allowing you to customize your outdoor structures to complement your home’s existing color scheme and overall design aesthetic.
Paint vs. Stain Comparison
Paint and stain each offer distinct advantages depending on your goals.
Paint completely conceals the wood grain, typically lasts between 3 to 7 years, and provides virtually unlimited color options to match any design vision.
However, stain allows the natural wood texture to show through, creating a more organic appearance.
Stain is generally easier to reapply when maintenance time arrives and usually lasts 2 to 3 years before requiring touch-ups.
When Can You Paint Pressure Treated Wood?
Timing is critical when painting pressure treated lumber. Rushing this step is one of the most common mistakes that leads to failed paint jobs and wasted time.
Importance of Drying Time
Newly treated wood contains high moisture levels from the chemical treatment process. This excess moisture needs to escape before paint can properly adhere to the surface.
Attempting to paint wood that’s still too wet will result in paint that peels, bubbles, or blisters within weeks or months.
The moisture trapped beneath the paint film can also cause the wood to warp or crack as it continues drying.
How Long Should You Wait?
Most pressure treated lumber requires 2 to 6 months of drying time before it’s ready for paint.
The exact timing depends on your local climate conditions, humidity levels, and the specific type of wood.
However, Kiln-Dried After Treatment (KDAT) lumber has already been dried following the chemical treatment, making it ready for painting much sooner than standard treated wood.
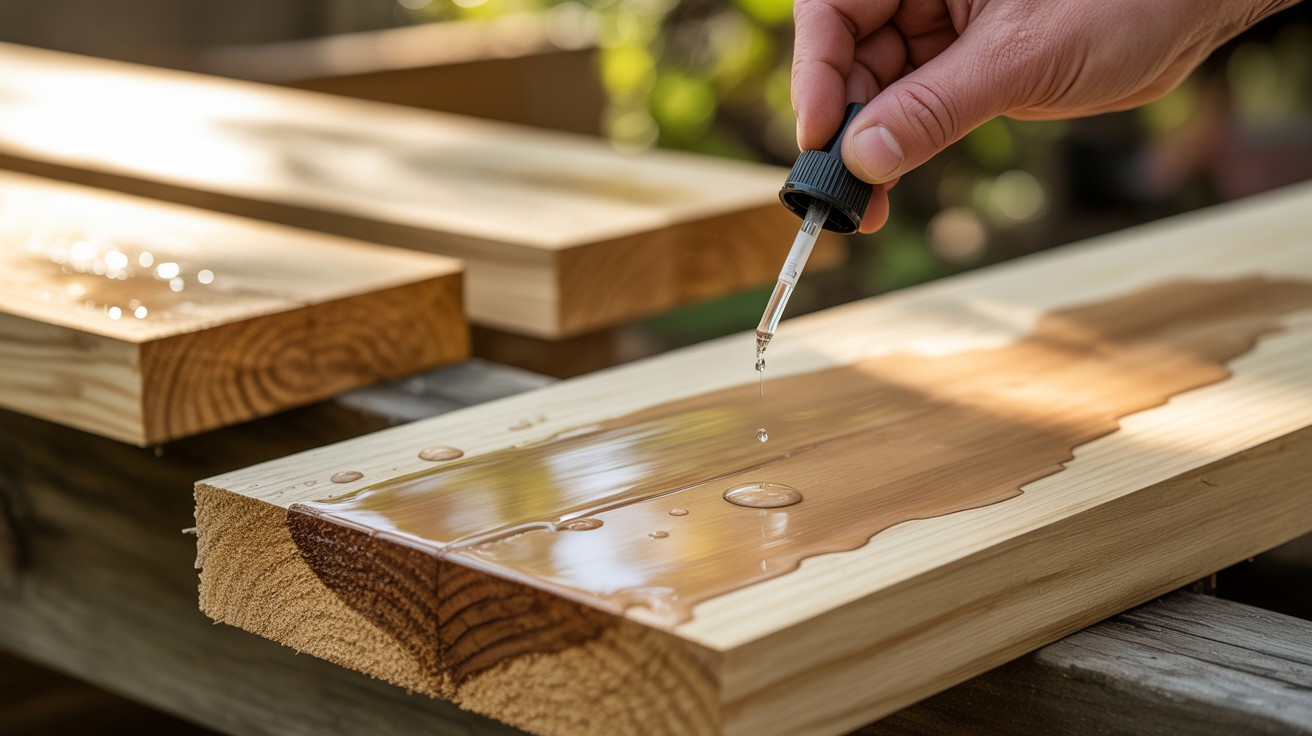
Water Test
- You can easily test if your wood is ready using a simple water test.
- Sprinkle a few drops of water onto the wood surface.
- If the water beads up and rolls off, the wood is still too wet for painting.
- If the water absorbs into the wood, it’s ready for primer and paint.
How to Prepare Pressure Treated Wood for Painting
Proper preparation is the foundation of any successful paint job. Even if your pressure treated wood has dried sufficiently, it still needs thorough cleaning before you can apply primer and paint.
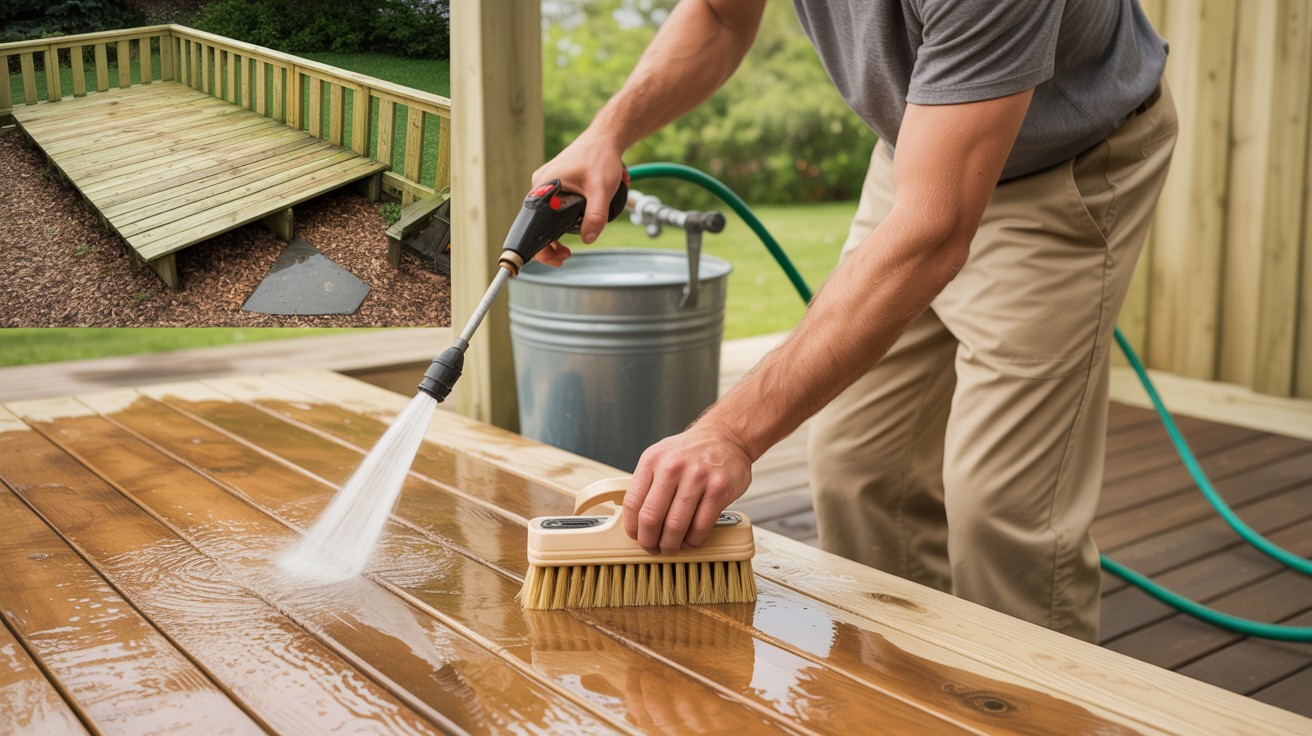
Cleaning the Surface
Start by removing all dirt, grime, mildew, and chemical residue that may have accumulated on the wood surface.
Mix warm water with a mild detergent or specialized wood cleaner, then scrub the entire surface using a stiff-bristled brush.
A garden hose works well for rinsing away soap and loosened debris. Pay special attention to areas that may have collected more dirt or staining.
Avoid using pressure washers during this cleaning process.
While they might seem like a quick solution, pressure washers can force water deep into the wood grain and potentially damage the surface fibers, creating an uneven texture that interferes with paint adhesion.
Drying Again After Cleaning
After cleaning, the wood needs time to dry completely once again. Allow at least 1 to 2 weeks of dry weather before proceeding with primer application.
This second drying period ensures that all moisture from the cleaning process has evaporated, preventing the same adhesion problems that occur when painting wet wood.
Priming Pressure Treated Wood
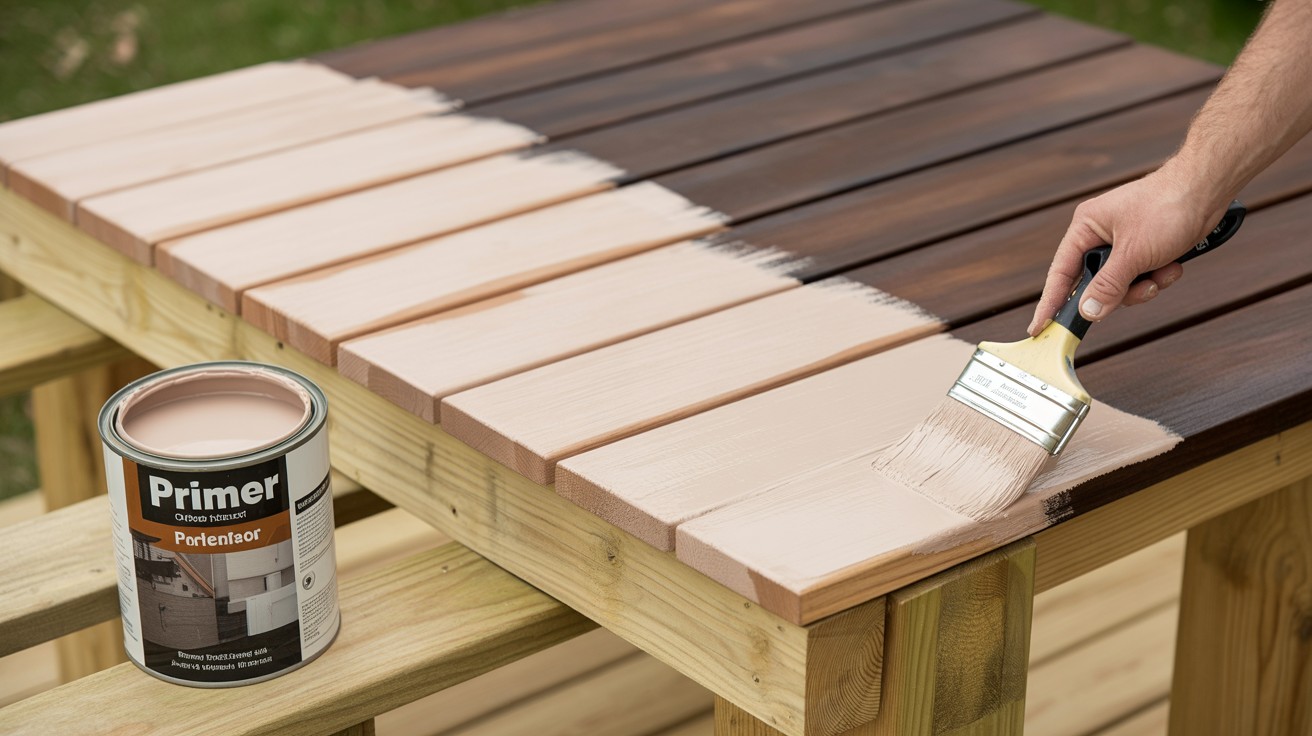
Never skip the primer step when painting pressure treated lumber. This crucial layer serves as the bridge between the treated wood surface and your finish coat.
Why Primer Is Essential
Primer creates a bonding surface that helps paint adhere properly to the chemically treated wood. Without primer, paint may not stick well to the smooth, treated surface, leading to poor coverage and premature failure.
Primer also seals the wood and prevents the natural tannins and chemicals from bleeding through your paint, which would create blotchy, uneven coloring or staining that ruins the final appearance.
The treated chemicals in the lumber can also react with certain paints, causing discoloration or adhesion problems.
A quality primer acts as a protective barrier that prevents these chemical interactions while providing the ideal surface for your topcoat.
Choosing the Right Primer
Always select a primer specifically formulated for exterior use, as it’s designed to withstand weather conditions and moisture exposure.
For lighter paint colors, white primer works perfectly and provides good coverage. However, if you plan to apply darker paint colors, consider having your primer tinted to a similar shade.
This tinted approach reduces the number of finish coats needed and helps achieve better color depth and uniformity.
Painting Pressure Treated Wood
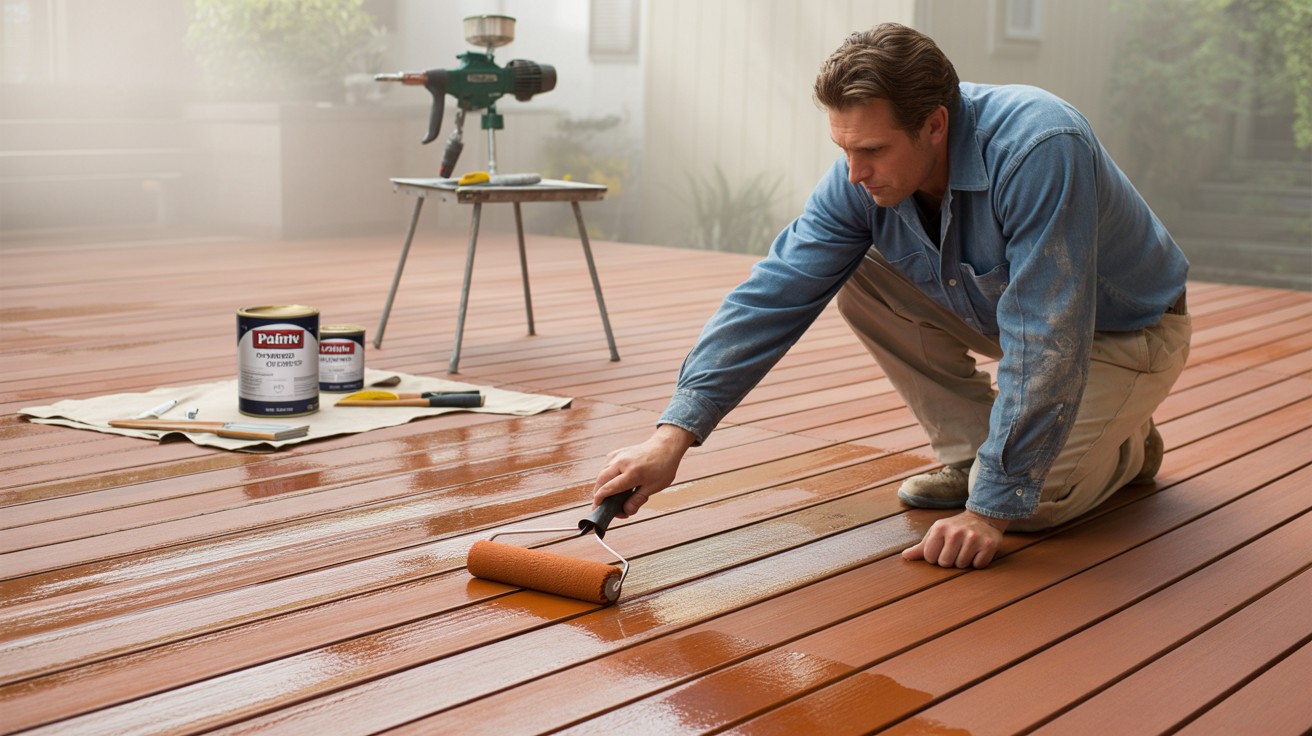
Once your primer has fully dried, you’re ready to apply the finish coat. The type of paint you choose makes a significant difference in both performance and longevity.
Best Paint Type
High-quality exterior latex paint is the optimal choice for pressure treated wood.
Water-based latex paints are specifically formulated to work well with treated lumber, providing excellent adhesion and long-lasting protection.
These paints allow the wood to breathe naturally, which prevents moisture from becoming trapped beneath the surface.
Avoid oil-based paints when working with pressure treated wood.
Oil-based formulas often have poor adhesion to treated surfaces and can trap moisture within the wood, leading to premature paint failure, bubbling, or peeling.
The chemicals used in pressure treatment can also interfere with oil-based paint curing.
Application Tips
Apply paint in thin, even coats rather than trying to cover everything in one thick application. Thin coats dry more uniformly and provide better adhesion than heavy applications.
Use rollers for covering large, flat surfaces efficiently, while brushes work best for detailed areas, corners, and edges.
Sprayers can also be effective for large projects but require more preparation to protect surrounding areas.
Allow adequate drying time between coats as specified by the paint manufacturer. Rushing this step can cause the second coat to lift or create an uneven finish.
Conclusion
Painting pressure treated wood is absolutely achievable with excellent results when you follow the proper steps.
The key to success lies in patience during the drying process and thorough preparation work before applying any coatings.
Taking time to clean, prime, and apply quality exterior latex paint will reward you with long-lasting protection and improved curb appeal for your outdoor structures.
Remember that rushing any stage of this process often leads to paint failure and the need to start over.
Each step builds upon the previous one to create a durable, attractive finish that withstands weather conditions for years to come.
If you’re not confident in your painting abilities or want guaranteed professional results, consider hiring experienced contractors who specialize in exterior wood finishes.
Their expertise ensures optimal durability and a flawless appearance.
Frequently Asked Questions
Can you paint pressure treated wood immediately after purchase?
No, you cannot paint pressure treated wood right away. The wood needs to dry for 2-6 months after treatment before it’s ready for primer and paint application.
What happens if you paint wet pressure treated wood?
Painting wet treated wood causes the paint to peel, bubble, or blister within weeks or months. The trapped moisture prevents proper paint adhesion and can lead to wood warping.
Do you need primer when painting pressure treated wood?
Yes, primer is absolutely essential when painting pressure treated wood. It helps the paint adhere properly and prevents chemicals from bleeding through and causing uneven coloring.
What type of paint works best on pressure treated wood?
High-quality exterior latex (water-based) paint is the best choice for treated lumber. Avoid oil-based paints as they have poor adhesion and can trap moisture in the wood.
How can you tell if pressure treated wood is ready to paint?
Perform a simple water test by sprinkling drops on the wood surface. If water beads up, it’s too wet; if it absorbs into the wood, it’s ready for painting.