
I know how frustrating sagging gutters can be. Water overflowing, foundation damage, and expensive repairs nobody wants to deal with.
Here’s the truth: Installing gutter hangers correctly isn’t complicated when you know the right steps.
In this guide, I’ll show you exactly how to install gutter hangers that actually hold up. You’ll learn which tools you need, how to space hangers properly, and the installation steps that prevent costly mistakes.
I’ve installed gutters on my own home and learned what works through real experience. No confusing jargon or unnecessary steps.
Whether you’re fixing loose gutters or installing new ones, this guide gives you practical advice that works. Let’s get those gutters properly supported so you can stop worrying about water damage.
What Gutter Hangers Are & Why Proper Installation Matters
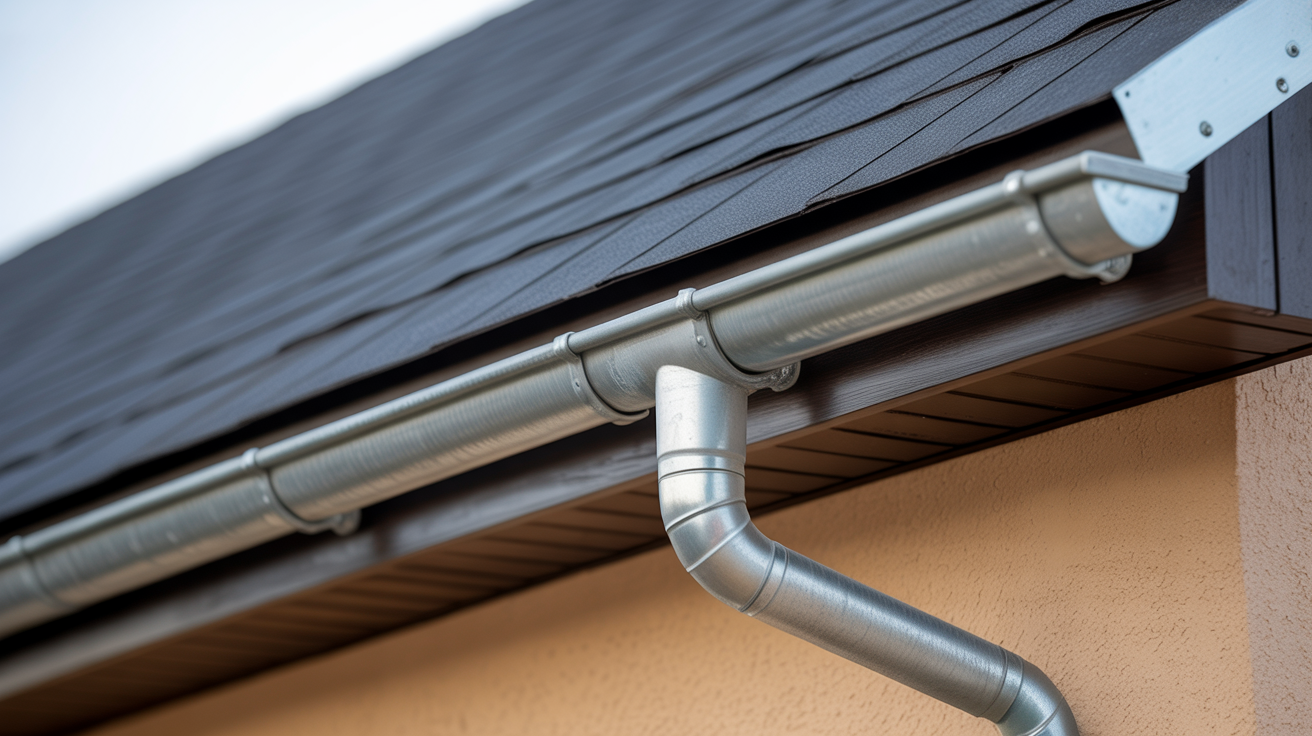
Gutter hangers are the brackets that attach your gutters to the fascia board. Think of them as the support holding up your gutter system.
Without solid hangers, gutters sag, pull away, or crash down during heavy rain. I’ve seen it happen to neighbors who cut corners.
Poor installation causes water backup. Your fascia boards rot from moisture. The gutters get damaged faster. You might face foundation problems, basement flooding, or landscaping erosion.
Fixing these problems costs way more than doing it right from the start.
Tools & Materials You Need

Here’s what you need:
- Sturdy ladder
- Power drill with bits
- 25-foot tape measure
- 2-foot level
- Chalk line
- Safety glasses
- Work gloves
- Gutter hangers
- Screws
- Pencil
Get a helper if possible. This job is easier with two people. Use a stable ladder on level ground. Safety matters more than speed.
Choosing the Best Type of Gutter Hanger
Hidden hangers sit inside the gutter. They’re invisible and look clean. I prefer these because they give good support without changing your home’s appearance.
Strap hangers wrap over the roof under shingles. They’re strong but only work during roofing projects.
Spike and ferrule systems are cheap but work loose over time. I don’t recommend them.
Bracket hangers mount to the fascia from below. They’re visible but really sturdy.
For most DIY jobs, I suggest hidden hangers with screws. They’re strong and easy to install. They work with K-style and half-round gutters.
Heavy snow areas need tougher hangers spaced closer.
The Best Way to Install Gutter Hangers
Here’s my step-by-step process that keeps gutters secure for decades.
Step 1: Inspect Existing Gutters & Fascia
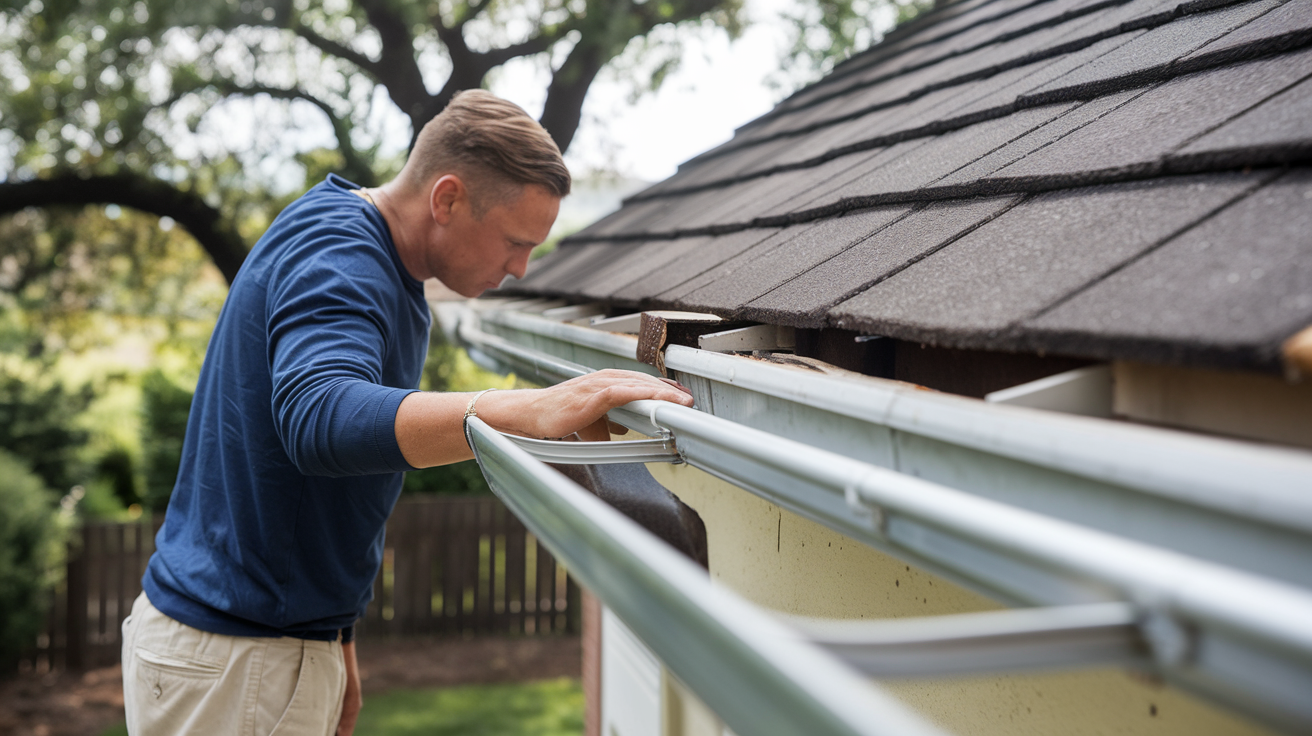
Walk around and check your fascia boards. Press on them. Soft spots mean rot. Replace those sections first.
Look for gutter damage. Cracks, rust, or sections pulling away need fixing before you add new hangers.
Find where your rafters are. Hangers screwed into rafters hold much better than fascia alone. Rafters sit 16 or 24 inches apart. Look for nail patterns or use a stud finder.
Step 2: Map Out Hanger Spacing
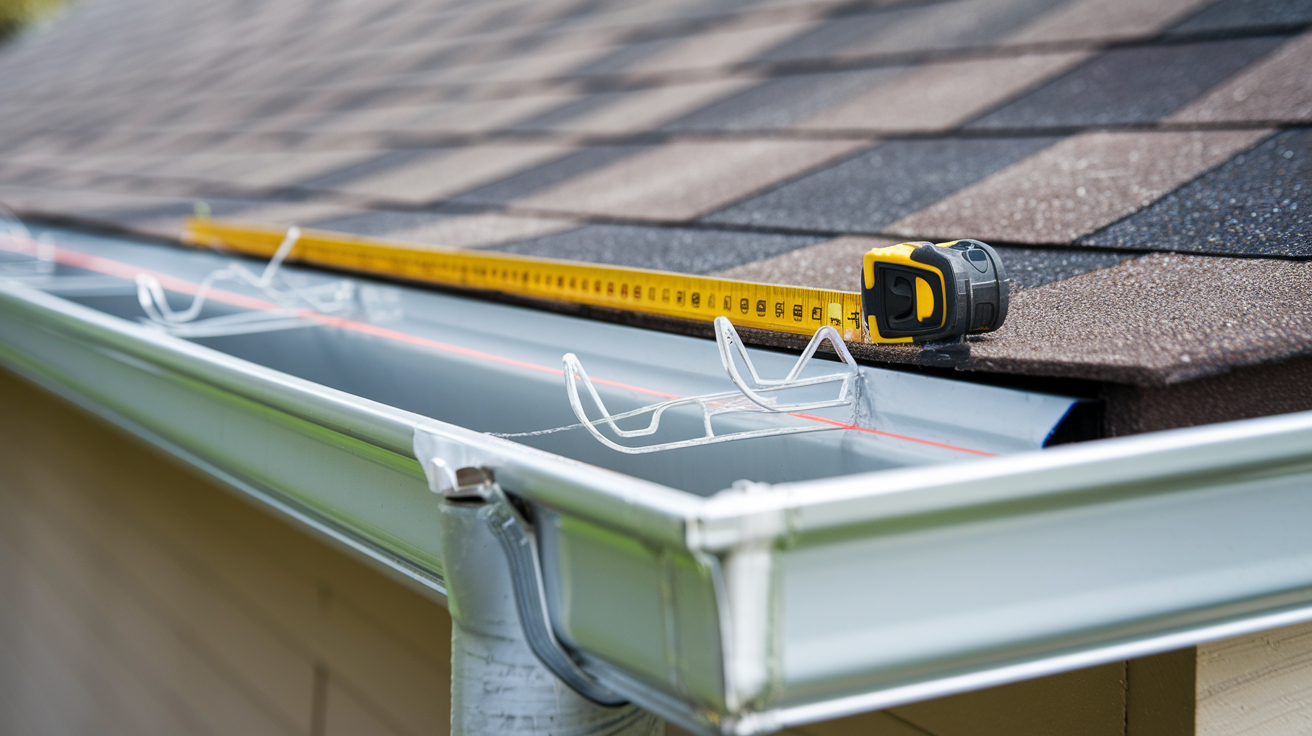
Space hangers every 24 inches for regular climates. I use every 16 to 18 inches in heavy snow areas. That extra support helps when gutters fill with water.
Start at the high end. Mark your first hanger about 6 inches from the end. Then mark every 16 to 24 inches along the length.
Try to align hangers with rafter locations. Your marks might shift an inch or two. That’s fine.
Step 3: Pre-Drill Holes
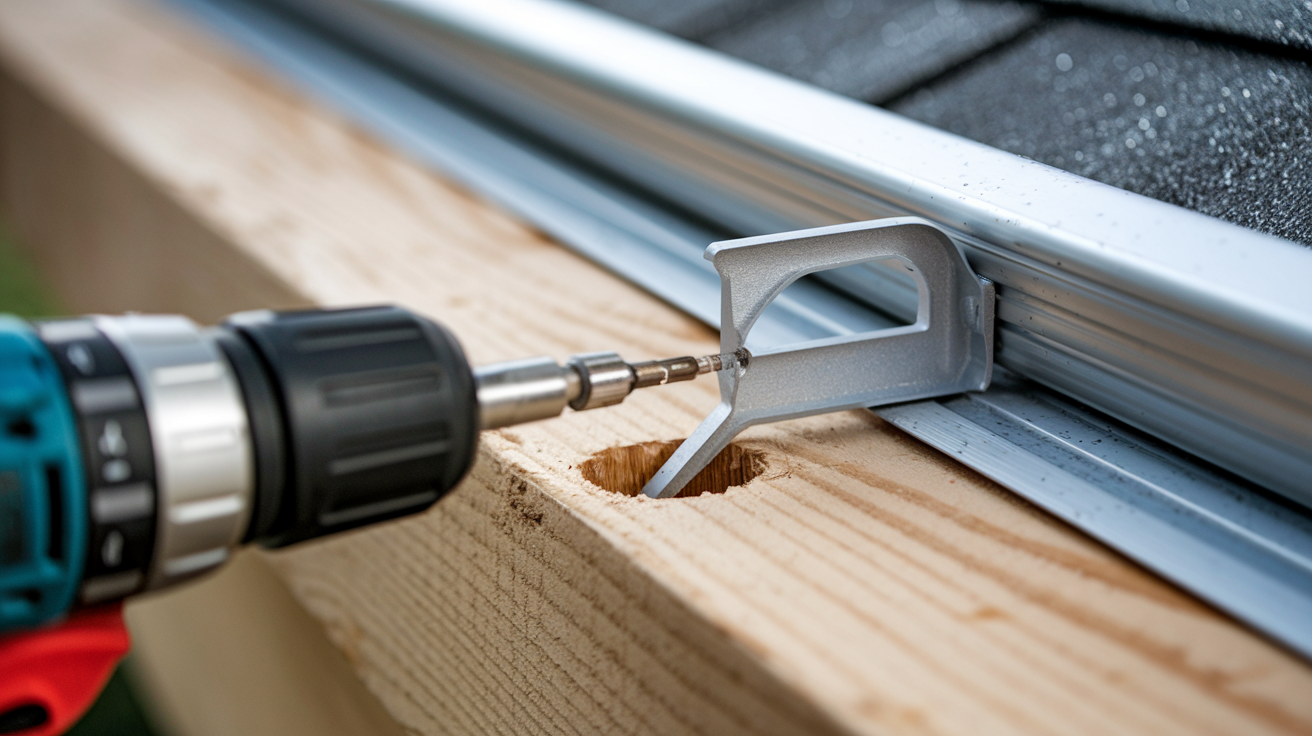
Pre-drilling prevents wood splitting. Use a drill bit slightly smaller than your screws. Usually 1/8 inch works.
Hold your hanger at the first mark. Check its level. Drill your pilot hole through the hanger into the fascia.
Hitting a rafter feels smooth and solid. Keep your drill perpendicular to the fascia.
Step 4: Secure the Hangers
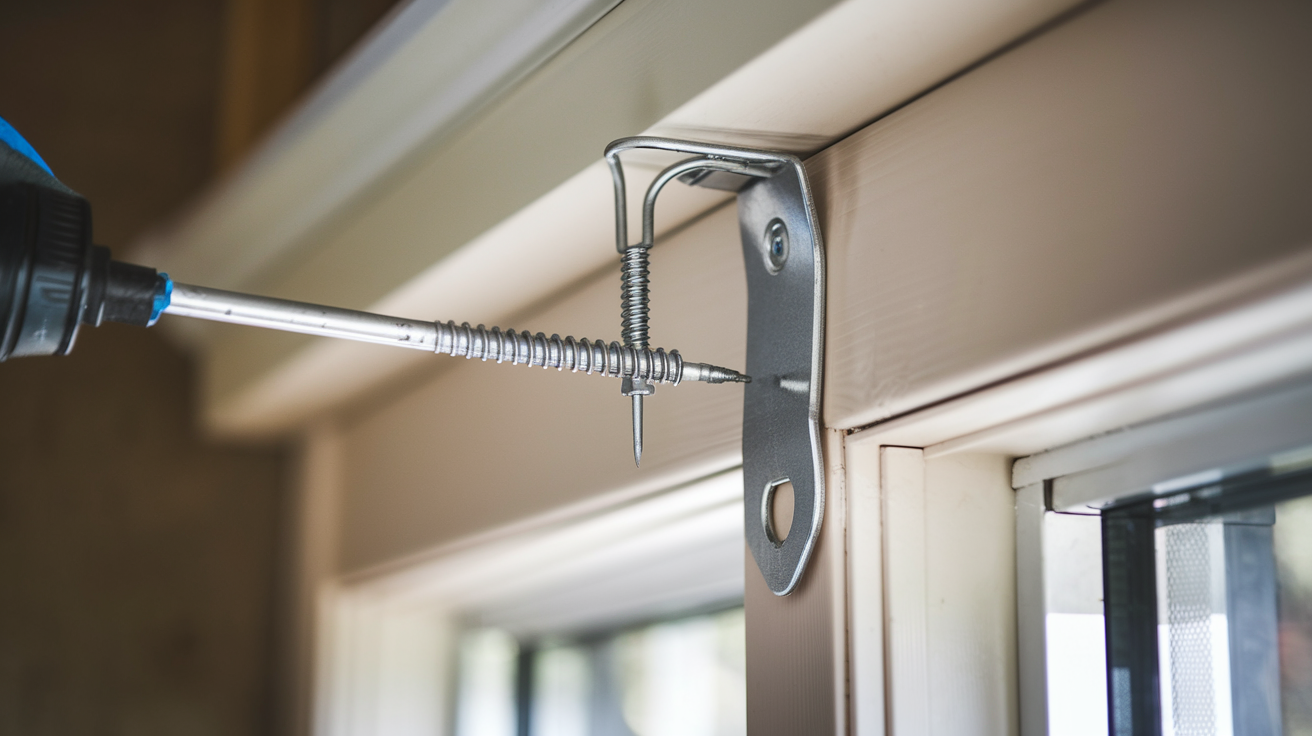
Position your hanger over the hole. Drive the screw in. Don’t overtighten. Snug is good. Too tight strips the wood.
The hanger should sit flush against the fascia. If you see gaps, back out and check why.
Install one hanger at a time. Work methodically. I do one complete section before moving to the next.
Test each hanger with a firm tug. It shouldn’t move.
Step 5: Check Gutter Slope
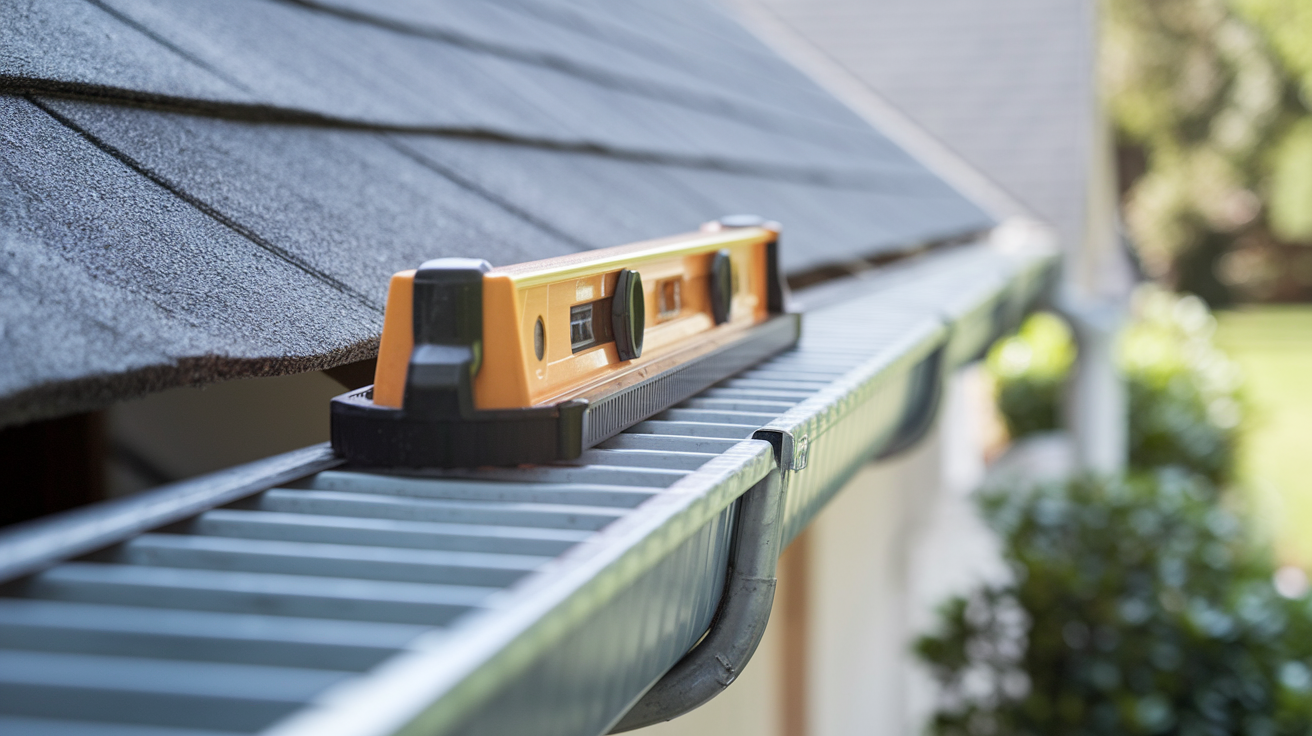
Gutters need a slight slope toward downspouts. The standard is 1/4 inch drop for every 10 feet.
Put your level on the gutter. It should show a gentle slope. If not, adjust your hangers.
Lower hangers as you move toward the downspout end. Start high and decrease height gradually.
Test by pouring water in the high end. Watch it flow. If it pools, adjust your slope.
Step 6: Recheck All Hangers
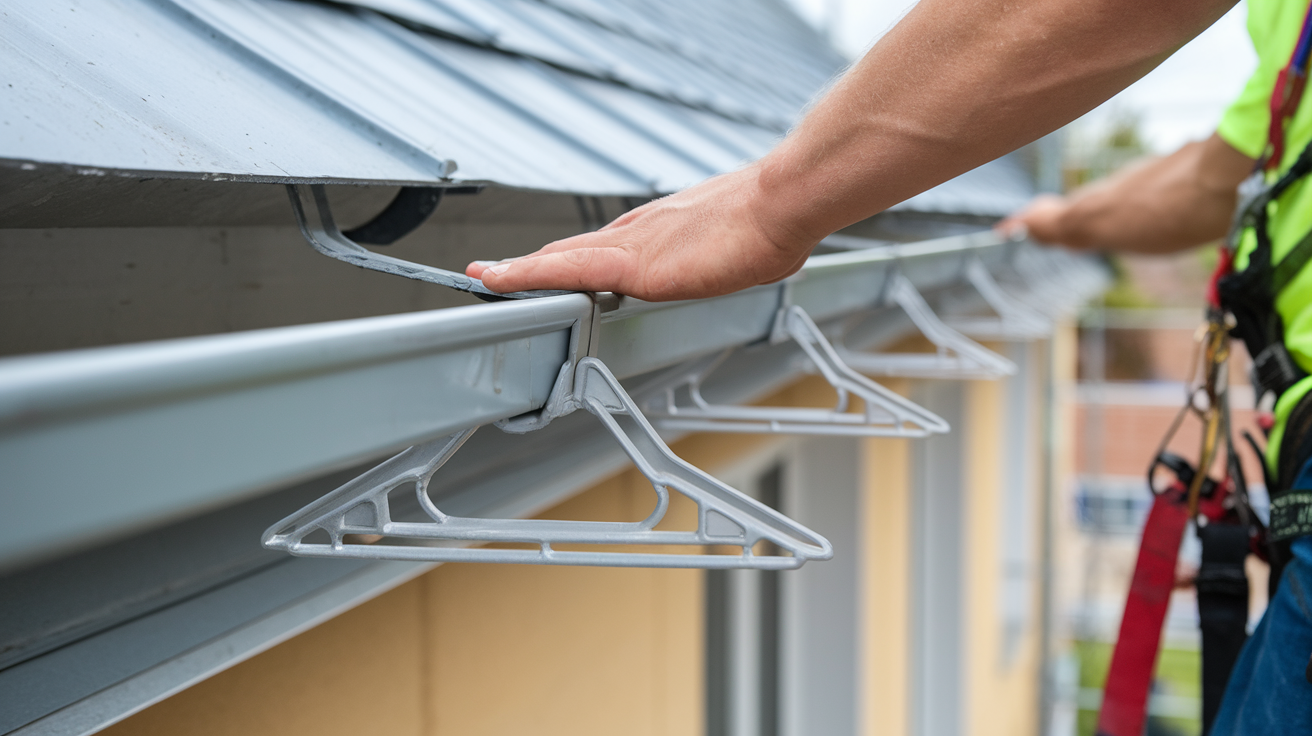
Walk the entire gutter and verify each hanger works. Look for sagging between hangers. That means you need another hanger there.
Pull down gently in several places. It should feel solid everywhere.
Check that gutters sit properly in each hanger. Make sure no screws stick out inside.
Common Mistakes to Avoid
- Spacing hangers too far apart is the biggest mistake. People save money using fewer hangers. Then gutters sag.
- Using short screws is another problem. Screws need to go at least 2 inches into solid wood.
- Ignoring the slope causes standing water.
- Installing hangers on rotted fascia fails fast.
- Overtightening screws strips wood and weakens connections.
- Not considering weight matters. A 10-foot gutter holds about 40 pounds of water when full. Add wet leaves and that’s serious weight.
DIY vs. Hiring a Professional
| Factor | Go DIY | Hire a Professional |
| House Type | Single-story or comfortable on ladders | Multi-story home or steep roof |
|
Skill Level |
Basic tool skills and patience | Complex rooflines or unusual angles |
| Fascia Condition | Good condition | Needs repair or replacement |
| Confidence | Comfortable on ladders | Not confident working on ladders |
| Time | Have a free weekend | Rather spend time doing something else |
|
Cost |
$50 to $150 in materials | $5 to $10 per linear foot (labor included) |
| Example Cost | Under $200 for 150 feet of gutters | $750 to $1,500 for 150 feet of gutters |
I did mine myself and loved the savings. But hiring out makes sense too. Your time and safety matter.
Recommended Products
Amerimax Hidden Gutter Hangers work great for standard installations. They’re affordable and easy to find.
US Gutter Supply Hidden Hangers are my upgrade pick. Better construction and wider mounting flanges.
Gutter Cover Supply’s Commercial Grade Hangers handle heavy-duty needs. Built tough for snow country.
K-style gutter brackets from Amerimax or GutterStuff work when you prefer visible hangers.
Avoid the cheapest options. Look for aluminum or stainless steel construction for rust resistance.
Conclusion
Installing gutter hangers the right way protects your home from serious water damage. It’s not the most exciting weekend project, but it matters more than you might think.
Take your time with measurements and spacing. Don’t rush through the steps trying to finish faster. Quality work now saves you from redoing everything later.
I’ve walked you through everything you need to know, from choosing hangers to securing them properly. You have the knowledge to do this yourself.
If ladders make you nervous or your roof is too high, calling a professional is smart. There’s no prize for dangerous DIY.
Your home deserves gutters that work correctly. Now go make it happen.
Frequently Asked Questions
Can I install gutter hangers without removing the gutters?
Yes, you can install most hidden hangers while gutters stay in place. Just make sure you can access the fascia board properly and existing gutters are in good shape.
How do I know if my gutter hangers are failing?
Look for sagging sections, gutters pulling away, or water spilling over during rain. Visible rust, loose screws, or gaps between gutter and fascia indicate problems.
What’s better for heavy snow areas, hidden hangers or brackets?
Heavy-duty hidden hangers work great for snow loads when spaced 16 inches apart. Bracket hangers also handle weight well. Both work with quality materials and proper spacing.
Should gutter hangers go into rafters or just fascia board?
Rafters provide much stronger support than fascia alone. Try to hit rafters whenever possible, but fascia-only mounting works for lighter loads if your fascia is solid wood.
How tight should I screw in gutter hangers?
Snug and firm is the goal. The hanger should sit flush without wiggle, but overtightening strips the wood and weakens your connection over time.