
Painting your bathroom tile floor offers an affordable alternative to expensive tile replacement while completely transforming your space’s appearance.
This budget-friendly solution can update outdated colors, cover damaged grout lines, and give your bathroom a fresh, modern look without the mess and cost of full renovation.
The benefits of painting over replacing tiles are substantial: significant cost savings, faster completion time, and the ability to customize colors that perfectly match your design vision.
Unlike tile replacement, which requires demolition, disposal, and professional installation, painting allows you to complete the project yourself over a weekend.
This comprehensive guide will walk you through every step of the tile painting process, from proper surface preparation to final protective coating application, ensuring professional-looking results that will last for years.
Materials and Tools You’ll Need
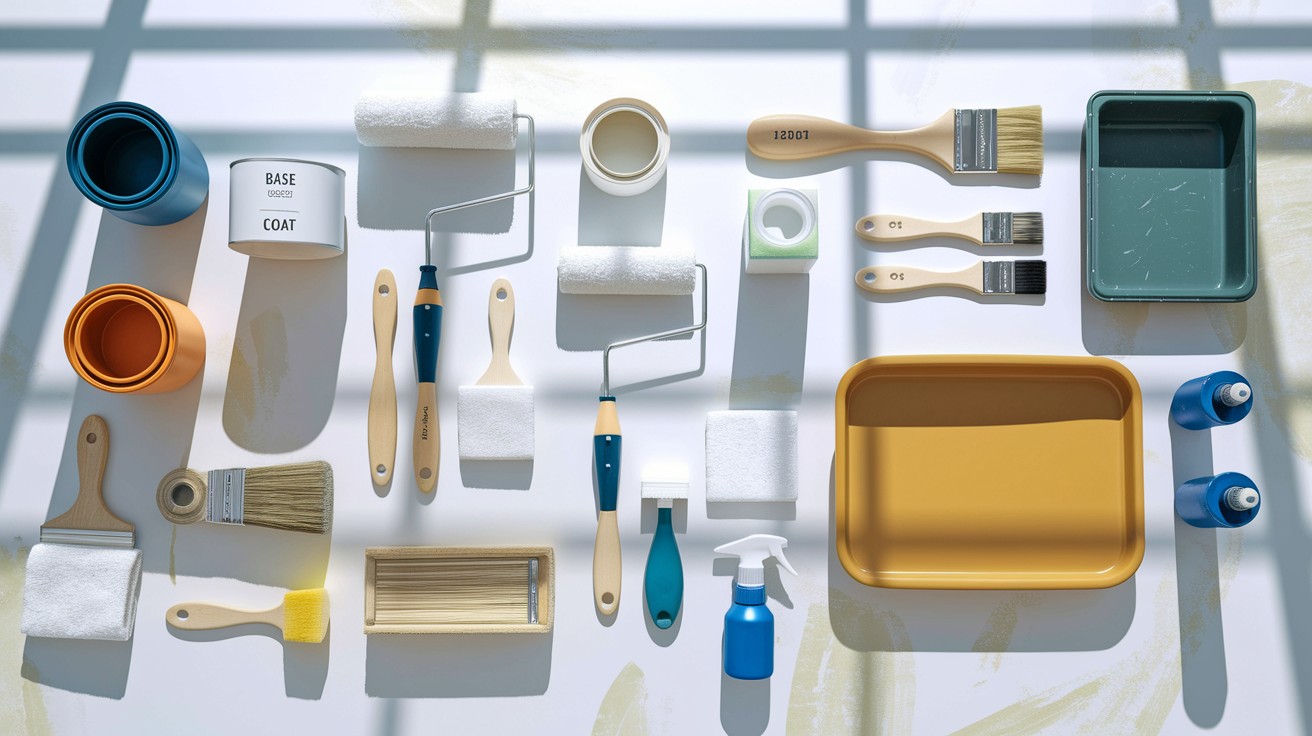
Success in painting bathroom tile floors depends on having the right materials and tools ready before you begin. Quality products and proper equipment will ensure your painted floor looks professional and lasts for years.
Paint Products
For optimal results, use a two-part floor coating system specifically designed for high-traffic areas.
Rust-Oleum HOME Floor Coating Base Coat provides excellent adhesion to tile surfaces and creates a durable foundation for your finish coat.
Follow this with Rust-Oleum HOME Floor Top Coat, which offers superior protection against moisture, scratches, and daily wear.
Consider adding anti-slip textured kits to your top coat if you’re concerned about creating a slippery surface, especially important in wet bathroom environments.
Tools and Supplies
- Rollers with 1/4″ or 3/8″ nap sleeves for smooth paint application
- Extension handle for comfortable coverage of large floor areas
- Quality paintbrush for cutting in edges and corners
- Painter’s tape to protect surrounding surfaces
- Drop cloths to prevent accidental paint splatter
- Paint tray to hold coating during application
- Comprehensive cleaning supplies for surface preparation
- Scrub brushes for thorough tile and grout cleaning
- Clean rags or paper towels for wiping surfaces dry
Step by Step Guide to Paint Your Bathroom Tile Floor
This comprehensive guide walks you through each phase of painting your bathroom tile floor, from initial preparation to final maintenance. Follow these detailed instructions to achieve professional results that transform your bathroom while saving money on expensive tile replacement.
Step 1: Prepare Your Bathroom Floor
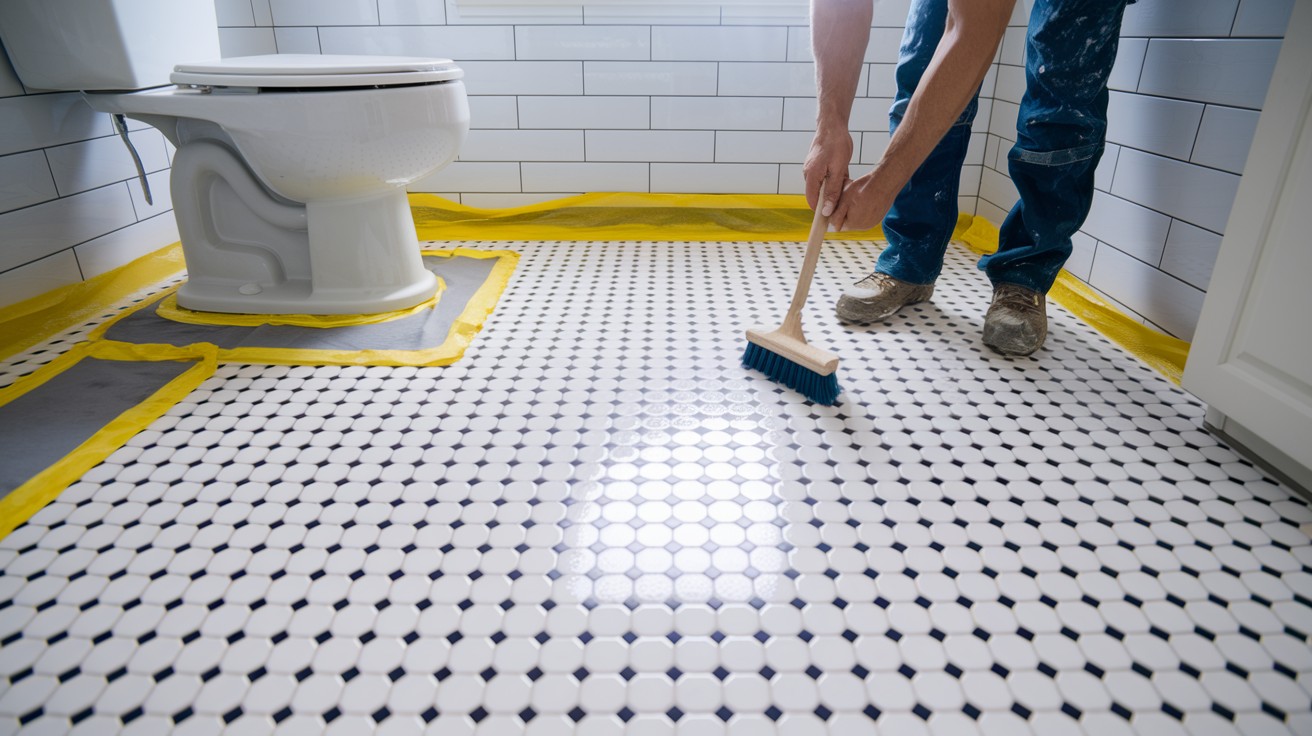
Proper preparation is the foundation of a successful tile painting project. Start by removing all furniture, rugs, and accessories from the bathroom to create a clear workspace.
Begin with comprehensive cleaning to remove all dirt, dust, soap residue, and debris from the tile surface and grout lines.
Use a degreasing cleaner or TSP substitute to eliminate any soap buildup or oils that could prevent proper paint adhesion.
Scrub thoroughly with a stiff brush, paying special attention to grout areas where grime accumulates.
After cleaning, rinse the entire floor with clean water and allow it to dry completely, as any remaining moisture will interfere with paint bonding.
Apply painter’s tape along baseboards, around toilet bases, and near any fixtures to create clean, professional lines.
Cover or remove items that cannot be moved and lay drop cloths to protect surrounding areas from paint splatter.
Step 2: Apply the Base Coat
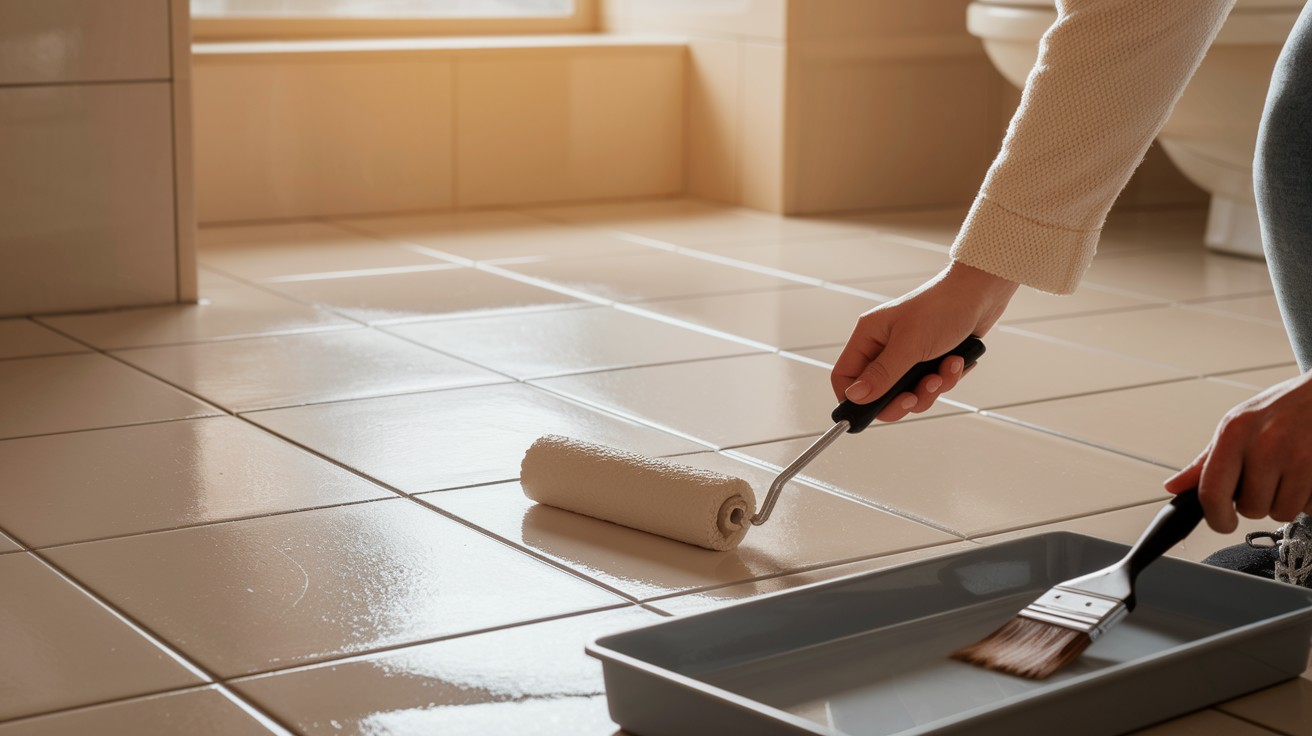
The base coat creates the foundation for your new floor finish and ensures proper adhesion to the tile surface.
Work systematically in 4’x4′ sections to maintain control and ensure even coverage, starting in the corner farthest from your exit point and working toward the doorway.
Pour base coat into your paint tray and load your roller evenly, then apply the coating in smooth, overlapping strokes while maintaining a wet edge between sections to avoid visible lap marks.
Avoid creating puddles or thick areas, as these will dry unevenly and create texture problems. Use your paintbrush to cut in edges and corners where the roller cannot reach.
Allow the base coat to dry for at least 6 hours before attempting any touch-ups or corrections.
If touch-ups are necessary, apply them carefully and allow an additional 1-2 hours of drying time before proceeding to the top coat application.
Step 3: Apply the Top Coat

The top coat provides the final protective layer and determines your floor’s ultimate appearance and durability.
Use the same systematic 4’x4′ section method employed for the base coat, following the same rolling technique with consistent pressure and overlap patterns for uniform coverage.
One coat of top coat is typically sufficient for most situations, but a second coat can be applied for enhanced durability in high-traffic areas.
If applying a second coat, it must be completed within 24 hours of the first coat application.
Exercise patience during the curing process to ensure optimal results by waiting a full 24 hours before allowing light foot traffic on the painted surface.
Avoid moving furniture back into the bathroom for at least 72 hours, and never drag heavy items across the fresh coating.
The paint reaches full cure strength after 7 days, at which point the floor can handle normal bathroom use and cleaning routines.
Step 4: Post-Paint Care and Maintenance

Proper care during the initial curing period and ongoing maintenance will maximize the lifespan of your painted tile floor.
Avoid washing or cleaning the floor until the full 7-day curing period is complete.
Once cured, clean the surface with mild, non-abrasive cleaners and avoid harsh chemicals that could damage the coating.
Use furniture pads under heavy items to prevent scratching, and promptly clean up spills to prevent staining.
Regular maintenance includes sweeping or vacuuming to remove abrasive dirt particles and occasional damp mopping with appropriate cleaners designed for painted surfaces.
Final Thoughts
Painting your bathroom tile floor is a rewarding DIY project that can dramatically transform your space without breaking the budget.
Remember the key factors for success: thorough surface preparation, proper application techniques using 4’x4′ sections, and patience during the curing process.
Quality materials and attention to detail will ensure your painted floor looks professional and withstands daily use.
Don’t let the process intimidate you – with careful planning and the right approach, this project is well within reach for most homeowners.
Take your time with each step, and you’ll be amazed at the transformation you can achieve in just a weekend.
We’d love to hear about your experience with this project! Share your before and after photos, ask questions, or offer tips to help other readers succeed with their own bathroom floor painting projects.
Frequently Asked Questions
Can I paint over any type of bathroom tile?
Most ceramic and porcelain tiles can be painted successfully with proper preparation and quality floor coatings. However, natural stone tiles like marble or travertine may not hold paint well and should be tested in a small area first.
How long will painted tile floors last?
With proper preparation and quality materials, painted tile floors can last 3-5 years in high-traffic bathrooms. Regular maintenance and avoiding harsh cleaners will help extend the life of your painted surface.
Do I need to remove existing grout before painting?
No, you don’t need to remove existing grout, but it must be thoroughly cleaned and in good condition. Loose or cracked grout should be repaired before painting to ensure proper adhesion and a smooth finish.
Will painted tile floors be slippery when wet?
Standard floor paint can create a slippery surface when wet, which is why anti-slip additives are recommended for bathroom applications. These textured kits provide better traction while maintaining the painted finish.
How soon can I use my bathroom after painting the floor?
You can walk on the floor with light foot traffic after 24 hours, but avoid heavy use for 72 hours. Wait the full 7-day curing period before cleaning the floor or returning it to normal bathroom use.