
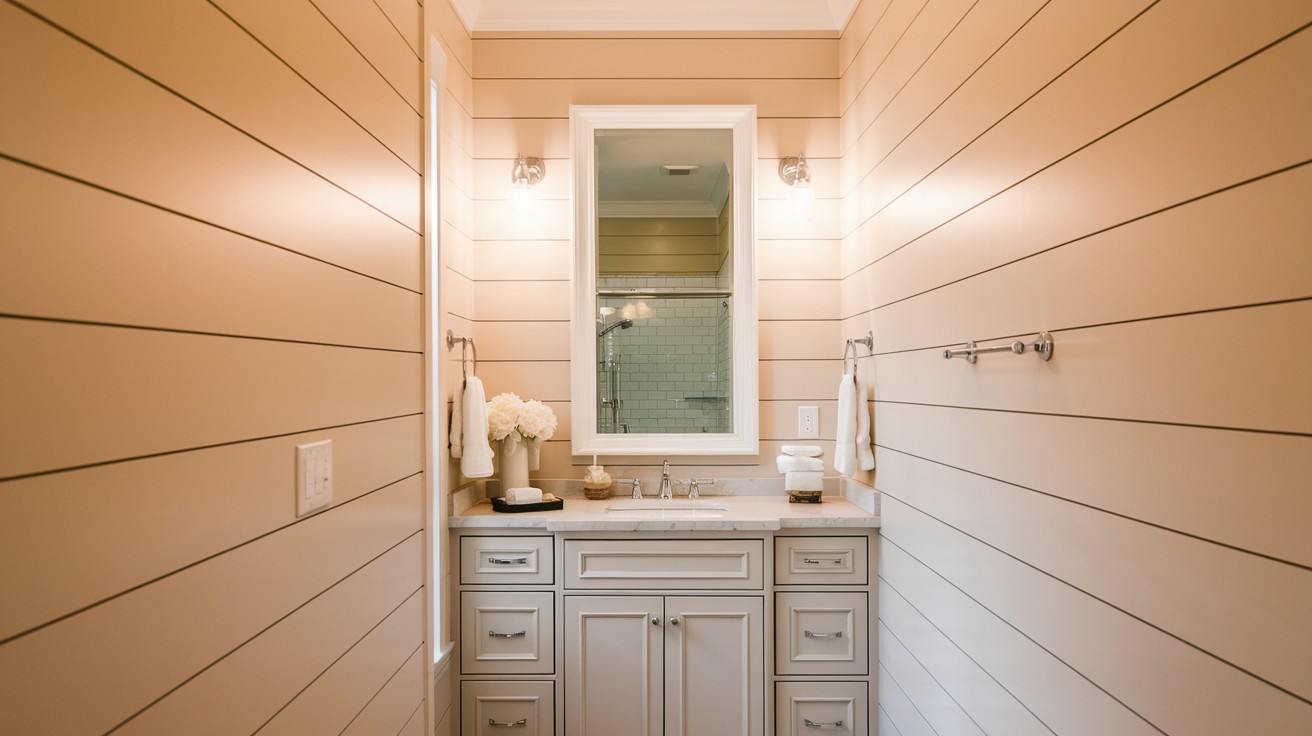
Board and batten wall treatment has remained a popular choice for bathroom renovations for good reason.
This classic design approach adds texture, visual interest, and architectural character to any space while maintaining a clean, organized appearance.
Small bathrooms and powder rooms particularly benefit from this treatment, as the vertical lines create an illusion of height and make compact areas feel more spacious.
Before starting your project, you’ll need basic tools including a miter saw, level, nail gun, and measuring tape.
Essential materials include boards for the battens, a base rail, cap rail, and appropriate adhesive or nails.
Proper planning involves measuring your walls accurately, determining batten spacing, and selecting the right wood or MDF materials for your bathroom’s humidity levels.
Step by Step guide to Create a Stunning Board and Batten Bathroom
Transform your bathroom with this comprehensive installation guide. Follow these detailed steps to achieve professional results, from initial planning and measurements to final paint touches and styling.
Step 1 – Plan Your Board and Batten Layout
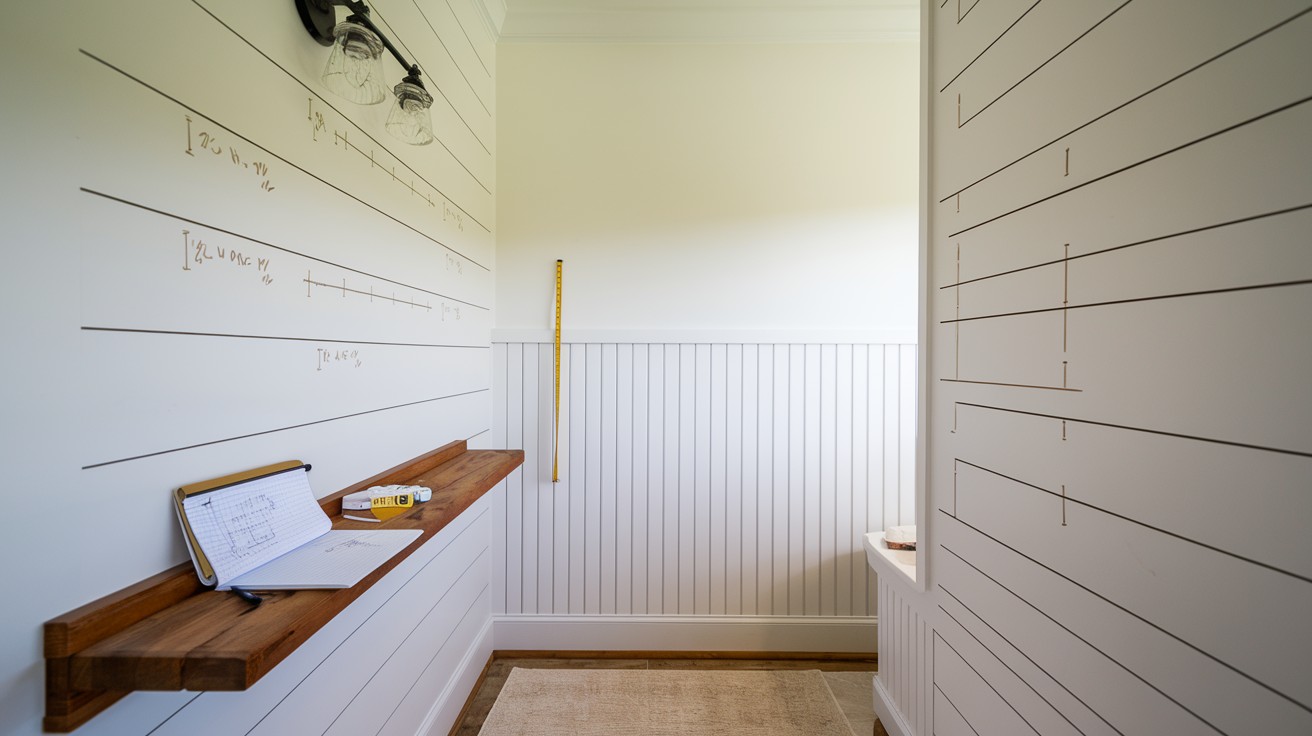
Accurate measurements form the foundation of any successful board and batten project.
Take precise measurements of all four walls in your bathroom, including the sides of doorways and any architectural features.
Record these measurements to the quarter inch to ensure your materials fit perfectly. Small discrepancies in measurement can compound throughout the installation process, leading to gaps or misaligned elements that detract from the finished appearance.
Consider whether you want a half-wall or full-wall treatment based on your bathroom’s proportions and style preferences.
Half-wall treatments work well in smaller spaces and can make rooms feel taller, while full-wall applications create dramatic impact. You’ll also need to decide between a grid pattern or vertical battens only. Grid patterns offer a more traditional look, while vertical-only designs feel more contemporary and streamlined.
Create a visual plan using a notepad or sketch app to test different batten placements and spacing options.
Draw one sheet per wall, marking exact measurements and batten locations.
This planning step helps you identify potential issues before cutting materials and allows you to experiment with different configurations until you find the most visually appealing arrangement.
Step 2 – Calculate Batten Spacing
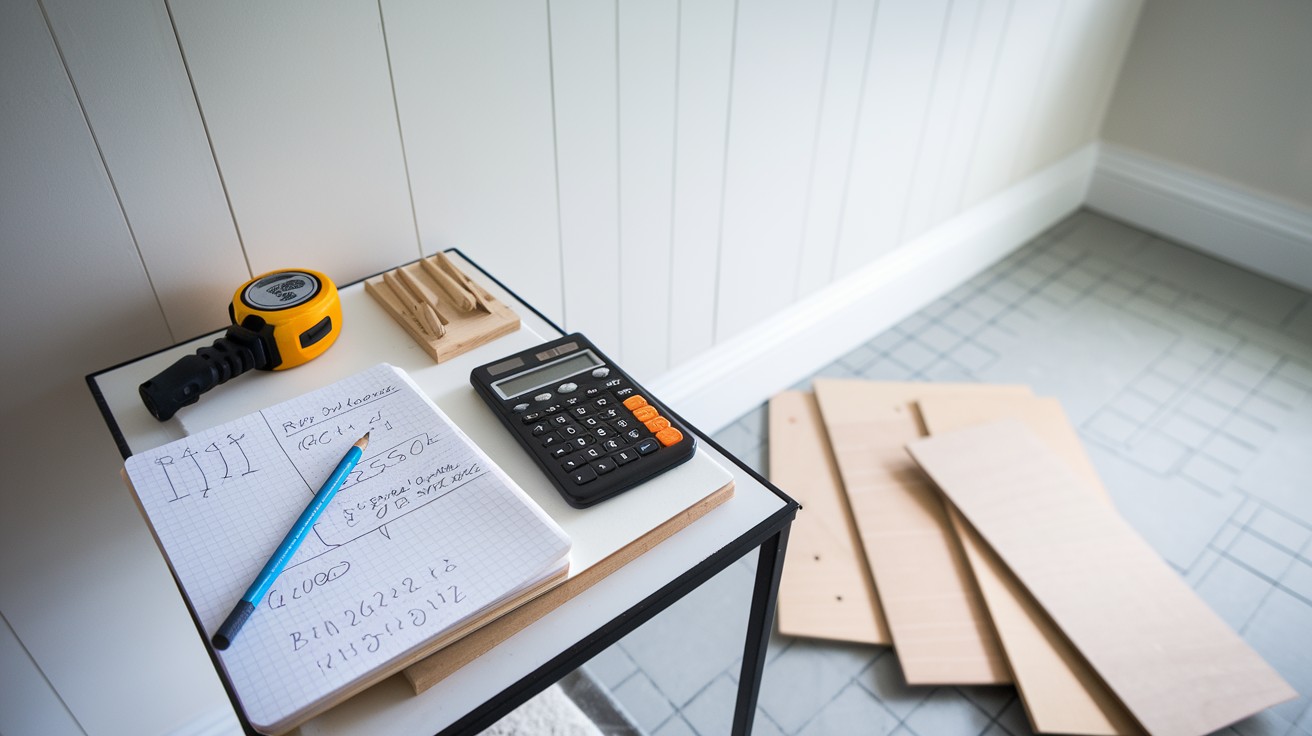
Use this simple formula to determine proper batten spacing: subtract the total width of all battens from your wall width, then divide by the number of spaces between battens.
For example, if your wall is 72 inches wide and you’re using five 1.5-inch battens, you’d calculate (72 – 7.5) ÷ 6 = 10.75 inches between each batten. This mathematical approach ensures even spacing across your entire wall.
Start your calculations with the smallest wall in your bathroom, as this makes it easier to match spacing on larger walls afterward.
This approach helps you avoid tight spacing surprises and maintains consistency throughout the room.
Once you establish the spacing for your smallest wall, you can adjust the number of battens on larger walls to maintain similar proportions.
Test your calculated spacing by laying boards on the floor in your planned configuration. This physical preview allows you to see how the spacing looks in reality and make adjustments before installation.
Sometimes spacing that works mathematically doesn’t look quite right visually, so this step helps ensure you’re happy with the proportions before committing to the layout.
Step 3 – Choose and Prepare Your Materials
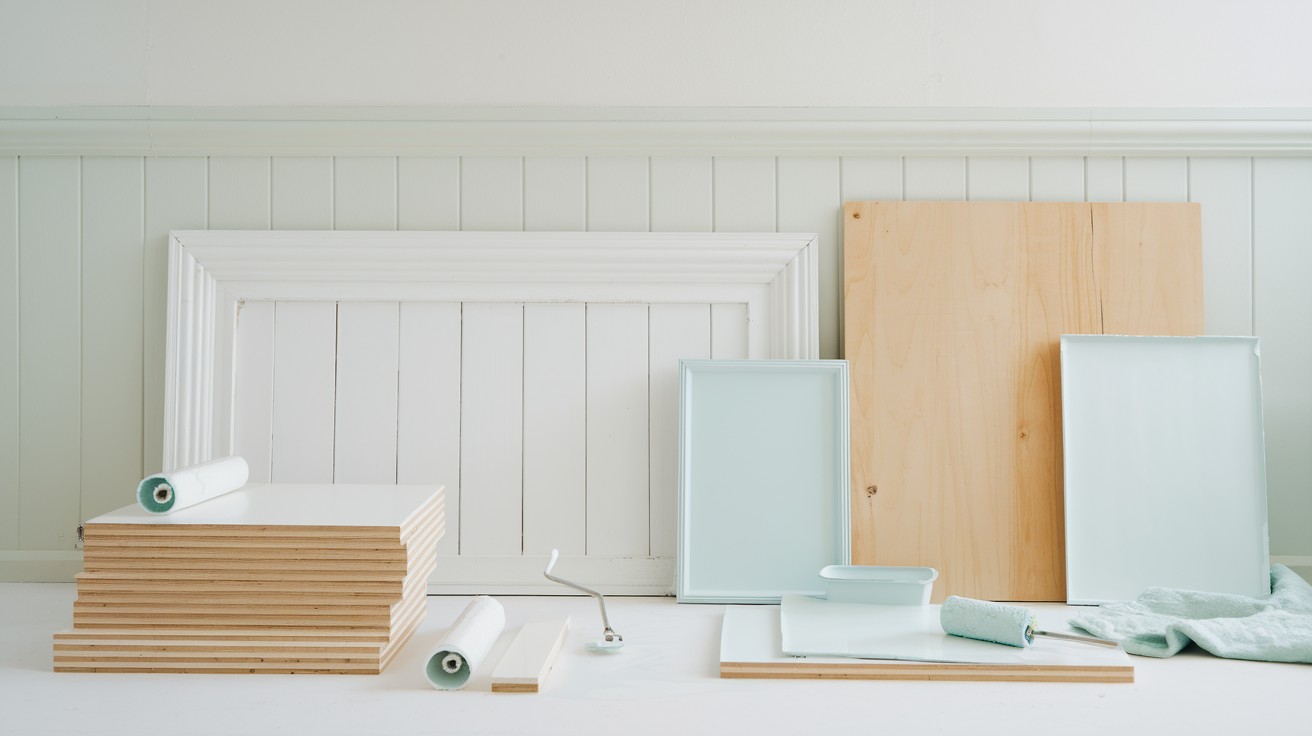
Select appropriate board sizes for each component of your installation. Use 1×2 boards for vertical battens, 1×4 boards for baseboards and top rails, and sanded molding for slim top trim pieces.
These dimensions provide good proportional relationships while remaining cost-effective and easy to work with during installation.
Install a 0.25-inch thick backing board behind your battens to create depth and visual interest.
This backing board also provides a stable mounting surface and helps create clean lines where battens meet walls.
The slight shadow created by this depth adds a professional-looking dimension to your finished project.
Pre-prime and paint your boards whenever possible before installation to save time and achieve better coverage.
This approach allows you to paint in a controlled environment and reduces the amount of cutting-in required after installation.
Consider using an eggshell finish paint like Behr’s Coney Island for durability in bathroom environments while maintaining an attractive appearance.
Step 4 – Handle Problem Areas
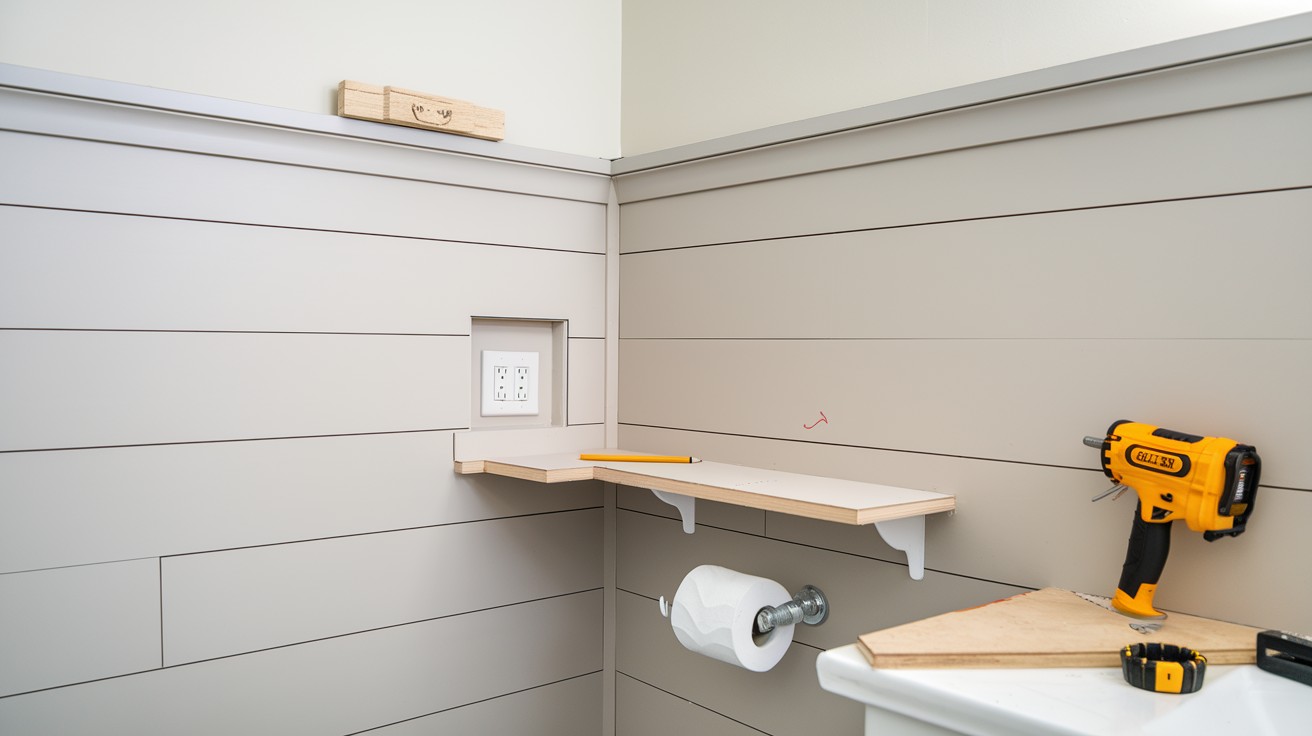
Plan corner treatments carefully, as overlapping battens will slightly reduce the width available for spacing. Address corner details first in your planning process to maintain symmetry throughout the room.
Corner treatments often require custom cuts or modified spacing, so resolving these details early prevents issues during installation.
Account for electrical outlets and light switches by planning necessary cutouts for flush mounting.
You may need to customize your top rail around existing fixtures or modify batten placement to accommodate switch plates. Measure outlet locations precisely and transfer these measurements to your boards before cutting.
Consider plumbing lines when planning your installation, especially in areas near sinks, toilets, or tubs. Plan for any necessary pipe or water line cutouts in advance.
Use shorter nails, around 1.25 inches, in areas where plumbing runs behind walls to avoid accidentally puncturing pipes during installation.
Step 5 – Install with Precision
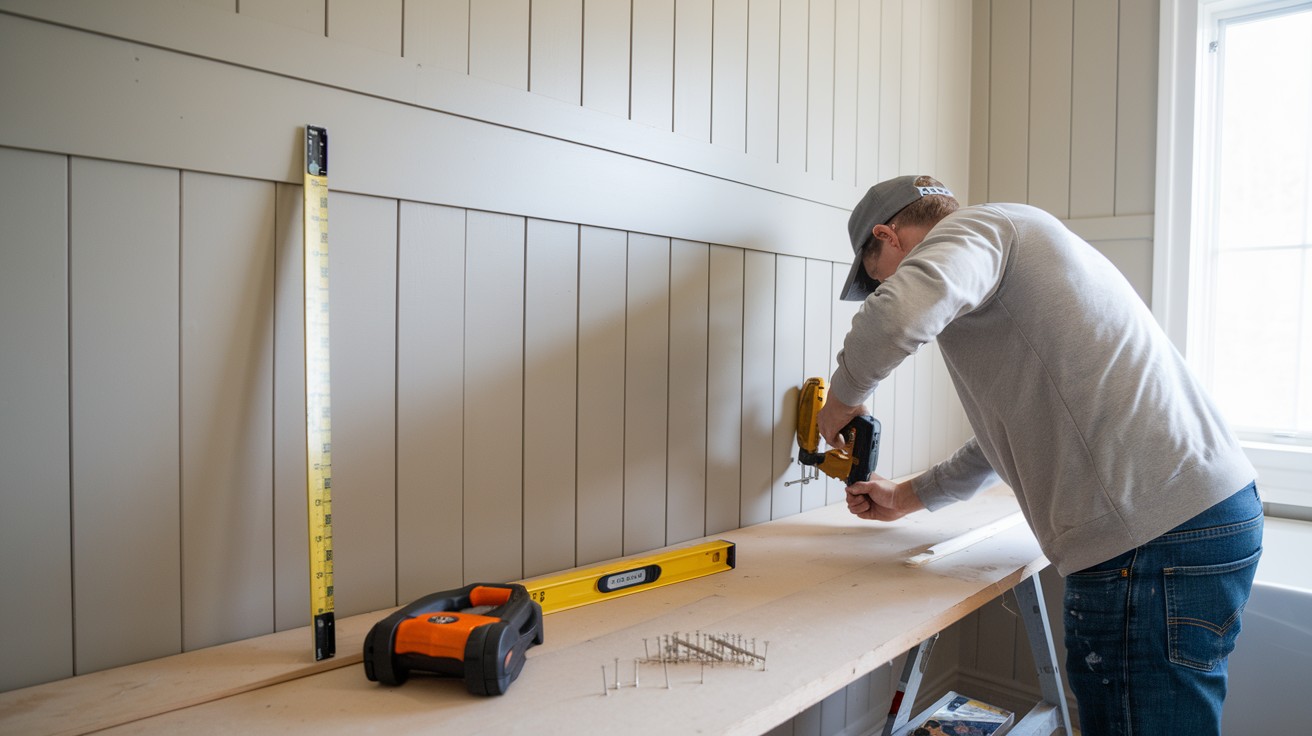
Follow a logical installation sequence for best results. Begin by installing backing boards, ensuring they’re level and properly secured.
Next, add baseboards and top rails, checking for level and making any necessary adjustments. Install battens one wall at a time, maintaining consistent spacing and checking alignment frequently.
Finish by adding slim top trim pieces for a polished appearance.
Gather all necessary tools before beginning installation to maintain workflow efficiency.
You’ll need a tape measure for ongoing measurements, a jig saw or multi-tool for making precise cuts, a nail gun with appropriate finishing nails for secure attachment, and a level to ensure straight, professional-looking installation.
Having the right tools readily available prevents delays and helps maintain accuracy throughout the project.
Final Touches and Reveal
Complete your board and batten installation by addressing all the small details that make a professional difference.
Fill nail holes with wood filler, allowing it to dry completely before sanding smooth.
Apply caulk along all seams where boards meet walls, corners, and ceiling lines to create clean, finished edges. Remove excess caulk immediately with a damp cloth for the smoothest appearance.
Apply a second coat of paint after installation if needed to achieve full coverage and hide any touch-up areas. Focus on areas where wood filler was applied and any spots that may have been scuffed during installation.
Use a high-quality brush for cutting in around edges and a small roller for larger flat surfaces to maintain consistent texture and coverage.
Consider how your new board and batten walls will work with other design elements in your bathroom.
Complementary wallpaper above a half-wall treatment can add pattern and interest. Vanity upgrades, new lighting fixtures, and coordinated accessories help tie the entire space together.
Choose elements that enhance rather than compete with your new wall treatment, creating a cohesive and polished final result.
Conclusion
Board and batten wall treatment brings timeless character to any bathroom, regardless of size.
This classic design approach works particularly well in small spaces, where the vertical lines create visual height and architectural interest that transforms ordinary walls into focal points.
The key to success lies in thorough planning and maintaining flexibility throughout the installation process.
Taking accurate measurements, calculating proper spacing, and addressing potential obstacles before beginning installation ensures smooth progress and professional results.
When challenges arise during the project, adapt your approach while staying true to your overall design vision.
Completing this DIY project provides genuine satisfaction beyond the visual transformation.
You’ll have created a custom feature that adds value to your home while developing new skills and confidence for future renovation projects.
Frequently Asked Questions
What is the best wood type for bathroom board and batten?
MDF (medium-density fiberboard) or pre-primed pine work well for bathroom applications. Both materials handle moisture better than raw wood when properly sealed and painted with quality bathroom paint.
How much does a DIY board and batten bathroom project cost?
Materials typically cost $200-500 for an average bathroom, depending on room size and wood choice. Labor savings make DIY installation significantly more affordable than hiring contractors.
Can I install a board and batten over existing tile walls?
Yes, but you’ll need to ensure tiles are firmly attached and create a level mounting surface. Use construction adhesive and longer screws to secure backing boards through tile into wall studs.
What spacing looks best between battens?
Most installations use 12-16 inch spacing between batten centers for balanced proportions. Calculate spacing based on your wall width to ensure even distribution and avoid awkward narrow spaces.
How long does board and batten installation take?
A small bathroom typically takes one weekend for a DIY installer with basic woodworking skills. Larger bathrooms or complex layouts may require additional time for cutting and fitting around fixtures.