
Creating your own curtain rods offers an excellent way to transform your living space without breaking the bank.
These homemade solutions provide both functionality and style while allowing complete customization to match your existing decor.
Budget-conscious homeowners can achieve professional-looking results that rival expensive store-bought alternatives.
With rising home decor costs, finding affordable ways to refresh your space becomes increasingly important.
DIY curtain rods represent a perfect balance between cost-effectiveness and visual appeal, proving that beautiful home improvements don’t require significant financial investment.
This simple project requires minimal materials and can be completed for under $10 in approximately 15 minutes.
The straightforward process makes it accessible to beginners while delivering impressive results that enhance any room’s appearance and atmosphere.
Materials You’ll Need
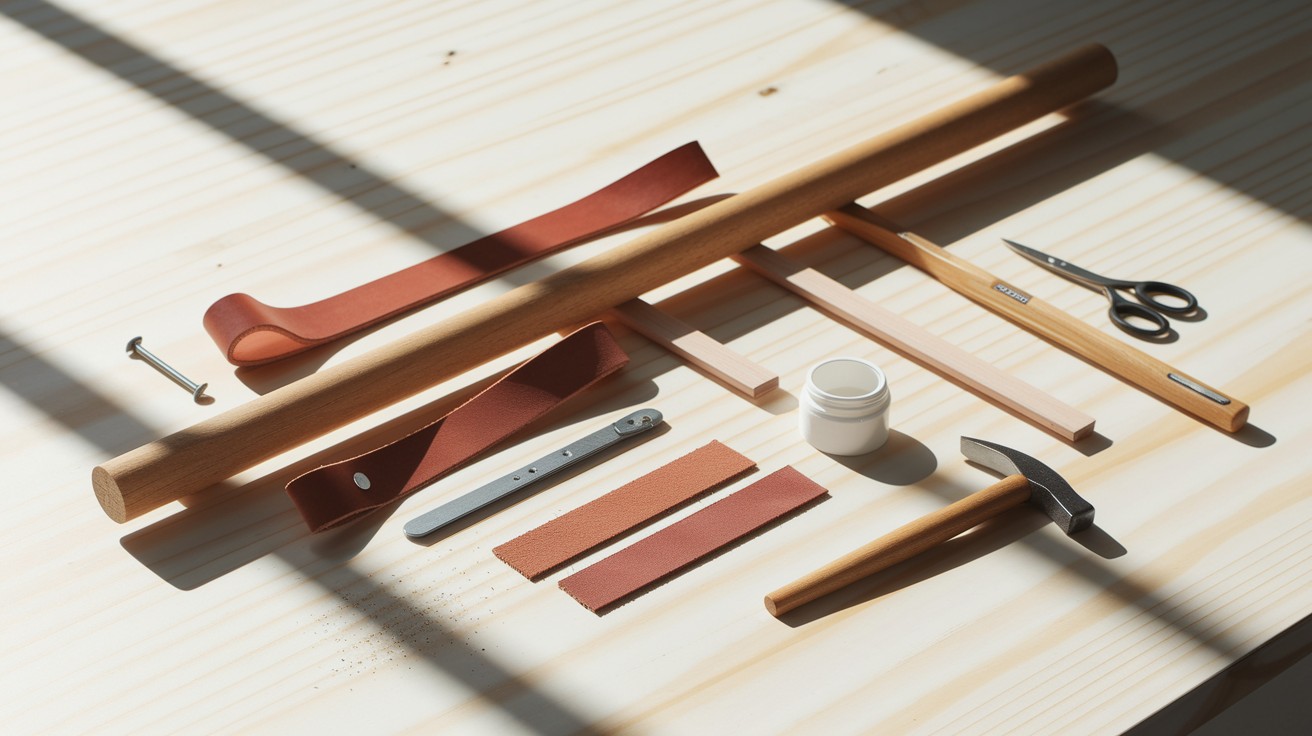
Getting started with this project requires just a few basic items that you likely already have at home or can easily find at your local hardware store.
Basic Supplies
- Wooden dowel rod: serves as the main support structure for your curtain system
- Leather scraps or leather straps: approximately one inch wide to create attractive mounting brackets
- Super fine sandpaper: smooths any rough edges on the wooden dowel for a professional finish
- Level: ensures proper alignment during installation for straight, even hanging
- Hammer: helps secure mounting hardware firmly into place
- Two nails: basic wall mounting option, or substitute with screws and drywall anchors for heavier curtains
- Scissors or sharp blade: cuts leather pieces to the exact size needed
- Clear coat (optional): provides extra protection for the wood and enhances its natural appearance
These simple materials combine to create a functional and attractive window treatment solution that complements any room’s decor while keeping costs minimal.
Most items can be found around the house or purchased inexpensively at hardware stores.
Step-by-Step Instructions
Follow these straightforward steps to create your custom curtain rod system that will transform your windows with minimal effort and maximum impact.
Step 1: Choose the Right Dowel Rod
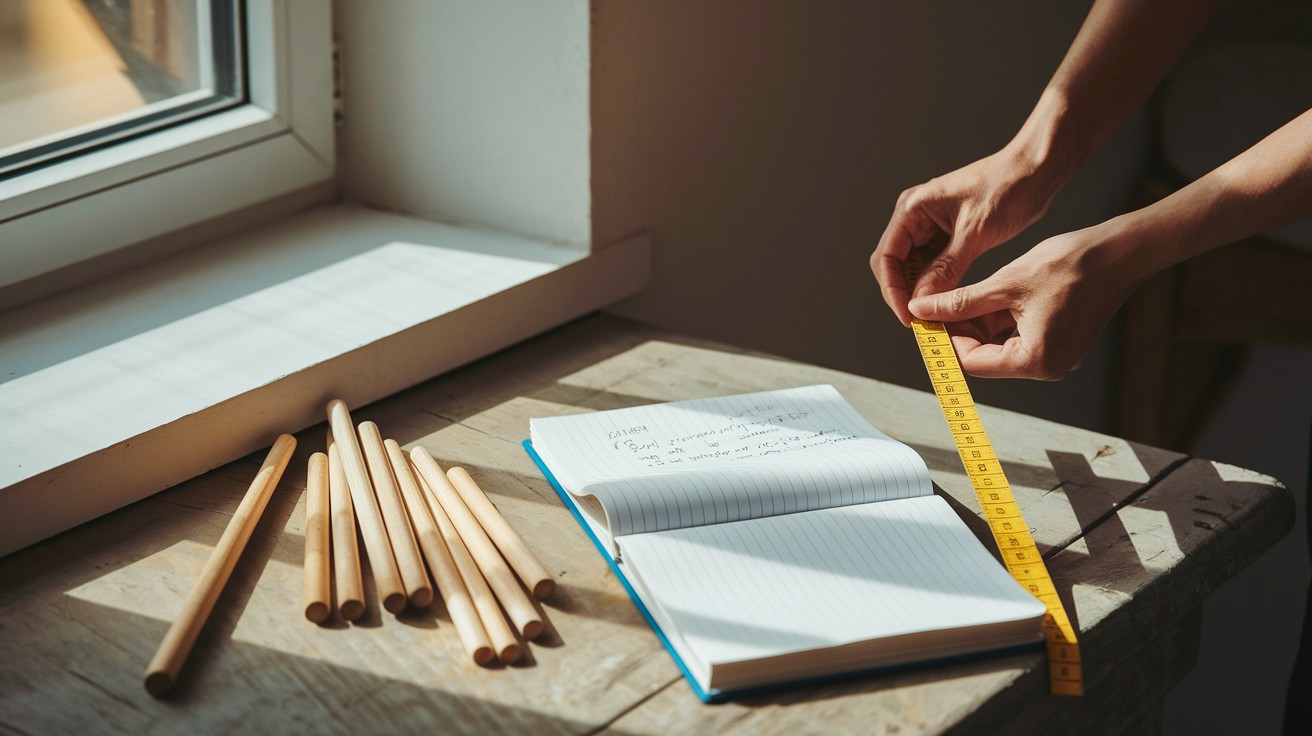
Begin by measuring your window accurately and selecting a dowel that extends slightly beyond each side for proper coverage and visual balance.
Consider standard sizes available at most hardware stores, as these offer the best value and immediate availability.
Visit retailers like Home Depot where you’ll find various dowel options at competitive prices with knowledgeable staff to assist your selection.
Step 2: Sand and Finish the Dowel
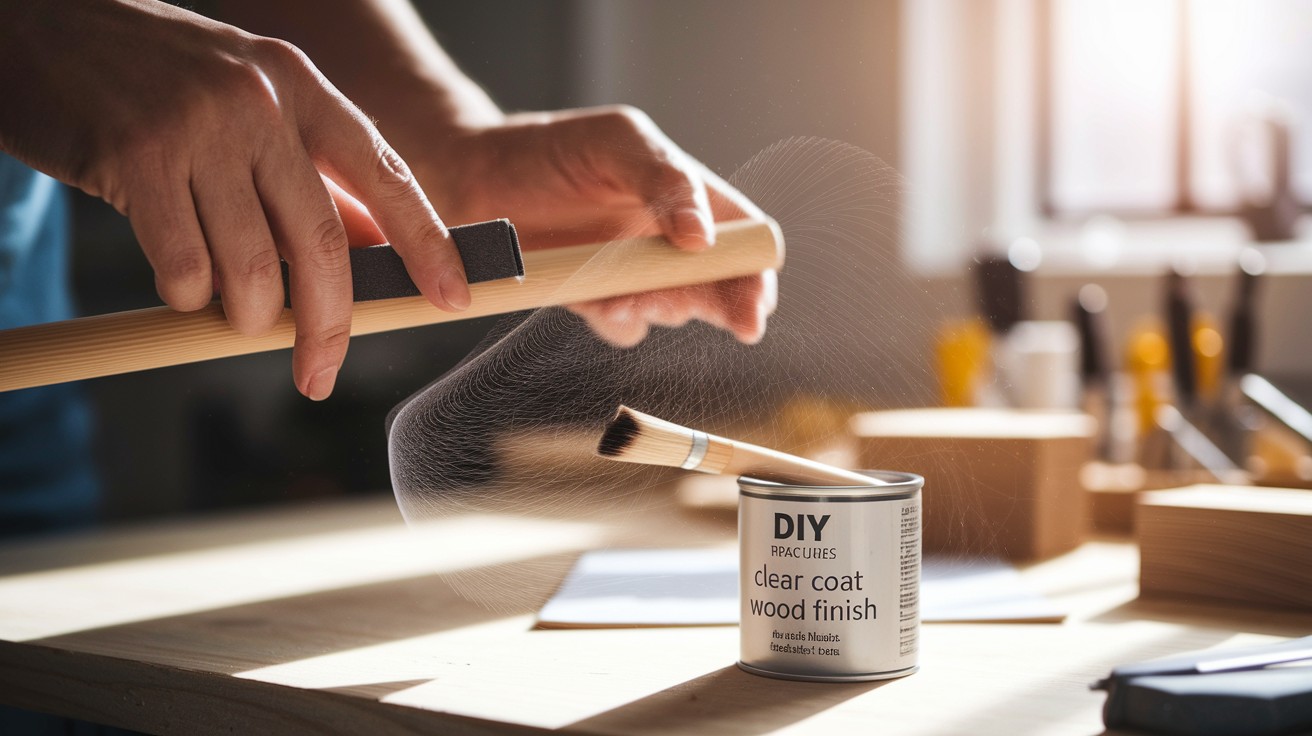
Create a smooth surface using super fine sandpaper to ensure curtains glide effortlessly along the rod without catching or snagging.
This step significantly improves functionality and prevents fabric damage over time.
Apply a clear coat finish as an optional step that adds durability and protects the wood from moisture and daily wear.
Step 3: Cut the Leather Straps
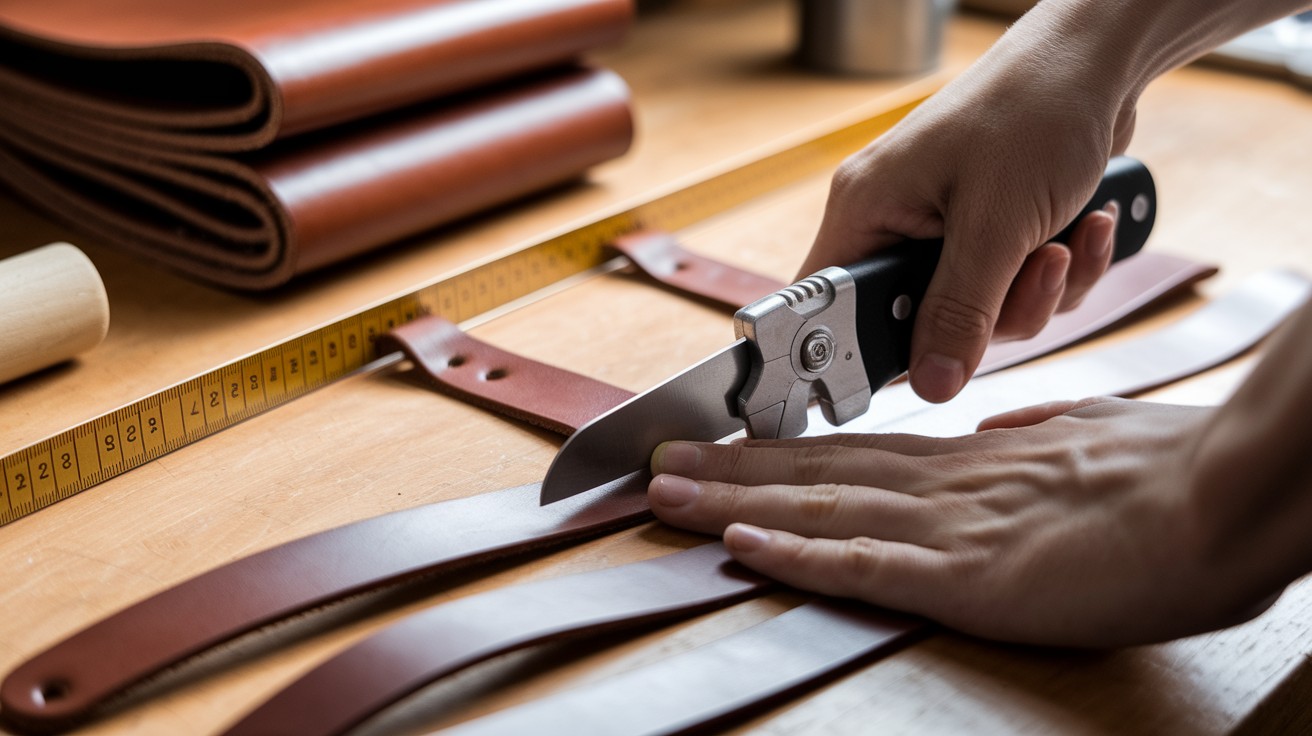
Measure carefully to determine the exact length needed for proper support, considering both the rod diameter and wall mounting requirements.
Cut precise pieces that will cradle the dowel securely while maintaining an attractive appearance when mounted.
The leather should be long enough to wrap around the dowel with sufficient material for secure wall attachment.
Step 4: Mark the Wall
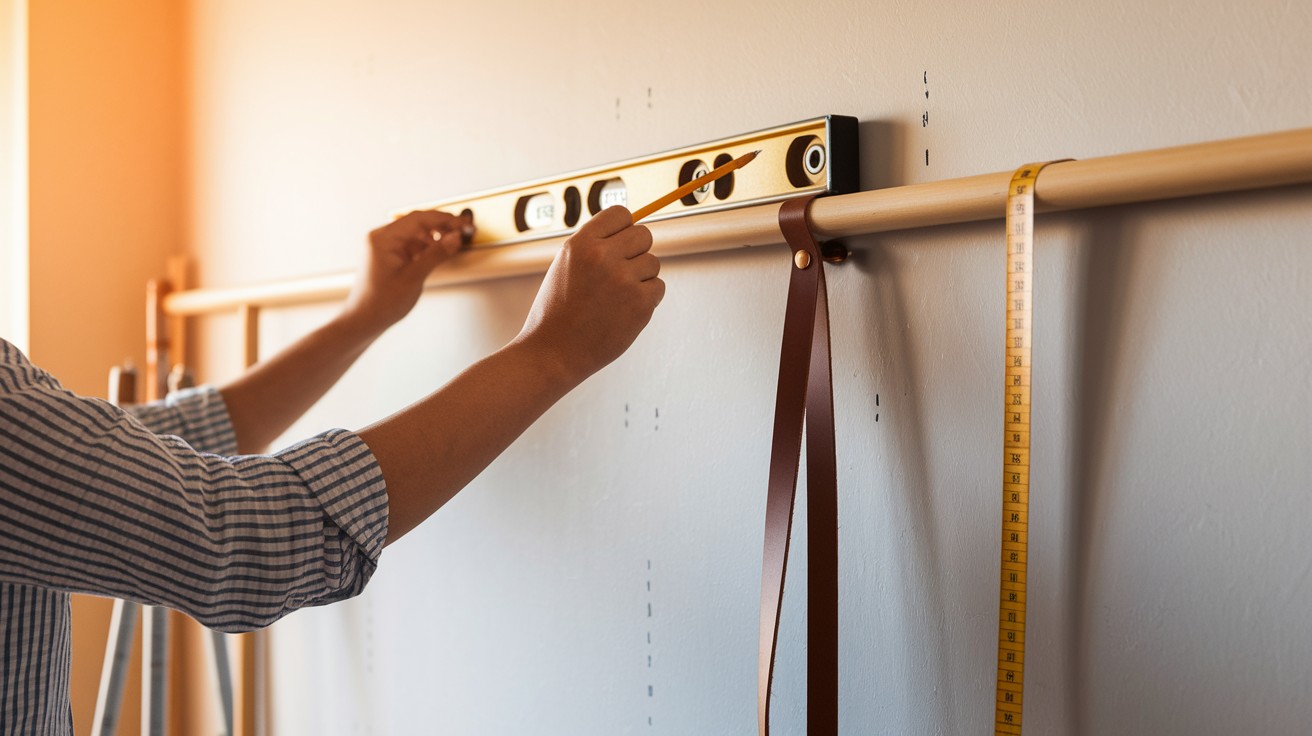
Align your measurements to ensure the curtain length works perfectly with your strap placement for optimal function and appearance.
Use a level to guarantee a straight, professional-looking installation that enhances rather than detracts from your room’s overall aesthetic.
Mark drilling points clearly before proceeding to the final installation step.
Step 5: Attach the Leather Straps and Hang the Curtain Rod
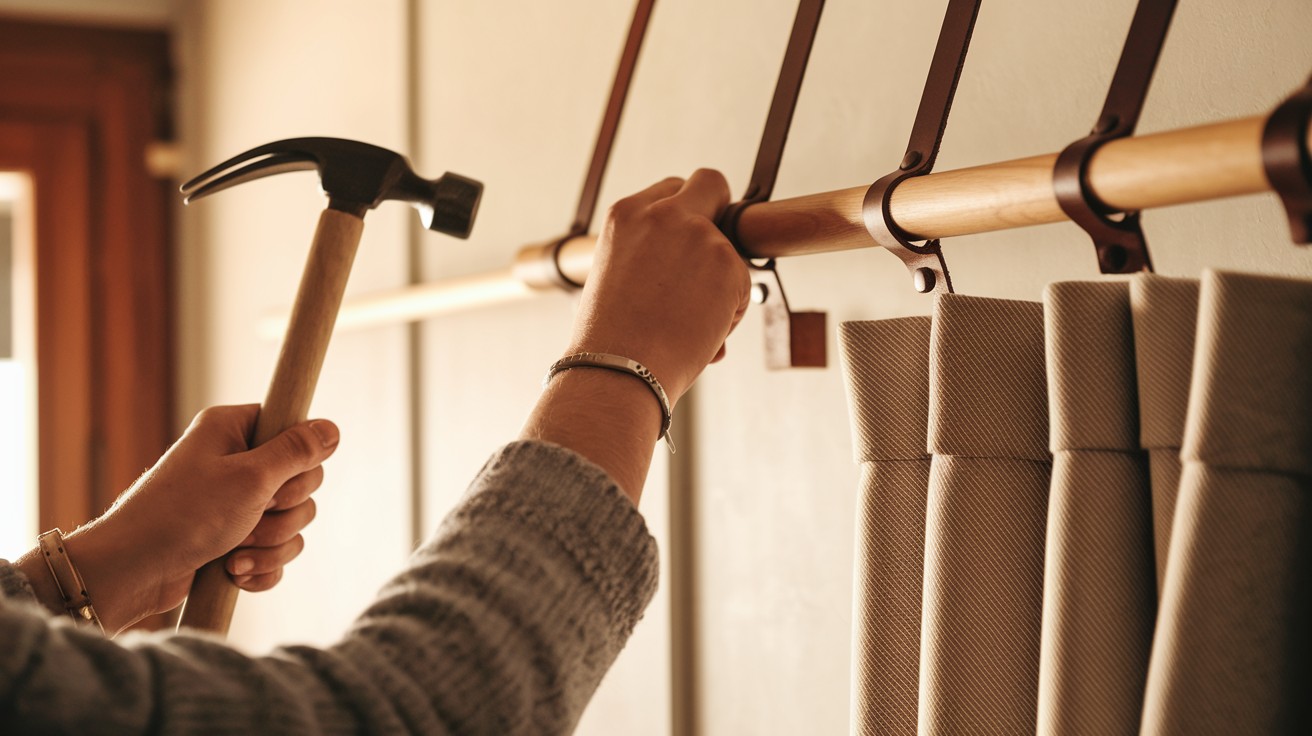
Choose your mounting method – either punch clean holes through the leather or hammer directly through for a more rustic appearance.
Assemble all components systematically, ensuring each piece fits securely before final installation.
Thread your curtains onto the rod and mount the complete system, making final adjustments for perfect positioning and smooth operation.
Customization Ideas
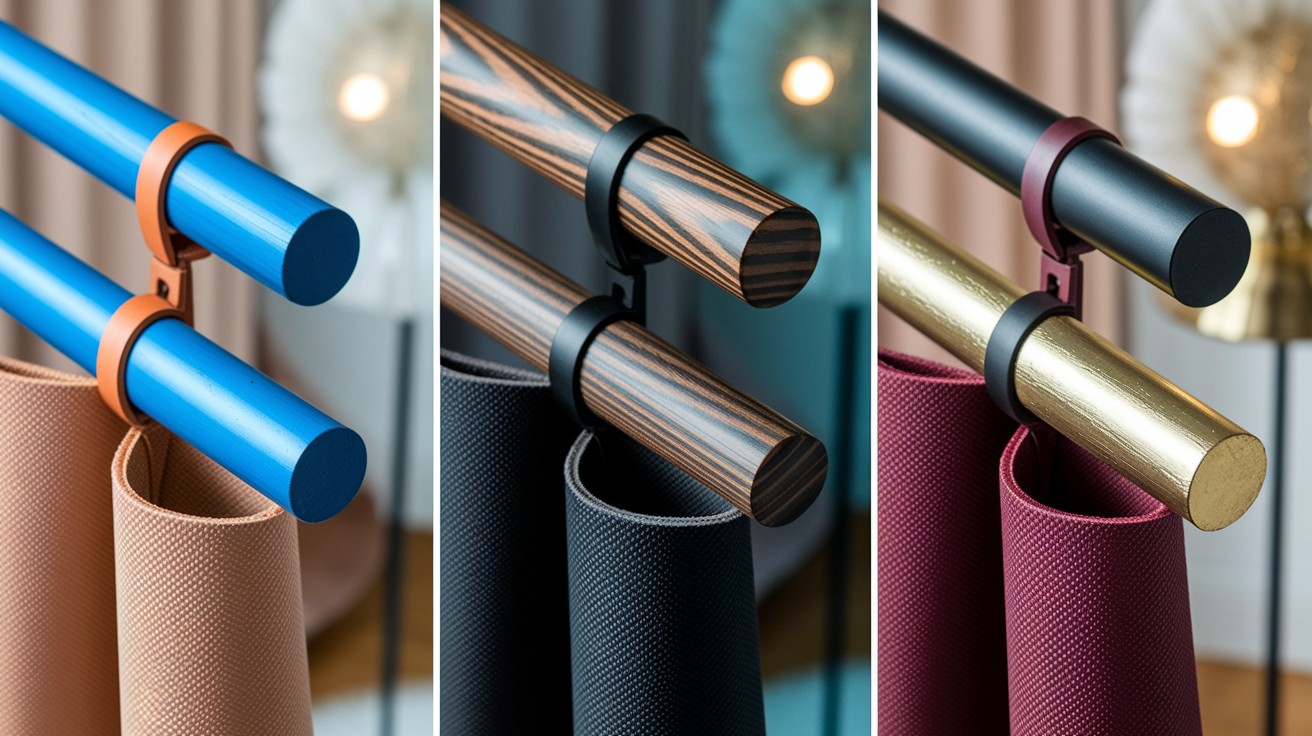
Transform your basic curtain rod into a personalized statement piece that reflects your unique style and complements your home’s existing decor.
Personalize Your Curtain Rods
The beauty of creating your own curtain rods lies in the endless possibilities for customization.
Consider painting or staining the wooden dowel to match existing trim work or create bold contrast with vibrant colors.
Staining enhances the wood’s natural grain while adding rich depth to the overall appearance.
For a more luxurious look, wrap the dowel with gold leaf or metallic vinyl to create an expensive appearance at a fraction of the cost.
This technique works particularly well in formal spaces where you want sophisticated touches.
The leather straps also offer customization potential through dyeing.
Use leather dyes to coordinate perfectly with existing furniture or create interesting color combinations that add visual interest to your windows.
Consider leather conditioners with tinted properties for subtle changes, or opt for dramatic dyes for bold transformations.
These simple customization options ensure your curtain rods become integral design elements rather than basic functional hardware, contributing meaningfully to your room’s overall aesthetic.
Helpful Tips and Alternatives
Make your DIY curtain rod project work for any situation with these practical adjustments and material substitutions.
For Heavier Curtains
- When working with thick or heavy window treatments, standard nails may not provide adequate support.
- Use screws and drywall anchors instead to ensure your curtain rod stays securely mounted.
- This approach distributes weight more effectively across the wall surface and prevents sagging or potential damage.
- Choose anchors rated for the combined weight of your rod, curtains, and any decorative elements you plan to add.
Non-Leather Options
- While leather creates an attractive rustic appearance, several alternative materials can achieve similar results.
- Fabric straps offer softer visual appeal and work particularly well in bedrooms or casual living spaces.
- Canvas provides durability comparable to leather while offering more color options and easier customization through painting or dyeing.
- Rope presents another interesting option, especially for coastal or nautical-themed rooms.
- Natural fibers like jute or hemp create organic textures, while synthetic ropes offer weather resistance for areas with high humidity.
- These alternatives often cost less than leather while providing unique aesthetic possibilities that complement different decorating styles throughout your home.
Conclusion
This DIY curtain rod project perfectly demonstrates how simple materials can create stylish results without straining your budget.
The combination of wooden dowels and leather straps produces professional-looking window treatments that rival expensive store-bought alternatives while allowing complete creative control over the final appearance.
The straightforward process makes this project accessible to crafters of all skill levels, requiring minimal tools and basic techniques.
With endless customization possibilities through painting, staining, or material substitutions, you can create unique pieces that perfectly complement your existing decor.
We encourage you to try this project and make it your own through personal touches and creative modifications.
Share your completed curtain rods, customization ideas, or helpful tips in the comments below.
Your experiences and photos can inspire others to transform their own spaces with this rewarding DIY solution.
Frequently Asked Questions
What materials do I need to make DIY curtain rods?
You’ll need a wooden dowel rod, leather straps or fabric alternatives, sandpaper, a level, hammer, nails or screws, and scissors. Most of these items can be found at home or purchased inexpensively at hardware stores.
How long does it take to complete this DIY curtain rod project?
The entire project can be completed in approximately 15 minutes once you have all materials ready. This includes sanding, cutting leather straps, marking the wall, and final installation.
Can I use alternatives to leather for the mounting straps?
Yes, you can substitute leather with fabric straps, canvas, or rope depending on your decor style. These alternatives often cost less while providing unique aesthetic possibilities for different room themes.
Will DIY curtain rods support heavy curtains?
For heavier curtains, use screws and drywall anchors instead of basic nails for added support. This approach distributes weight more effectively and prevents sagging or potential wall damage.
How can I customize my DIY curtain rods to match my decor?
You can paint or stain the wooden dowel, wrap it with metallic vinyl or gold leaf, and dye the leather straps. These customization options allow you to create pieces that complement your existing room aesthetic.