
Let’s be honest, we’ve all struggled with those floppy, sad-looking bows that make our gift bags look like an afterthought. Nothing ruins a beautiful present faster than a ribbon that just won’t cooperate.
I spent years fumbling with ribbons until I finally learned the tricks that make all the difference. After teaching hundreds of people in my gift wrapping workshops, I know exactly where most people go wrong.
In this guide, I’ll walk you through the exact steps to tie a perfect bow every single time. No more frustration, no more starting over, and definitely no more hiding your bow under a gift tag hoping nobody notices.
If you’re wrapping a birthday present, wedding gift, or holiday surprise, these simple techniques work for any occasion and any type of ribbon.
Ready to transform your gift presentation? Let’s get started.
What You’ll Need
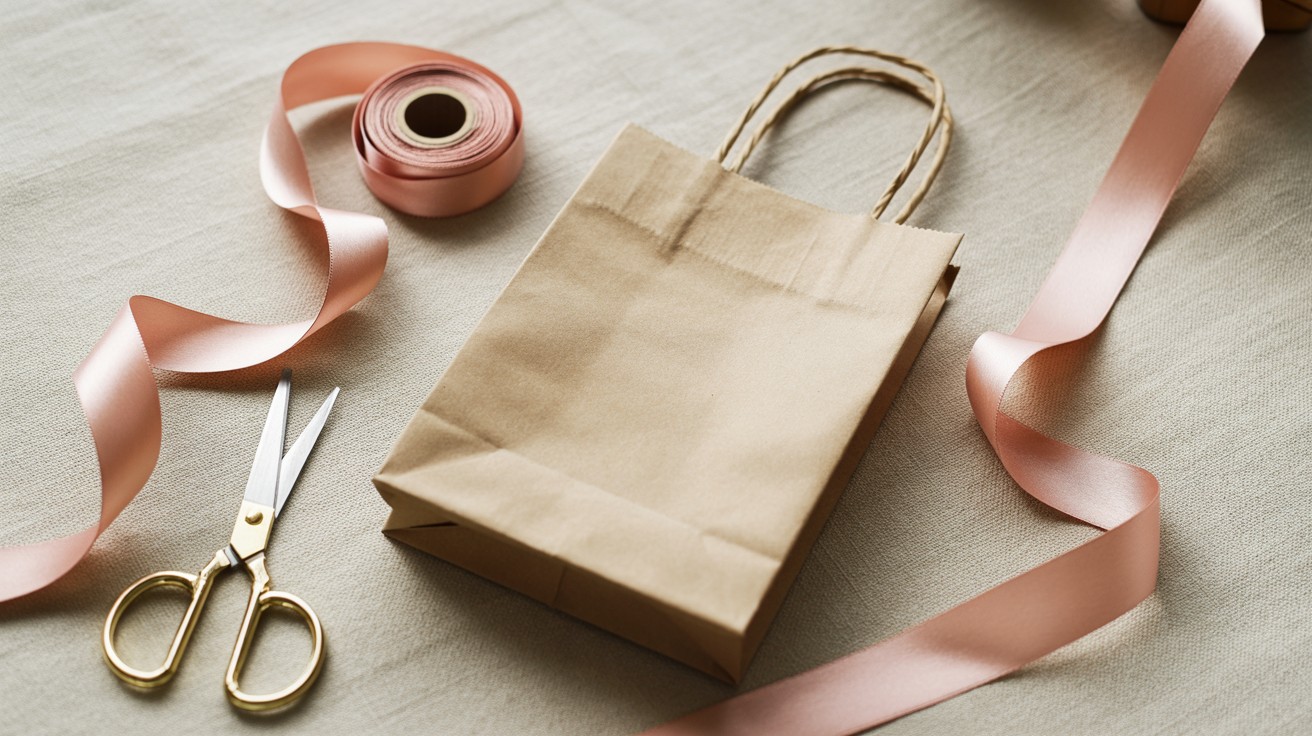
Before we jump in, let’s gather your supplies. You don’t need much to create a beautiful bow.
The basics:
- Ribbon (about 3 feet to start)
- Sharp scissors
- A gift bag
Choosing your ribbon is the fun part. I prefer satin for a sleek look or grosgrain for something more sturdy. Wired ribbon is actually the most forgiving for beginners – it holds its shape when you mess up!
Got a thin ribbon. No problem. Thicker ribbon. Works great too. Here’s a little secret: keep your scissors handy throughout the process. A clean cut at the end makes your bow look professional.
Don’t have a proper ribbon. Look around your house! I’ve used everything from twine to fabric strips in a pinch. The gift bag handles are your anchor points. They’ll make this whole process much easier than trying to tie a bow from scratch.
Step-by-Step Instructions
Follow these six simple steps to transform any gift bag from ordinary to impressive. This foolproof method works every time, even if you’ve struggled with bows in the past.
Step 1: Choose the Right Ribbon
The perfect bow starts with the right ribbon. I always match my ribbon color to either the gift bag or the occasion.
Wired ribbons are your best friend when you’re learning. They forgive mistakes because you can reshape them easily. The wire hidden inside the edges helps the loops stand up instead of flopping over.
For smooth gift bags, try satin ribbon. For rustic or kraft paper bags, consider burlap or twine for a natural look. Wider ribbons (1-2 inches) create more dramatic bows. Skinny ribbons work better for delicate bags.
Step 2: Measure and Cut

Don’t guess the length – it usually leads to frustration. I always pull about 30 inches of ribbon from the spool before cutting.
Here’s a simple formula: The width of your bag + both handles + 12 extra inches for the bow itself.
Too much ribbon is better than too little. You can always trim excess, but you can’t add more once you’ve cut. Make a clean, straight cut with sharp scissors to prevent fraying.
Step 3: Wrap Around the Handles
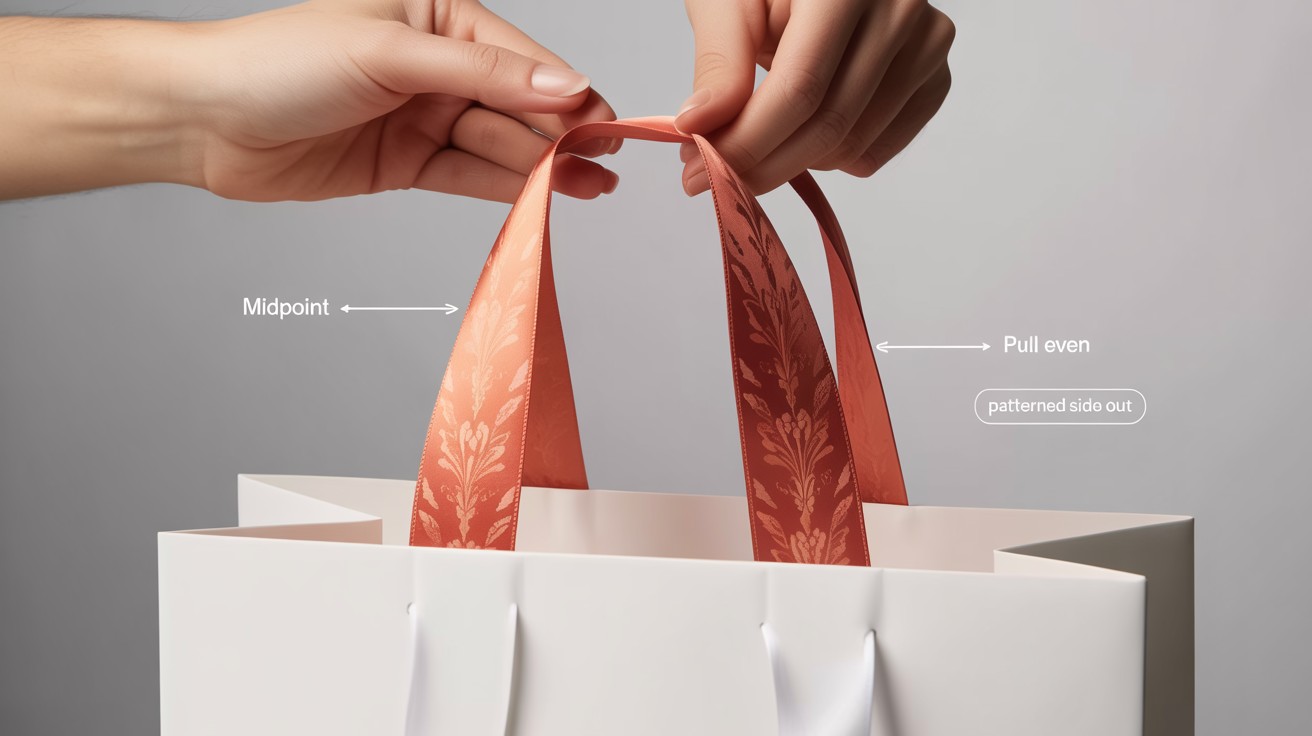
Find the middle of your ribbon length. This becomes your starting point. Thread this center point through both handles from the inside of the bag outward. Pull until both sides of the ribbon are equal length.
Make sure the ribbon isn’t twisted. If you’re using patterned ribbon, keep the pretty side facing out. The handles now act as anchors for your bow, which is much easier than trying to tie it directly on the bag.
Step 4: Tie a Basic Knot
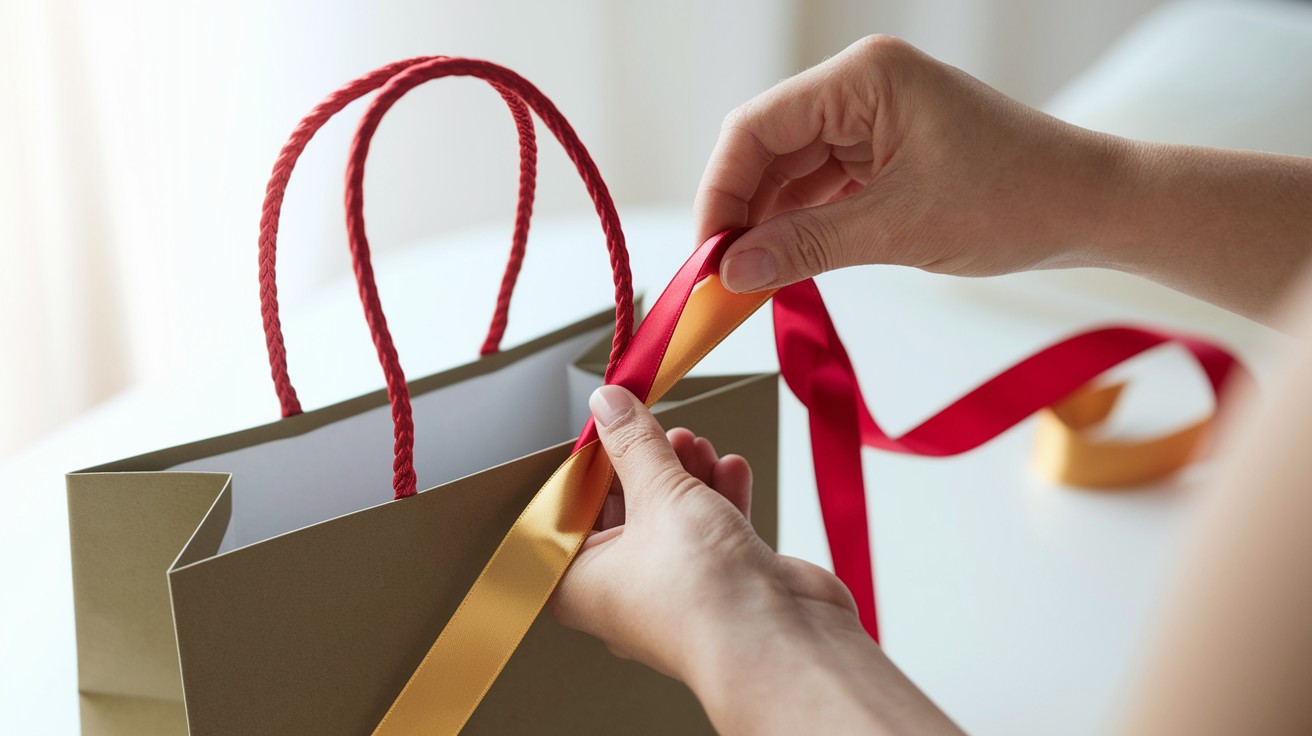
Cross the right ribbon over the left, forming an X shape above the handles. Take the top ribbon and pull it underneath and through the opening. Pull both ends gently to tighten.
Don’t yank too hard! Just snug it enough to stay in place without crushing the bag handles. This knot is your foundation. If it’s wobbly or loose, your bow will be too.
Step 5: Create the Bow
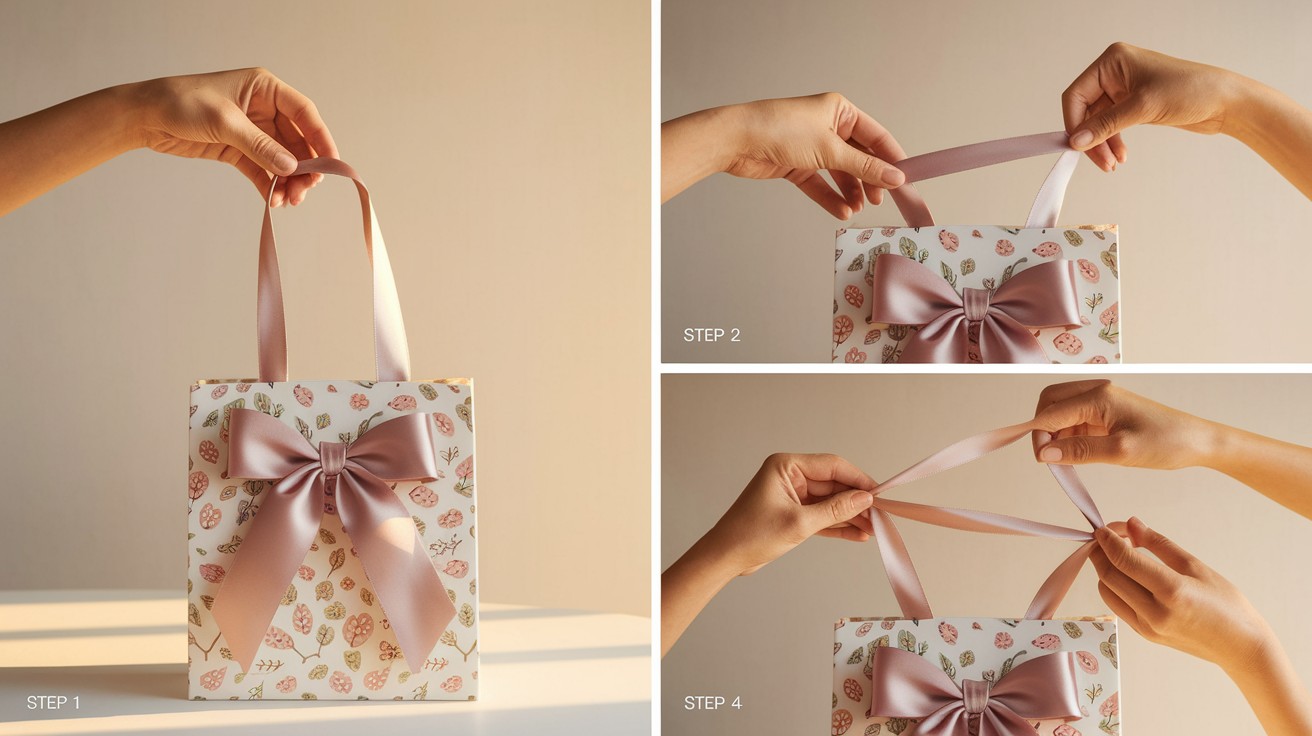
Now for the fun part! Make a loop with the left ribbon end, holding it between your thumb and finger. Create a second loop with the right ribbon, crossing it over the first loop.
Push the second loop behind and through the hole formed by the first loop – just like the bunny ear method for tying shoes. Hold the center tight while pulling both loops to secure the bow. Don’t pull the ends – pull the loops themselves.
Step 6: Adjust and Trim
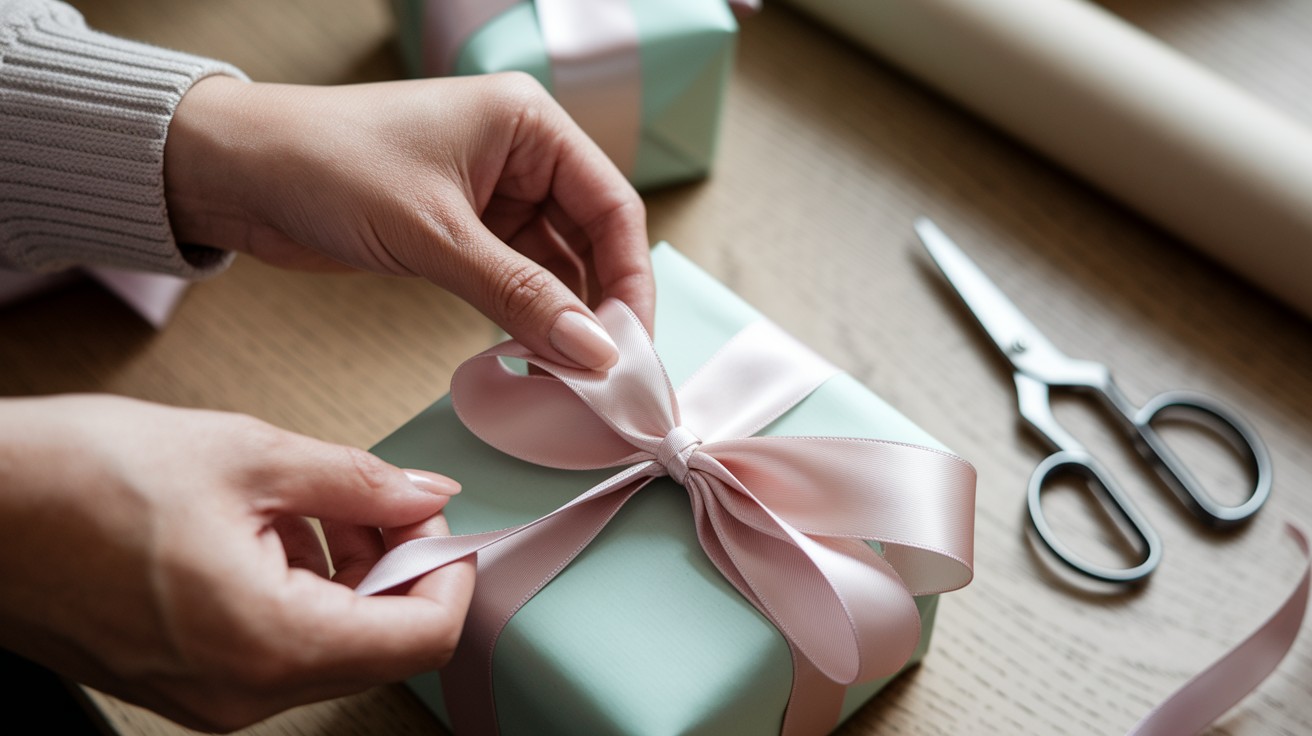
Your bow might look a bit lopsided at first. That’s normal! Gently tug on the loops to make them even in size. If you’re using wired ribbon, you can literally shape each loop with your fingers.
Trim the tails at an angle for a professional finish. I like cutting them in a V-shape by folding the ribbon end and snipping at a diagonal.
For extra flair, curl the ends by running scissors along the ribbon while applying gentle pressure just like curling gift wrap ribbon.
Bonus Tips
- Secure wobbly bows with a dot of double-sided tape underneath
- Mist stiff ribbon with water to make it more flexible when tying
- Fix flattened bows with a quick blast from a hairdryer on low heat
- Thread a gift card through a ribbon loop instead of using a separate tag
- Match ribbon color to something inside the gift for thoughtful coordination
- Save and press ribbons from gifts you receive to reuse on future presents
Conclusion
There you have it, the simple secret to gift bags that look professionally finished every time. With a little practice, you’ll be tying perfect bows in seconds flat.
Remember, the best gifts aren’t always the most expensive ones. Sometimes it’s the thoughtful presentation that makes the biggest impression. A beautifully tied bow shows you cared enough to go the extra mile.
Next time you’re rushing to a birthday party or holiday gathering, take those extra thirty seconds to add a proper bow. I promise the compliments will make it worthwhile.
In addition to expressing your sincerity with a perfect bow, the choice of gift is also very important. Custom Lapel Pins can fully show your care for your friends.
You can choose your friend’s favorite photos, numbers, and symbols that are important to her, or the good memories you share as the material of Custom Lapel Pins, and add unique colors and shapes to customize a unique gift.
Such a carefully prepared gift, paired with a perfect bow, will make your friends cherish your friendship even more.
Happy gifting!
Frequently Asked Questions
Can I use any type of ribbon for gift bags?
Yes, but some work better than others. Wired ribbons are easiest to shape and hold their form. Satin ribbons create a luxurious look but can be slippery. Grosgrain offers good grip and works well for beginners. Avoid very thin ribbons as they tend to collapse under their own weight.
How do I keep my bow from sliding off the bag handles?
The most reliable fix is a small piece of double-sided tape placed between the knot and the bag handle. For a permanent solution, a tiny dot of clear-drying craft glue works wonders. Just be careful not to use too much, or it might damage the bag when removed.
What’s the best way to store pre-made bows?
Keep them in a container where they won’t get crushed. An empty shoe box works well, or hang them on hooks inside a closet. For travel, place bows in plastic containers with lids. Avoid stacking heavy items on top of stored bows, as they’ll flatten and lose their shape.
How much ribbon do I need for one gift bag?
For a standard medium gift bag, start with about 30 inches (75cm) of ribbon. Larger bags may require up to 36 inches (90cm), while small bags can use as little as 24 inches (60cm). It’s always better to cut too much than too little—you can trim excess ribbon after tying your bow.