
Looking at that worn leather couch that doesn’t match your style anymore? You don’t need to spend hundreds on a replacement. Painting leather furniture is easier than you think.
In this guide, I’ll walk you through transforming old leather pieces into stunning focal points for your home. If your leather is cracked, faded, or just the wrong color, paint can give it new life.
I’ve been refinishing furniture for over a decade, and leather painting is one of the most rewarding projects. It’s budget-friendly, letting you customize pieces to your exact style while keeping perfectly good furniture out of landfills.
The best part? You don’t need professional skills to get professional results. Just follow these simple steps, and you’ll wonder why you didn’t try this sooner.
Materials You’ll Need
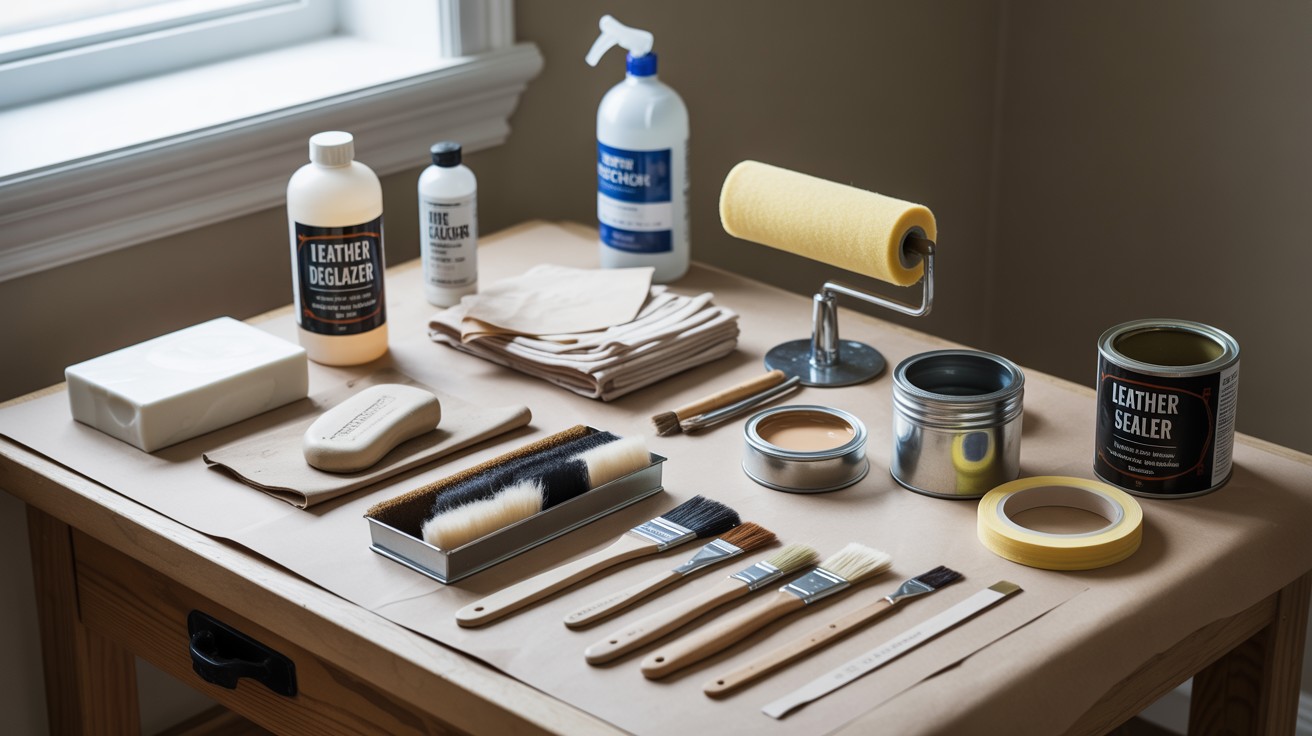
Let’s gather what you need. No mid-project store runs!
For cleaning:
- Mild soap
- Clean rags
- Rubbing alcohol
- Leather deglazer (for glossy finishes)
For painting:
- Leather paint
- Foam rollers
- Fine-bristle brushes
- Mixing containers
Don’t skip the finishing items. A quality leather sealer protects your work. Fine-grit sandpaper helps too. Grab painter’s tape to shield areas you want paint-free.
I’ve tried cheaper alternatives before. They cracked within months. Quality materials might cost more upfront, but they’ll save you from redoing the entire project next year.
Remember that proper ventilation is essential. I open all windows when I work with these products. Your lungs will thank you!
7 Simple Steps To Paint Your Leather Furniture
Want to refresh your old leather furniture? With the right prep and materials, painting leather is easier than you might think. Follow these 7 simple steps for a smooth, long-lasting finish.
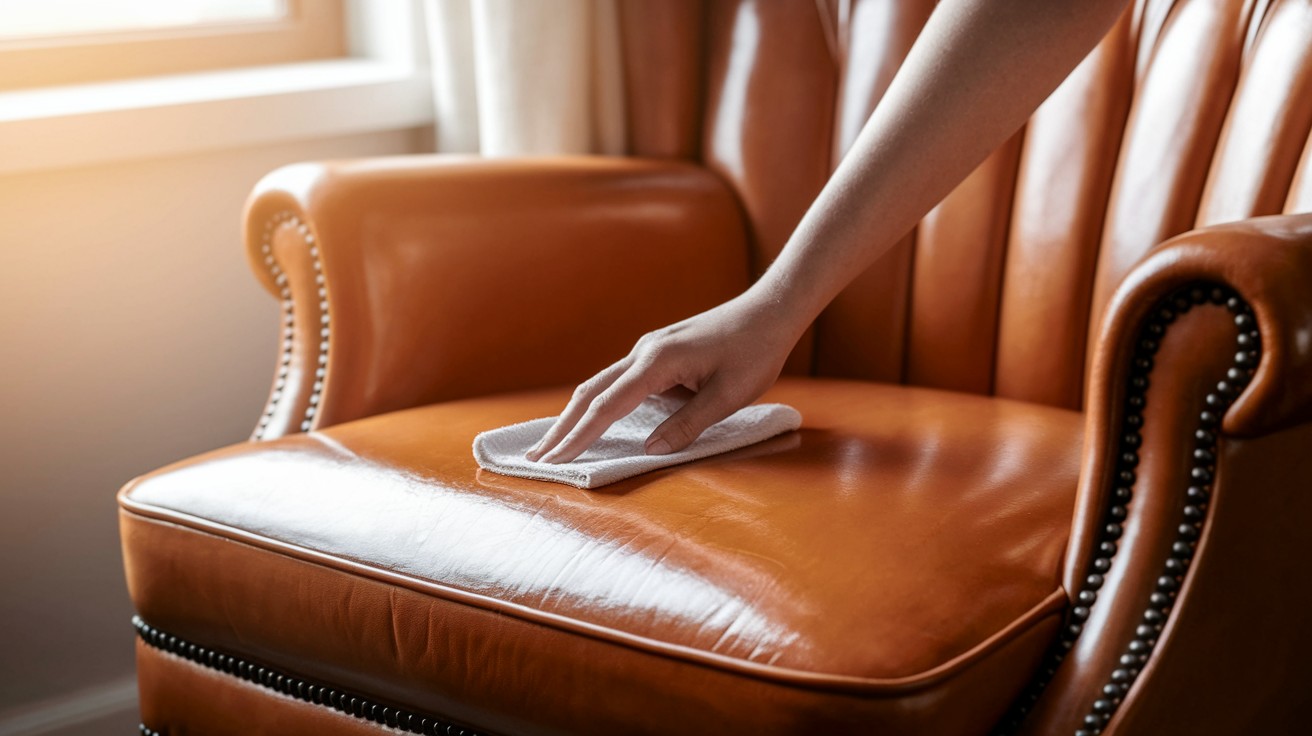
Step 1: Clean the Leather Thoroughly
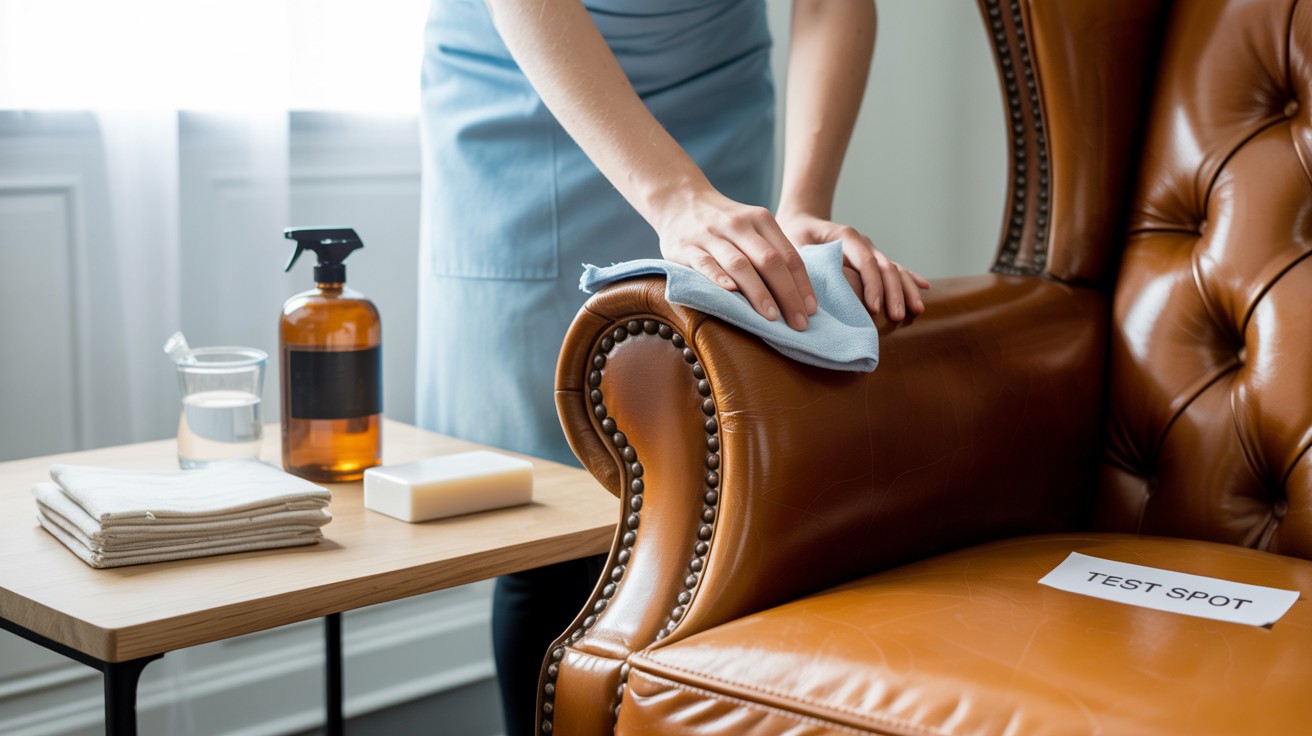
Clean leather is happy leather. Skip this step and your paint won’t stick. Mix a little dish soap with warm water. Wipe down the surface with a cloth. Don’t soak it!
I once skipped proper cleaning on an armchair. The paint peeled off within weeks. Learn from my mistakes. Oils from hands and bodies hide on leather surfaces. They create invisible barriers that reject paint. Thorough cleaning removes these barriers.
Next, grab rubbing alcohol on a fresh cloth. This removes hidden oils. Always test in a hidden spot first.
What you’ll need:
- Basic dish soap
- Rubbing alcohol
- Soft cloths
Let it dry completely before moving on.
Step 2: Lightly Sand the Surface
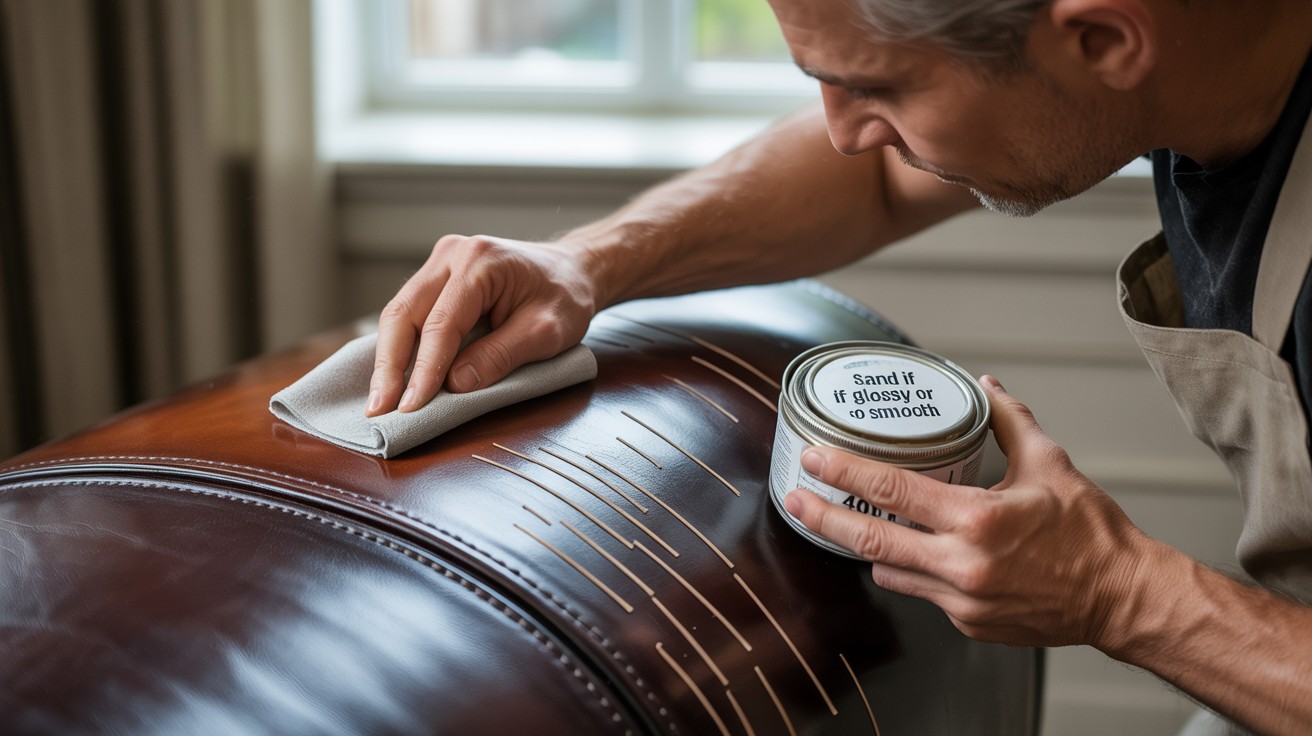
Do you need to sand? It depends.
Sand if your leather is:
- Super glossy
- Very smooth
- Slightly scratched
Skip sanding if your leather is:
- Already dull-looking
- Thin or delicate
- Suede or nubuck
Think of sanding like creating tiny teeth on the surface. These microscopic scratches give paint something to hold onto. Most factory leather has protective coatings that resist liquids. Sanding helps break through these barriers for better adhesion.
Use fine sandpaper (400-600 grit) with light pressure. Just enough to create tiny scratches for the paint to grab. Wipe away all dust when you’re done!
Step 3: Apply Leather Prep or Deglazer
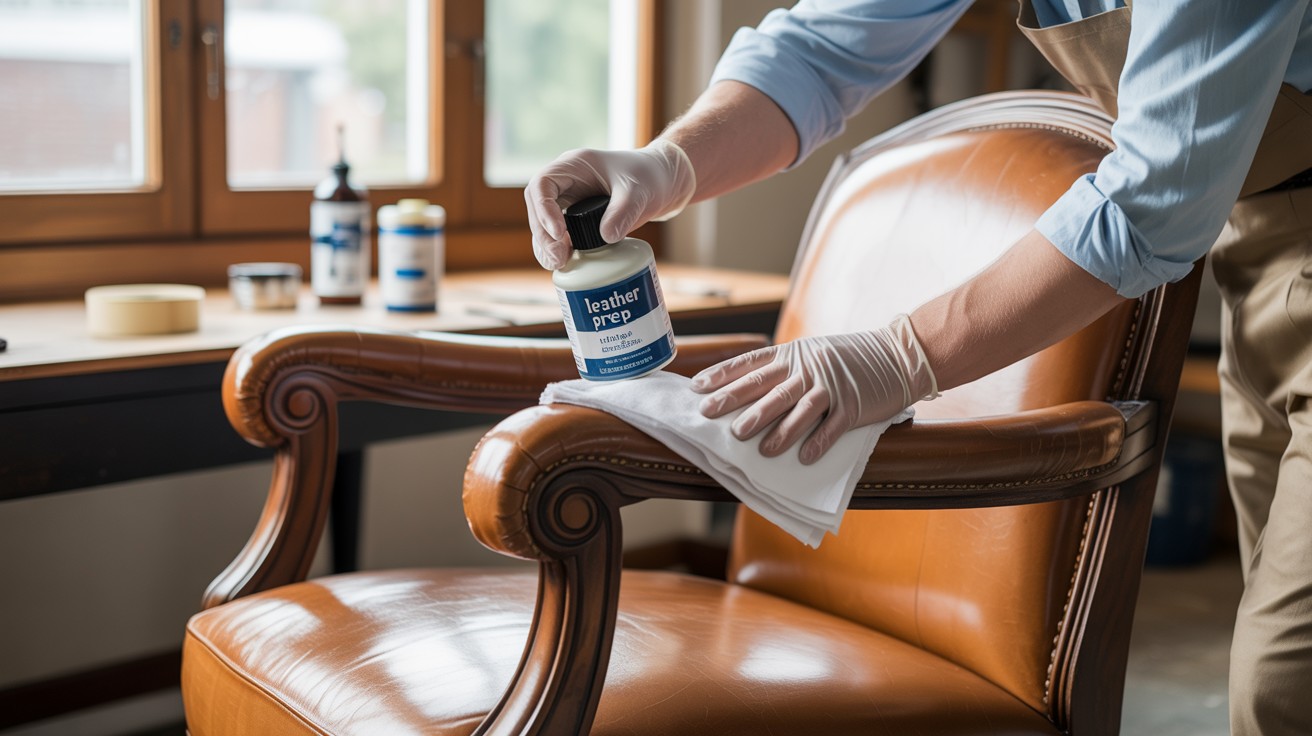
This stuff removes factory finishes so paint can stick better. Put a little on a cloth – never pour directly on leather. Work in small sections using circular motions.
Deglazers are professional-grade products that break down surface treatments. They create the perfect canvas for your new color.
Without this step, paint might look great initially but peel away over time. Proper preparation prevents poor performance. Your clothes will pick up color. That’s good!
Open windows when using this stuff. The fumes are strong, and gloves are a smart idea. When leather looks slightly duller, you’re ready for the next step.
Step 4: Apply a Primer
You need primer when:
- Changing from dark to light colors
- Working with glossy leather
- Covering cracks or damage
Primer creates a neutral base that helps true colors shine. It prevents the old color from bleeding through your new paint.
The right primer can hide minor imperfections. It fills tiny cracks and creates a smooth surface for the topcoat.
Apply thin coats with a foam roller or brush. Think whisper-thin layers. Let each coat dry completely – usually 1-2 hours. Two thin coats work better than one thick coat.
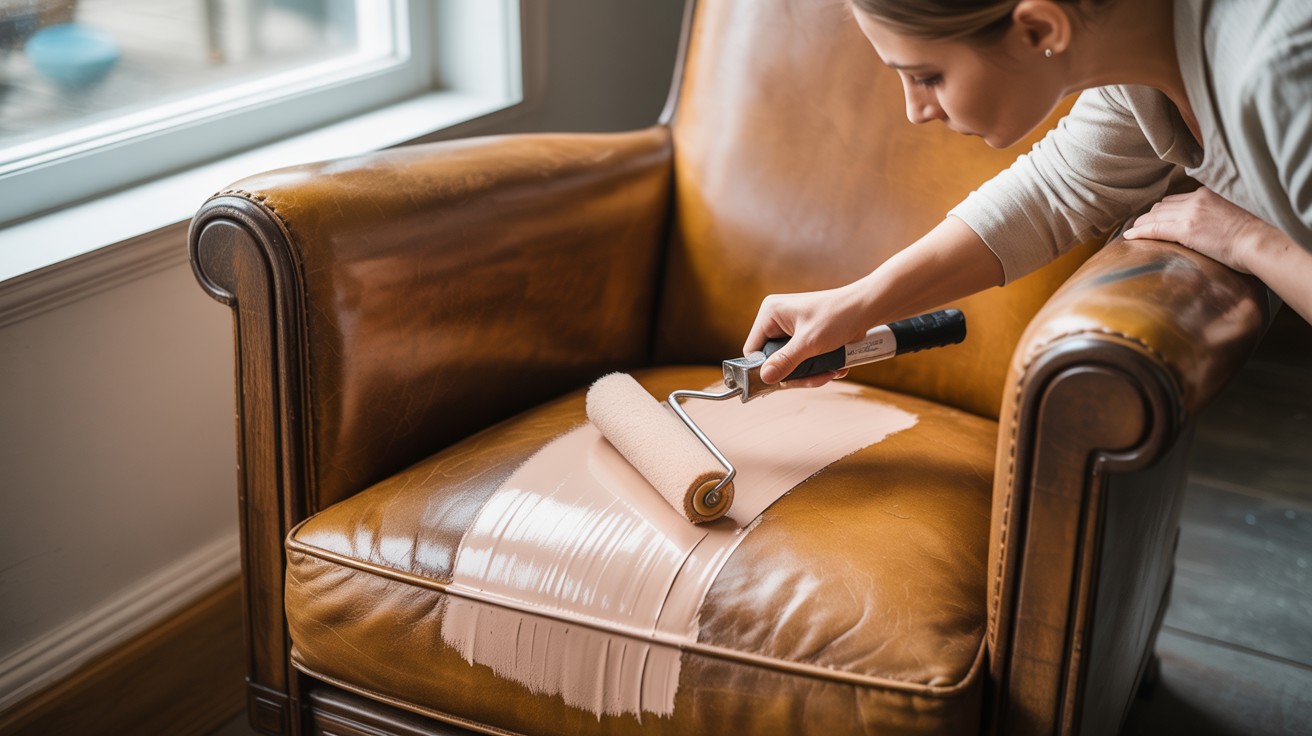
Step 5: Start Painting
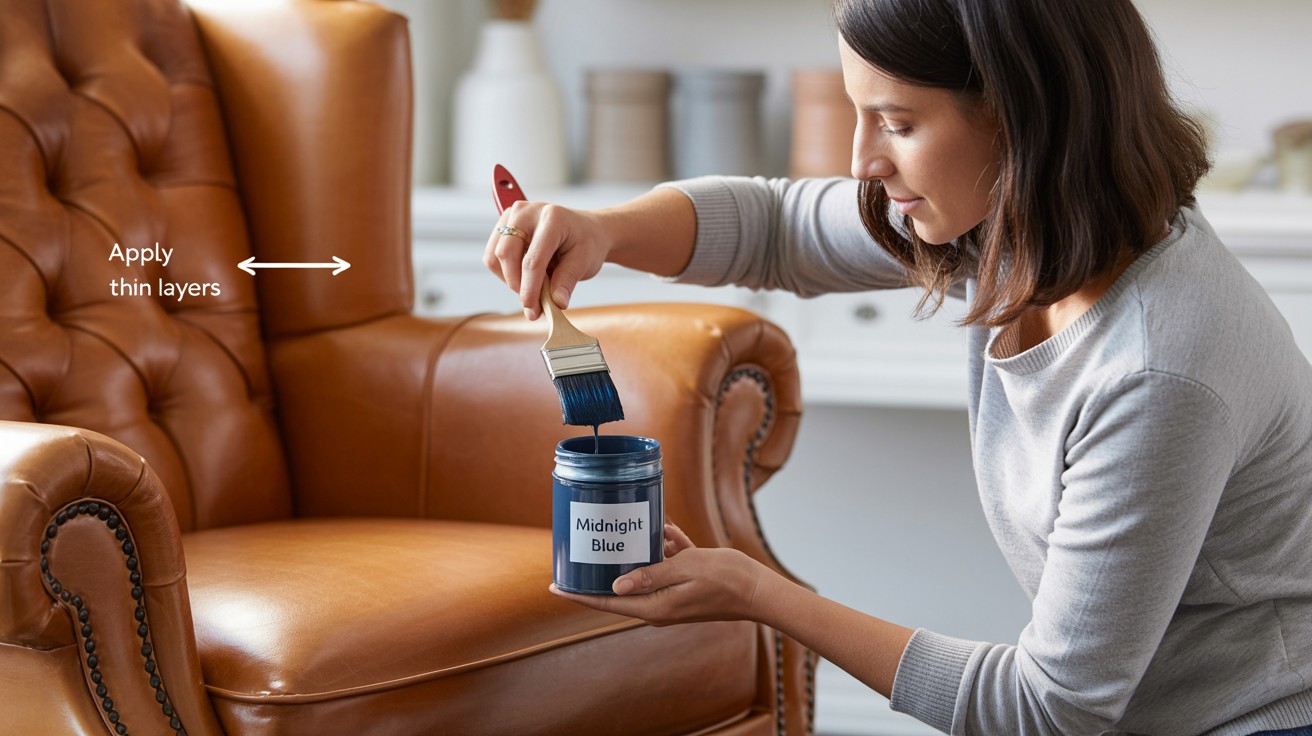
Thin layers win the race! Thick paint will crack later. Pour a small amount of paint into a container. You can thin it slightly (10%) for smoother application.
Leather paint needs to flex with the material. Multiple thin layers maintain this flexibility better than one thick coat. Heat can affect drying time dramatically. Avoid painting in direct sunlight or near heaters for best results.
For large areas:
- Use foam rollers
- Go in one direction
- Apply 3-4 thin coats
For edges and details:
- Use a fine brush
- Follow the furniture’s natural lines
- Build color slowly
The most common mistake? Too much paint at once.
Step 6: Let It Dry & Cure Properly
Paint might feel dry quickly, but don’t be fooled!
Between coats:
- Wait at least 30 minutes
- Touch test in a hidden spot
- If paint comes off on your finger, wait longer
Humidity affects drying time significantly. In damp conditions, double your waiting time between coats. Temperature matters too. Paint cures best between 65-75°F. Extreme temperatures can prevent proper hardening.
After your final coat:
- Wait 24 hours before light use
- Wait 72 hours before sitting
- Give it 7 full days to completely harden
Rushing this step leads to smudges and fingerprints.
Step 7: Seal the Paint
Think of sealer as sunscreen for your paint job. It protects your hard work.
A good sealer:
- Stops cracking and peeling
- Makes the paint flexible
- Guards against spills and sun damage
Daily use puts constant stress on painted surfaces. Sealers add a protective barrier against friction and body oils. Sunlight through windows can fade even the best paint jobs. Quality sealants include UV protection to maintain color vibrancy.
For a matte look, use water-based leather sealers. For shine, choose leather finishers with gloss. Apply with a soft cloth using gentle circles. Two thin coats work best.
Seal slightly beyond your painted areas to prevent edges from lifting later. Wait 24 hours after sealing before using your furniture. Your patience will pay off!
Conclusion
You’ve now got everything you need to transform that tired leather furniture into something special. Remember, this isn’t just about saving money—though you’ll save hundreds compared to buying new pieces.
This is about creating exactly what you want. That perfect color that matches your room. That unique piece no one else has.
My first leather painting project was terrifying. Now it’s my favorite weekend activity. Start small if you’re nervous, maybe a footstool or small cushion.
Take your time with each step, especially the cleaning and drying phases. These make all the difference between a professional-looking finish and a disappointing one.
Your “new” furniture is waiting to be discovered under that old color. Grab your supplies, set aside a weekend, and breathe new life into those leather pieces. I can’t wait to see what you create!
Frequently Asked Questions
Will the paint crack or peel over time?
Not if you follow the process correctly. The key is proper preparation, thin coats, and quality sealer. I painted my living room sofa four years ago, and it still looks great with daily use. Skipping steps—especially cleaning and deglazing—almost guarantees peeling later.
Can I paint any type of leather?
Most types, yes, but with different results. Genuine and top-grain leathers accept paint beautifully. Bonded leather is trickier because it’s partly synthetic. Suede and nubuck can be painted but will lose their distinctive texture. Always test in a hidden spot first. I’ve had excellent results on everything except very worn, cracking leather.
How long does a painted leather piece last?
With proper prep and sealing, 3-5 years of regular use is realistic. High-friction areas like armrests might need touch-ups sooner. My dining chairs get heavy use and needed minor touch-ups after two years, while decorative pieces still look perfect. Protect your work with leather conditioners every few months.
Can I change dark leather to a light color?
Yes, but it requires patience. You’ll need primer and multiple coats of paint. My chocolate brown ottoman is now cream-colored after two coats of primer and four coats of paint. The key is allowing proper drying time between layers. Don’t rush this process—each layer needs to cure fully before adding the next.