Transforming part of Entryway into functional mudroom lockers was really exciting and challenging. I wanted to make a clean, organized place to keep jackets, shoes, bags, and seasonal items.
While many associate mudrooms with entryways, I find my coat closet to be a good alternative.
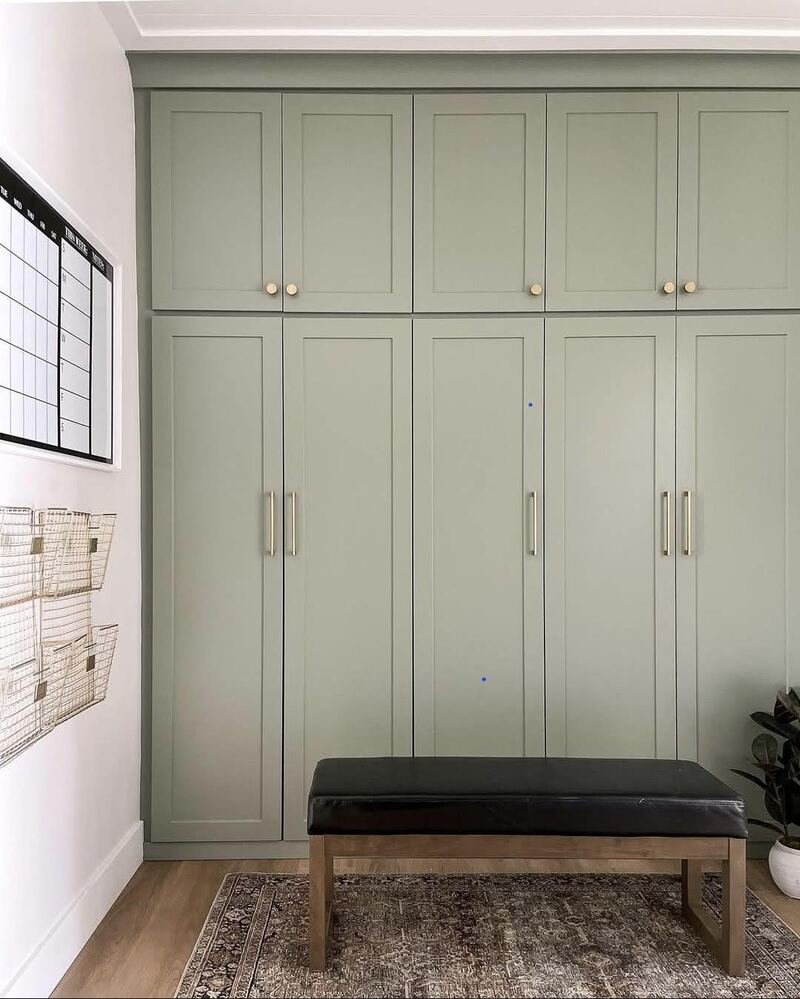
Inspired by designs online, I customized the look to match my room’s aesthetic a soft sage green paired with warm wood tones. This DIY project was a blending of creativity, utility, and personal style. I will share my journey of my DIY Mudroom locker with you.
Create a Mudroom Lockers Layout Design
I made a mudroom locker for Entryway. The fun and creative process was in coming up with a clear design. I sketched out my ideas, considering both the functional and aesthetic needs of my space.
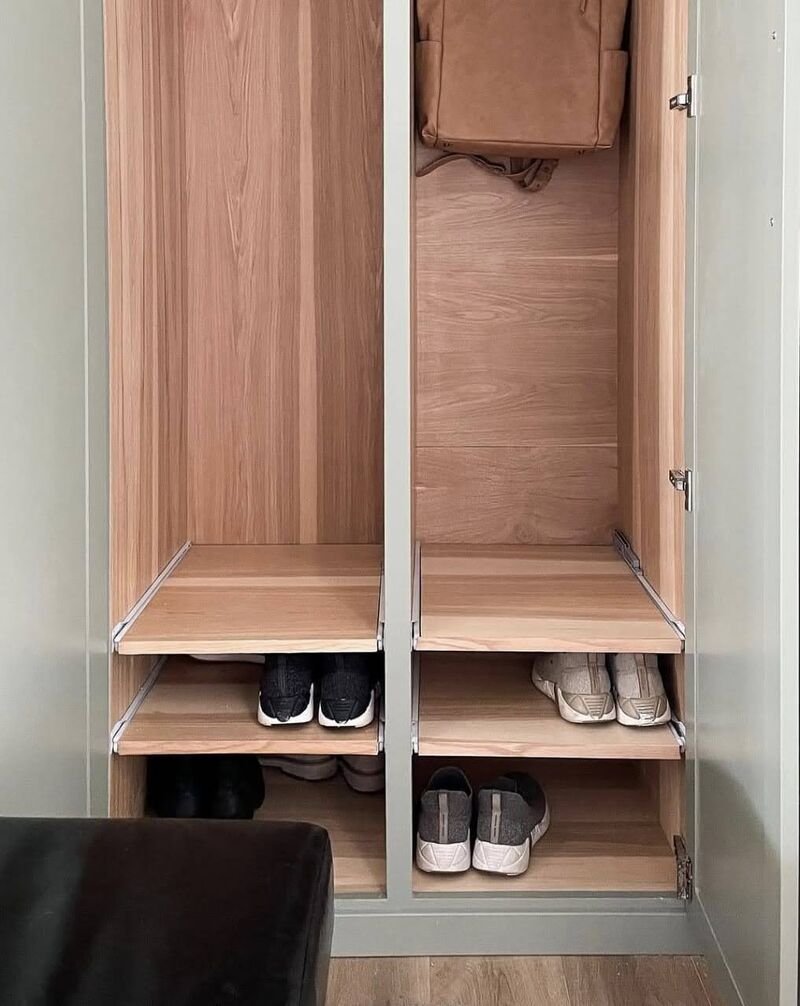
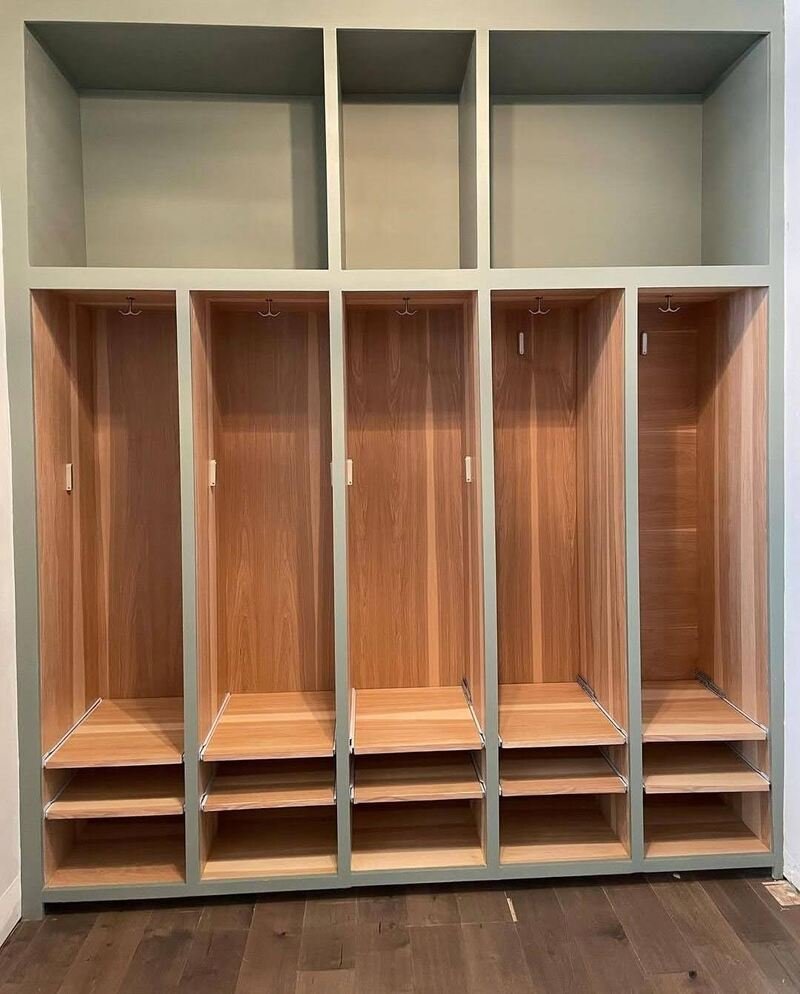
Since I was working with limited Entryway dimensions, I decided to incorporate three main sections to maximize utility: upper cabinets for off-season storage like winter hats and blankets, vertical cubbies with hooks for jackets and bags, and a bench with cubbies below for shoes and seating.
This design approach allowed me to create a multi-functional setup that fits well into my room. I opted for a minimalist design with clean lines, so it would fit with the decor of Entryway.
The Shaker-style cabinet doors gave it a modern yet classic touch, while the warm oak finishes for the cubby interiors gave it a cozy and premium feel.
Keeping practicality in mind, I also made sure each section had enough space, allowing for the different objects to fit without appearing chaotic. The sage green helped complete my room’s color palette.
Designing it on paper before making it crucial to visualize the final appearance and ensure the lockers are functional as well as aesthetically pleasing, which is the perfect mix of looks and functionality.
Material and Tools Need for DIY Mudroom Lockers
Materials Used For this Project
- Plywood: For the body of the lockers, it is light yet strong.
- Oak veneer sheets: to line the cubbies and give a high-end, warm feel.
- Trim Boards: To give smooth, professional edges and final touches.
- Paint: A soft sage green, semi-gloss to resist scuffs
- Hardware: Gold knobs on the upper cabinets and bar handles for the locker doors.
- Screws, wood glue, and L-brackets: To ensure the structure was secure and long-lasting.
Pro Tip: When selecting materials, consider both aesthetics and practicality. The Sage green paint gave Entryway a modern touch, while the oak veneer added warmth.
Tools Required For this Project
- Saw Tools: circular saw for cutting large plywood sheets, jigsaw for curved edges, and miter saw for precise angles on the trim boards.
- Drill and Screwdriver: To assemble the cubbies and attach the cabinet doors.
- Measuring Tape and Level: To ensure everything was aligned and proportionate.
- Sander and Sandpaper: To smooth edges and prepare the surfaces for paint and stain.
- Paint Supplies: rollers for large areas, brushes for the tiny corners, and painter’s tape for sharp lines.
Preparation Tip: Before the actual painting, check whether your tools are in excellent condition, and store drill bits and screws as a reserve to avoid interruptions during painting.
Measurement of Dimensions for Mudroom Lockers
Accurate measurements made the bulk of this undertaking, ensuring that everything fits perfectly in Entryway’s layout. The total height of the lockers was calculated to be 8 feet, and I duly aligned them along with the ceiling for a custom-built appearance.
This really endowed the structure with a tall and elegant look. The upper cabinets were 2 feet tall, thereby providing enough storage for seasonal items while remaining easily accessible.
The vertical cubbies below the upper cabinets were 4.5 feet tall to store long coats and bags. The bench was 1.5 feet tall and provided a comfortable seating height with enough depth for shoe storage.
I divided the bench into cubbies, 18 inches wide and 12 inches deep. This way, it was possible to put almost anything in them. This made the storage boxes flexible for use with various types of items while maintaining a clean, streamlined look.
I measured using a tape measure and then marked these dimensions on the wall before cutting any materials to see the design come alive in real time and have made any necessary adjustments.
Careful planning of the dimensions not only ensured functionality but also gave the mudroom lockers a polished, professional look, transforming part of Entryway into an organized and stylish space.
Build a DIY Mudroom Lockers Bench
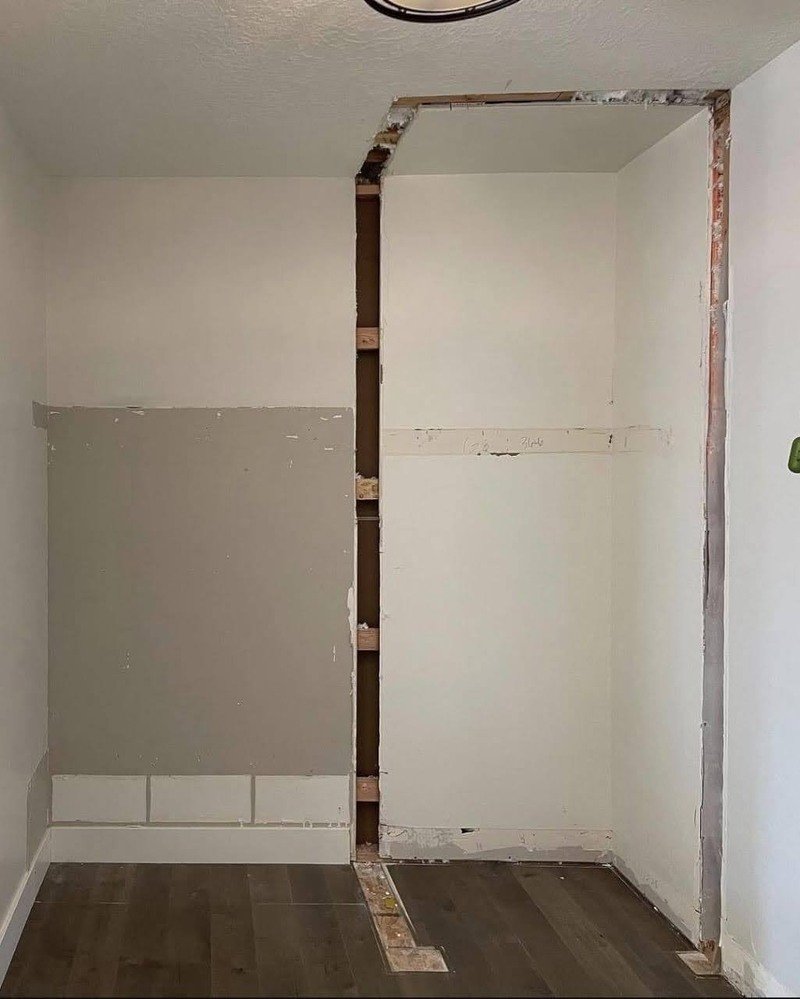
The bench was a mainstay of the mudroom locker, providing both seating and a place to store shoes. I began by pulling the baseboards and sanding the imperfections from the walls to get a good foundation surface.
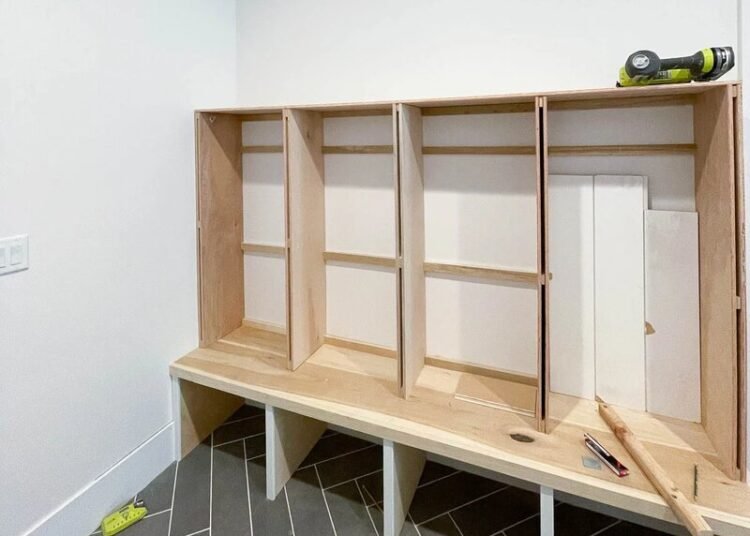
I built a rectangular frame using 2x4s as the base, attached firmly to the wall using screws and brackets for additional strength. I then broke this frame up into equal-distance cubbies by running perpendicular plywood dividers for multiple pairs of shoes to fit inside.
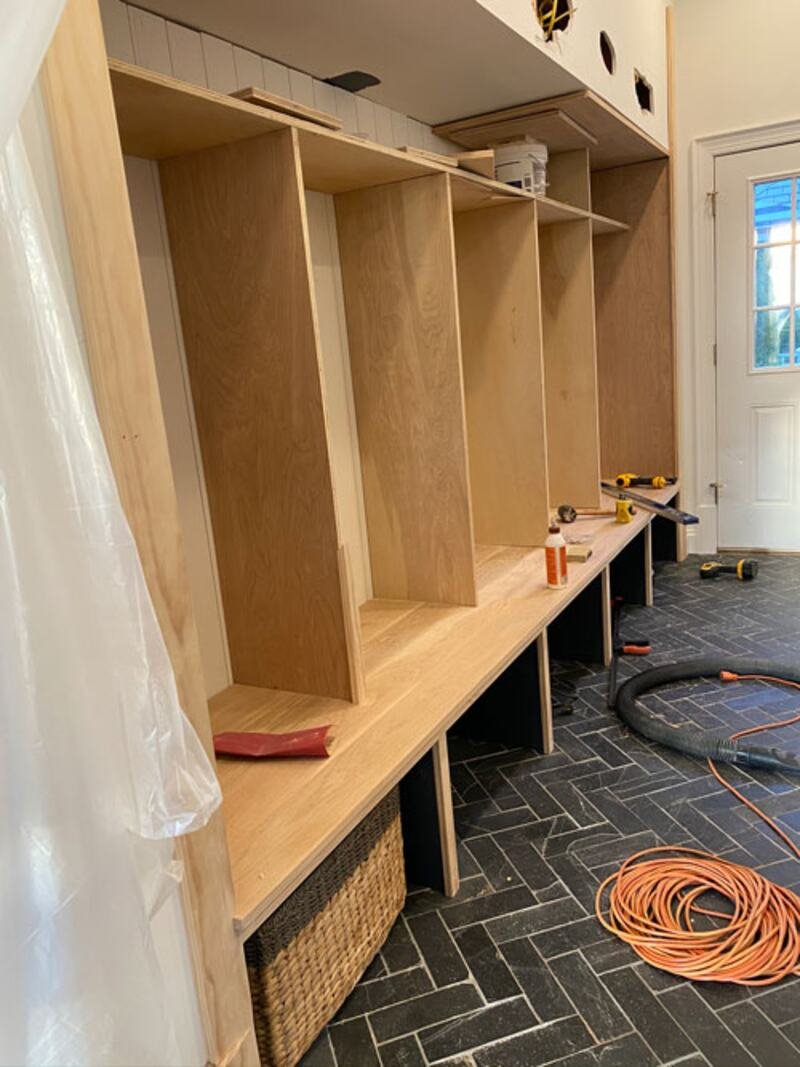
I chose a thick oak board for the benchtop because of its durability and natural warmth. After cutting it to size, I sanded the surface thoroughly to remove rough edges and enhance its grain.
I then applied a light wood stain and sealed it with polyurethane for added protection and a polished finish. The completed bench provided a functional and stylish centerpiece for the mudroom, seamlessly blending storage and seating into one practical design.
Construct the Lockers Compartments
Once the bench was in, I turned my attention to the vertical locker compartments that would be used for neat storage of jackets, backpacks, and bags.
I cut up plywood sheets to make the back, sides, and dividers of each cubby. I made sure each section was 18 inches wide and 12 inches deep.
The pieces were put together with wood glue and screws for a strong, solid structure. I attached the lockers to the bench using L-brackets and screws.
To enhance functionality, I installed hooks inside the cubby for hanging items. For a premium finish, I lined the interiors with oak veneer sheets to tie them aesthetically with the oak benchtop.
These comprised a balance between practicality and design, so as to provide a polished and efficient storage solution.
Assembling the Upper Cabinets
These helped with additional storage for such less frequently used items as blankets and seasonal equipment. I built them out of rectangular plywood boxes, making sure each was deep enough for some of the bulkier pieces.
After marking their placement directly over top of the vertical lockers, I mounted them to the wall with heavy-duty L-brackets and screws.
To create a seamless, integrated appearance, I used trim boards to fill any gaps between the cabinets and the wall.
This would make it appear seamless as it complemented the rest of the structure. The upper cabinets utilized the vertical space without closing the place up.
They concluded the functional design of the mudroom with stylish, accessible storage that maximized efficiency.
Adding Mudroom Locker Doors
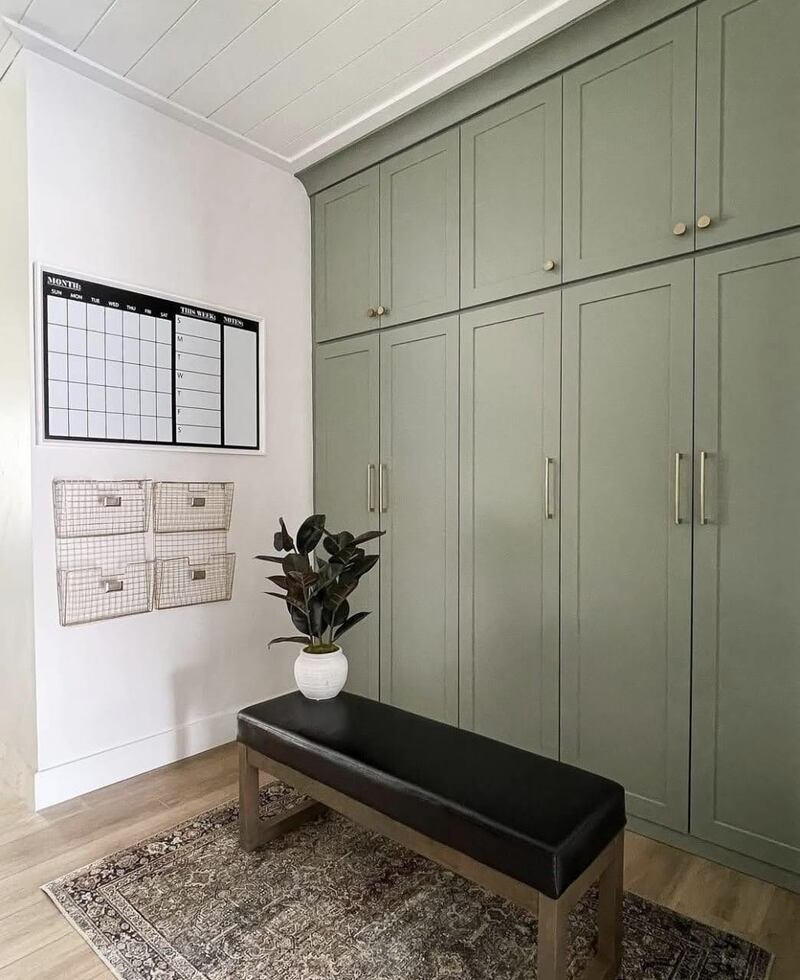
The addition of cabinet doors gave it a touch of sophistication and visual appeal. I selected Shaker-style doors with recessed panels, providing the most timeless and elegant design possible.
Cut the plywood panels, added narrow trim boards to the edges, sanded them down to get a smooth finish, and then mounted them.
Then painted the doors Sage green. The color looked bright and even with two coats. Soft-close hinges were on the doors so that they opened and closed easily, while gold knobs and handles provided a subtle contrast against the paint.
The lockers improved the aesthetic look of the mudroom and added functionality to it along with elegance. They gave it a personal and stylish look.
Paint the Lockers for Finish
Painting was the final touch that gave life to the mudroom lockers. I prepared the surfaces by sanding them down to smoothness and then applying a coat of primer for even paint coverage.
I used a roller to paint the larger areas in sage green, while using a brush for the detailed corners and edges. Two coats of paint gave it a smooth, polished finish.
For added protection against daily wear and tear, I applied a clear topcoat, adding durability and a subtle sheen. The sage green paired beautifully with the oak accents, creating a harmonious and modern look that ties the entire structure together.
Final Reveal of Our DIY Mudroom Locker
The completed mudroom lockers transformed Entryway into a functional and organized space. The sage green paint and warm oak accents created a balanced design that felt both modern and inviting.
Each element the upper cabinets, vertical lockers, and bench came together to form a cohesive and stylish storage solution.
Now, coats hang neatly, shoes are tucked away, and seasonal items have their designated spots. This project improved my room’s organization but also improved its aesthetic.
It was a boost in confidence regarding DIY home improvement and gave a space that perfectly balances practicality and personal style.


