
Tired of messy, tangled garden hoses? We’ve all been there – that frustrating pile of rubber taking up space and making your yard look cluttered.
A DIY hose holder is the simple, budget-friendly solution that can transform your garden maintenance routine. In this article, i will share 7 creative hose holder ideas you can build in a weekend.
I’ll walk you through the materials you’ll need for each project and provide step-by-step building instructions. You’ll also find helpful tips to match your holder to your outdoor space and a quick-start guide to help you choose the right design.
As gardening experts with over 15 years of experience, we’ve tested these designs in our own yards. These solutions work – they keep hoses tidy, extend their life, and make watering tasks much easier.
Say goodbye to that messy coil on the ground and hello to an organized, functional yard space!
Why a DIY Hose Holder is a Game Changer?
A homemade hose holder does more than just tidy up your yard. It transforms how you manage outdoor tasks while adding a personal touch to your space.
Store-bought hose holders can cost $30-50 or more, but you can build one yourself for under $15 using basic materials. The money you save can go toward other garden projects or tools you actually need.
What makes DIY holders truly special is how you can customize them to fit your exact needs. Want it higher off the ground? Need it to hold a longer hose? Prefer a specific color to match your fence? You get to decide every detail.
Our team has built dozens of these holders over the years for homes of all sizes. We’ve seen firsthand how a simple weekend project can make daily yard work so much easier and keep outdoor spaces looking neat and organized year-round.
7 Genius DIY Hose Holder Ideas
I’ve tested dozens of hose storage ideas in my own yard. These seven stand out as the most practical and simple to build. You can make any of them in a weekend with basic tools.
1. Wall-Mounted Hose Hook

A simple wooden board with a sturdy hook attached that mounts directly to your house, shed, or fence. This basic design uses minimal materials while providing a secure spot to hang your coiled garden hose off the ground.
This space-saver is perfect for patios or small yards. The design keeps your hose off the ground and neatly coiled.
What you’ll need:
- Heavy-duty wall hook (rated for at least 25 pounds) – $8
- Wood backing (cedar works great outdoors) – $6-10
- Outdoor screws – $3
- Drill
Construction details: Cut cedar board to about 12″x12″. Pre-drill holes in all four corners. Mount the hook in the center with at least two screws. Attach the entire assembly to your wall studs or use wall anchors for masonry. Sand edges for splinter prevention.
Total cost: $17-21
Make it yours: Paint the wood to match your house or add a small nameplate. I painted mine blue to match my garden bench.
2. Freestanding Wooden Post
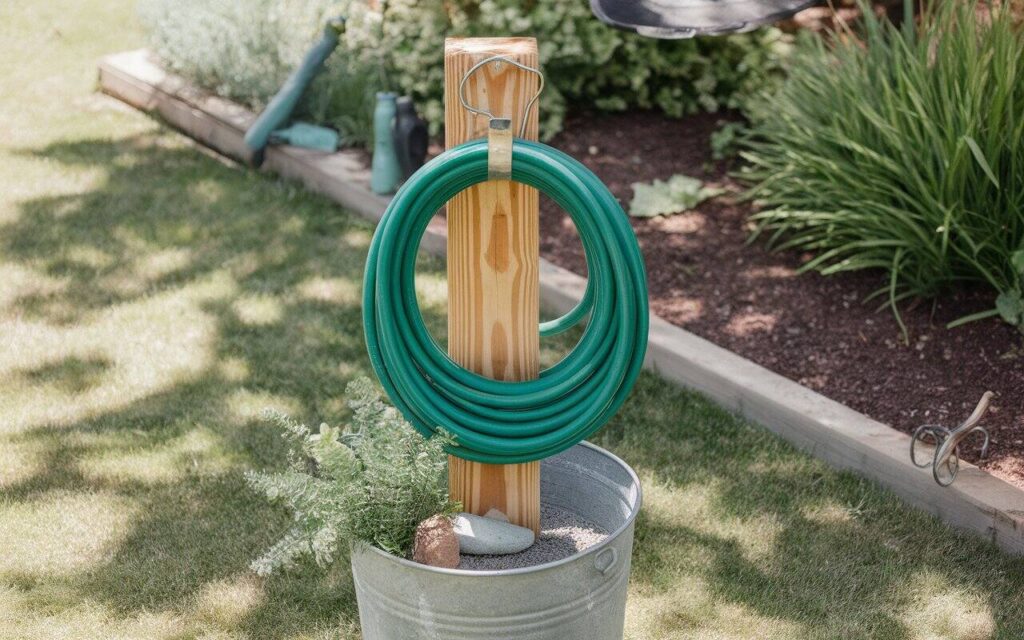
A portable hose holder made from a vertical wooden post set in concrete inside a bucket. The design allows you to place your hose storage anywhere in your yard and move it as needed, unlike fixed wall mounts.
Want to move your hose holder around? This classic design gives you freedom to place it wherever you need.
What you’ll need:
- 4×4 pressure-treated fence post (about 4 feet tall) – $10
- Large hook or commercial hose hanger – $5
- Quick-set concrete – $8
- 5-gallon bucket for the base – $4 (or free if recycled)
Construction details: Cut post to 4 feet length. Center it in bucket and fill with quick-set concrete, leaving 1 inch at the top unfilled. Let dry for 24 hours. Screw in the hose hanger about 6 inches from the top. For extra stability, add small rocks around the base before pouring concrete.
Total cost: $23-27
The best part? You can place this anywhere in your yard without drilling into walls.
3. Galvanized Bucket Holder
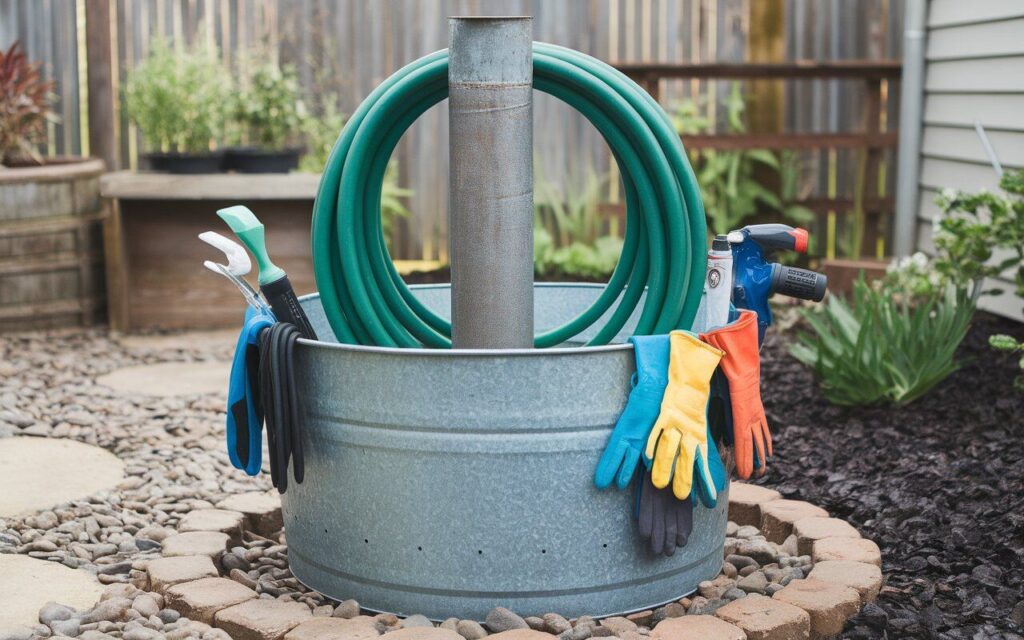
A multi-functional hose storage solution that uses a metal bucket filled with concrete and a center post. Your hose wraps around the post while the bucket rim provides extra storage space for garden tools and accessories.
My favorite multi-purpose option! This holder keeps your hose tidy while giving you extra storage.
What you’ll need:
- Large galvanized bucket (2-3 gallon size) – $15
- Concrete mix – $8
- 2-inch PVC pipe (about 2 feet tall) – $6
- Small rocks for drainage – Free (collected from yard)
Construction details: Drill 4-5 holes in bucket bottom for drainage. Place rocks in the bottom (about 2 inches deep). Center the PVC pipe and secure it temporarily with tape. Mix concrete and pour around the pipe, leaving the top 8 inches of pipe exposed. Let cure for 48 hours before using.
Total cost: $29
Add a few holes in the bottom for water drainage. You can store garden gloves, sprayer nozzles, and other small tools in the bucket too.
4. Pallet Hose Rack
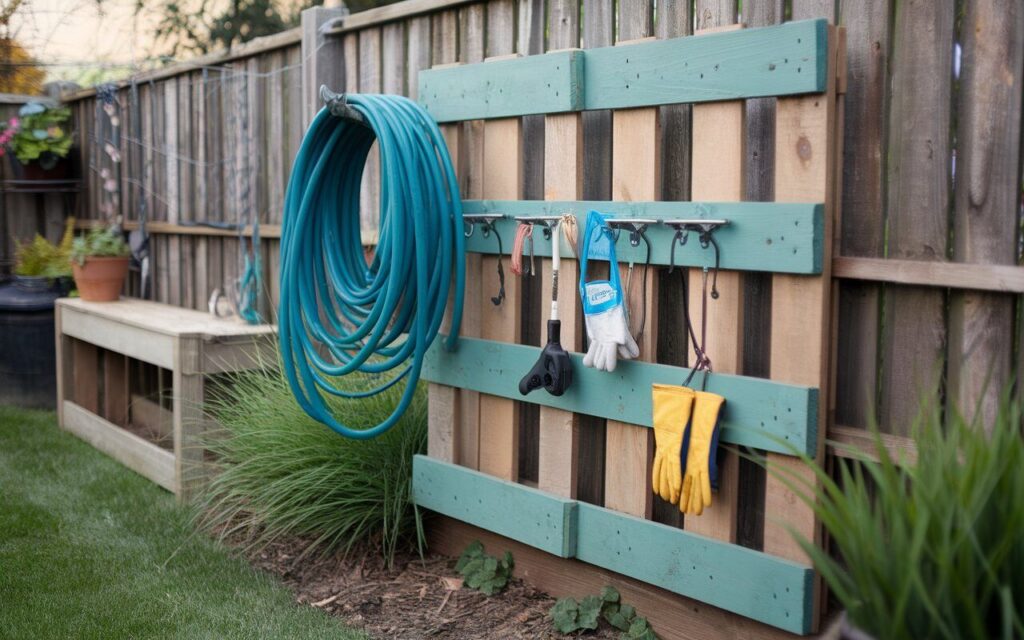
A repurposed wooden shipping pallet mounted vertically that creates a large surface area for winding and storing your garden hose. The slats of the pallet create natural guides for the hose while the open design allows for quick drying.
Got an old wooden pallet? Turn it into useful yard storage that costs almost nothing.
What you’ll need:
- Wooden pallet – Free (check local businesses/Facebook Marketplace)
- 80-grit sandpaper – $3
- Outdoor paint or stain – $10
- 3-4 heavy-duty hooks – $8
Construction details: Clean pallet thoroughly with soap and water. Sand rough edges and splinters. Apply two coats of outdoor stain or paint for weather protection. Stand the pallet vertically and secure to a fence or wall using at least four 3-inch screws into studs. Space hooks evenly across the middle slats, screwing them in at least 1 inch deep.
Total cost: $21 (even less if you already have paint)
Stand the pallet vertically and attach it to a fence or wall. This gives you plenty of space to wind your hose around the slats. Add extra hooks for sprayers or gloves.
5. Copper Pipe Stand

An attractive hose holder built from copper plumbing pipes and fittings arranged in a U-shape. This modern design stands freely in your garden or yard and develops a beautiful patina finish over time as the copper ages naturally.
This sleek, modern option looks great in contemporary yards. The copper gets a nice patina over time.
What you’ll need:
- ½-inch copper pipe (about 6 feet total) – $18
- 4 copper elbows – $8
- 2 T-fittings – $6
- Pipe cutter – $15 (or borrow one)
- Pipe glue or solder kit – $10
Construction details: Cut pipe into five sections: two 12-inch pieces for the base, two 18-inch pieces for the uprights, and one 12-inch piece for the top. Use T-fittings to connect the base pieces with the uprights. Add elbows at the top of the uprights and connect with the top piece. For stability, fill the base pipes with sand before sealing all connections.
Total cost: $42-57
Form the pipe into a U-shape with a wide base. The copper resists rust and looks better with age.
6. Repurposed Tire Reel
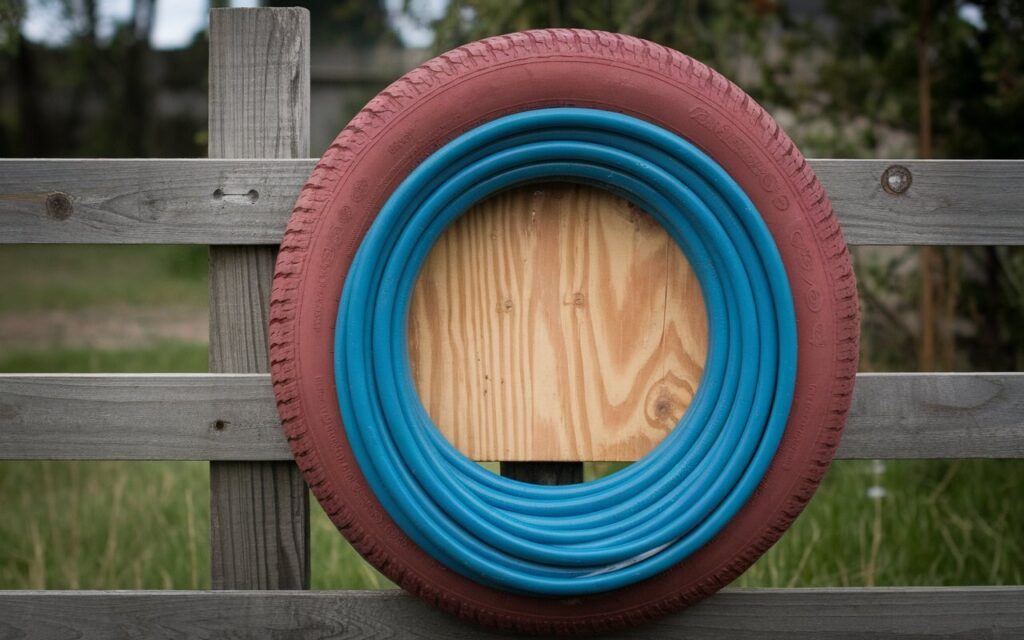
A creative hose storage solution made from an old tire mounted to a wall or post. The round shape creates a perfect form for wrapping your garden hose, while giving new life to a tire that would otherwise end up in a landfill.
Give an old tire new life as a hose holder! This eco-friendly option is perfect for casual garden spaces.
What you’ll need:
- Old tire (cleaned thoroughly) – Free
- Plywood circle (cut to tire size) – $8
- 4 bolts (5″ long) with washers and nuts – $6
- Outdoor spray paint – $5
- Drill with 3/8″ bit
Construction details: Scrub tire with soap and bleach solution to remove dirt and grime. Let dry completely. Cut plywood to match the tire’s diameter. Drill four evenly spaced holes through both the tire and plywood. Bolt them together with washers on both sides. Paint the entire assembly. Mount to a fence post or wall using 3″ lag screws through the plywood backing.
Total cost: $19
Mount the tire horizontally to a post or wall. The round shape makes winding up your hose easy and quick.
7. Vintage Garden Reel
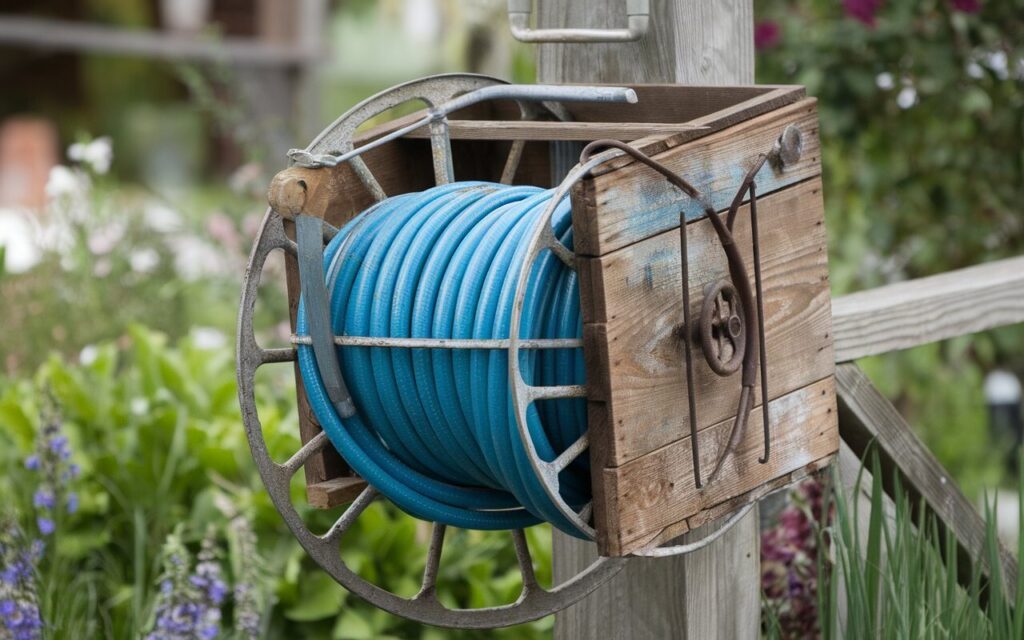
A decorative hose holder created from repurposed antique or vintage items like old spools, wagon wheels, or industrial parts. This option adds character to your garden while providing functional hose storage that shows off your personal style.
This charming option adds character to your garden while being totally functional.
What you’ll need:
- Vintage item like an old reel, sewing machine base, or wooden crate – $5-20 (thrift store/yard sale)
- Spray paint or stain – $5
- 2 metal hose guides – $8
- Mounting hardware (screws, brackets) – $6
- Clear polyurethane for weather protection – $10
Construction details: Clean the vintage item thoroughly. For wooden items, sand lightly and apply stain or paint, followed by two coats of polyurethane for outdoor durability. For metal items, remove rust with wire brush and apply metal primer before painting. Mount hose guides to create a path for the hose to wind around the item. Attach to wall or post with appropriate hardware based on the item’s weight.
Total cost: $24-49 (depends on the vintage find)
Yard sale tip: Keep an eye out for unique items that could hold a coiled hose. Old metal wheels, industrial spools, or even antique bed frames can work great!
Conclusion
A messy, tangled hose doesn’t have to be part of your garden routine. With just a few basic materials and a couple hours of work, you can create a practical storage solution that makes yard work simpler and your outdoor space more organized.
Each of these seven DIY hose holders offers something different – from the budget-friendly pallet rack to the stylish copper stand. Pick the one that fits your space, budget, and skills, then give it a try this weekend.
We’d love to see how your project turns out! Share a photo of your finished hose holder in the comments below. And if you have questions about any of these builds or need help troubleshooting, just ask – our community is full of helpful gardeners ready to lend advice.
FAQs
What’s the easiest DIY hose holder for beginners?
The Wall-Mounted Hose Hook is simplest. Just attach a sturdy hook to a wooden board and mount it on a wall.
How much do materials cost on average?
Most DIY hose holders cost between $15-30, with the pallet rack being cheapest and copper pipe stand being most expensive.
Can I make one without power tools?
Yes! The bucket holder and repurposed tire designs can be made with just a hammer, screwdriver, and hand saw.