
Have you ever stood near the doorway between different rooms and felt unsure about connecting those wood floors?
I’ve been there, staring at that awkward meeting point, together with I wondered how to make it look intentional instead of like a mistake.
In truth, it is not too stressful to mix wood floors. A person may make some wise decisions. Then you are truly proud in order to show guests that transition you turn it to.
This guide shares the tips and molding ideas that have worked for many homeowners facing the same challenge. We are able to solve this problem with each other.
Why Transitions Between Adjoining Wood Floors Matter
Getting the transition right between different wood floors affects both how your home looks and how safely it functions.
A well-planned transition helps different wood types work together instead of clashing, creating a smooth visual flow from room to room.
Beyond aesthetics, proper transitions prevent tripping hazards caused by uneven edges or height differences-keeping your family safe as they move through the house.
The best part? That meeting point doesn’t have to be an eyesore. With the right molding or transition piece, you can turn it into a design feature that adds character to your space.
Key Considerations Before Creating Transitions
Before you pick out molding or start any work, take a close look at what you’re working with. These details will guide your choices and save you headaches later.
- Study the grain patterns in both floors. One might have tight, straight lines while the other shows wider, wavy patterns that create a completely different look.
- Compare the color tones side by side. Notice if one floor leans warm with honey or red undertones while the other reads cool with gray or brown shades.
- Get down and check if both floors sit at the same height. Run your hand across the meeting point to feel for any bump or dip that could cause problems.
- Measure any height difference you find. Even a quarter-inch gap matters and will determine what type of transition piece you need to buy.
- Look at which direction the floorboards run in each room. Planks going the same way need different solutions than planks meeting at right angles.
- Consider the finish on each floor. A glossy surface next to a matte one affects how light reflects and how unified the rooms feel.
Creative Transition Methods Between Adjoining Rooms
You have more options than you might think when connecting two different wood floors. Here are the methods that work best for different situations.
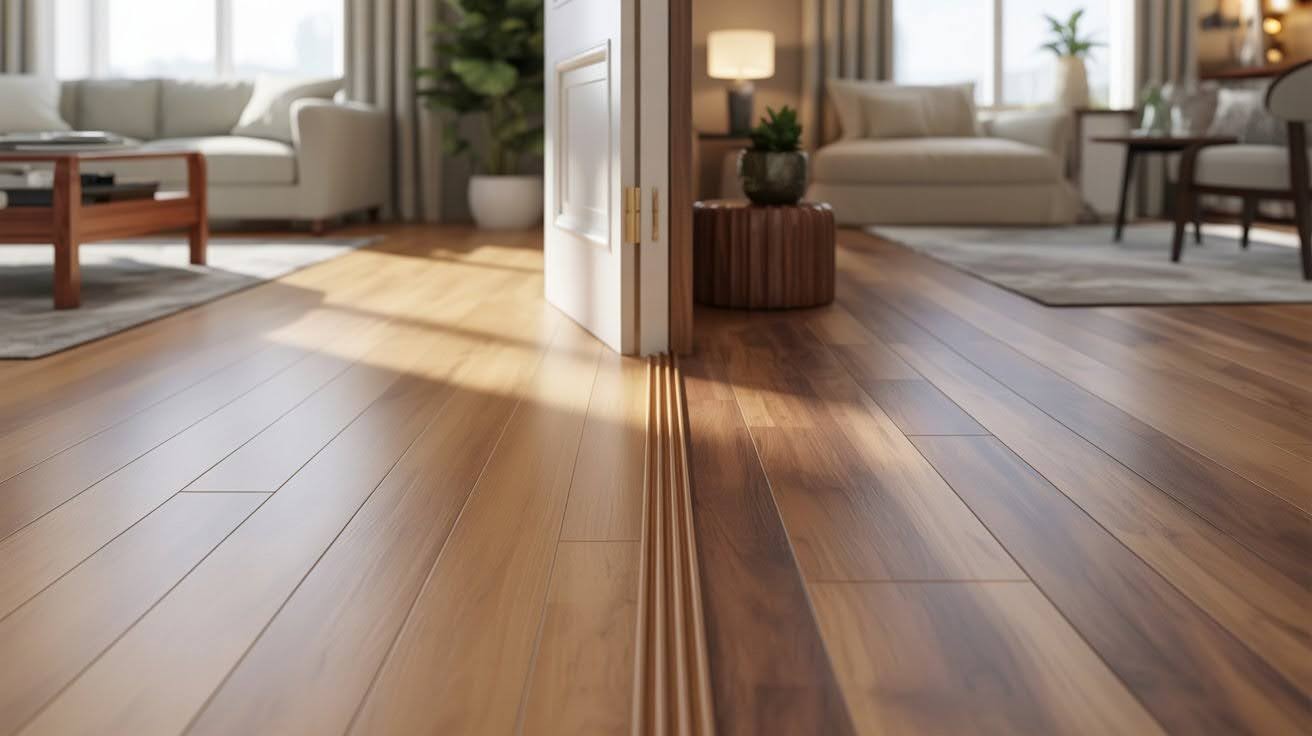
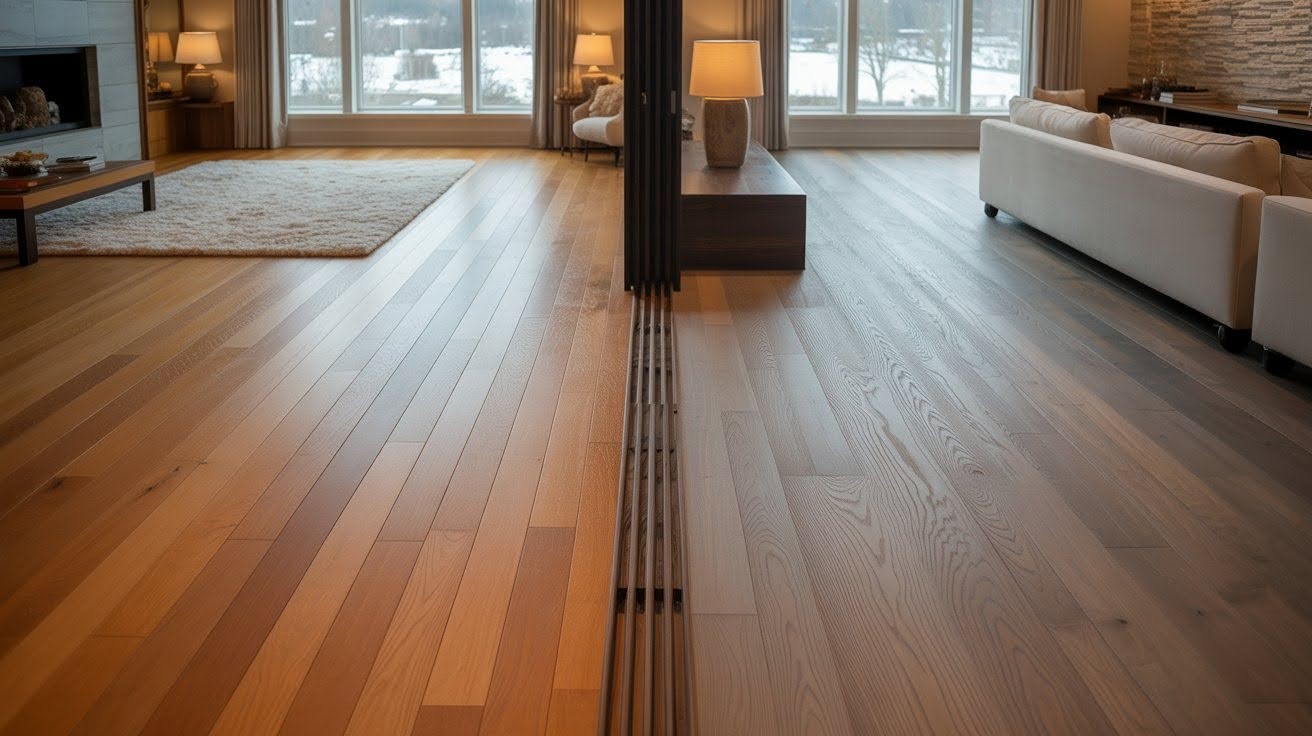
1. T-Molding for Smooth Connections
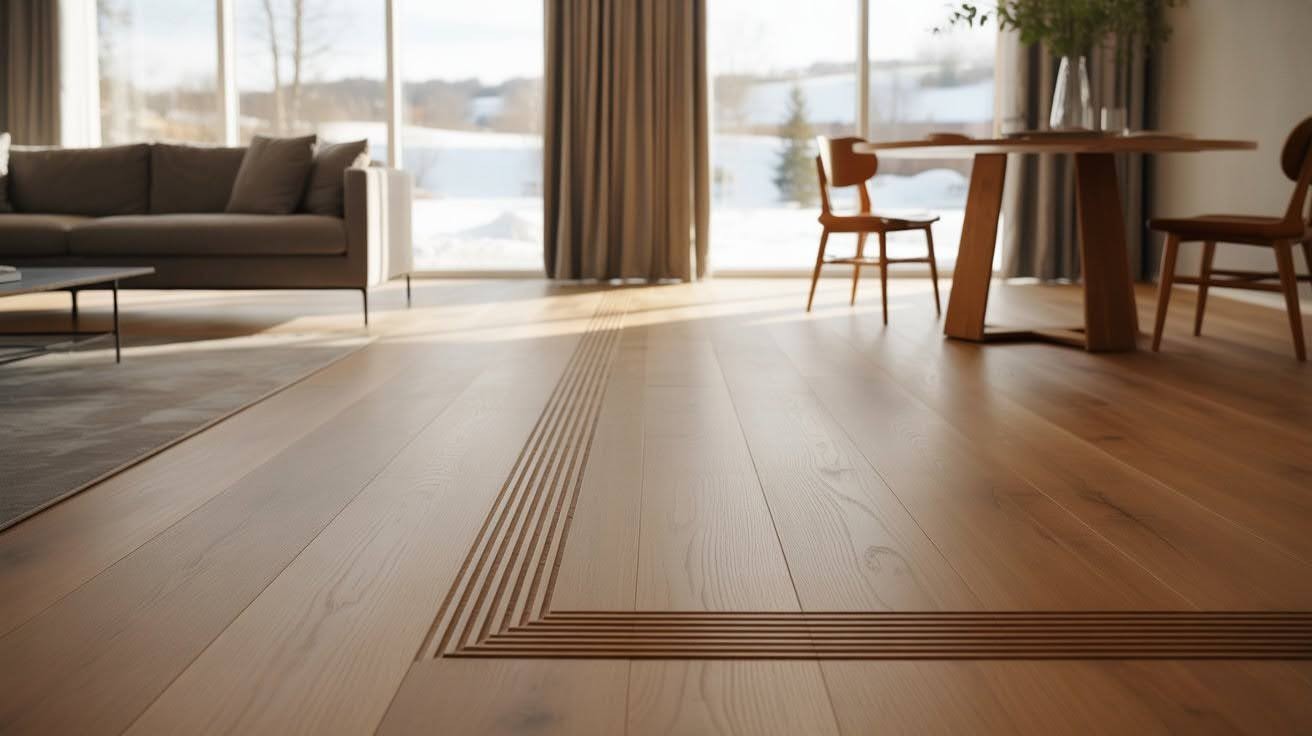
This is your go-to choice when both floors sit at the same height. T-molding looks like a flat “T” shape that sits in the gap between your floors.
It creates a clean line without drawing too much attention. You’ll see this in many homes because it’s simple, affordable, and gets the job done in doorways or open areas.
2. Reducer or Overlap Molding
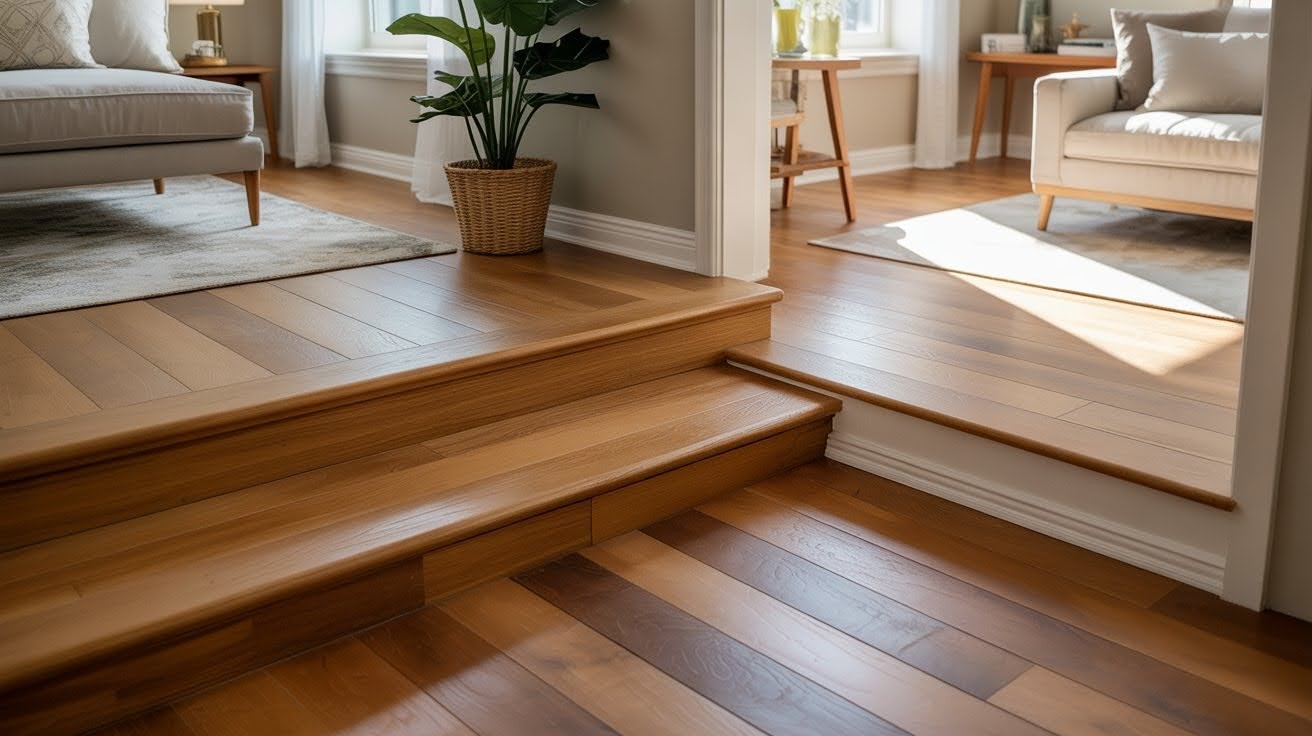
Got floors at different heights? A reducer strip gently slopes from the higher floor down to the lower one, creating a safe, smooth ramp instead of a sudden drop.
These pieces come in various widths to fit your specific height difference. They’re practical and keep everyone safe.
3. Quarter-Round or Custom Molding
Quarter-round molding sits along the edge and hides gaps or imperfections while adding a finished look.
Custom molding costs more but lets you create a unique profile that matches your home’s style perfectly.
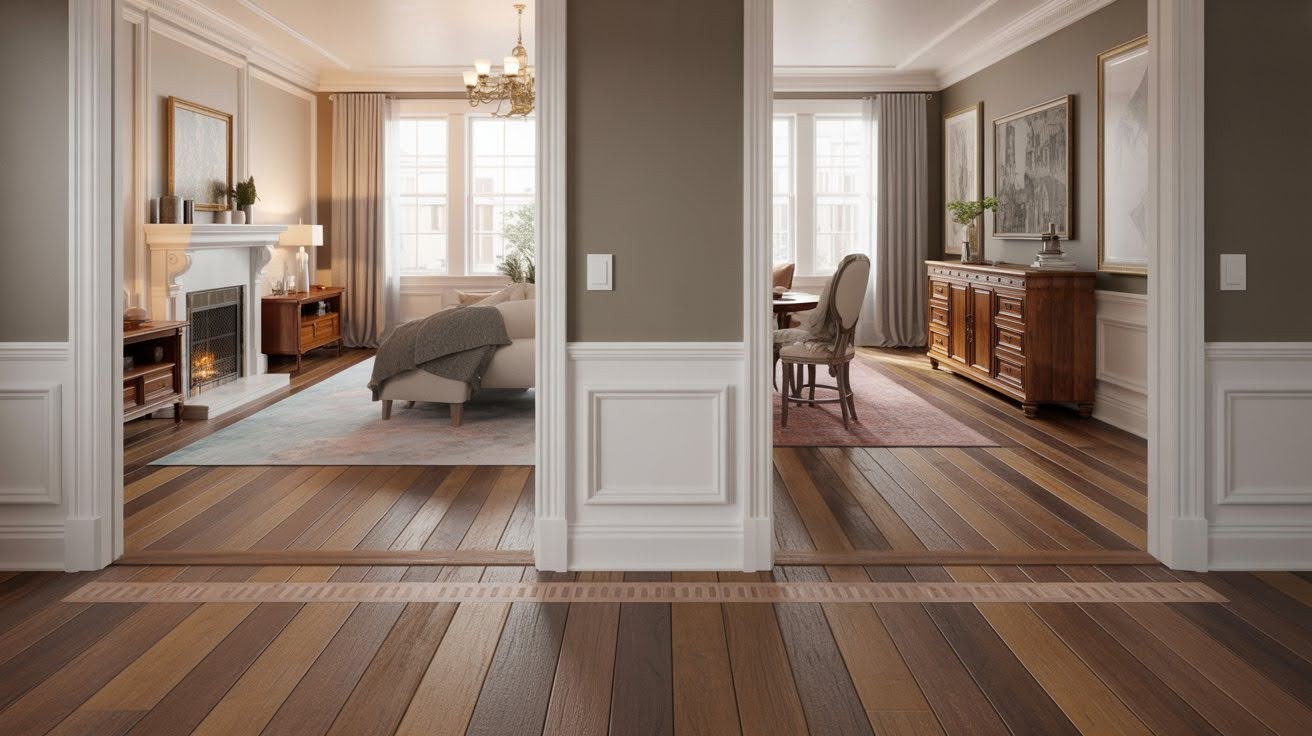
4. Decorative or Patterned Inlays
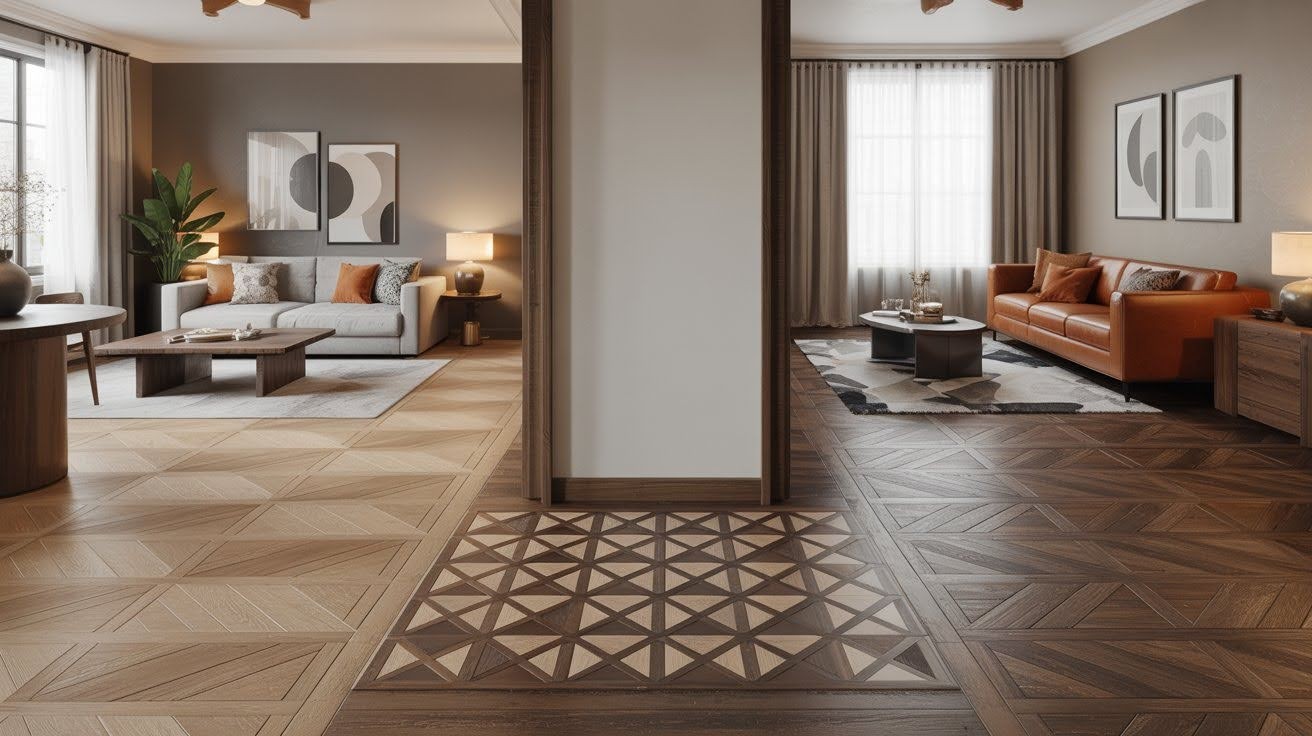
Make that transition the star of the show. Inlays use contrasting wood pieces in geometric patterns or borders.
You might add a stripe of darker wood between lighter floors or create a herringbone pattern at the meeting point. This takes more skill but looks like professional design work.
5. Blending Colors and Finishes
Stain or paint your transition piece to tie everything together. Match it to one floor for cohesion, or pick a middle tone that complements both.
This small detail makes a big difference in how unified your rooms feel.
Changing Flooring Direction Between Adjoining Rooms
Sometimes your floorboards don’t run the same way in every room. This isn’t a mistake—it’s actually a smart design choice when done right.
Plan the Layout
Changing plank direction helps define different areas in your home. Run boards lengthwise down a hallway to make it feel longer, then switch to a perpendicular direction in the living room. This shift tells your eye you’re entering a new space without needing walls or dividers.
Use Transition Strips Strategically
When planks meet at an angle, T-molding or threshold strips bridge that change cleanly. These pieces sit right where the direction shifts, covering the seam and giving both sets of planks something solid to meet against. Without them, you’d see raw edges and gaps.
Maintain Visual Symmetry
Line up your transitions with natural breaks like doorways or archways. In open floor plans, a poorly placed direction change makes the space feel choppy. Pay attention to room shape and make sure the changes feel intentional, not random.
Refinishing and Custom Solutions for Seamless Transitions
Sometimes standard options don’t work. Sanding and refinishing can level small height differences and unify colors through matched stains.
For unusual angles or curved doorways, custom moldings fit your exact measurements. Skilled craftsmen can also create inlays that turn problem areas into design features.
Getting transitions right requires precision, and even small mistakes show. Professionals have the experience to measure accurately and install flawlessly, saving you from costly errors.
Conclusion
Connecting two different wood floors doesn’t have to feel overwhelming with the options now known.
Homeowners I’ve observed often transform design issues into items they truly love displaying. The key is to take time for assessing your floors, to choose the right transition method, also not to fear getting creative.
Sometimes a simple T-molding works well. You may instead have a desire for something custom on other occasions.
A custom selection is able to make a statement now. You should rely on your own instincts, do not hasten the process and recall that to seek professional help is wise when it is necessary.
Your home has earned the right to be finished so very well. Those finishing touches should be done just right.
Frequently Asked Questions
Can I connect two different wood floors without using transition strips?
Yes, but it’s tricky and works best when both floors are the same height and thickness. You’ll need precise cutting and fitting skills to create a clean seam, or you risk gaps and an unfinished look that collects dirt over time.
What’s the best transition for floors at different heights?
A reducer molding or overlap strip is your best choice for uneven floors. It creates a gentle slope between the two levels, preventing trips while looking intentional and finished.
Should my transition piece match one floor or split the difference?
That depends on your design goal. Matching one floor creates a cohesive flow into that room, while choosing a middle tone can help both floors feel connected and balanced.
How do I handle transitions in doorways without doors?
T-molding or flush transition strips work well in open doorways. Place the strip right where the two rooms meet to create a clean division without blocking the visual flow between spaces.
Can I install floor transitions myself, or should I hire a professional?
Simple T-molding on level floors is a manageable DIY project if you’re handy with tools. For height differences, custom work, or refinishing, hiring a professional saves you from measurement errors and installation mistakes that show.