
Most homeowners worry about shower walls and floors but forget about what’s above. Sound familiar?
Many people leave plain drywall exposed above their shower surrounds, thinking it’s safe. Big mistake.
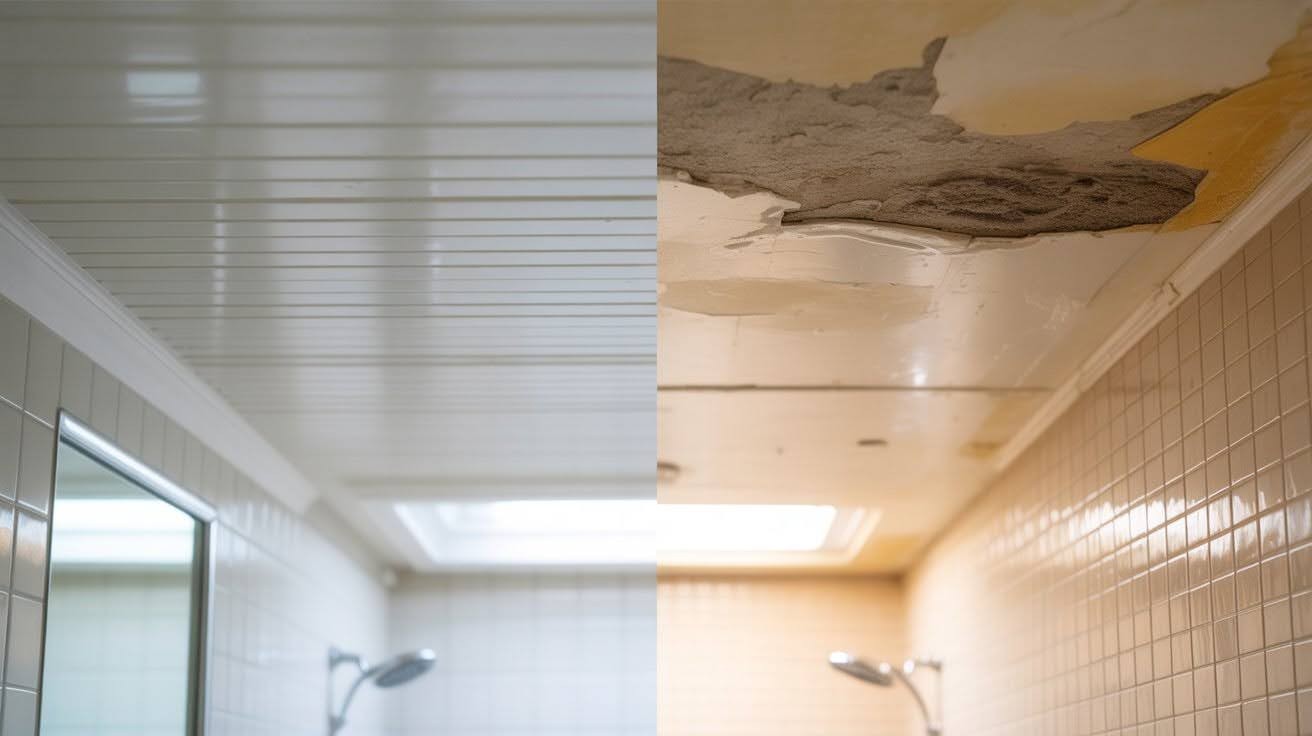
Here’s the problem: steam rises. Every hot shower sends moisture straight up to that unprotected drywall. Over time, you’ll see mold, peeling paint, and expensive repairs.
Think about your morning routine – all that steam has to go somewhere, and it’s going up.
When wondering what to put above shower surround, the answer is simple: waterproof materials that actually handle moisture while looking good.
Don’t wait until you’re dealing with mold or water damage. Protecting this space now saves you major headaches and money later. Your bathroom deserves materials that work as hard as they look.
Do You Really Need a Shower Ceiling Panel?
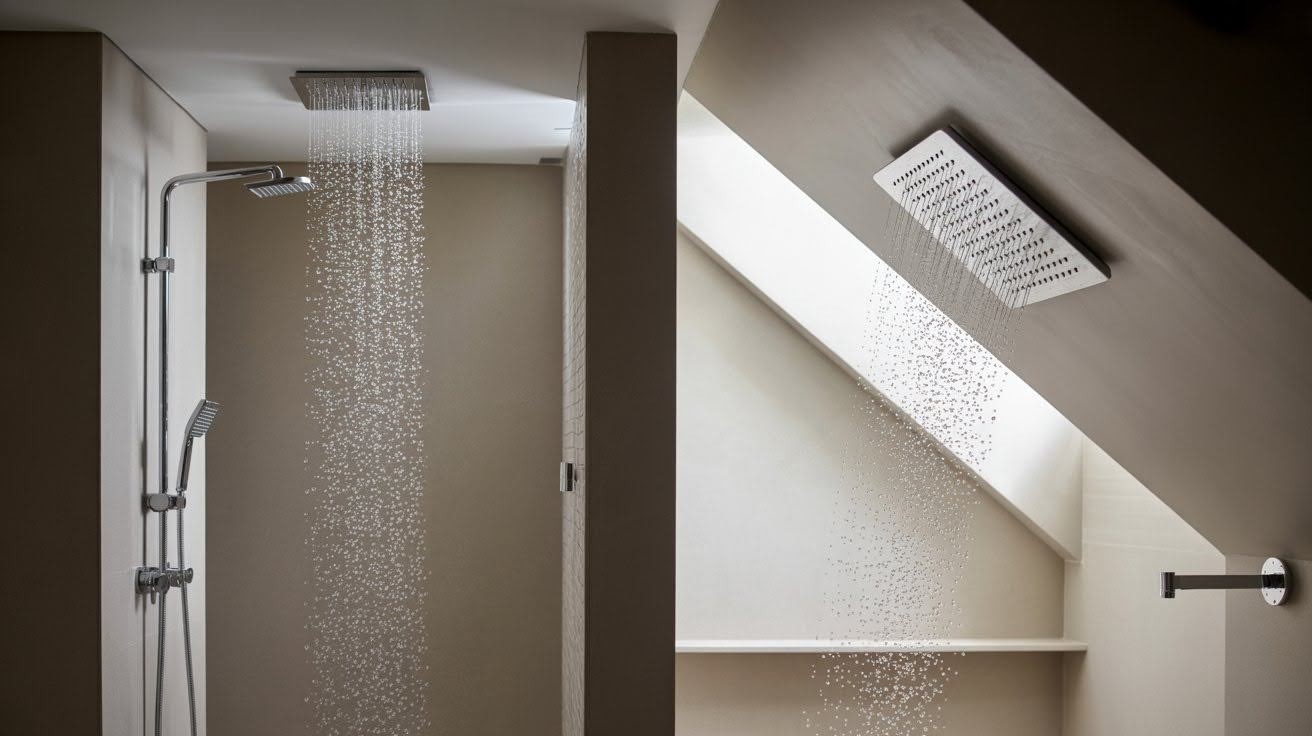
It depends on your shower setup. Standard alcove showers trap steam at the ceiling level, making panels highly recommended. High ceilings with good ventilation might not need them, but it’s still smart protection.
Slanted ceilings that slope into your shower are different. They get hit directly with water and steam, making ceiling panels essential.
Most showers benefit from ceiling protection. It’s a small investment that prevents big problems later.
Best Materials for Above a Shower Surround
Choose the right ceiling material to protect your shower from moisture damage while matching your bathroom’s style and maintenance needs.
Acrylic Shower Ceiling Panels
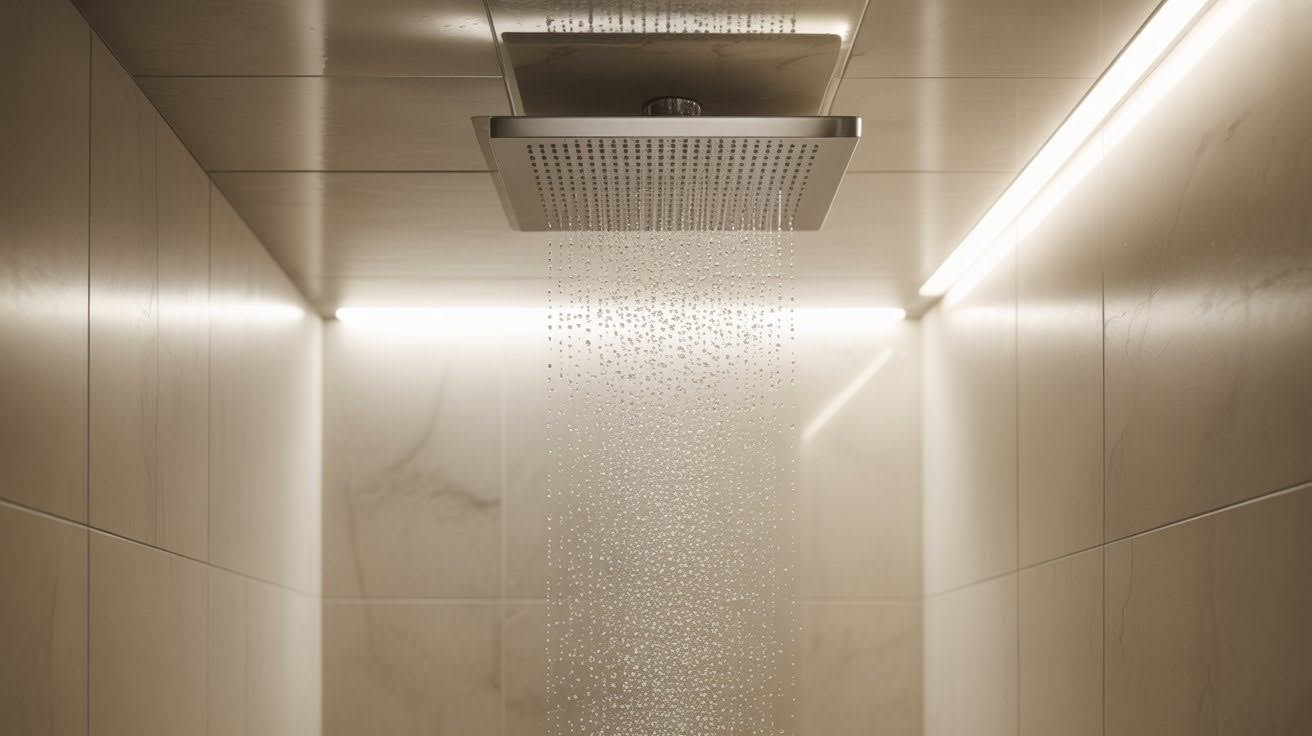
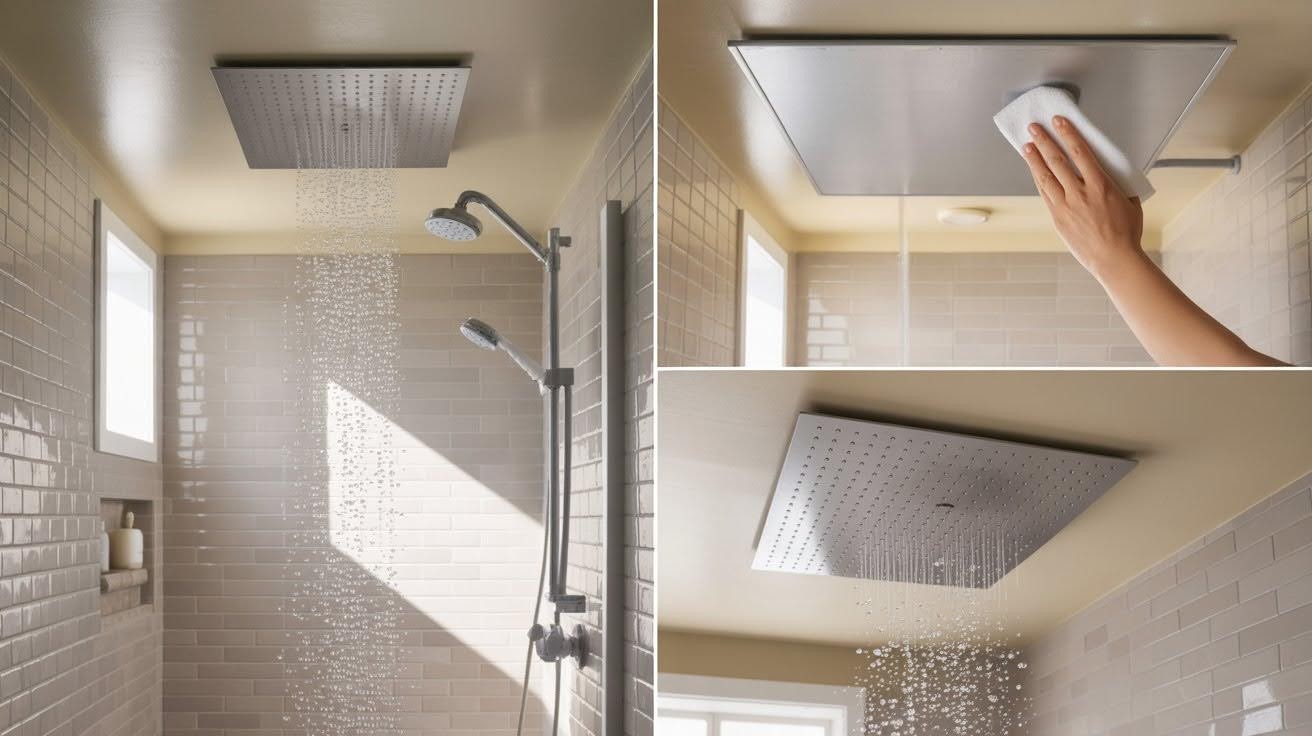
Acrylic panels are your best bet for most situations. They blend seamlessly with acrylic walls and resist water completely.
Mold and mildew can’t take hold on these smooth surfaces. Maintenance is simple, just wipe down with mild soap and water during regular cleaning.
Installation is straightforward, and panels come in various colors to match your existing shower surround perfectly.
Tiled Shower Ceilings

Ceramic or porcelain tiles create a luxurious look when paired with tiled walls. You can choose matching tiles for consistency or contrasting ones for visual interest.
The downside? Grout lines absorb moisture and need regular cleaning and resealing. Miss this maintenance, and you’ll see mold growth and water damage, which may require professional water damage restoration in Houston, TX. Professional installation is usually required, adding to project costs.
Other Options
Waterproof paint offers the most budget-friendly solution for well-ventilated bathrooms. It works well in larger spaces where steam disperses quickly, but requires more frequent touch-ups than solid panels.
Specialty wall panels made from PVC or fiberglass provide middle-ground protection at lower costs than full acrylic systems. Some features have unique finishes for added visual appeal.
Match your material choice to your shower setup, budget, and maintenance preferences.
Benefits of Adding a Shower Ceiling Panel
Shower ceiling panels provide moisture protection, create a cohesive look, prevent costly repairs, and require minimal maintenance compared to other options.
1. Moisture Protection
Ceiling panels create a barrier that keeps steam and water from reaching drywall or plaster underneath.
This prevents mold growth, peeling paint, and unsightly water stains that can ruin your bathroom’s appearance. You won’t have to deal with musty odors or health concerns from hidden mold colonies.
2. Seamless, Custom Look
When your ceiling matches your shower walls, the entire space feels intentional and professionally designed.
The continuous surface creates a spa-like appearance that makes your bathroom feel more expensive and well-planned. No awkward transitions or mismatched materials to break up the visual flow.
3. Long-Term Durability
Protecting your ceiling now saves money later. Without proper coverage, moisture can damage the structural elements behind your walls and ceiling.
Ceiling panels act as insurance against expensive repairs like replacing rotted framing, fixing ceiling joists, or dealing with widespread mold remediation.
4. Easy Cleaning and Maintenance
Forget about scrubbing grout lines or touching up peeling paint every few years. Most ceiling panels wipe clean with basic bathroom cleaners.
No special treatments, no periodic resealing, and no worry about water damage from aggressive cleaning. Your maintenance routine stays simple and quick.
Cost vs. Long-Term Savings
Installing a shower ceiling panel costs a few hundred dollars upfront, but saves thousands in potential mold remediation and drywall replacement later.
Think of panels as insurance for your bathroom. They protect against water damage that can spread beyond the ceiling, requiring expensive structural repairs you can’t see.
You’ll save on maintenance, too. Instead of repainting every few years or fixing peeling and staining, you simply wipe down panels during regular cleaning.
Most homeowners who skip ceiling protection end up paying more in repairs than they would have spent on panels initially.
Expert Tips for Installation
- Use mold-resistant backerboard in wet areas before installing any ceiling material. This creates an extra barrier against moisture that could seep through small gaps over time.
- Seal every seam with acrylic-specific caulking. Regular caulk won’t bond properly with acrylic surfaces and can fail within months. The right caulk creates a watertight seal that lasts for years.
- For uneven or angled ceilings, integrate the ceiling panel into your wall system rather than trying to fit separate pieces together. This creates a continuous surface without weak points where water can penetrate.
- Always ensure proper ventilation to reduce excess moisture in the first place. Even the best ceiling protection works better when there’s less steam to handle. A quality exhaust fan removes humidity before it can cause problems.
- Plan your installation carefully. Measure twice, cut once, and test-fit pieces before applying adhesive or caulk. Mistakes with ceiling panels are harder to fix than wall installations because of the overhead angle.
Conclusion
Don’t overlook the space above your shower surround, it needs protection just like your walls and floor. Skip this step, and you’ll face expensive moisture damage down the road.
When deciding what to put above shower surround, acrylic panels are your best bet. They block moisture effectively while looking clean and professional. Plus, they work with almost any existing shower setup.
I’ve seen too many homeowners ignore this area only to deal with costly repairs later. The ceiling above your shower gets just as wet as everything else, so it needs the same attention.
Investing in proper ceiling protection now saves major headaches and money later. It’s a small upfront cost that prevents big problems.
Your bathroom will look great and stay worry-free for years. Trust me, your future self will thank you for this smart move.
Frequently Asked Questions
What happens if I don’t put anything above my shower surround?
Steam and moisture will damage your drywall over time, causing mold, peeling paint, and water stains. You’ll end up with expensive repairs that could have been easily prevented.
Can I just use regular paint on my shower ceiling?
Regular paint will peel and bubble when exposed to constant steam and moisture. Only specialized waterproof paint should be used, and even then, it requires frequent maintenance compared to solid panels.
How much does it cost to install a shower ceiling panel?
Basic acrylic panels typically cost between $150-$400, depending on your shower size and panel quality. Professional installation adds another $200-$500, but many homeowners can handle simple installations themselves.
Do I need a ceiling panel if my bathroom has good ventilation?
Good ventilation helps, but steam still rises directly to the ceiling during showers. Even with excellent fans, unprotected drywall will eventually show signs of moisture damage in most shower setups.
What’s the difference between acrylic panels and tile for shower ceilings?
Acrylic panels require no maintenance and provide complete water protection with easy cleaning. Tile looks luxurious but needs regular grout maintenance, resealing, and professional installation to prevent long-term water damage.