
If you’re tired of cramped desks that don’t fit your space or your style, a built-in desk might be exactly what you need.
These custom workstations are absolute game-changers for home offices and tight spaces, giving you the perfect blend of functionality and design.
The best part? You can create something truly yours without breaking the bank.
Think about it: extra storage, a surface that fits your exact needs, and a polished look that makes your space feel intentional.
I know what you’re thinking, “But I’m not handy!” Trust me, with a solid plan and some patience, you can absolutely pull this off. Let’s get started.
What Is a Built-In Desk?
A built-in desk is a custom workspace that’s permanently attached to your wall or built into an existing space like an alcove or corner.
Unlike freestanding desks that you can move around, built-in desks become part of your room’s architecture and stay put.
These custom workspaces offer incredible space-saving benefits because they fit perfectly into awkward corners or small areas where regular furniture won’t work.
They also create a seamless, custom look that matches your home’s style perfectly while providing exactly the functionality you need.
You can install built-in desks almost anywhere in your home, from dedicated home offices and bedrooms to living rooms and hallway nooks. The customization options are endless, too.
You get to choose the paint colors, add decorative trim, select hardware that matches your taste, and design storage solutions like drawers, shelves, or cabinets that work specifically for how you use your workspace.
Materials and Tools You’ll Need
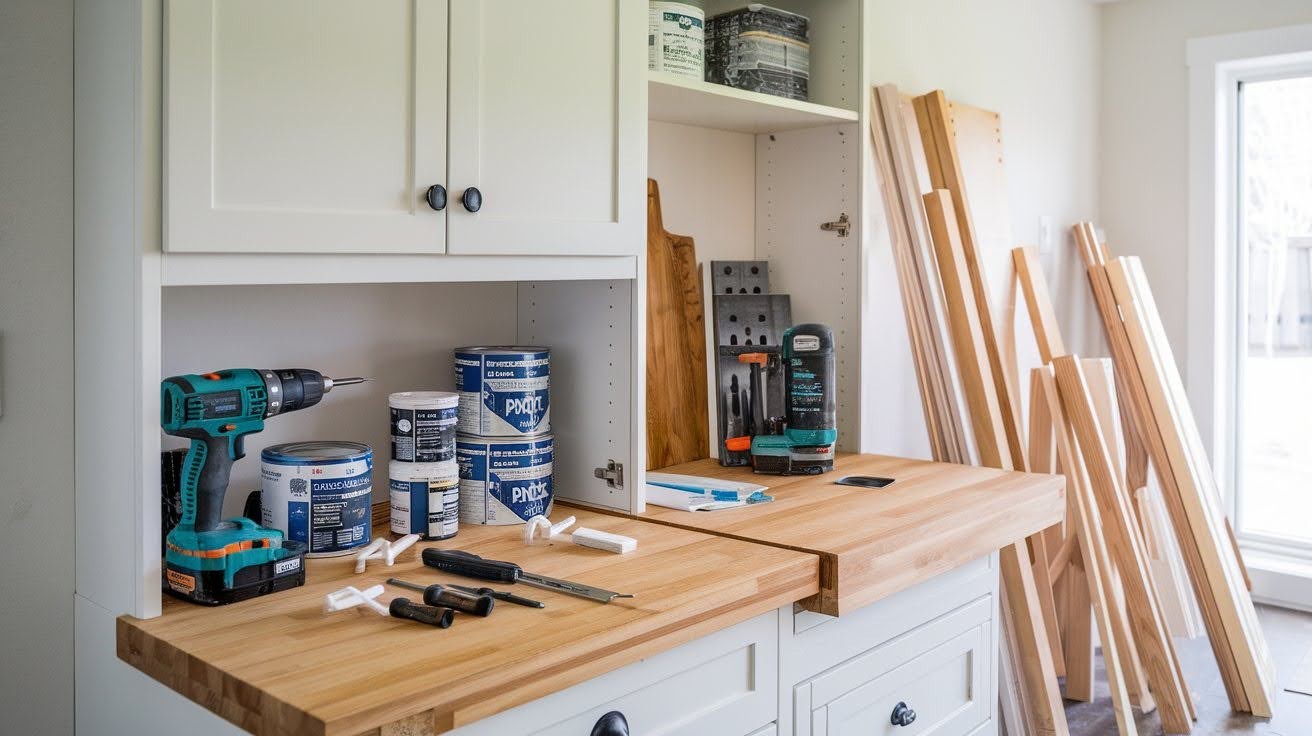
Cabinets (pre-made or kitchen style)
Start with your base cabinets. You can grab pre-made ones from any home improvement store, or go with kitchen-style cabinets if you want something sturdier and more durable.
Butcher block or plywood top
For the desktop, butcher block gives you that warm, natural look, while plywood keeps costs down and paints beautifully. Choose based on your budget and style preference.
1x4s, trim, and filler panels
You’ll need some 1×4 lumber for extra support underneath your desktop. Trim pieces give you that finished look, while filler panels help everything fit together perfectly in your space.
Drill, jigsaw, pocket hole jig, brad nailer
Your drill handles most assembly work. A jigsaw cuts around outlets or obstacles. The pocket hole jig creates those clean, hidden connections. A brad nailer makes attaching trim quick and easy.
Paint, primer, wood filler, caulk, hardware
Primer ensures your paint goes on smoothly and lasts longer. Wood filler hides any gaps or imperfections. Caulk creates clean seams. Pick hardware that matches your style – knobs, pulls, or hinges that make you smile.
Step-by-Step Guide to Building Your Built-In Desk
Follow these clear, manageable steps to create your custom workspace from planning and measuring to the final finishing touches.
Step 1: Plan Your Space
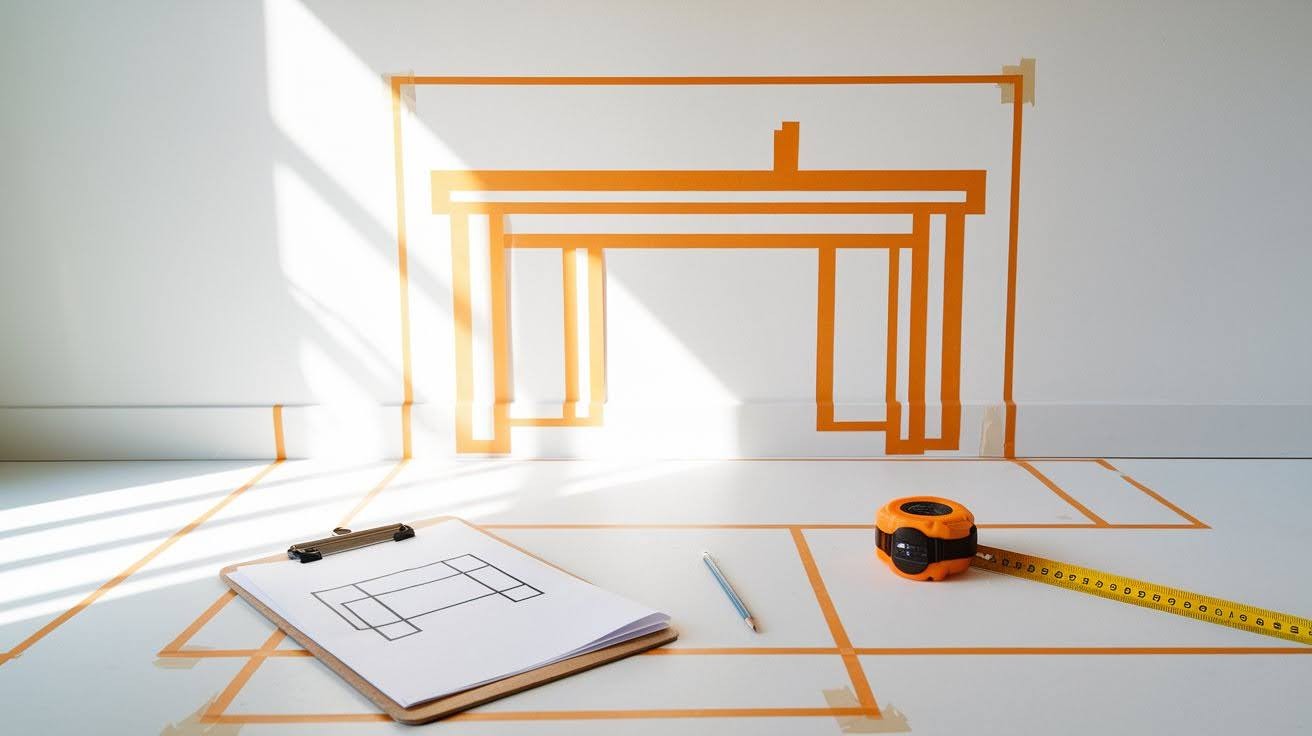
Measure your wall and decide on desk height (28-30 inches works best). Use painter’s tape to outline your desk on the wall so you can visualize the final result. Choose your layout: single cabinet, multiple cabinets, or add upper storage.
Step 2: Prepare the Base
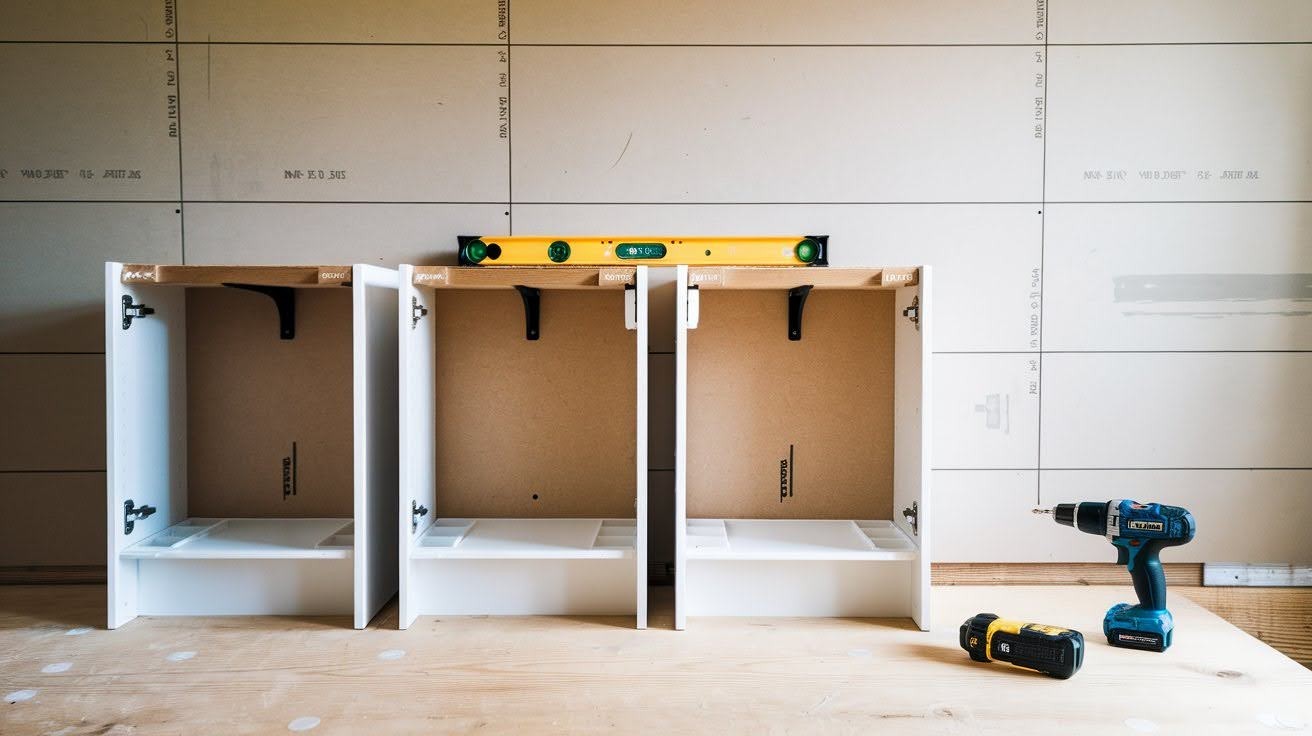
Cut off the toe kick from the kitchen cabinets for a flush fit. Position cabinets and secure them to wall studs. Use a level to make sure everything sits perfectly even.
Step 3: Add the Desktop
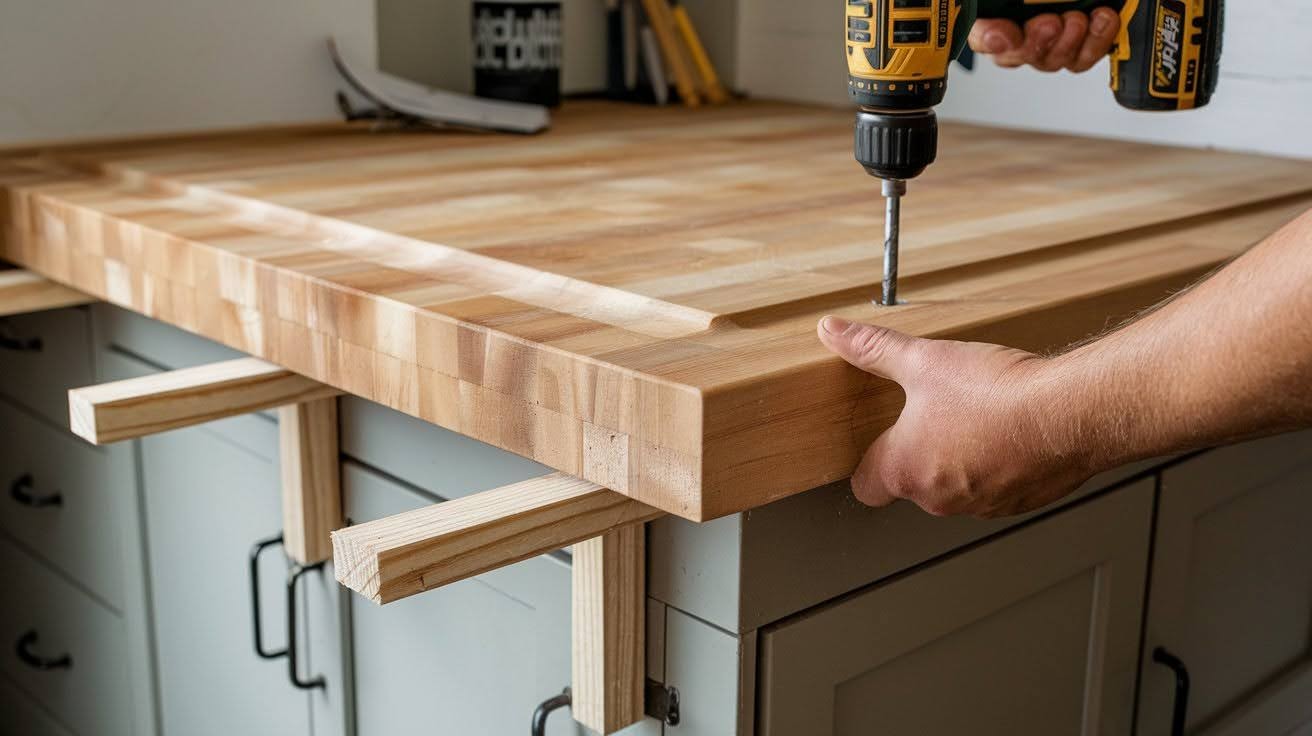
Place your butcher block or plywood top over the cabinets. Screw up through the cabinet tops to attach it. Add 1×4 supports under the front edge and to the wall studs for stability. Sand all edges smooth.
Step 4: Add Storage Cabinets
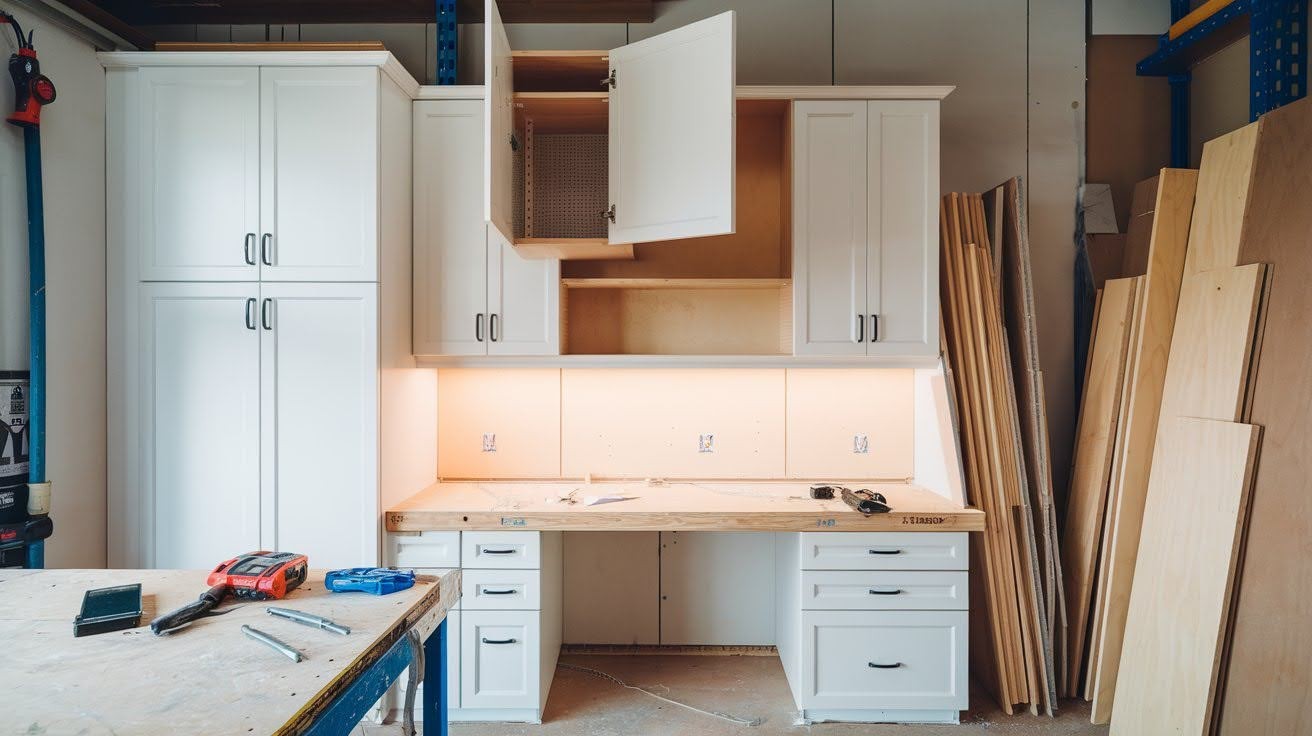
Secure upper cabinets or shelves to wall studs above your desk. Attach each one carefully before moving to the next. Cover any gaps with plywood strips or filler panels.
Step 5: Make It Seamless
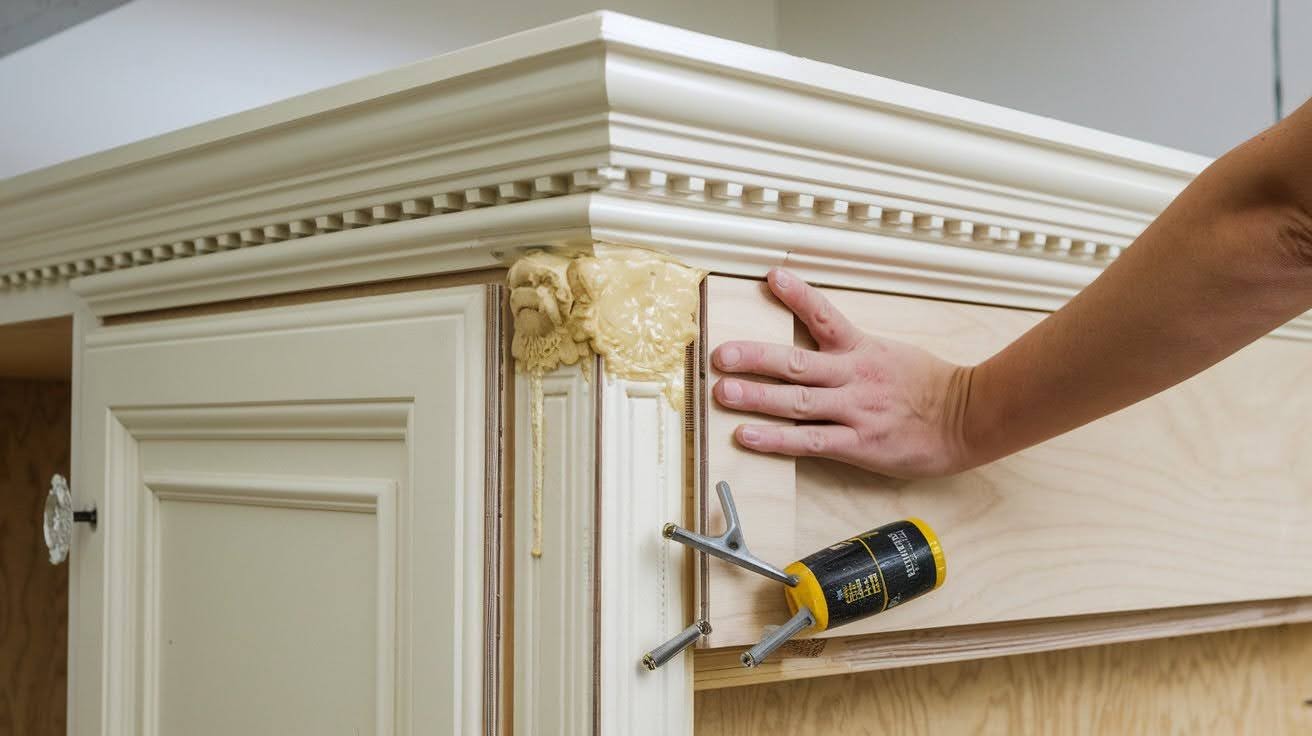
Fill cracks and seams with wood filler. Attach 1/4 inch plywood to exposed cabinet ends for a polished look. Add crown molding or trim for authentic built-in character.
Step 6: Prep for Paint
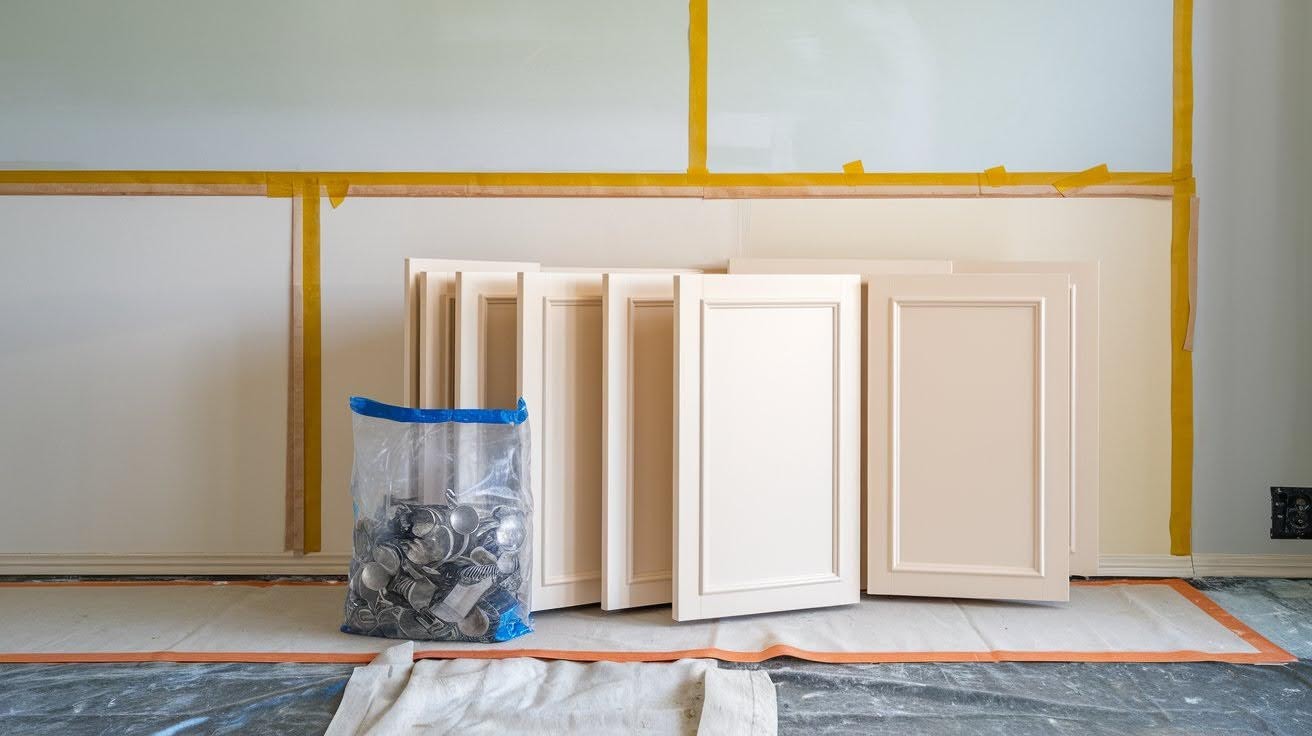
Remove cabinet doors and bag the hardware. Sand-filled areas until smooth. Caulk along trim edges. Tape off walls and cover floors if using a sprayer.
Step 7: Prime, Paint, and Finish
Apply primer to all surfaces, then paint using your preferred method. Seal desk edges with clear silicone caulk. Reattach cabinet doors and add your chosen hardware.
Design & Color Inspiration
Neutrals for Every Style
Accessible Beige is your safe bet if you want something that works with everything. This warm, creamy color feels timeless and cozy without being boring.
It pairs beautifully with any decor style and won’t feel dated in five years.
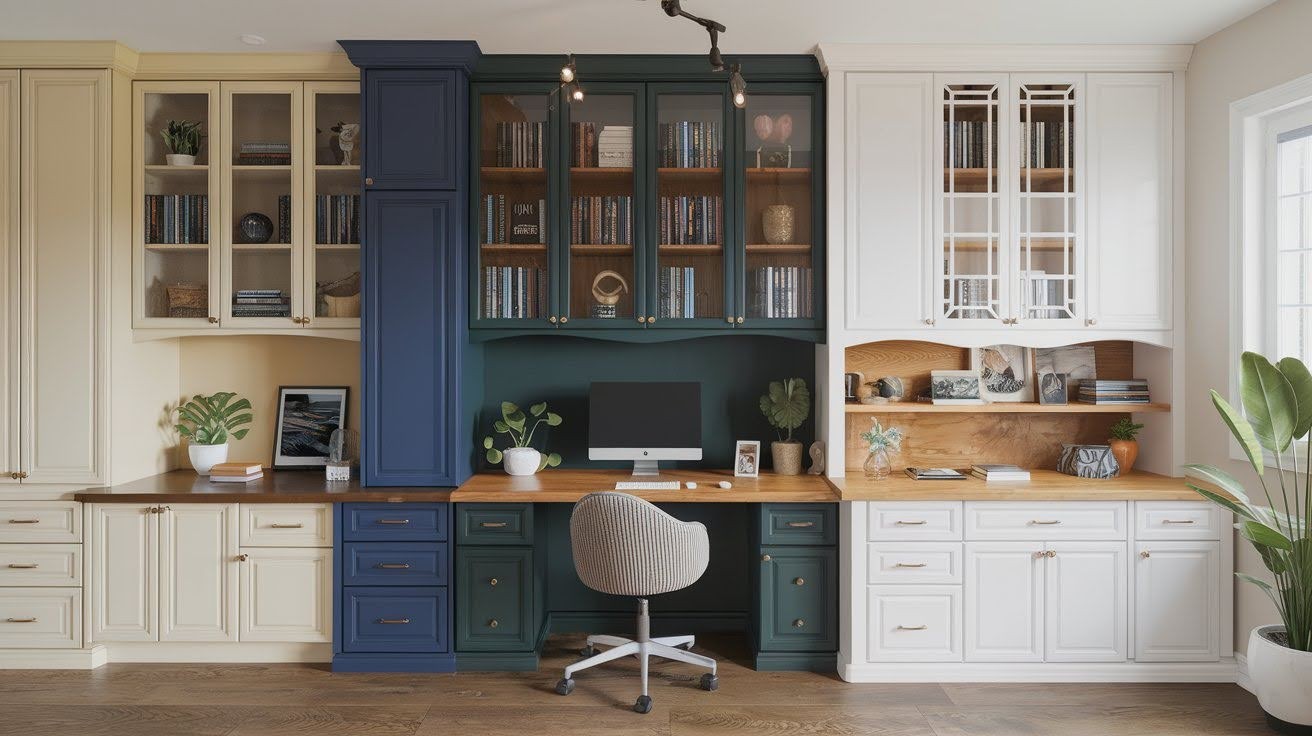
Go Bold for Impact
Ready to make a statement? Navy blue creates serious drama while still feeling professional. Classic black never goes out of style and makes everything else in the room pop.
Deep green brings in that rich, refined vibe that feels both modern and traditional.
The Natural Approach
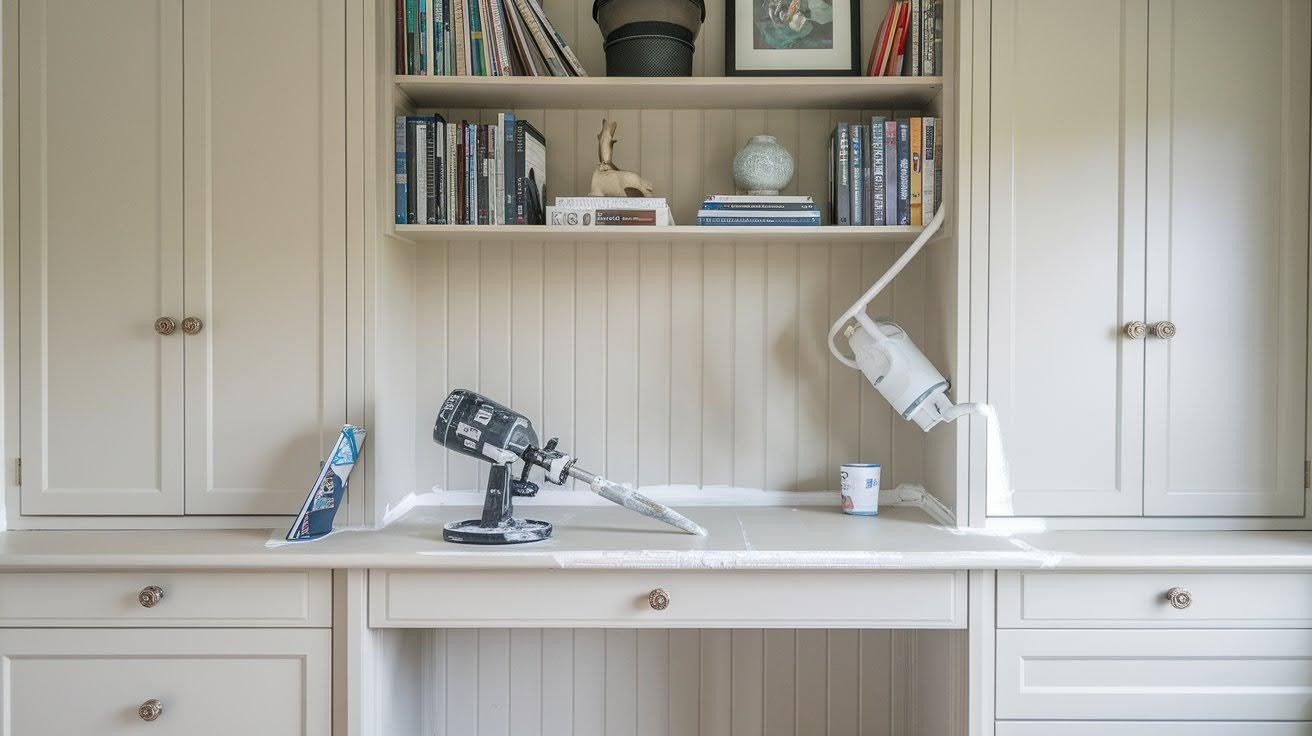
You can’t beat the combination of a warm butcher block top with crisp white cabinets. This look feels fresh and inviting while giving you that perfect mix of natural texture and clean lines.
It works in any room and makes your space feel bigger and brighter.
Pro Tips for Beginners
- Always double-check for level before securing pieces. A wonky desk will bother you every day.
- Pre-drill screw holes to avoid splitting wood. This simple step prevents heartbreaking cracks.
- Keep all hardware organized in labeled bags. Nothing kills momentum like hunting for missing screws.
- Allow paint to cure fully before use. Give it 24-48 hours to harden properly before setting up your workspace.
- Measure twice, cut once. Take your time with measurements to avoid costly mistakes and wasted materials.
Conclusion
You’ve got all the pieces now: planning your space, preparing the base, adding your desktop, making everything seamless, and finishing with paint.
Each step builds on the last one, and before you know it, you’ll have a workspace that looks like it cost a fortune.
I won’t lie to you. There will be moments when you wonder what you got yourself into. Maybe the measurements don’t line up perfectly, or the paint takes longer to dry than expected.
That’s completely normal. Every DIYer has been there.
Begin small and handle it one step at a time. Your custom-built-in desk will be worth every minute of effort.
When you’re finally sitting at your new workspace, coffee in hand, you’ll realize you didn’t just build a desk. You built confidence, saved money, and created something completely yours.
Frequently Asked Questions
How much does it cost to build a DIY built-in desk?
Most people spend between $200-600, depending on materials and size. Using pre-made cabinets and plywood keeps costs down, while butcher block tops and custom trim add to the budget.
Do I need advanced woodworking skills for this project?
Not at all. This project uses basic tools and techniques that beginners can handle. The key is taking your time and following each step carefully.
How long does it take to complete a built-in desk?
Plan for a weekend project, though it might stretch to 3-4 days with drying time. Painting and curing add extra time, so don’t rush the finishing steps.
What’s the standard height for a built-in desk?
Most people find 28-30 inches comfortable for working. Consider your chair height and personal preference when making the final decision.
Can I build this in a rental property?
Yes, but check with your landlord first since you’ll be screwing into walls. You can make it more removable by using fewer wall attachments and keeping the original cabinet pieces.